In this blog post, I will share a few obstacles I have encountered while trying to monitor a complete Alfresco setup with all these components. As an overview, here are the templates I will use:
- Apache ActiveMQ by JMX
- Apache Solr by HTTP
- Apache Tomcat by JMX
- Generic Java JMX (for transformation service)
- Linux by Zabbix agent
- Nginx by Zabbix agent
- PostgreSQL by Zabbix agent 2
- Website certificate by Zabbix agent 2
Until now, I only did simple monitoring:
One component, one host.
As a matter a fact, having multiple Java Virtual Machine (JVM) on same host bring challenges which will see in the next chapter. Alfresco server was provisioned with YaK and Alfresco role.
Multiple JVM Monitoring
In my previous blogs, I usually declare one or two hosts interfaces max:
- An Agent interface to communicate with Zabbix Agent
- A JMX interface to communicate with a JVM via Zabbix Java Gateway (setup example here)
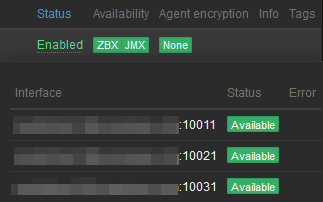
If you look at the list of templates, there are three templates which are JMX based, thus I will have to declare 3 JMX interfaces:
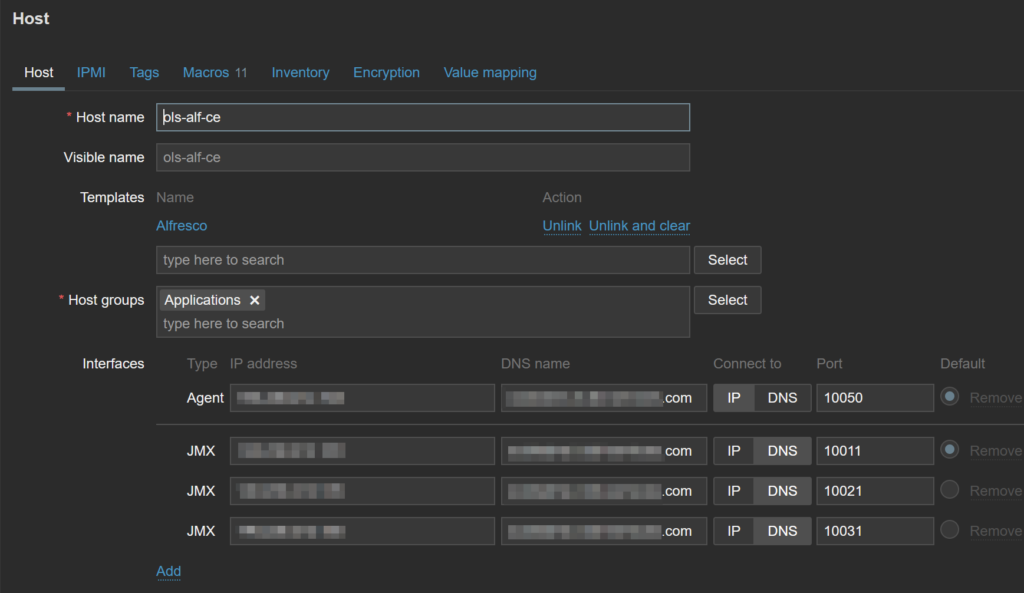
Each interface has its own port.
For an item, one of the parameters I overlooked is “Host interface”. As a matter a fact, each item will address one interface to get its “value” from. When linking a template, you can’t directly set to which JVM it will get data from. This will have to be done in a second step.
I decided to assign the following ports as Tomcat has the more discovery rules and thus, I will not need to modify them to point to a different interface:
- 10011 for Apache Tomcat
- 10021 for ActiveMQ
- 10031 for Generic Java JMX
Going the “manual” Way
Active MQ by JMX templates contains the following elements to update:
- 2 Discovery rules
- 21 Items prototypes
Fortunately, Zabbix front-end has a “Mass update” feature. It is still missing for discovery rule, but a feature request exists here. Vote for it, if you want to have it a next release 🙂 .
To do it for ActiveMQ, I proceed as follow:
- Click on host.
- Select Discovery rule.
- Click on one of the two ActiveMQ discovery rule:
- Brokers discovery
- Destinations discovery
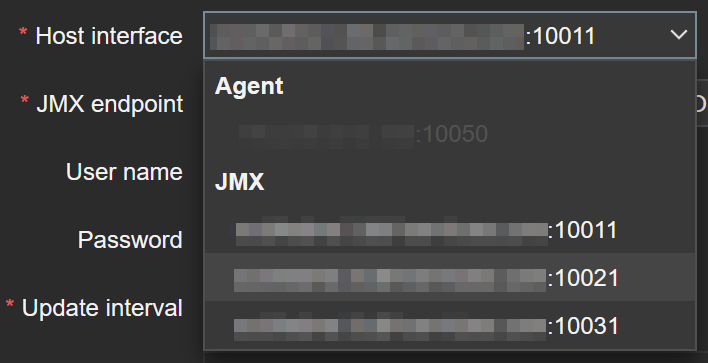
- In Host interface drop down list, change from 10011 to 10021:
Next, inside each DR, there are items definition so called item prototypes:
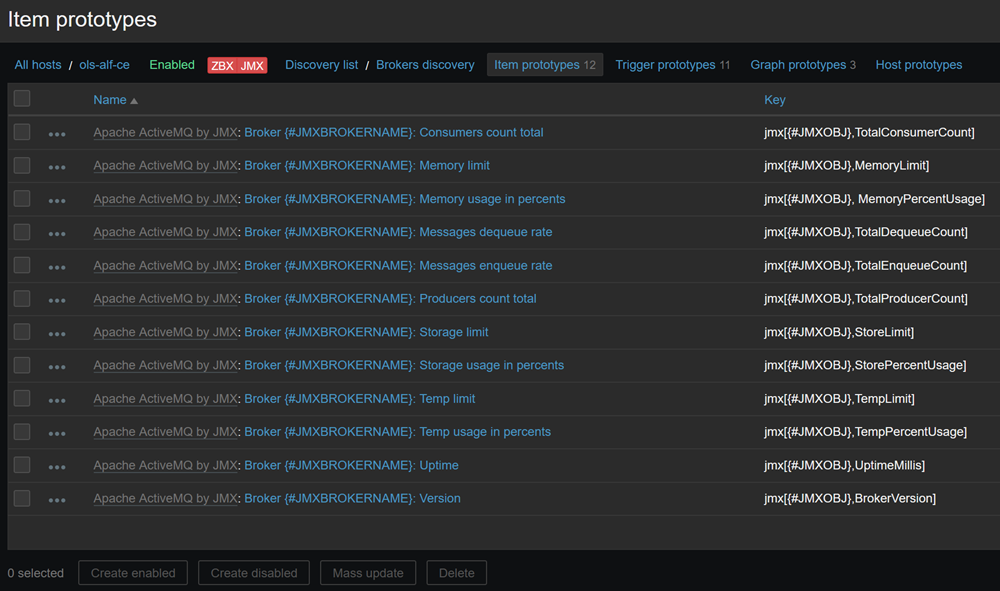
Here we have Mass update button, so let’s use it.
- Select all item prototypes.
- Click “Mass update” button.
- Tick Host interface checkbox and select the 10022 interface:
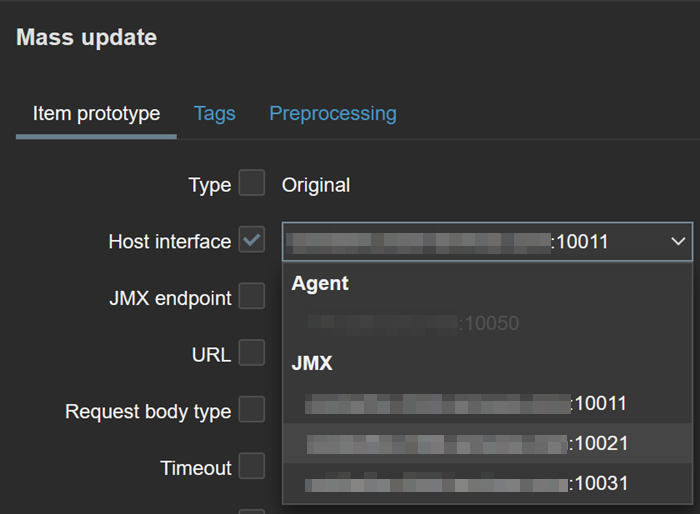
Finally, click “Update”.
Repeat this for the second DR.
Also repeat this for Generic Java JMX template where we will use 10031 interface.
JMX RMI Setup
RMI is a powerful protocol, but then very sensitive as many things can be done beside monitoring. To protect resources correctly, I will enable password protection and encryption.
Password Protection
First, I need to create two files:
- jmxremote.access:
monitorUser readonly- jmxremote.password:
monitorRole P@ssword?Permissions of these files must be limited to user. One might think this is not safe to leave a password in clear text, but, no worries, it will be encrypted at first connection attempt with the user.
To use these files following JVM parameters must be added:
-Dcom.sun.management.jmxremote.access.file=/path-to-file/jmxremote.access
-Dcom.sun.management.jmxremote.password.file=/path-to-file/jmxremote.password
Traffic Encryption
To enable traffic encryption, I will need a key store and a trust store. These are provided using these parameters:
-Djavax.net.ssl.keyStore=/path-to-file/keystore.p12
-Djavax.net.ssl.keyStorePassword=${KS_PASSWORD}
-Djavax.net.ssl.trustStore=/opt/openjdk-x.y.z/lib/security/cacerts
-Djavax.net.ssl.trustStorePassword=${TS_PASSWORD}
Extra Parameters
To enable remote JMX, SSL and force client authentication, some extra parameters must be added:
-Dcom.sun.management.jmxremote.local.only=false
-Dcom.sun.management.jmxremote.ssl=true
-Dcom.sun.management.jmxremote.authenticate=true
-Dcom.sun.management.jmxremote.ssl.need.client.auth=true
-Djava.rmi.server.hostname=${HOSTNAME}
Finally, for each JVM, I provide the two ports required (example below if for ActiveMQ):
-Dcom.sun.management.jmxremote.port=10021
-Dcom.sun.management.jmxremote.rmi.port=10022
Zabbix Server
On the Zabbix Java Gateway side, there are also extra parameters to set. For that, I had the following lines to /etc/zabbix/zabbix_java_gateway.conf:
JAVA_OPTIONS="${JAVA_OPTIONS} \
 -Djavax.net.ssl.keyStore=/etc/zabbix/security/<ks_name>.p12 \
 -Djavax.net.ssl.keyStorePassword=<ks_password> \
 -Djavax.net.ssl.trustStorePassword=<ts_password>"
Followed by a service restart:
systemctl restart zabbix-java-gateway.serviceOnce this is completed, I will see all JMX interfaces up when mousing over JMX box in hosts list:
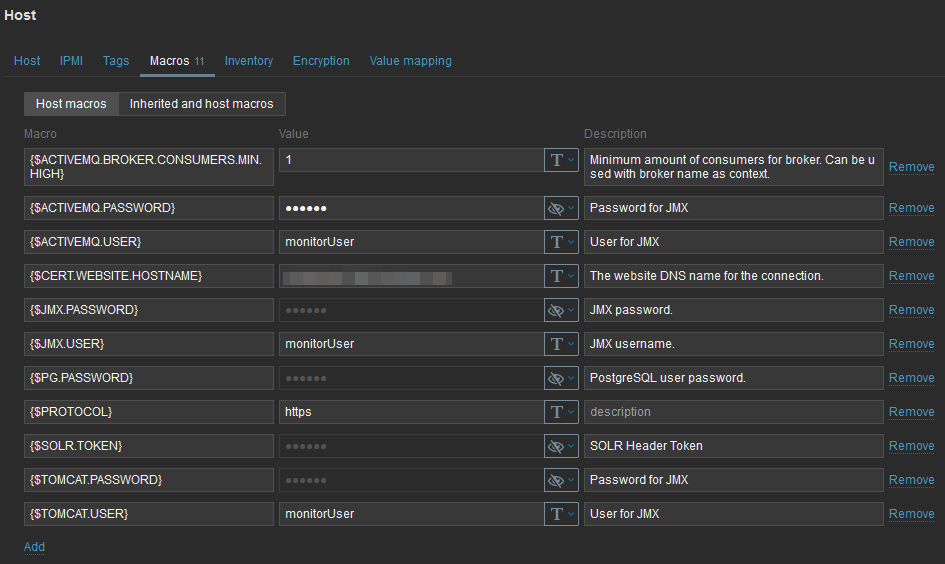
Finally, I must set macros for JMX user and password. Each template has its own macros:
Going Further
A possible improvement, which I am already working on, is to use Zabbix API to programmatically do every steps. Another improvement would be to replace all JMX user/password related macros to only two.
Monitoring a full stack taught me a lot on monitoring in general and Zabbix in particular.
![Thumbnail [90x90]](https://www.dbi-services.com/blog/wp-content/uploads/2022/08/GME_web-min-scaled.jpg)
![Thumbnail [90x90]](https://www.dbi-services.com/blog/wp-content/uploads/2022/08/ATR_web-min-scaled.jpg)