One of my last mission was to configure Apache JMeter for performance and load tests on a Web Application. The access to this Web Application requires authentication provided by a Microsoft Advanced Directory Federation Services single Sign On environment.
This Single Sign On communication is based on SAML (Security Assertion Markup Language). SAML is an XML-based open standard data format for exchanging authentication and authorization data between parties, in particular, between an identity provider and a service provider. ADFS login steps relies on several parameters that need to be fetched and re-injected to the following steps like ‘SAMLRequest’, ‘RelayState’ and ‘SAMLResponse’.
This step-by-step tutorial shows the SAML JMeter scenario part to perform those ADFS login steps.
Record a first scenario
After installing the Apache JMeter tool, you are ready to record a first scenario. Have a look on the JMeter user manual to configure JMeter for recording scenario.
1. Adapt the HTTP(s) Test Script Recorder
For this task we need to record all HTTP(S) requests. Those from the Application and those from the Single Sign On Server. We need then to change the HTTP(S) test Proxy Recorder parameters as below
Open the “WorkBench” on the tree and click on the “HTTP(S) Test Script Recorder”.
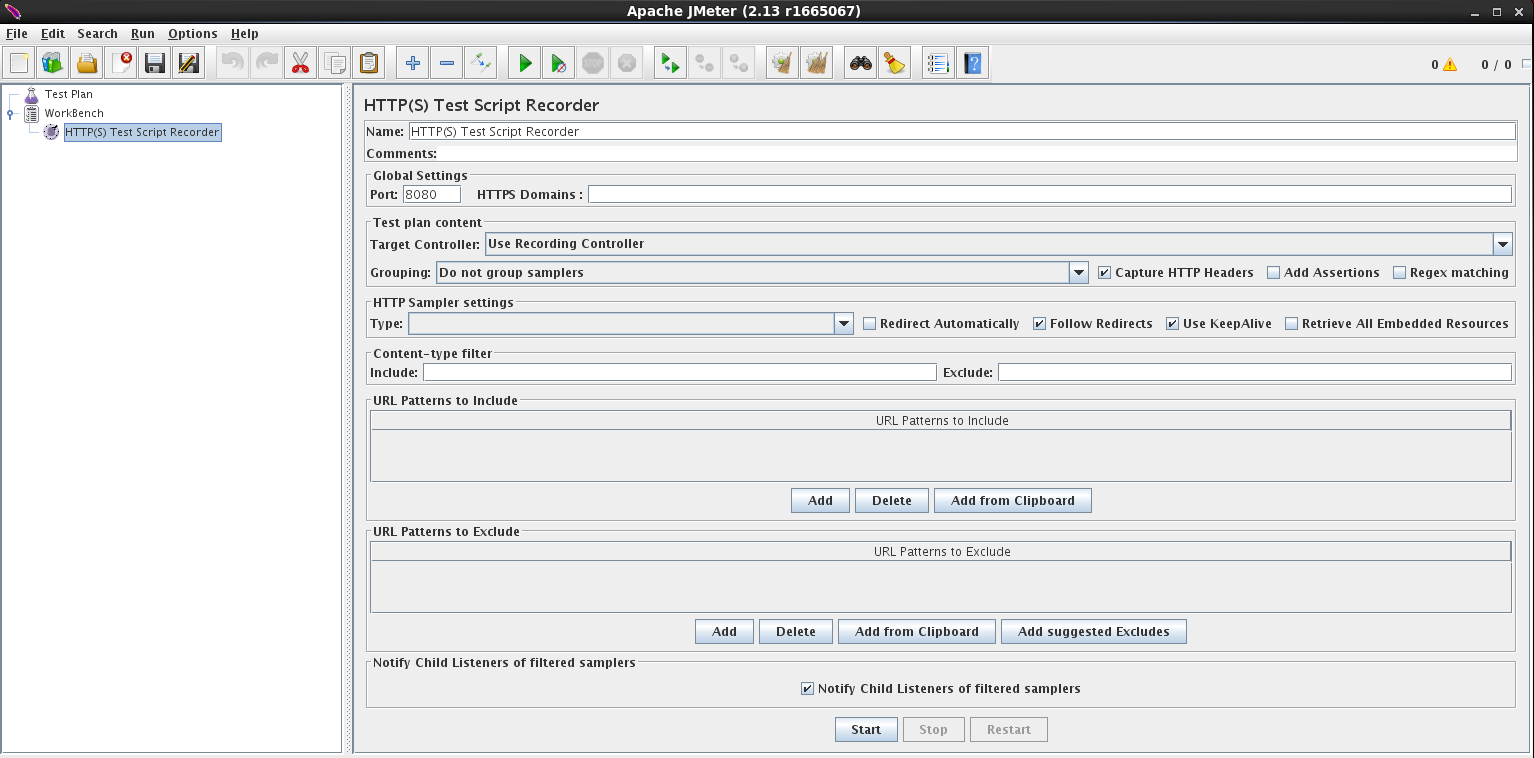
The scenario recording requires some changes onto the “HTTP(S) Test Script Recorder”.
Change the:
Port: this is the port on the server running JMeter that will act as proxy. Default value is 8080.
URL Patterns to Include: Add “.*” to include all requests (you may exclude some later, if you desire).
2. Configure the Browser to use the Test Script recorder as proxy
Go to your favourite browser (Firefox, Internet Explorer, Chrome, etc.) and configure the proxy as explained as follow:
The example below is for Internet Explorer 11 (it may differ from version to version):
- Go to Tools > Internet Options.
- Select the “Connection” tab.
- Click the “LAN settings” button.
- Check the “Use a proxy server for your LAN” check-box. The address and port fields should be enabled now.
- In the Address type the server name or the IP address of the server running JMeter HTTP(S) Test Script Recorder and in the Port, enter the port entered in Step 1.
From now, the JMeter is proxying the requests.
3. Record your first scenario
Connect to the Web Application using the browser you have configured in the previous step. Run a simple scenario including the authentication steps. Once done, stop the HTTP(S) Test Script Recorder in JMeter.
4. Analyse the recorded entries
Analyse the recorded entries to find out the entry that redirects to the login page. In this specific case, it was the first request because the Web Application automatically displays the login page for all users not authenticated. From this request, we need to fetch two values ‘SAMLRequest’ and ‘RelayState’ included in the page response data and submit them to the ADFS login URL. After successful login, ADFS will provide a SAMLResponse that need to be submitted back to the callback URL. This can be done by using Regular Expression Extractors. Refer to the image below to see how to do this.

| Extractor Name | Associated variable | Regular Expression |
| SAMLRequest Extractor | SAMLRequest | name=”SAMLRequest” value=”([0-9A-Za-z;.: \/=+]*)” |
| RelayState Extractor | RelayState | name=”RelayState” value=”([&#;._a-zA-Z0-9]*)” |
| SAMLResponse Extractor | SAMLResponse | name=”SAMLResponse” value=”([&#;._+=a-zA-Z0-9]*)” |
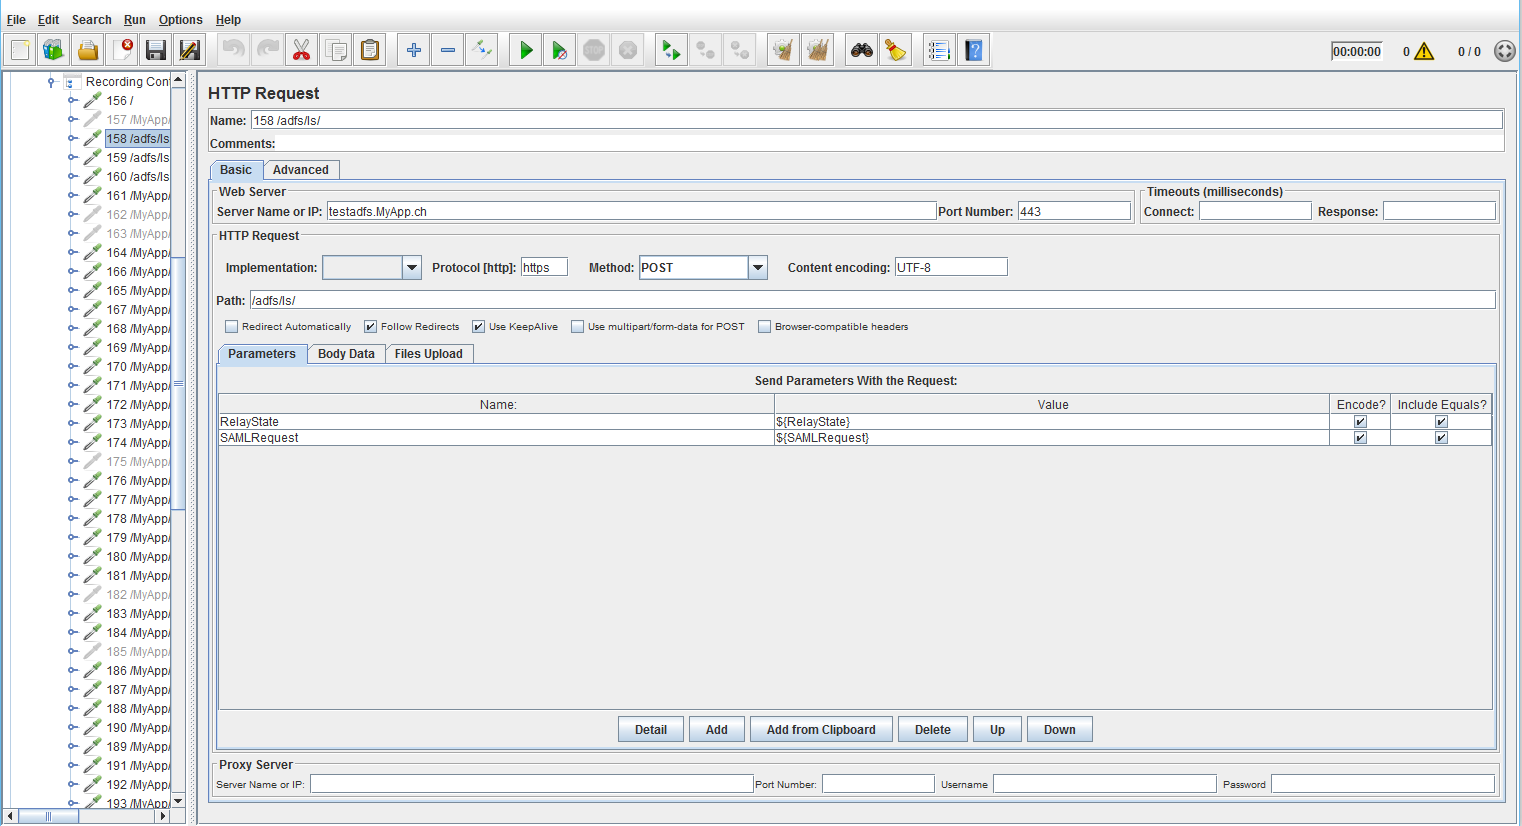
In the registered scenario look for the entries having SAMLRequest, RelayState and SAMLResponse as parameter and replace them with the corresponding variable set in the regular expressions created in the previous step.
* Click on the image to increase the size

Once this is done the login test scenario can be executed now.
This JMeter test plan can be cleaned from the URL requests and be used as a base plan to record more complex test plans.
![Thumbnail [90x90]](https://www.dbi-services.com/blog/wp-content/uploads/2022/09/DDI_web-min-scaled.jpg)