Welcome to this blog, we’re going to setup our first Pinia store in a Vue application with typescript support.
First, what is Pinia ?
From Pinia official website, “Pinia is a store library for Vue, it allows you to share a state across components/pages. A pineapple is in reality a group of individual flowers that join together to create a multiple fruit. Similar to stores, each one is born individually, but they are all connected at the end.”.
Why using Pinia instead of Vuex ?
First of all, Pinia is now the state management tool officially recommended in Vue documentation. It has been mentioned as the version 5 of Vuex.
With Pinia, you can forget about mutations, no need to worry about its complex verbosity. It fully supports TypeScript and provides autocompletion even in JavaScript. It’s also light, modular and extensible.
Creating our Vue app
Just before creating the app, notice that I’m using Vue cli version 5.0.8 and npm version 9.5.1.
That said, we can start with the app creation.
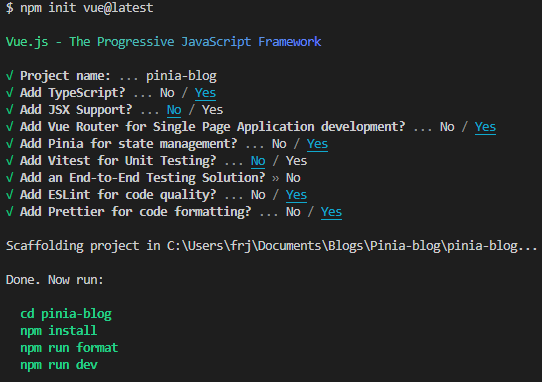
As you can notice, we directly have the possibility to Add Pinia to our new project. We also choose to enable TypeScript, Vue Router, ESLint and Prettier.
Then, follow the step indicated by the Vue cli:
cd pinia-blog
npm install
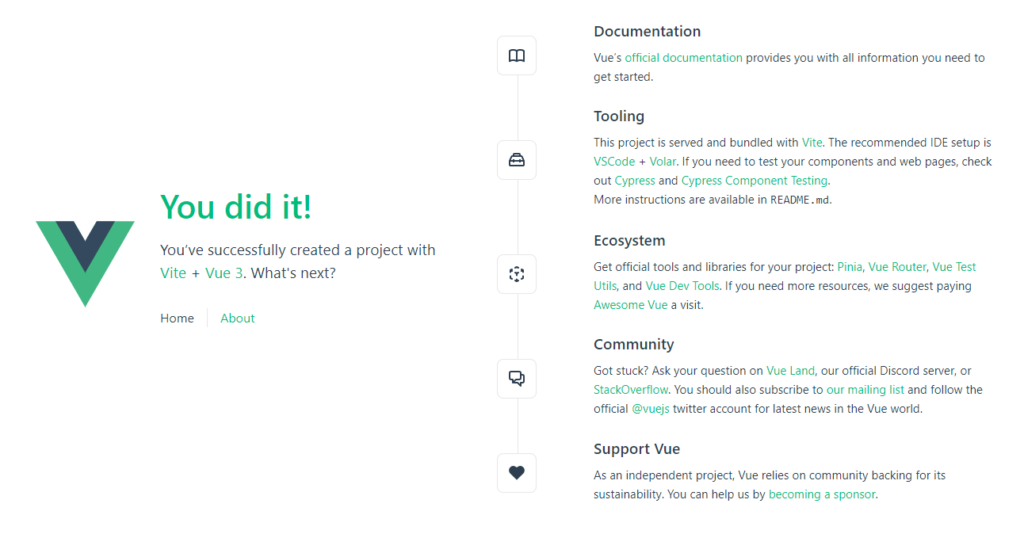
Your project is now ready to start and afterwards you can open it the browser.
npm run devIf you press “o” from the Vue cli, it’ll open a new window in your browser.
Cleaning automatically generated code
By default, many files are generated in the project, we don’t need it for our app and we can therefore clean it.
Before deleting the files, stop your server from the terminal with “ctrl+c” or you will get some errors because of the missing files.
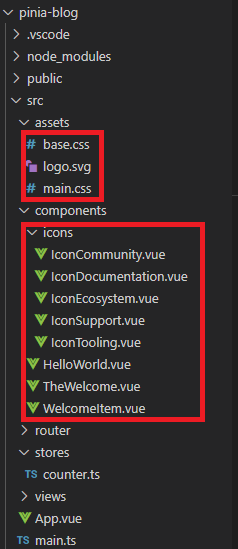
You can also delete AboutView.vue in views folder.
Next, clean the following files:
- router/index.ts:
import { createRouter, createWebHistory } from 'vue-router'
import HomeView from '../views/HomeView.vue'

const router = createRouter({
  history: createWebHistory(import.meta.env.BASE_URL),
  routes: [
    {
      path: '/',
      name: 'home',
      component: HomeView
    },
  ]
})

export default router
- App.vue:
<script setup lang="ts">
import { RouterView } from 'vue-router'
</script>

<template>
  <RouterView />
</template>
- HomeView.vue:
<script setup lang="ts">
</script>

<template>
  <main>
  </main>
</template>
Generated Store
As we added Pinia when creating our Vue project, it has updated our main.ts file to use Pinia and generated an example store in src/stores.
For this blog, we’ll use this example, let’s have a look at it.
main.ts:
import './assets/main.css'

import { createApp } from 'vue'
import { createPinia } from 'pinia'

import App from './App.vue'
import router from './router'

const app = createApp(App)

app.use(createPinia())
app.use(router)

app.mount('#app')
In the import statements, you can see the function createPinia.
It’s used few lines later to create the Pinia root store and then it’s passed to the app.
Concerning the Store file, let’s have a look in detail:
import { ref, computed } from 'vue'
import { defineStore } from 'pinia'

export const useCounterStore = defineStore('counter', () => {
  const count = ref(0)
  const doubleCount = computed(() => count.value * 2)
  function increment() {
    count.value++
  }

  return { count, doubleCount, increment }
})
The first thing to notice is that the store is written as a Setup Store. Setup Store is a syntax to define stores. It’s similar to the Vue Composition API’s setup function. You can also write store file as Option Stores, similar to Vue’s options API.
From Vue documentation, “Setup stores bring a lot more flexibility than Option Stores as you can create watchers within a store and freely use any composable. However, keep in mind that using composables will get more complex when using SSR.
Setup stores are also able to rely on globally provided properties like the Router or the Route. Any property provided at the App level can be accessed from the store using inject()”
import { ref, computed } from 'vue'This line imports the ref and computed functions from the Vue library. ref is used to create reactive references to values, and computed is used to create computed properties that automatically update when their dependencies change.
import { defineStore } from 'pinia'This line imports the defineStore function from the Pinia library, used to define a store.
export const useCounterStore = defineStore('counter', () => {This line exports a Pinia store called useCounterStore. The defineStore function is used to create a Pinia store and takes two arguments: a unique name for the store (in this case, 'counter'), and a setup function that initializes the store’s state and methods.
const count = ref(0)This line creates a reactive reference (ref) named count and initializes it with the value 0. This will be our state variable representing the count in the counter store.
const doubleCount = computed(() => count.value * 2)This line creates a computed property named doubleCount using the computed function. It calculates the double value of count by multiplying count.value by 2. The computed property will automatically update whenever count changes.
function increment() { count.value++ }This line defines a function named increment that increments the value of count by one. Since count is a reactive reference, updating its value with count.value++ will automatically trigger reactivity and update any dependent computed properties.
return { count, doubleCount, increment }This line returns an object containing the count, doubleCount, and increment properties. These properties represent the state (count), the computed property (doubleCount), and the method (increment) of the Pinia store. They will be accessible to components that use this store via the useCounterStore store instance.
Time to use our store !
Store usage
Usually you should create a component that you’d call in a view file, but here, as the goal is to understand how to use Pinia, we’ll simply use HomeView.vue.
We’ll edit the file, simply to use the count, doubleCount and increment properties:
<template>
  <div>
    <h1>Home View</h1>
    <p>Count: {{ counter.count }}</p>
    <p>Double Count: {{ counter.doubleCount }}</p>
    <button @click="counter.increment()">Increment</button>
  </div>
</template>

<script lang="ts" setup>
import { useCounterStore } from '@/stores/counter'

const counter = useCounterStore()
</script>
Let’s have a deep dive to understand what’s going on in there:
<script lang="ts" setup>The script section of the file is declared with setup attribute. It enables the new setup syntax in Vue 3, which simplifies the way we define data, computed properties, and methods.
import { useCounterStore } from '@/stores/counter'In the script section, we first import the useCounterStore function from our store file.
const counter = useCounterStore()This line calls the useCounterStore function to create an instance of the counter store and stores it in the counter variable (Remember that our function useCounterStore() returns an object). This instance will be reactive, meaning any changes to the state or computed properties in the store will automatically trigger updates in the template where counter is used.
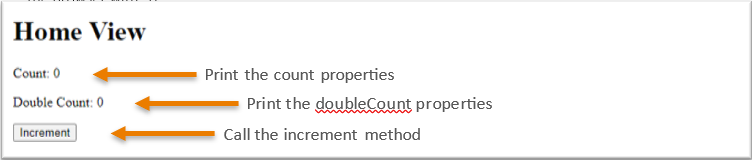
Looking at the template section now, it contains the HTML structure that defines the visual representation of the component.
<p>Count: {{ counter.count }}</p>
<p>Double Count: {{ counter.doubleCount }}</p>
<button @click="counter.increment()">Increment</button>
It contains two paragraphs (<p>) that display the count and doubleCount properties from the counter object, respectively. There is also a button that calls the increment method when clicked.
Test the application
You can now test the application by running the “npm run dev” command in your terminal and then open it in the browser with “o”.
Click on the increment button, you should directly see the updated values.
Sharing the data across multiple component
The advantage of using a state management tool like Pinia, is that the state of your store can be shared across your whole application. Let’s verify it.
Create a new view File named CounterView.ts in your views folder.
<template>
  <div>
    <h1>Counter View</h1>
    <p>Count: {{ counter.count }}</p>
    <p>Double Count: {{ counter.doubleCount }}</p>
    <button @click="counter.increment()">Increment</button>
  </div>
</template>

<script lang="ts" setup>
import { useCounterStore } from '@/stores/counter'

const counter = useCounterStore()
</script>
Update the router file router/index.ts so that you can access your new file through routing.
Import your new view file:
import CounterView from '../views/CounterView.vue'Add the following object into the routes array:
    {
      path: '/counter',
      name: 'counter',
      component: CounterView
    },
Add a link into the template section of each view file to navigate between them:
- HomeView.vue:
<!-- Router link to go to "/counter" -->
<router-link to="/counter">Go to Counter</router-link>
- CounterView.vue:
<!-- Router link to go to "/" -->
<router-link to="/">Go to Home</router-link>
Now, if you click on the increment button and then click on the link to go to the counter page, you can see that the value of the counter property has also been updated there.
This is thanks to the state of the count property that is managed in Pinia.
Bonus
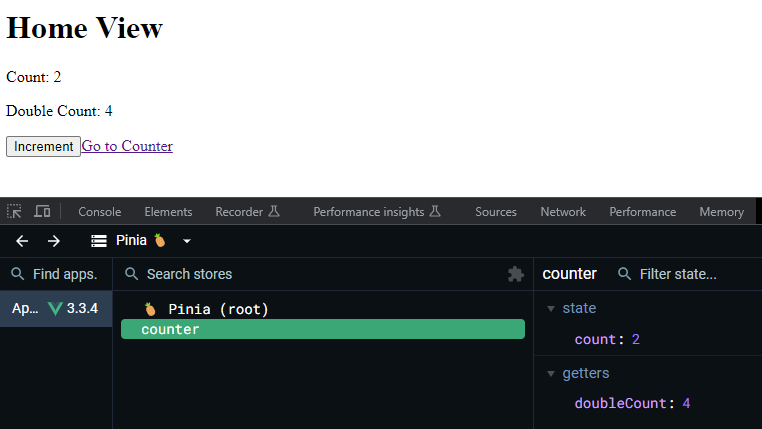
To help you debug your Vue application and also to understand what is going on in your Pinia stores, I recommend you to install the Vue dev tools.
It’s a browser extension available from the dev panel.
For example, within our application it’s useful to control the properties of our stores:
Conclusion
In conclusion, we’ve embarked on a journey to set up our first Pinia store in a Vue application with TypeScript support. Through this blog, we’ve explored the key concepts of Pinia.
Thank you for joining me on this exploration of Pinia and Vue. With your newfound understanding, you’re now ready to create robust, reactive, and efficient applications that make the most of the power and simplicity that Pinia offers. Happy coding!
Useful Links
Pinia official documentation : https://pinia.vuejs.org/introduction.html
Vue official documentation : https://vuejs.org/guide/quick-start.html
![Thumbnail [60x60]](https://www.dbi-services.com/blog/wp-content/uploads/2022/08/FRJ_web-min-scaled.jpg)
![Thumbnail [90x90]](https://www.dbi-services.com/blog/wp-content/uploads/2022/08/NME_web-min-scaled.jpg)