Introduction
Last time, we have seen how to add a Redis plugin to Grafana in order to monitor and generate graphs and charts for your reports or analysis.
During this configuration you may encounter some issues or miss some steps that will end to an error message.
Today we will see some typical error message and who to fix it quickly.
Check if your plugin’s version installed on Grafana
First step is to have confirmation that your Redis plugin is installed and up to date.
- Go to Administration then Plugins
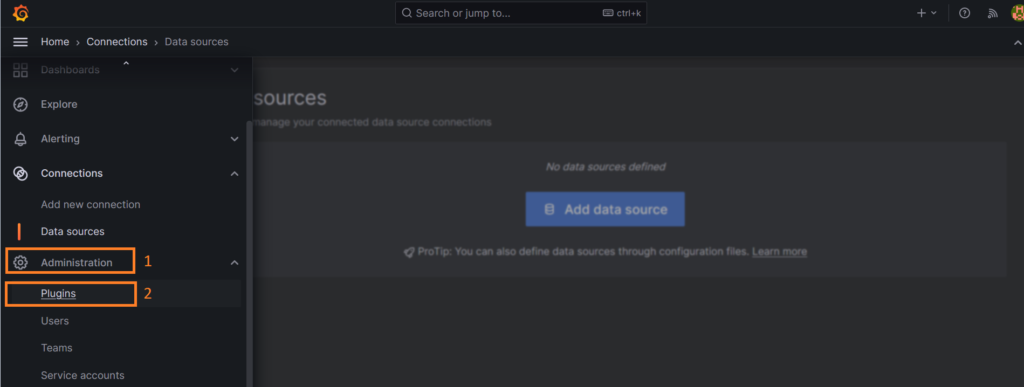
- Check if plugin is here
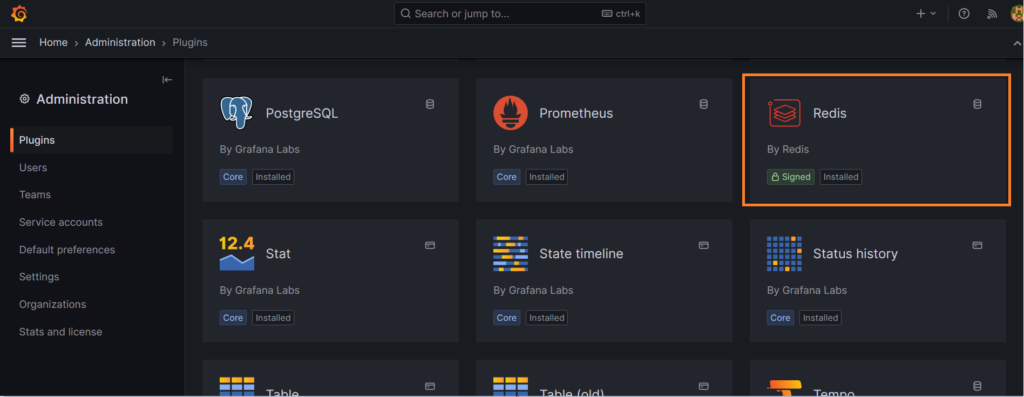
- As you see, plugin is here and installed
- Check the plugin version ( in case you are not able to debug it it may be useful for Redis support team )
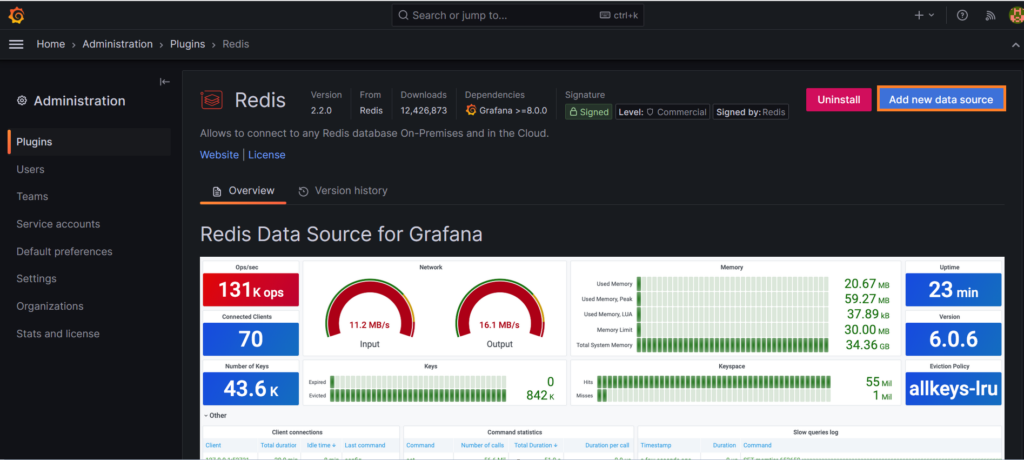
Now you have the plugin version and also its compatibility with the Grafana version
( in our example it is compatible with Grafana versions > +8.0.0 )
If all is fine at this level, we can now focus on the different error messages related to Redis instance.
Fix getInstance error: connection refused
When you connect to Grafana, you have to define the Redis database:
- Go to Home Connections=>Data sources
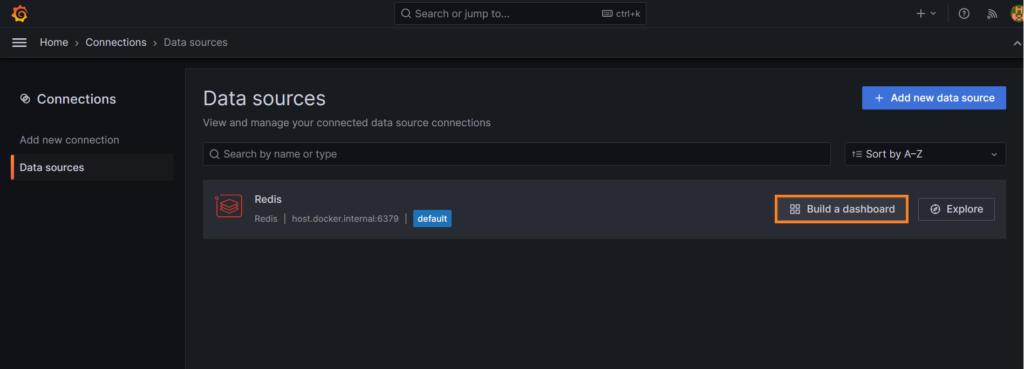
- When adding all your database details and you click on “save and test” button, your can face the famous issue
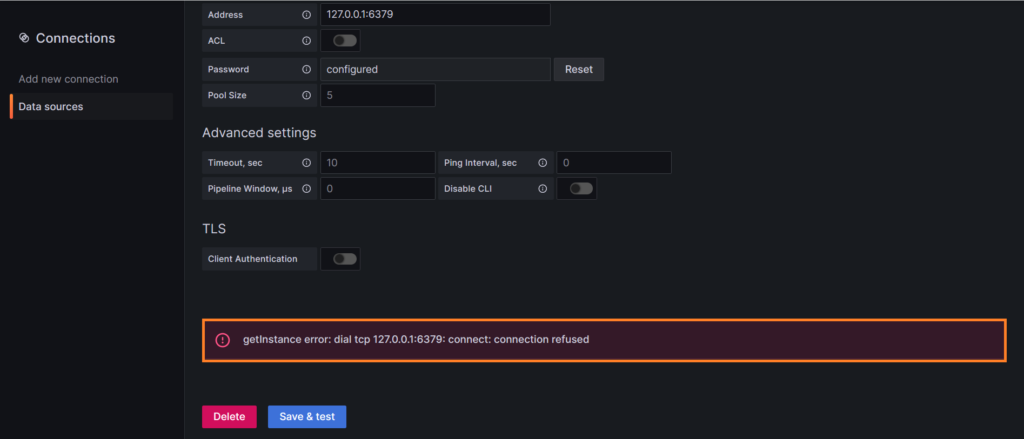
For this specific case it can simply due to the fact that your Redis database is not up!
So check that in priority.
- If it is not UP, then start it and retry the “Save and test” option
- Use the redis-server command or start the Redis service using systemd on your Redis server:
nso@DBI-LT-NSO:~> redis-server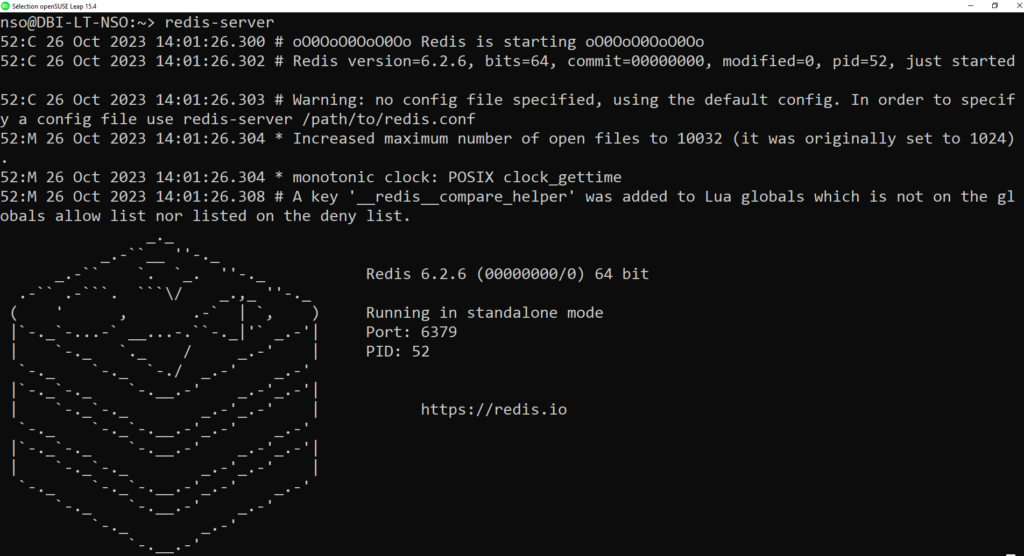
Example on Linux:
sudo systemctl start redis.service- If you are in that specific case it should work fine now 🙂
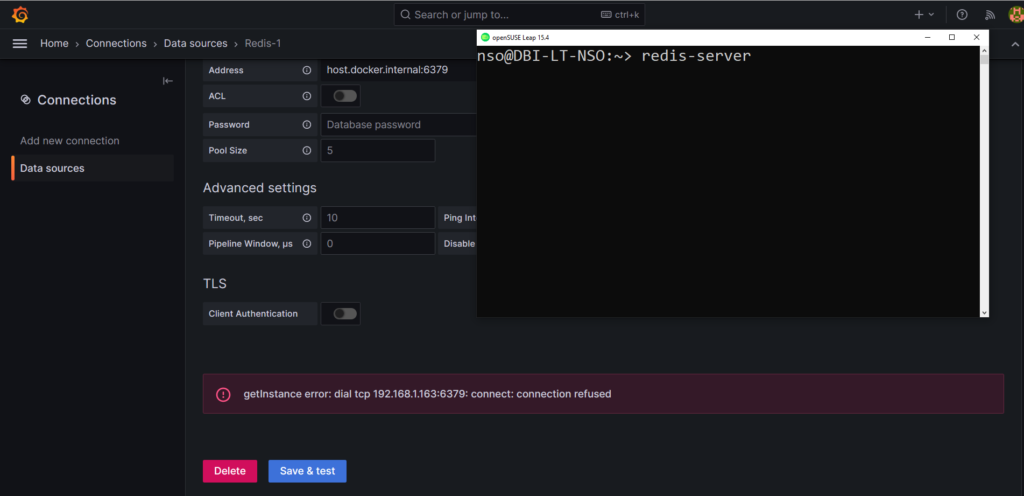
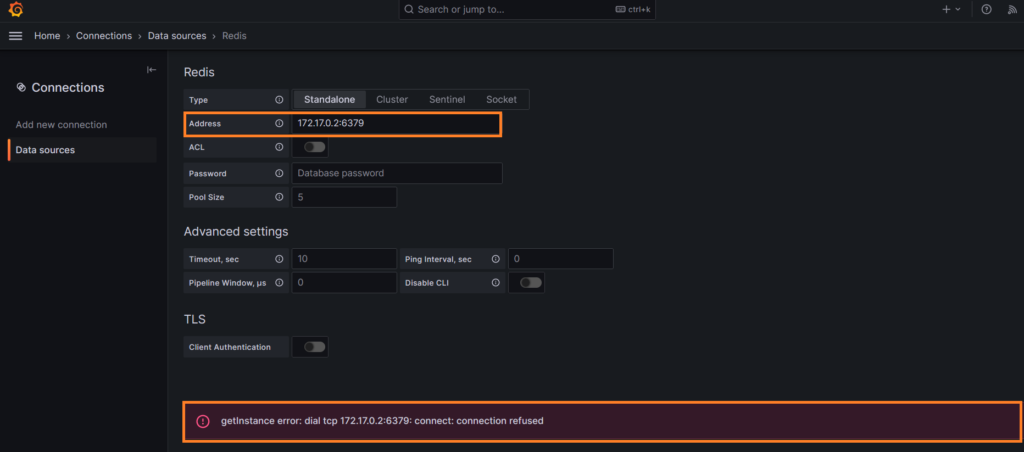
- The second case can be because your address is not correctly set or not recognized
Below my local host name didn’t worked:
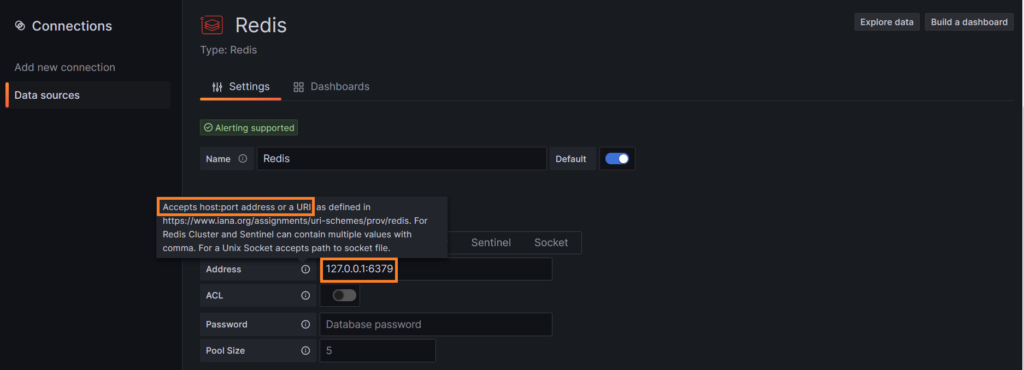
- So for those using a Docker image like me we must add the docker host IP address instead.
Get the docker host IP Address
To get the docker ip address use the following commands:
docker inspect <containerNameOrId>Example:
C:\WINDOWS\system32>docker inspect 8c6c36853ab0490ecca607a6aa28bd158f8f798fd221c24f973faf33be7dfb23You can then pick the Docker ip address
Here in my example it is 172.17.0.2
“Usually, the default docker ip range is 172.17.0.0/16.
Your host should be 172.17.0.1 and your first container should be 172.17.0.2 if everything is normal and you didn’t specify any special network options.”

- Let’s try now:
- If it is still not working with Docker IP address you picked by using the docker inspect command, use the following syntax:
host.docker.internal: <your_Redis_port>Example:
host.docker.internal: 6379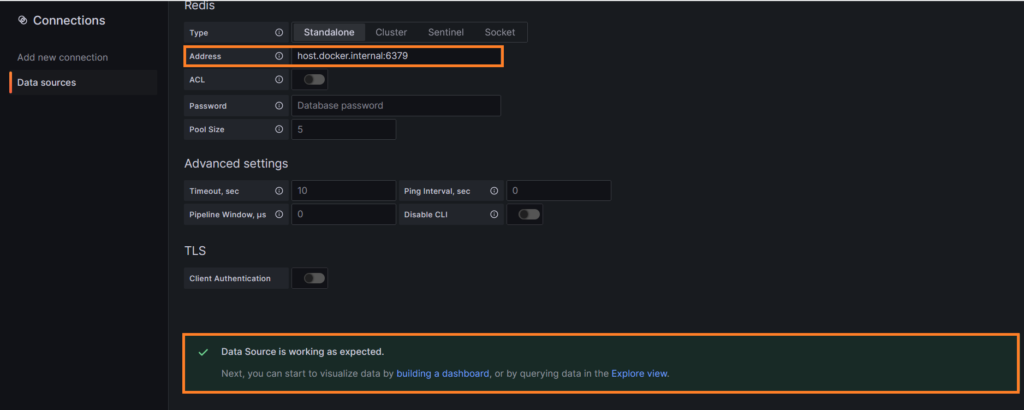
It should work now!
Fix getInstance error : ERR AUTH
This “error” message will display when you have not configured the default password user.
- So you know what to do as the error message is explicit ( check your configuration )
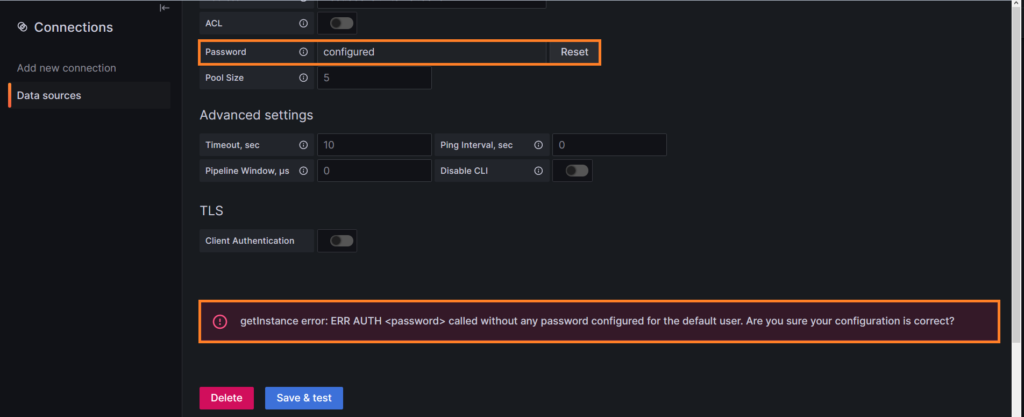
- Anyway, If you let the password part empty (click reset and remove the password) you can test with success

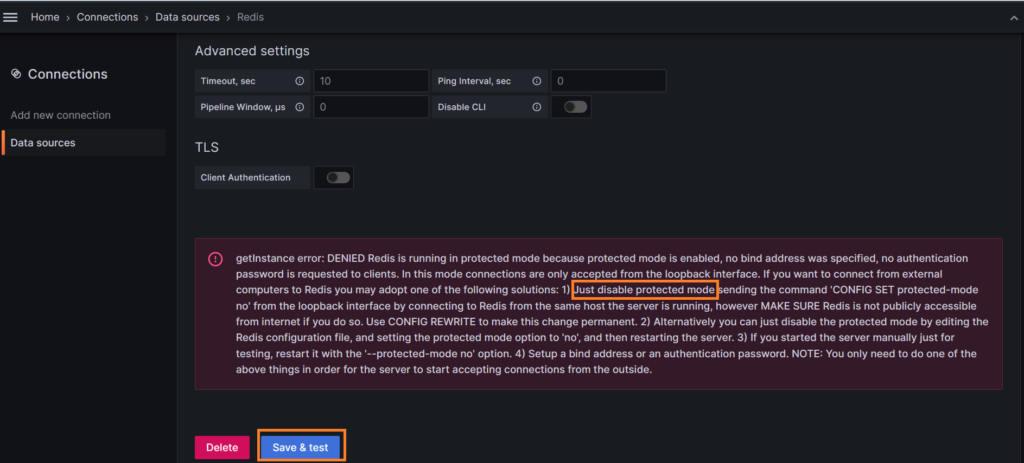
Fix getInstance error : DENIED
- This specific message is more verbose,it propose you solution to fix it such as:
a)disable the protected mode by many ways
b)setup a bind address or authentication by password
- Here are the different ways to disable the protected mode:
“DENIED Redis is running in protected mode because protected mode is enabled, no bind address was specified, no authentication password is requested to clients. In this mode connections are only accepted from the loopback interface. If you want to connect from external computers to Redis you may adopt one of the following solutions:
1) Just disable protected mode sending the command “CONFIG SET protected-mode no” from the loopback interface by connecting to Redis from the same host the server is running, however MAKE SURE Redis is not publicly accessible from internet if you do so. Use CONFIG REWRITE to make this change permanent.
2) Alternatively you can just disable the protected mode by editing the Redis configuration file, and setting the protected mode option to ‘no’, and then restarting the server.
Go to your redis.cfg file and update the below line and set it to “no”
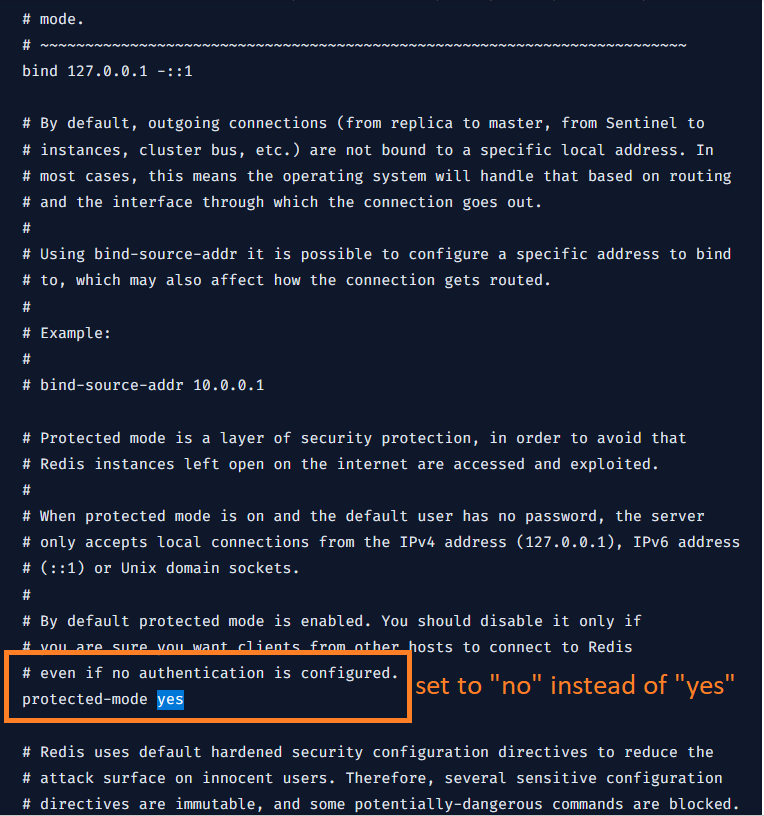
3) If you started the server manually just for testing, restart it with the ‘–protected-mode no‘ option.
4) Setup a bind address or an authentication password.
Of course : You only need to do one of the above things in order for the server to start accepting connections from the outside.
From Redis site
Example:
- For our case we will disable protected mode as it is only for test purpose.
- Use the below command on your Redis instance:
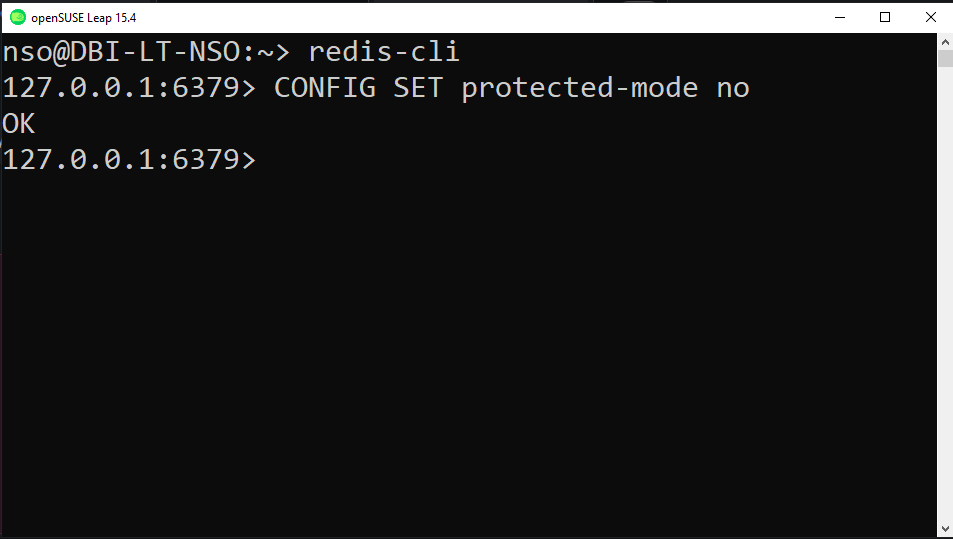
- Now you can use the save and test option it should work
Conclusion
Now you know how to fix the main issues when defining your Redis instance in Grafana.
If you are still stuck, you can also check on Grafana official site database you can find some useful info.
Feel free to check my other posts and also the dbi bloggers.
Next time we will see how to use Grafana with MongoDB.
Stay tuned!
![Thumbnail [90x90]](https://www.dbi-services.com/blog/wp-content/uploads/2025/05/JDE_Web-1-scaled.jpg)
Greg
30.04.2025When setting up this plugin I am getting getInstance error: EOF
Can you suggest a solution?