Introduction
Hi Team
Here we go again , last time we have seen how to install Redis on Windows 10 using Redis binaries , let’s see the 2nd method I used to install Redis on my machine and of course how to link it to RedisInsight.
For that we will install a Linux/Unix from Microsoft store.I have selected openSUSE OS and will install Redis on it ( First I have chosen Ubuntu but the download failed 🙁 , if someone has the same problem please comment , also note that it is working fine for openSUSE)
Note:
Redis is not officially supported on Windows
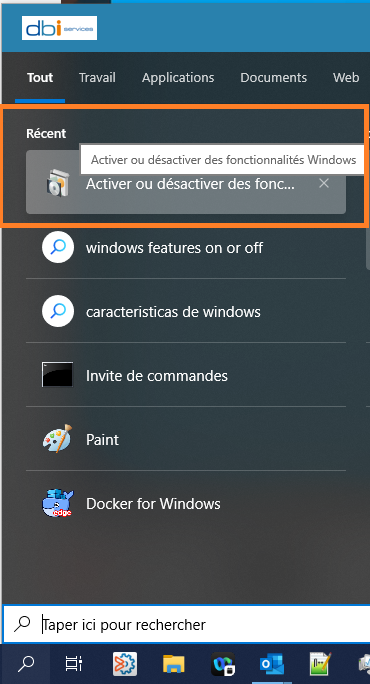
Activate Linux Subsystem on your Windows 10 (WSL)
- In your Windows search bar type”turn windows features on or off”
Note:
You have many method to access the panel you can also use command line or take another way like go in program and features part
- Select “subsystem for Linux“

Using Powershell
- You can activate WSL by sending this command in powershell
Enable-WindowsOptionalFeature -Online -FeatureName Microsoft-Windows-Subsystem-Linux
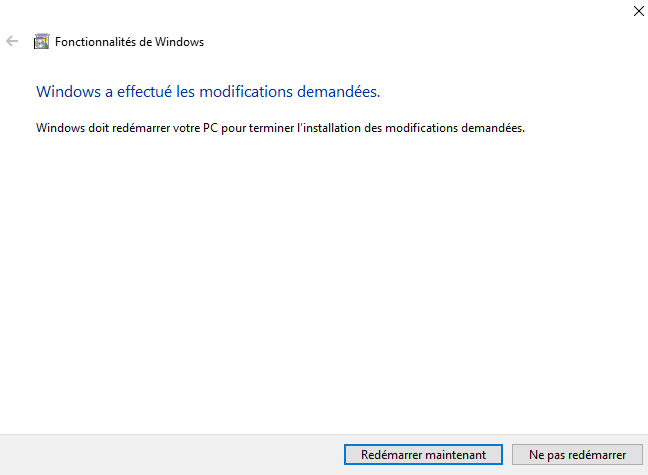
- After that you must restart your computer to take changes in account
Prerequisite
- Installation will be done on Windows 10 with latest update
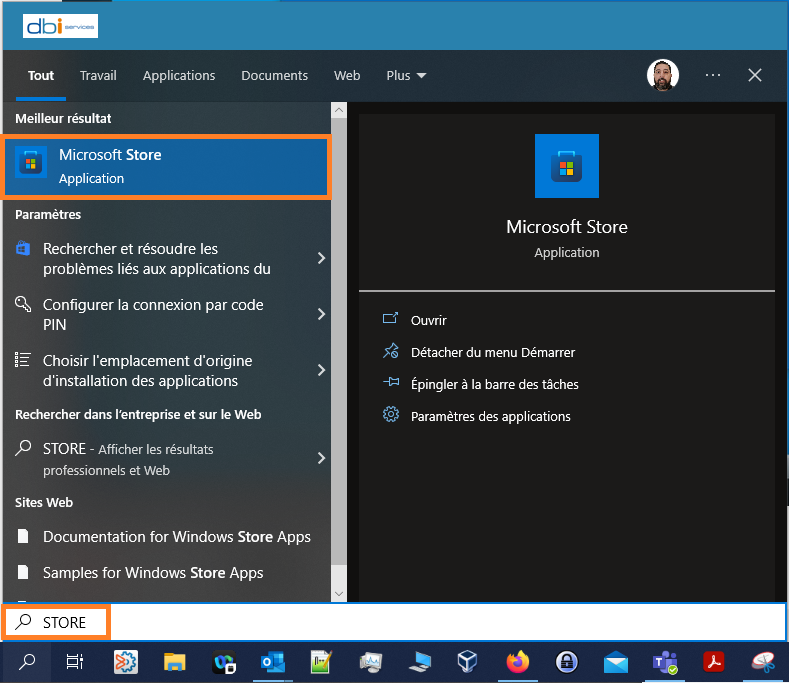
Open Microsoft store
- By command line
start ms-windows-store:
- By Windows starting Bar
Select the OS
I have selected openSUSE Leap 15 for my Redis installation but you can also choose within the below list
The following links will open the Microsoft store page for each distribution:
- Ubuntu 18.04 LTS
- Ubuntu 20.04 LTS
- Ubuntu 22.04 LTS
- openSUSE Leap 15.1
- SUSE Linux Enterprise Server 12 SP5
- SUSE Linux Enterprise Server 15 SP1
- Kali Linux
- Debian GNU/Linux
- Fedora Remix for WSL
- Pengwin
- Pengwin Enterprise
- Alpine WSL
- Raft(Free Trial)
Select the OS of your choice ( if available of course …)
- Download it
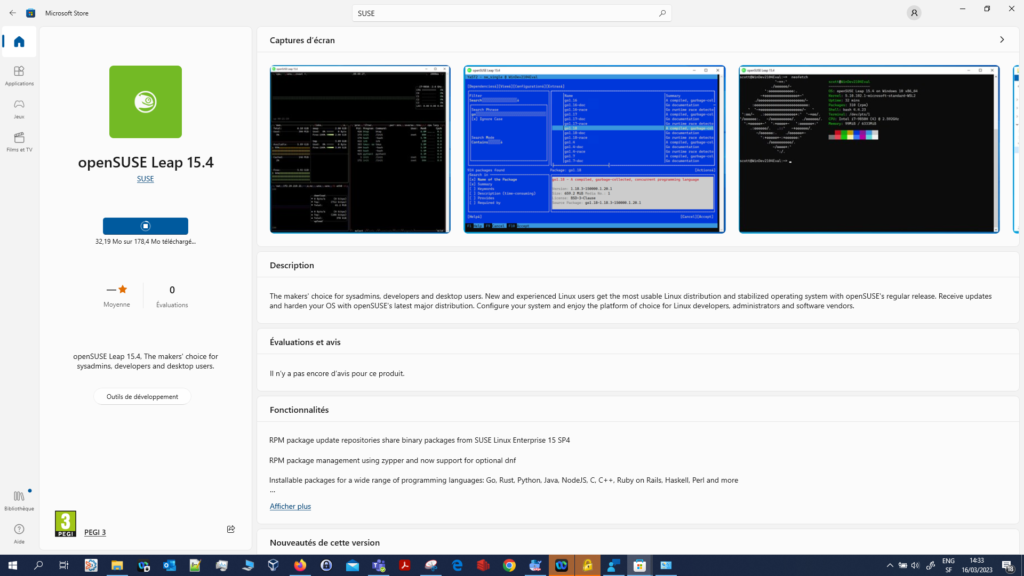
- You can see all specificity and also how to update the OS
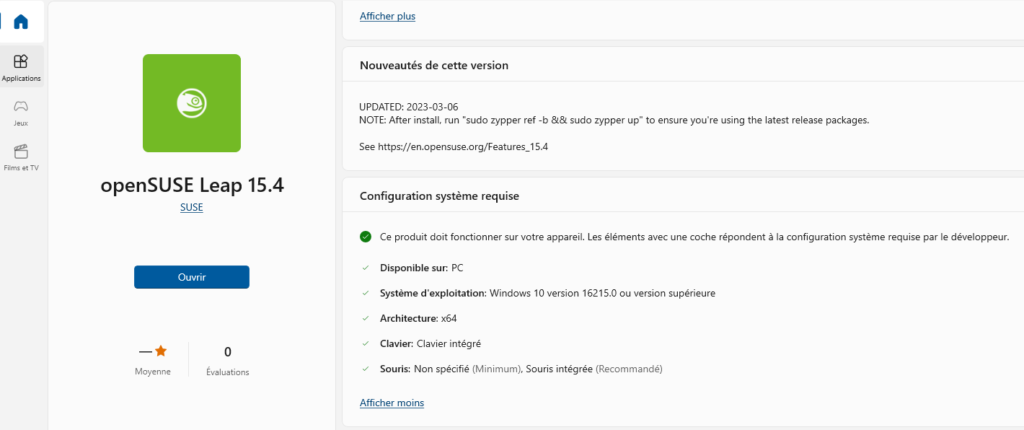
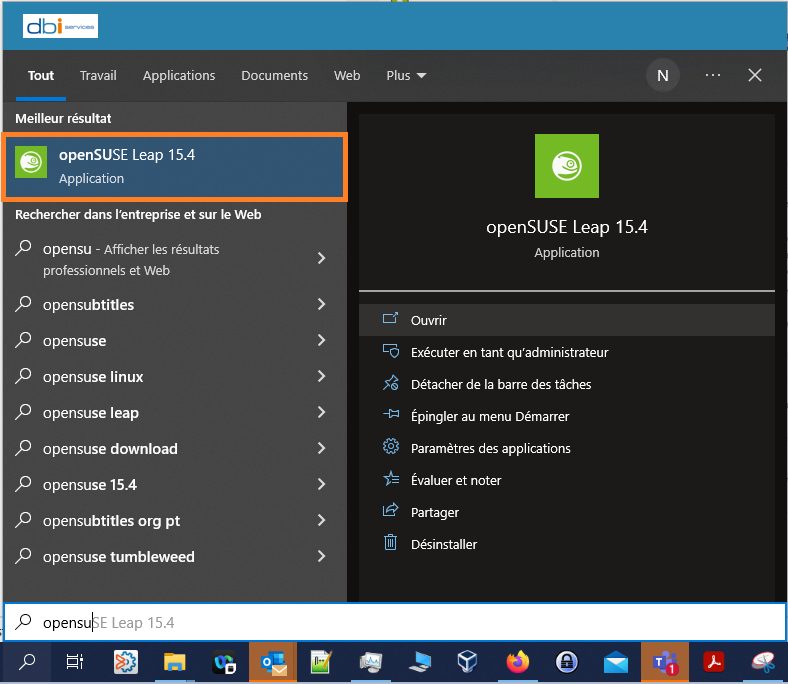
- Start the OS from your control panel
Finalize installation
- When you start openSUSE installation has to be finalized to be able to use it

- After installation , you will have to create your user

Download and Install Redis
Update your OS
- Use commands to refresh and update your OS
sudo zypper ref -b && sudo zypper up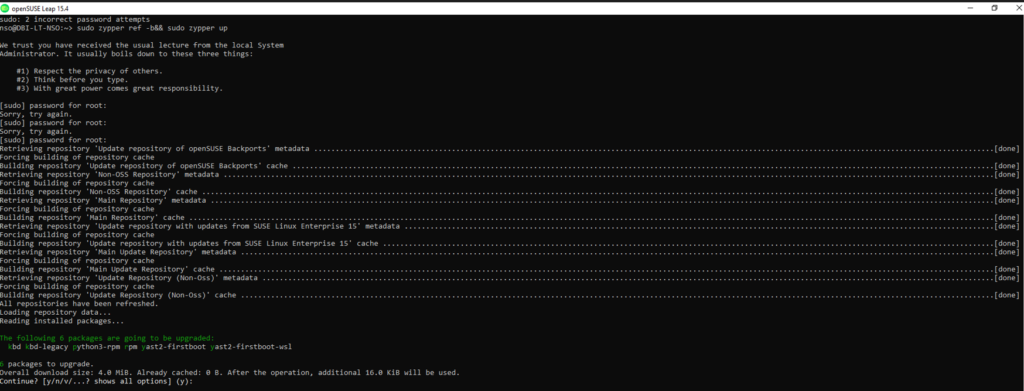
- Installation is now done , you can browse and see that your user is created and you have sufficient rights to perform install and updates


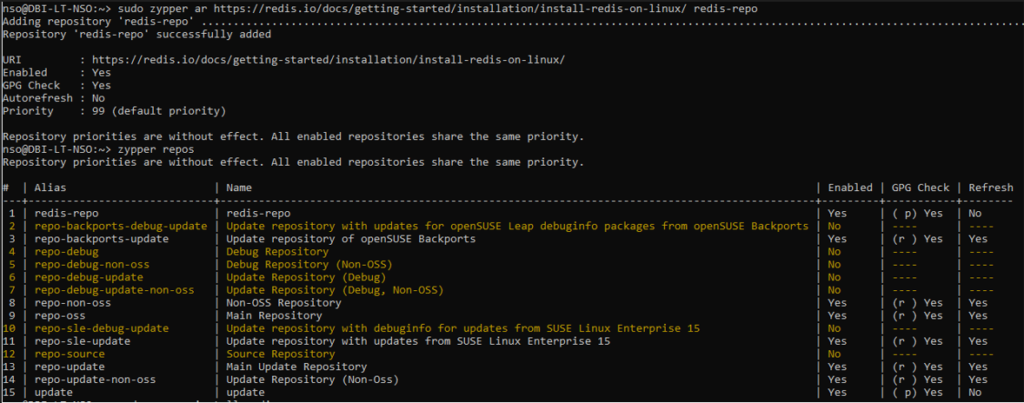
Add Redis REPO
- Now your OS is installed and running we will install Redis , but for that we need to add a Repository otherwise it will fail
Adding Repositories
- You may make use of any of the two commands – ‘zypper addrepo‘ or ‘zypper ar‘. You may use repo url or alias to add Repository
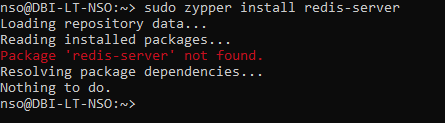
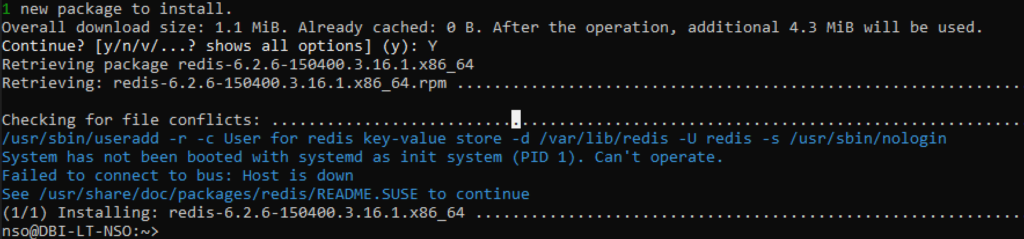
Install Redis
- Use the below command to Install Redis
nso@DBI-LT-NSO:~> sudo zypper in redis*- Once installed you can check your Redis version
Check Redis Version
- Use this command
nso@DBI-LT-NSO:~> redis-server --version
Start Redis server
- Use the below command to start your Redis server
nso@DBI-LT-NSO:~> redis-server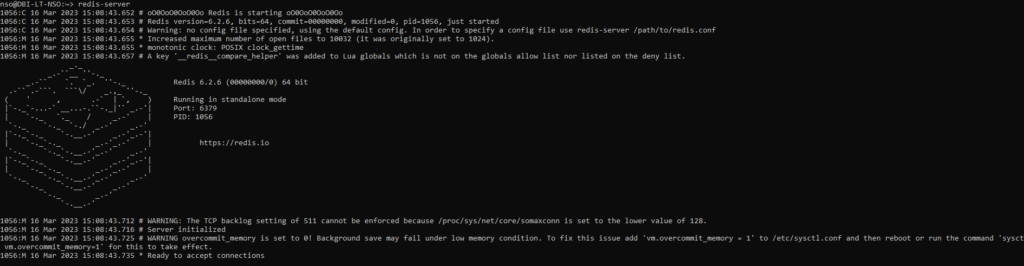
Launch Redis-CLI
- As the server is running let’s try some command using redis-cli
For that open a new openSUSE terminal
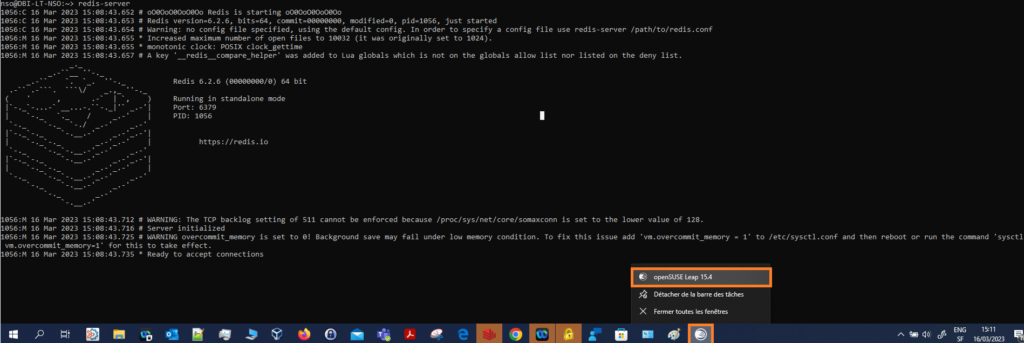
- In the new window use the command
nso@DBI-LT-NSO:~> redis-cli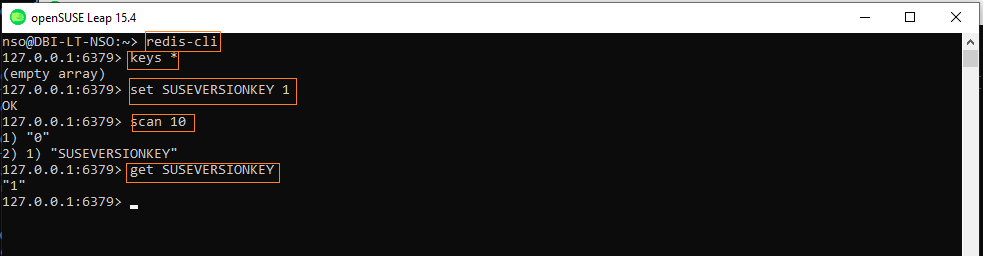
- You can now create your keys and work on Redis : GREAT!!!
Note: We have created a key named SUSEVERSIONKEY let’s see if we can find it on RedisInsight as we did for the previous BLOG!
Link your DB to RedisInsight
Now you have your Redis UP and running we will use RedisInsight to have a more comfortable usage
If you don’t remember how to use and install RedisInsight follow my previous blog
- Open RedisInsight and define your REDIS database
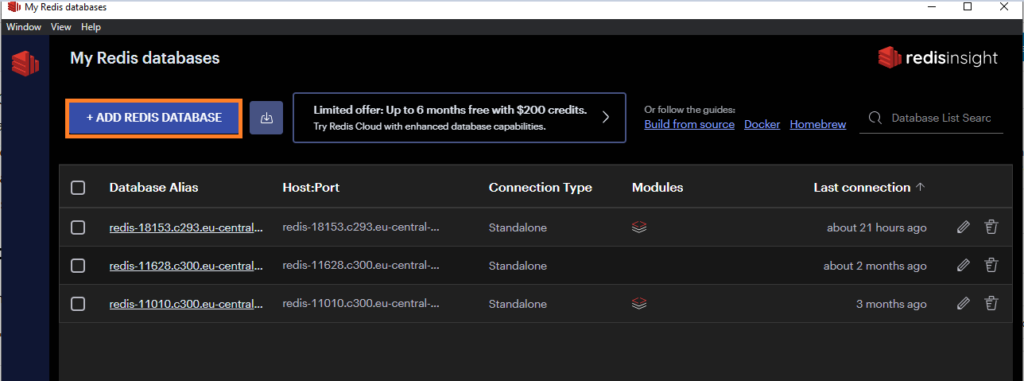
- Click on “Add redis database” button and fill the fields
- You will find the ports and address when starting Redis server on your CLI
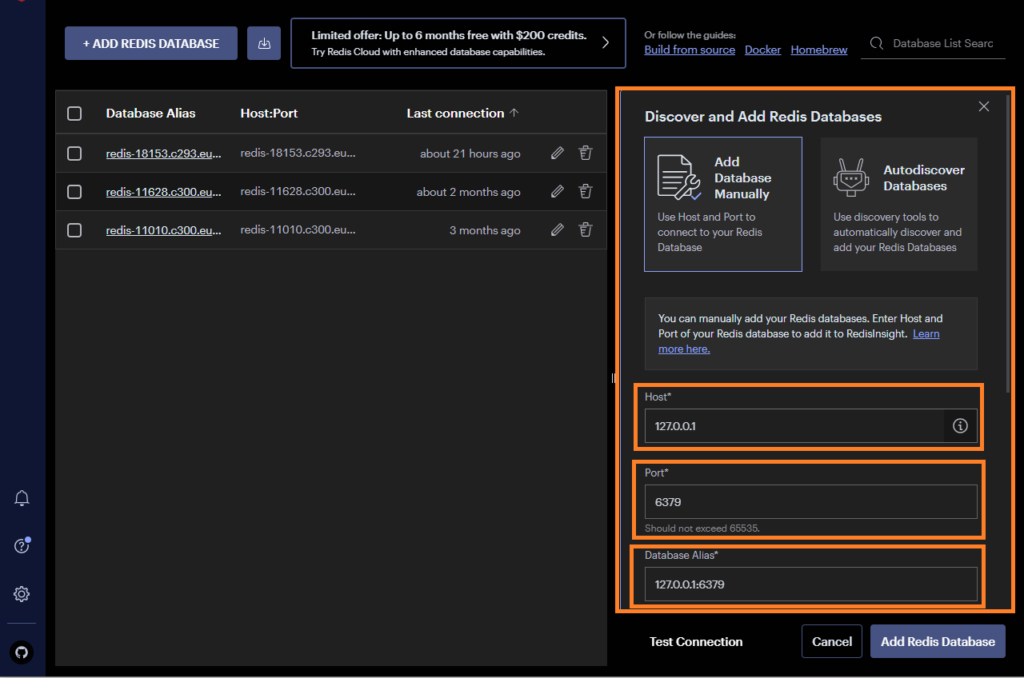
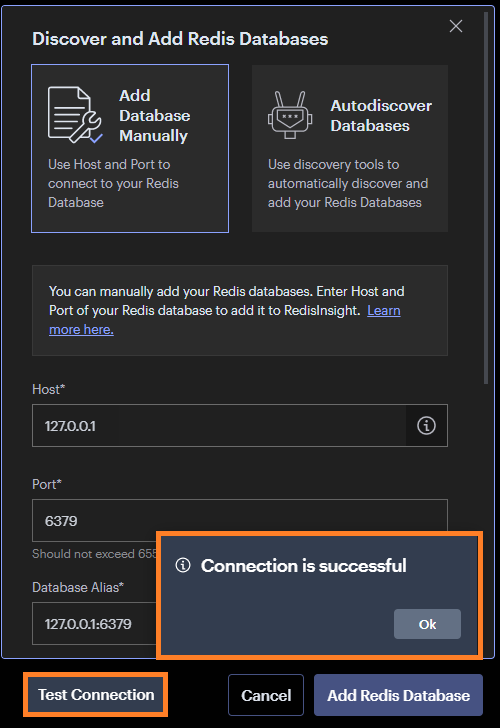
- Once your data input you can test your connection then click on Add Redis Database
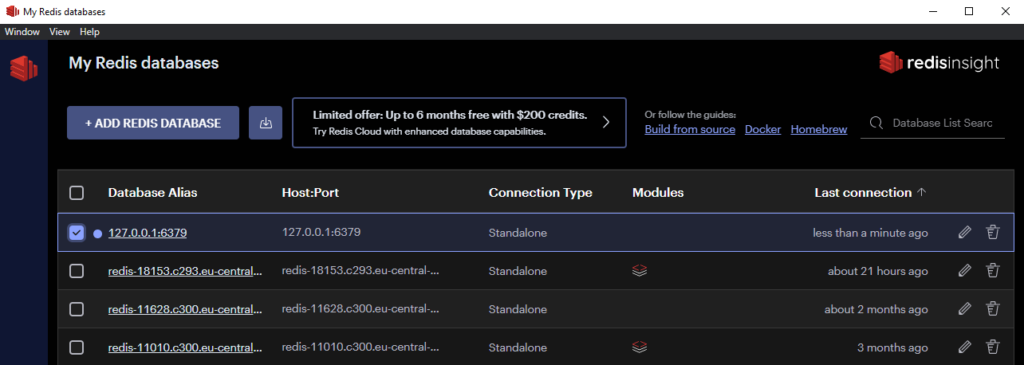
- You can now open your fresh Redis database and check if our SUSEVERSIONKEY is here
- Use the RedisInsight interface to retrieve your created key ( SUSEVERSIONKEY )

- Now we can see that Redis is connected to RedisInsight and you can work as well to create your new keys ( click on key then enter your new key fields and values )
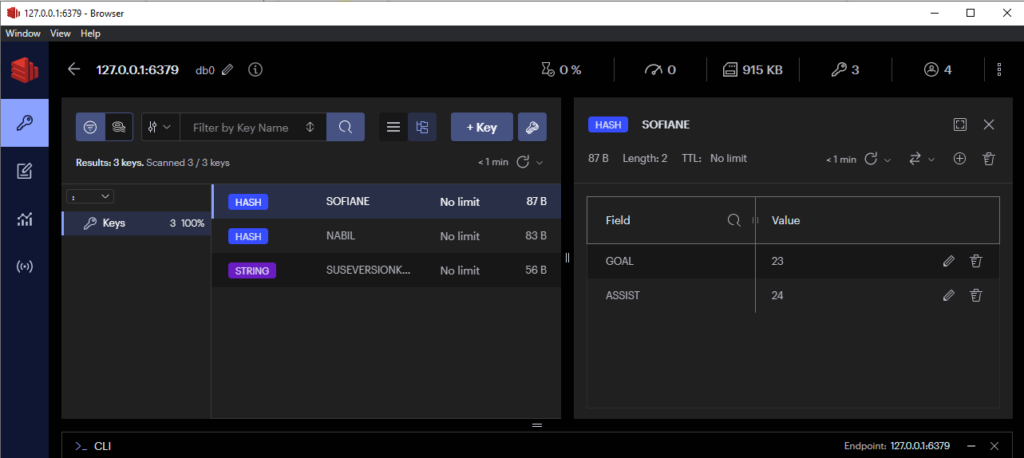
- Check on openSUSE with redis-cli if all is fine
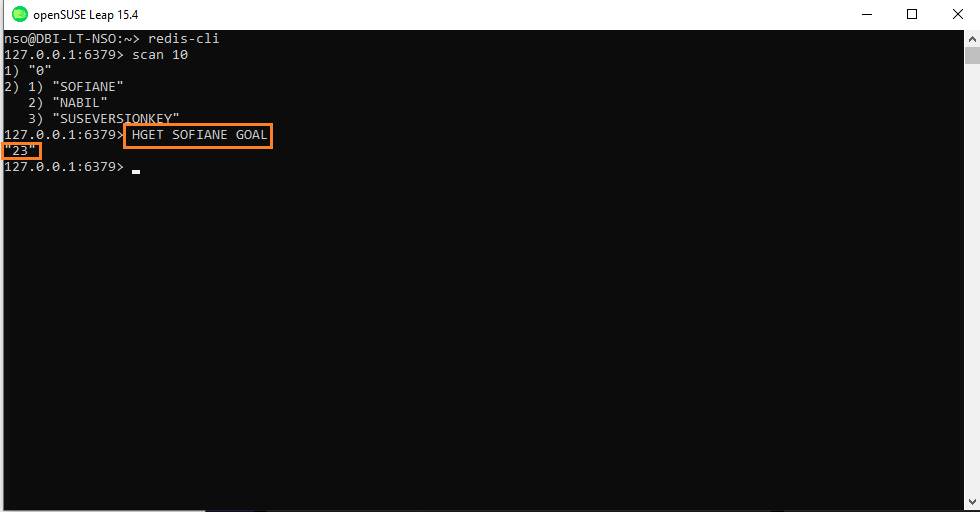
- We see that keys are displaying as expected (also 23 goals it’s pretty descent for Sofiane , I hope he will beat Haaland‘s record 😀 )
Conclusion
Now you know how to install Redis on your Windows machine using WSL feature, it can be really helpful if you need to make tests or training easily on your Windows environment.
I hope you enjoyed this Blog, so don’t hesitate to share with us and also to visit dbi bloggers in order to have more and more tips and tricks !
![Thumbnail [90x90]](https://www.dbi-services.com/blog/wp-content/uploads/2022/11/TBR-web-min-scaled.jpg)
![Thumbnail [90x90]](https://www.dbi-services.com/blog/wp-content/uploads/2022/08/FRJ_web-min-scaled.jpg)
![Thumbnail [90x90]](https://www.dbi-services.com/blog/wp-content/uploads/2025/05/JDE_Web-1-scaled.jpg)