We all had that time where we needed to upgrade a ages old system that was running for years without any interruption. This sometimes can be quite tricky and take some time and nerves to do correctly. But since SUSE rocks its amazing YaST (Yet Another Setup Tool), you can nail this setup without deep shell skills. In this Blog post I will try to explain you the steps one has to take to prepare a SUSE Enterprise Linux for Upgrading it. To make it more relatable I will document both the Major-Upgrade and the Minor-Upgrade. Additionally I will explain the biggest issues one might face and give you some hints in how to solve them.
Prepare your SUSE/ SLES
The fact that OpenSUSE does not need any subscription means, that there is no need for cleanup at this point of my Blog. For all users that are using OpenSUSE: just jump to the Chapter 3.
Chapter 1: Cleanup of unused Modules or Add-ons
Before we start migrating or activating the system, ensure no unused or unneeded modules or add-ons linger on it. These could stop us from activating the system if our license doesn’t cover them.
To check for unneeded modules, open YaST and select ‘Software/Add-On Products.’ This lists all Add-On Products deployed on your system.
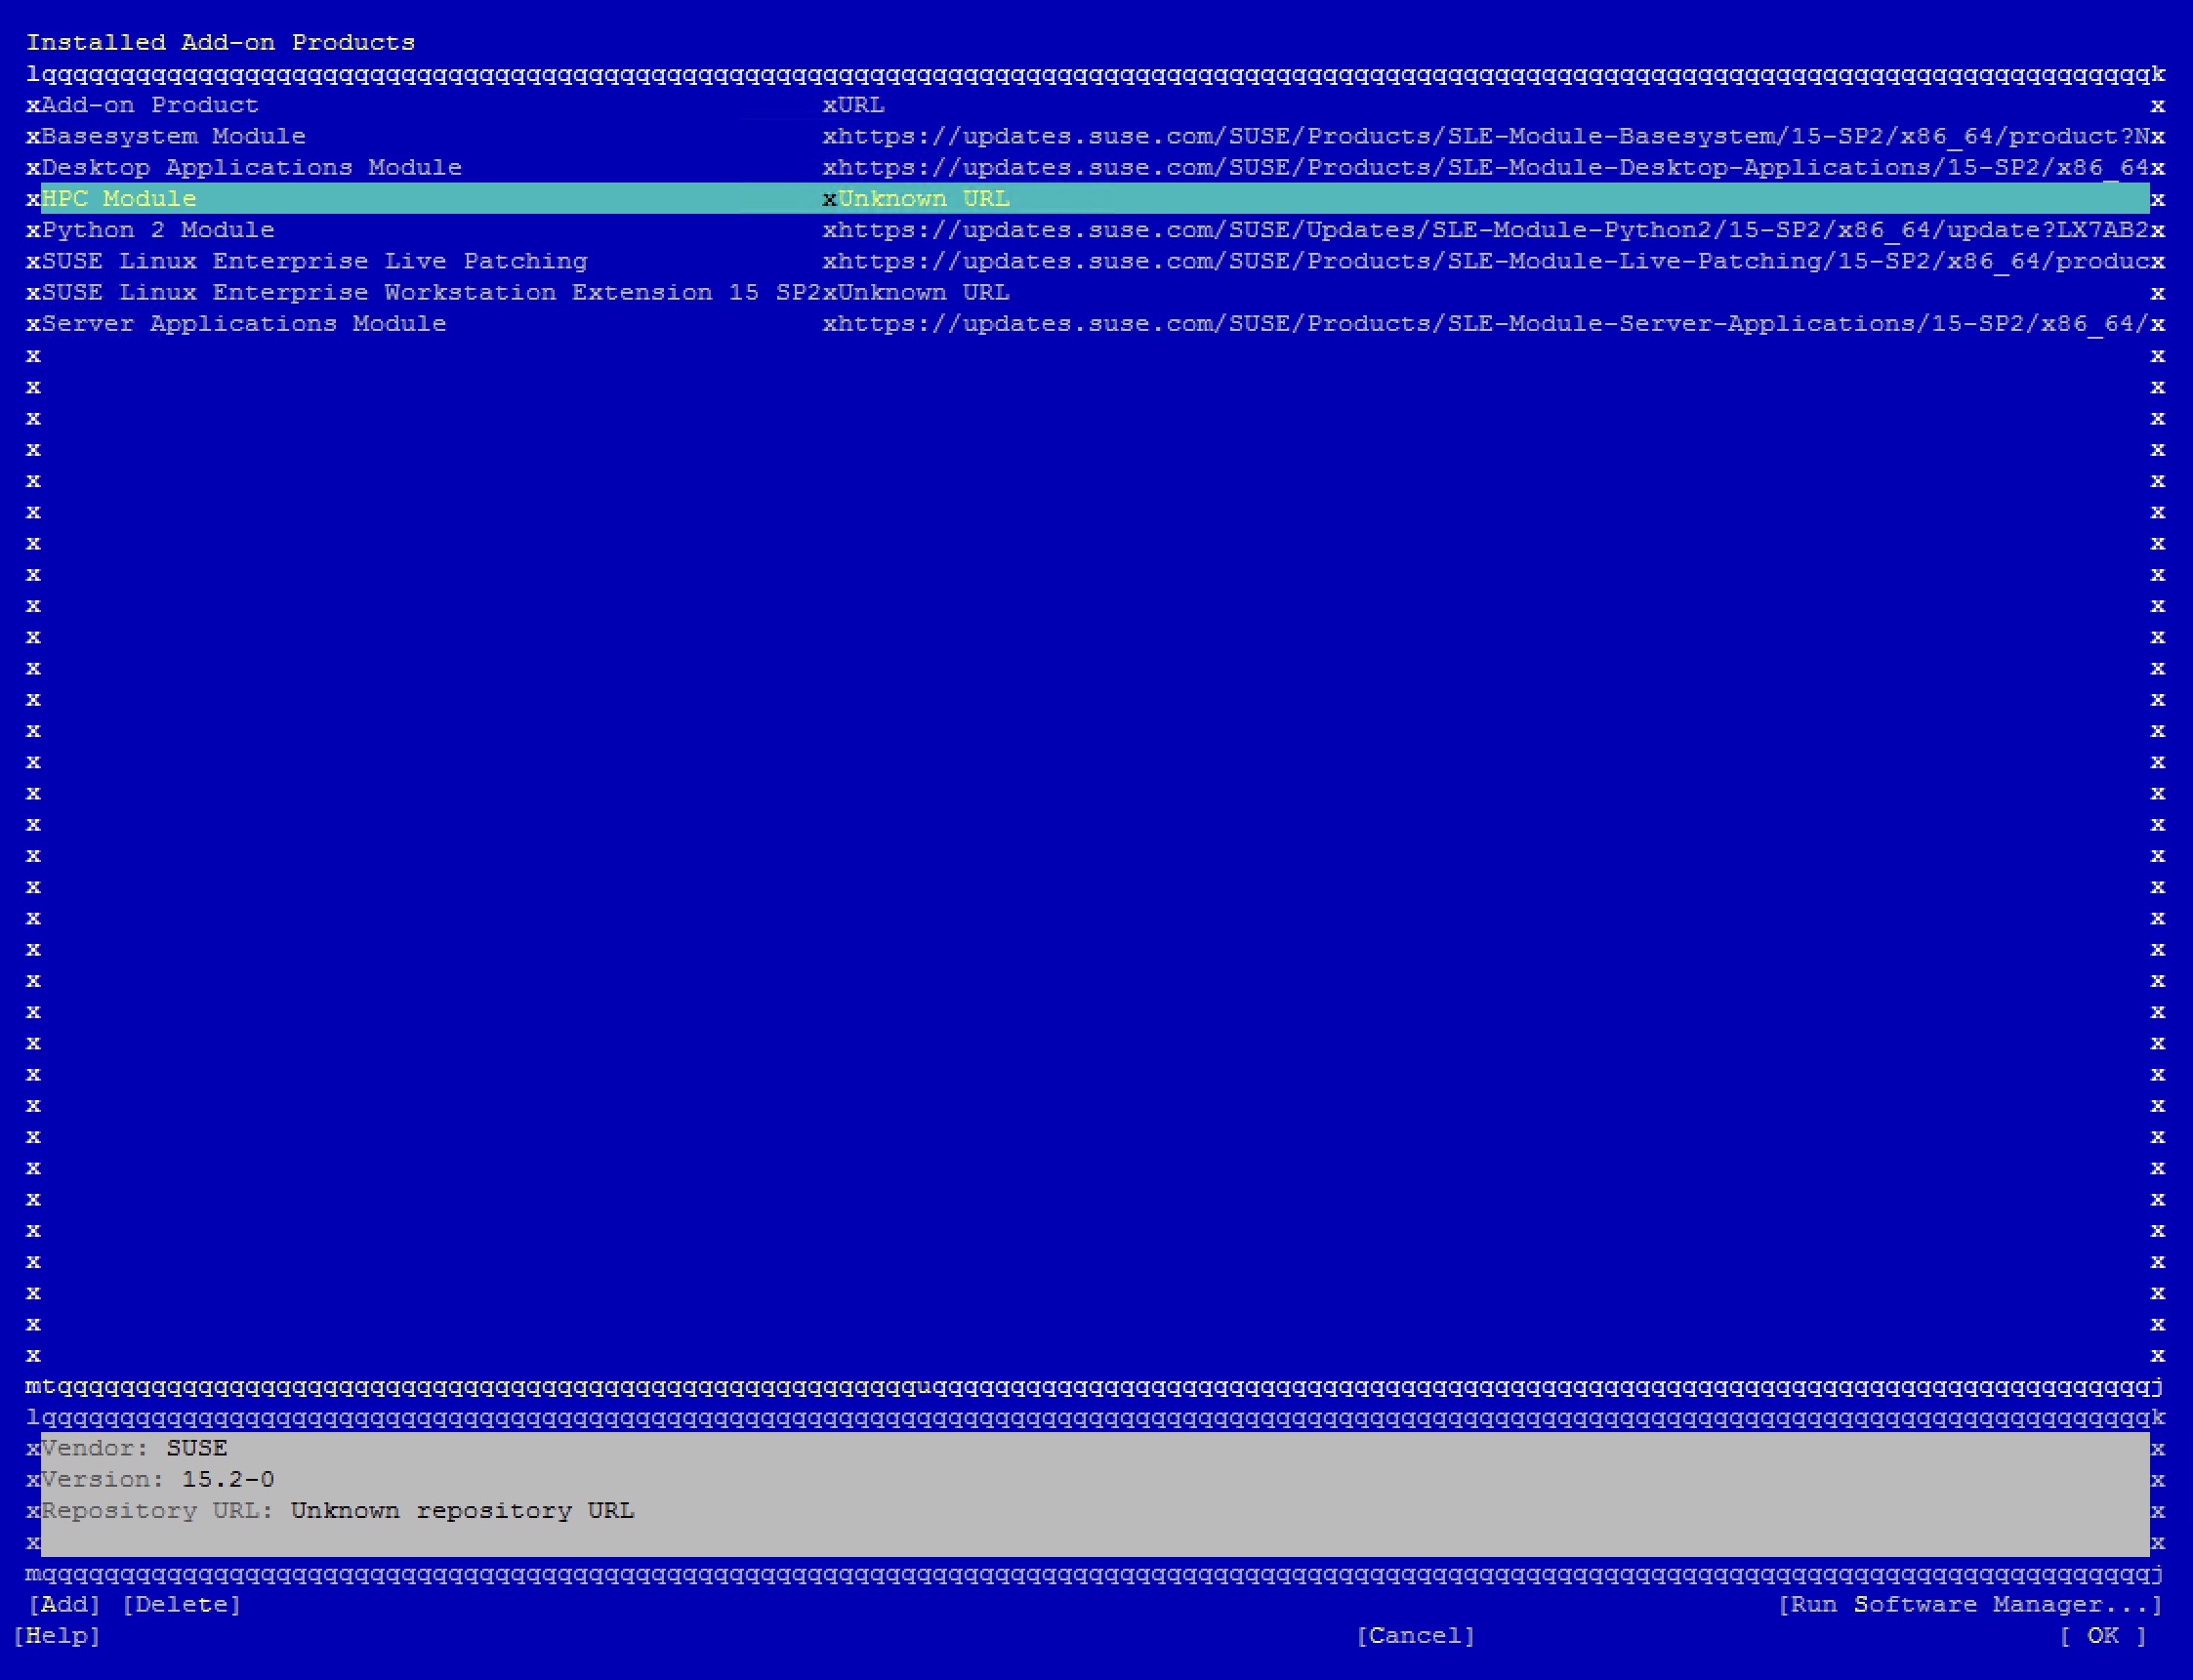
If the URL is defined as ‘Unknown URL,’ this Add-on either isn’t available anymore or changed its URL in future releases. Delete all Add-ons with missing URLs and check the ‘Software Manager’ in the bottom-right corner. Use the Software Manager to see if deleting an Add-on removes any packages.
Chapter 2: Activating and preparing SLES Subscription
This step is done in YAST or on the shell.
Shell:
# Check the Subscription of your SLES machine with SUSEConnect
$ SUSEConnect --status-text
# This will generate a list of all Repositories and Add-Ons used on your system and inform you about their state (Not Registered or Registered)
# Here is a example Output:
$ SUSEConnect --status-text | grep -i "not Registered" -B 3
SUSE Linus Enterprise Live Patching
(sle-module-live-patching/15.2/x86_64)
Not Registered
--
Python 2 Module
(sle-module-python2/15.2/x86_64)
Not Registered
--
Desktop Applications Module
(sle-module-desktop-applications/15.2/x86_64)
Not Registered
--
HPC Module
(sle-module-hpc/15.2/x86_64)
Not Registered
--
SUSE Linux Enterprise Workstation Extension 15 SP2
(sle-we/15.2/x86_64)
Not Registered

# The most important module on a SLES server is "sle-module-basesystem". This module has to be activated to be able to use the official SLES repositories.
# To activate the Base System Module run:
$ SUSEConnect -r ABCD1EF2GHIJKL34
Registering system to SUSE Customer Center
Updating system details on https://scc.suse.com...
Activating SLES 15.2 x86_64...
-> Adding service to svstem...
Activating sle-module-basesystem 15.2 x86 64...
-> Adding service to system...
-> Installing release package...
Activating sle-module-server-applications 15.2 286 64...
-> Adding service to svstem...
-> Installing release package...
Successfully registered system

# To activate specific modules you can run the SUSEConnect commands like this:
# The module name can be found inside the () when executing "SUSEConnect --status-text"
$ SUSEConnect -p sle-we/15.2/x86_64 -r ABCD1EF2GHIJKL34

# In case you have issues with activating or connecting to the SUSE activation server "https://scc.suse.com" check the File /etc/SUSEConnect and/ or add a proxy inside your /etc/sysconfig/proxy:
$ cat /etc/SUSEConnect
---
url: https://scc.suse.com
insecure: false

# If your network is being limited or closed for http/ https connections add the following proxy settings inside the /etc/sysconfig/proxy file:
$ vi /etc/sysconfig/proxy
# Enable proxy forward
PROXY_ENABLED="yes"
# Configure a http proxy:
HTTP_PROXY="http://192.168.0.1:3128"
# Or a https proxy:
HTTPS_PROXY="http://192.168.0.1:3128"
# Here you can define which connections should not go over the proxy:
NO_PROXY="localhost, 127.0.0.1"
YaST:
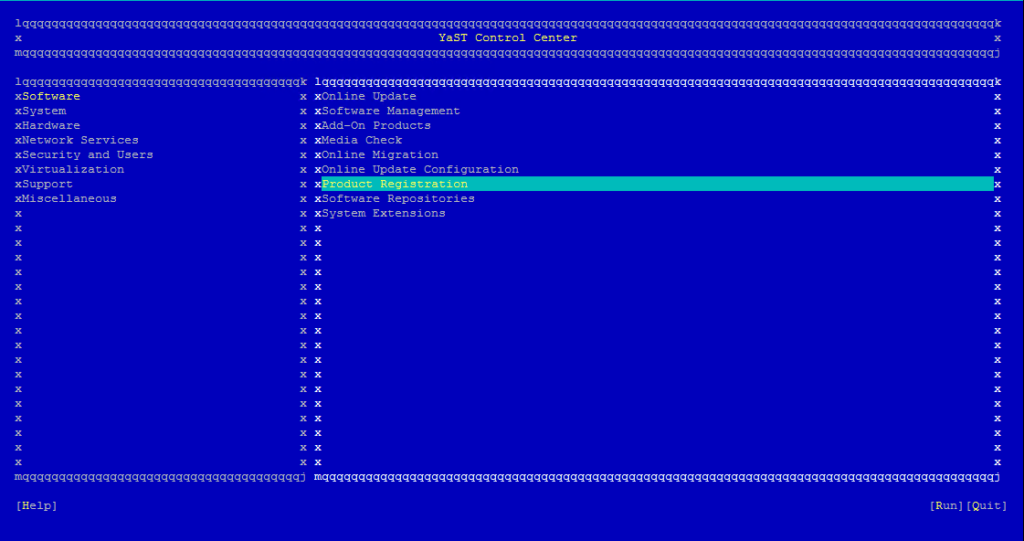
The whole setup can be done via YaST too. So in case you don’t feel very comfortable inside the shell this is by far the most useful tool for system setup. To activate the SLES Base-System just start yast via GUI or run “yast2” in your shell:
Choose Software/ Product Registration:
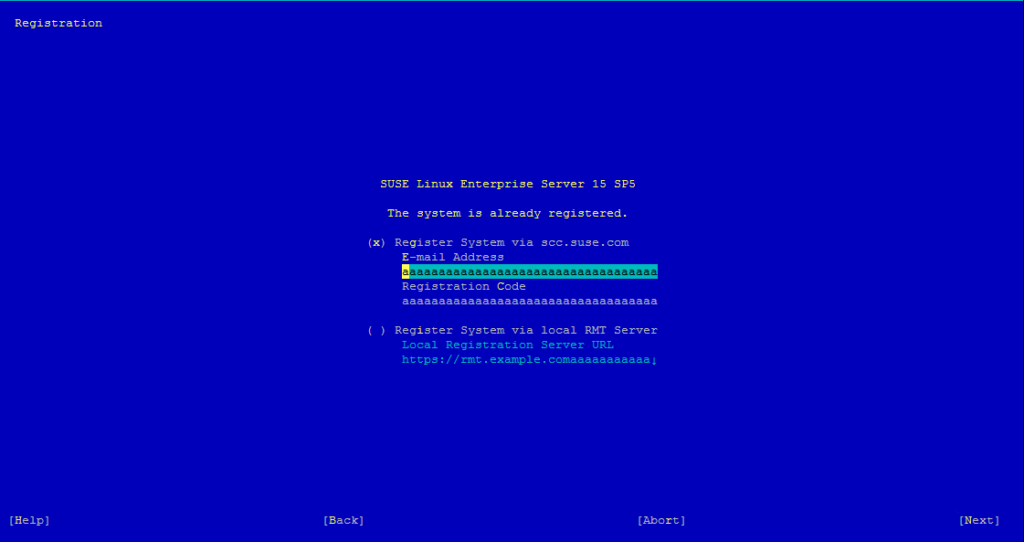
Then choose “Register Again” to register your Base-System. Type in the “E-Mail Address” owning the SUSE-License and type in your “Registration Code”:
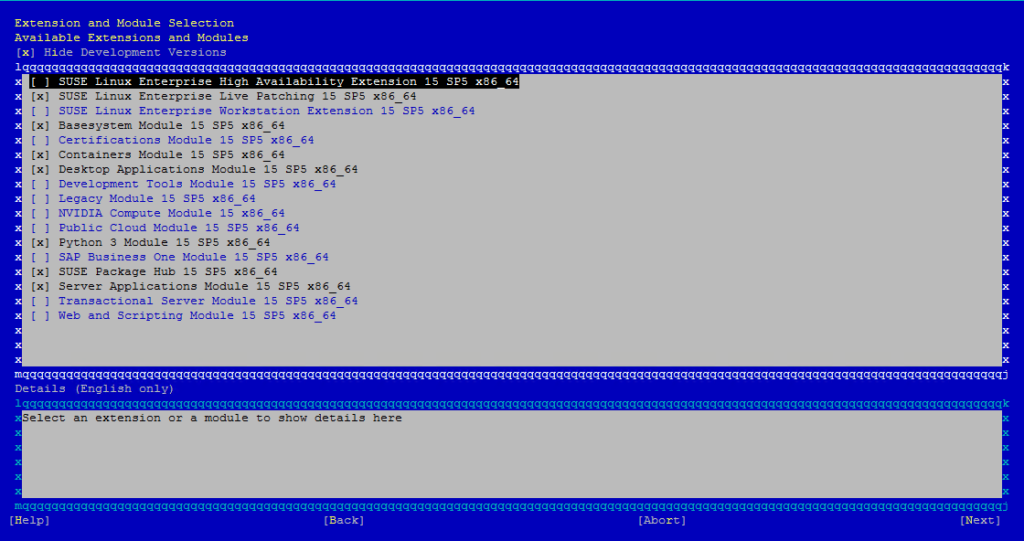
Afterwards you can choose “Select Extensions” to activate additional extensions:

If your registration code permits it, pick extra modules to use in your system:
Chapter 3: Online Migration (Minor Upgrade)
Now we can finally start with the Upgrade Process. Before jumping into execution it is smart to check the possibilities and upgrade paths that matches your systems version. You can find this in the official SUSE documentation: https://documentation.suse.com/sles/15-SP5/html/SLES-all/cha-upgrade-paths.html

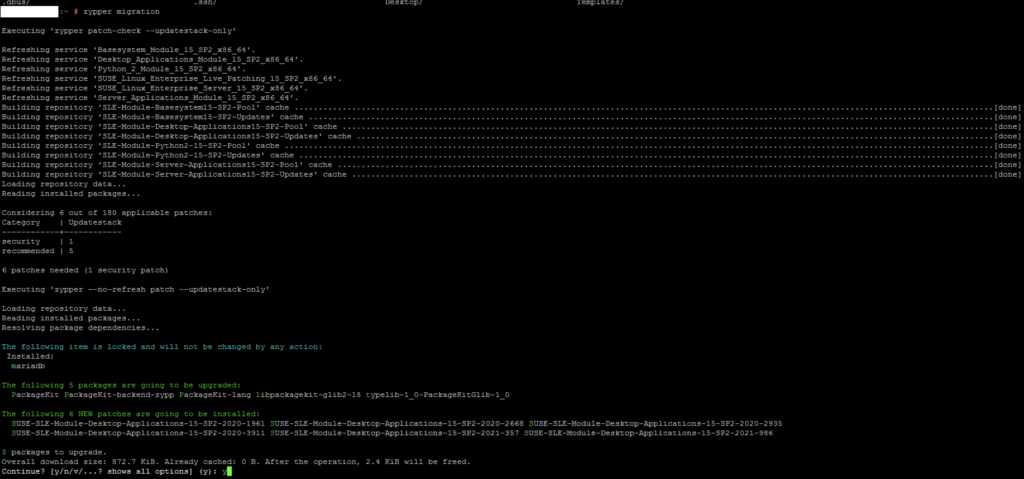
In my example we will be doing a Online Upgrade from SLES 15-SP2 to SLES 15-SP5. You can tackle this step either on the shell with the ‘zypper migration’ command or through YaST.
Shell:
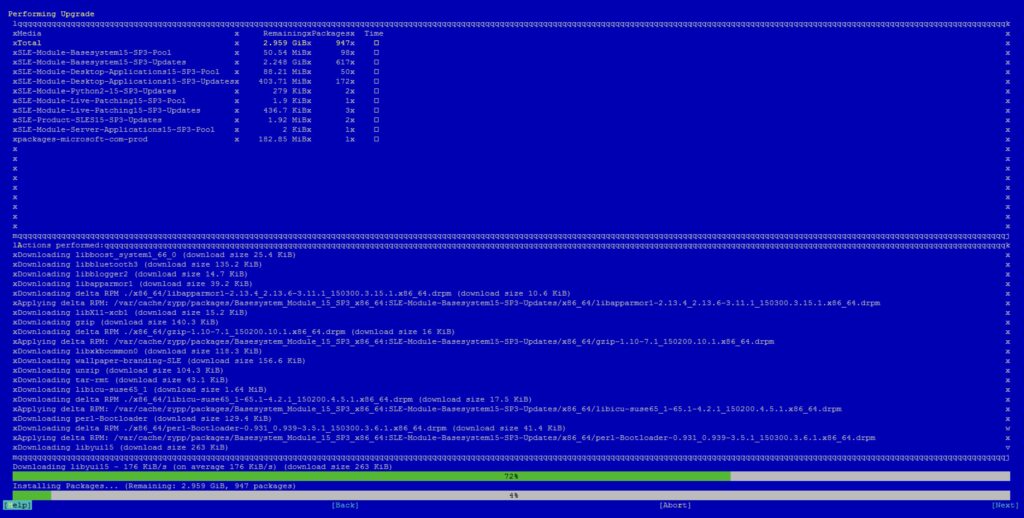
To kick off the online migration on the shell, run ‘zypper migration’—then pick the version you want to install when prompted. Before starting the migration zypper will also make sure to update all repositories and patch all security patches for your current version.
HINT: In some cases, disable interaction for the migration to keep the process rolling if a package demands a license agreement.
# Use zypper without any interruption by product license agreement:
$ zypper migration --auto-agree-with-product-licenses

# Use zypper without any interruption at all:
$ zypper migration --non-interactive
This will look something like this:
YaST:
After the cleanup and the server activation, we can now open YaST and go to “Software/ Online Migration”. There, a short update of the repositories greets us, and we’ll see a list of possible upgrades:
In our case we will choose the (at that time) newest release SLES 15 SP5.
As of the end of January 2025, the latest release is SUSE Linux Enterprise Server (SLES) 15 SP6. Use this version — I recommend it since support for each service pack usually ends six months after the new one drops.
# It is possible to use YAST without interruption as well, this is suggested in bigger upgrades like here:
$ vi /etc/zypp/zypp.conf

# Add the parameter:
$ autogreeWithLicenses = yes
Chapter 4: Offline Migration
When trying to upgrade any pre-SLES 15 system (like SLES 11 or 12), there is only the offline upgrade path available. This might sound harder than the one-click online migration, but in reality, it’s almost as easy as using YaST. The only difference is that you need to boot the server with the desired ISO version. In our example, my SLES 12 SP5 will need to be booted with the SLES 15 SP6 ISO. Depending on your server (and whether it’s bare metal or a VM), the specifics might vary case by case. In my case, I’m using a self-built virtualization server with OpenSUSE and running a KVM Server. The only thing I need to do to boot my SLES 15 SP6 ISO, is to mount the ISO file to my VM and disable secure boot. After that, reboot the VM and enter the “Upgrade” tab from your ISO. This will then start the step-by-step migration of your system.
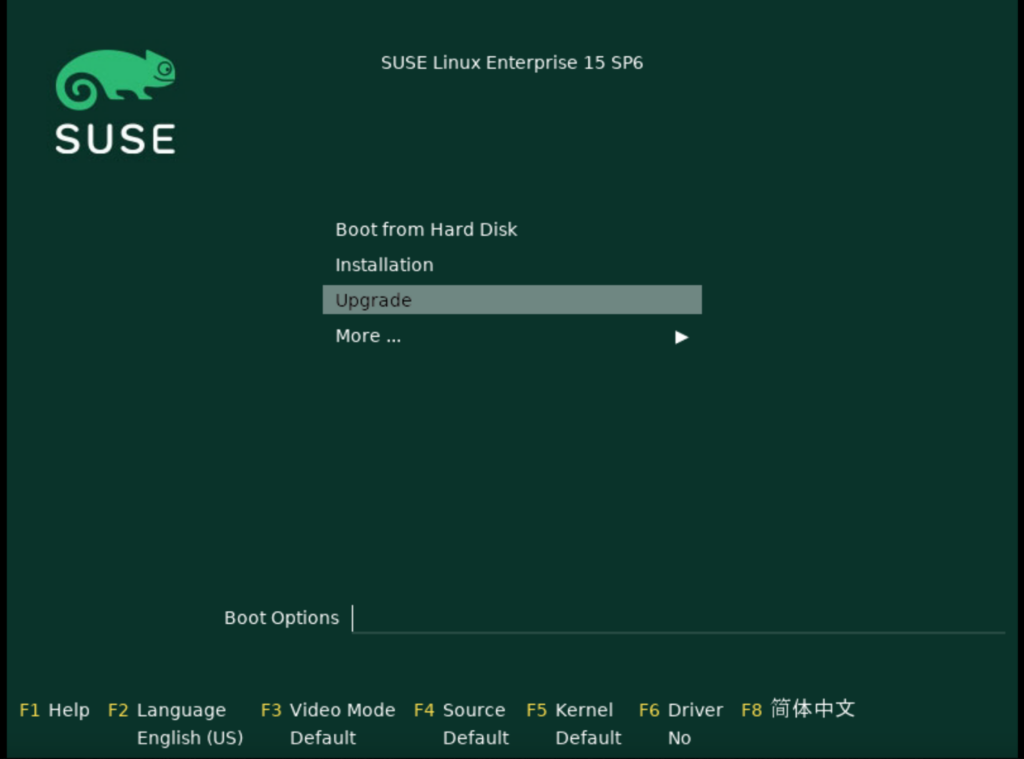
After booting the ISO you will be greeted with these options. Choose “Update” to in-place upgrade your SUSE Enterprise Linux to the version of your ISO.
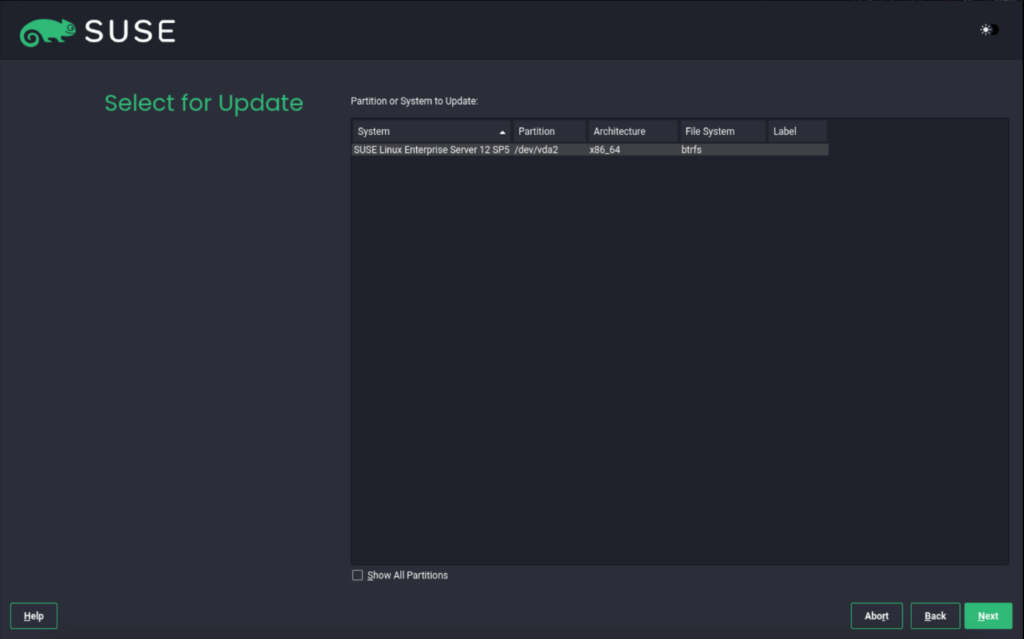
In case you use any other Filesystem than btrfs, use the checkbox “show All Partitions”. This will list even LVM volumes and filesystems.
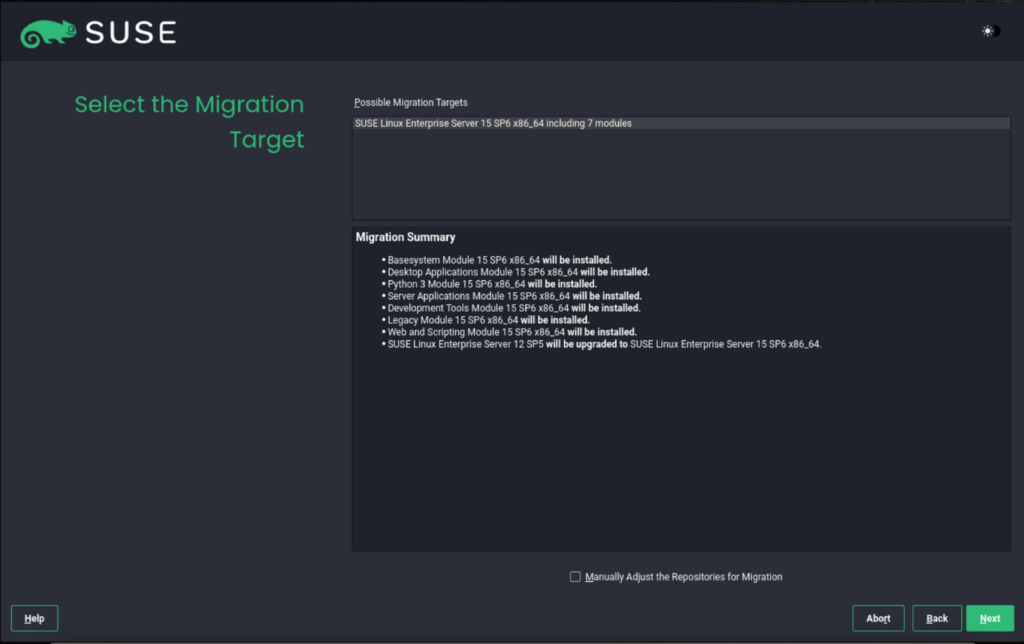
II strongly suggest you check all the products you plan to install. If some aren’t needed or are missing, tick the ‘Manually Adjust the Repositories for Migration’ checkbox.
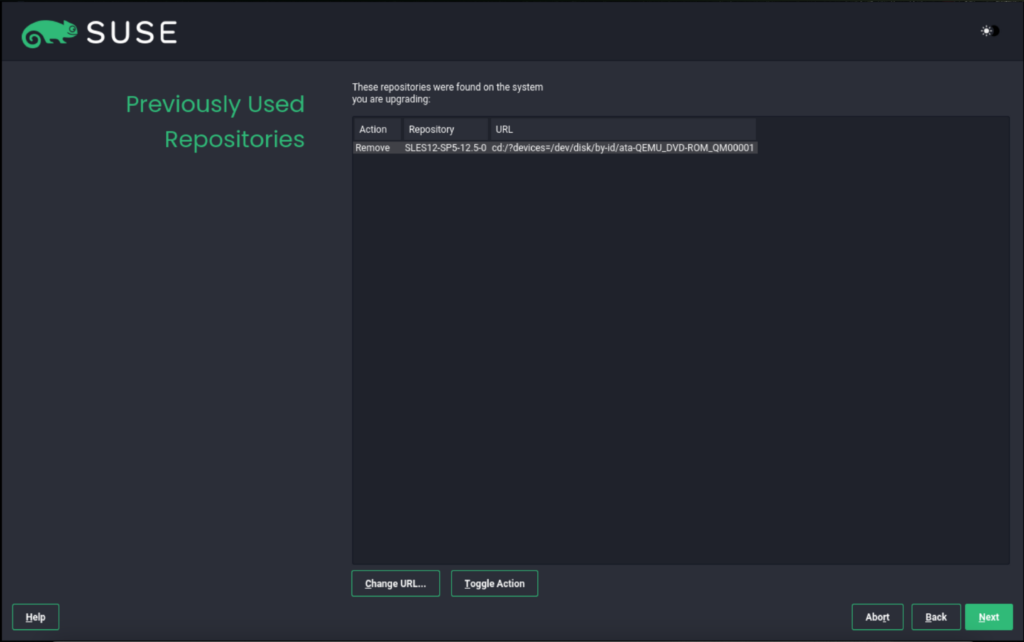
This step reminds us that the old SLES 12 SP5 repositories will be removed after the upgrade.
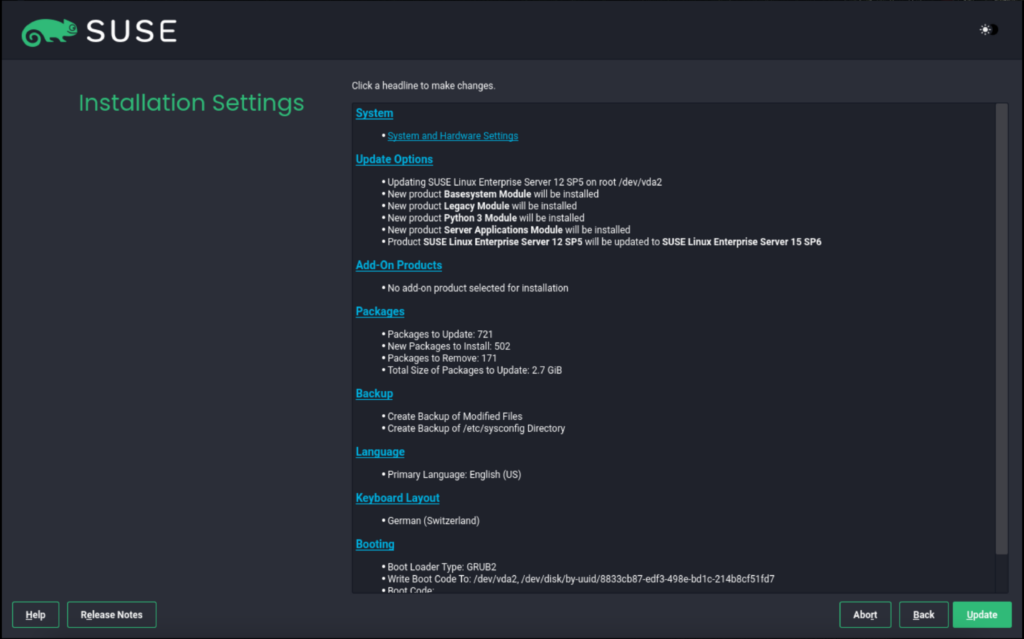
And the final step is a summary which we need to check carefully if all the settings are correct. After that the server will install the brand new release and boot it up after the installation process.
![Thumbnail [60x60]](https://www.dbi-services.com/blog/wp-content/uploads/2022/05/open-source-author.png)

![Thumbnail [90x90]](https://www.dbi-services.com/blog/wp-content/uploads/2022/11/TBR-web-min-scaled.jpg)
![Thumbnail [90x90]](https://www.dbi-services.com/blog/wp-content/uploads/2022/08/FRJ_web-min-scaled.jpg)
![Thumbnail [90x90]](https://www.dbi-services.com/blog/wp-content/uploads/2024/03/AHI_web.jpg)
tee
18.04.2025I got this working perfectly using NFS and autoyast, upload the iso to an nfs share and create an xml that will respond to all the prompt during install.
Ansible is your good friend. Now i got everything automated and very fast and easy to scale across multiple servers.
More reference on SuSE document on autoyast.