In this blog, I would like to show you how to setup JBoss EAP 7.0.0 in domain mode. It’s a step to step guide so you can follow the instructions in this blog and build your environment by yourself 😉
Environment preparation
In my case I will prepare three hosts, below prerequisites should be verified, so make sure that:
- you have the same JBoss version on three hosts
- they are in the same local network
- they can access each other via different TCP/UDP ports, sometimes firewall may cause some issues at this level.
As said, I will have :
Three hosts:
- One master : run as domain controller.
- Two slaves (slave1, slave2) : will run under the domain management of master.
First, I installed JBoss EAP 7 on three VMs under /opt/install/jboss-eap-7, I configured some environment variables to make the blog readable 😉
Configure and start the Domain
Interface configuration
On Master
Define below environment variables:
JBOSS_HOME=/opt/install/eap-7.0.0
DOMAIN=/opt/install/master
Copy the domain folder as below:
cp -rp $JBOSS_HOME/domain $DOMAIN
Update the host.xml configuration:
vi $DOMAIN/configuration/host.xml
We need to change the address to the management interface so slaves could connect to master. My master’s host is vmjboss, so I change the config to:
<interfaces>
    <interface name="management">
        <inet-address value="${jboss.bind.address.management:vmjboss}"/>
    </interface>
    <interface name="public">
        <inet-address value="${jboss.bind.address:vmjboss}"/>
    </interface>
</interfaces>
On slaves
Steps below for slave1, repeat the same for slave2 🙂
Define below variables environment:
JBOSS_HOME=/opt/install/eap-7.0.0
DOMAIN=/opt/install/slave1
Update the host.xml configuration:
vi $DOMAIN/configuration/host.xml
First we need to set the hostname, I change the name property as below:
<host xmlns="urn:jboss:domain:4.1" name="slave1">
Then we need to modify domain-controller section so slave can connect to master’s management port:
    <domain-controller>
        <remote protocol="remote" host="${jboss.domain.master.address:vmjboss}" port="${jboss.domain.master.port:9999}" security-realm="ManagementRealm"/>
    </domain-controller>
As we know, vmjboss is the address of master.
Finally, we also need to configure interfaces section and expose the management ports to public address:
<interfaces>
    <interface name="management">
        <inet-address value="${jboss.bind.address.management:vmjboss1}"/>
    </interface>
    <interface name="public">
        <inet-address value="${jboss.bind.address:vmjboss1}"/>
    </interface>
</interfaces>
Now, if you start JBoss on master, slave1 and slave2 you will see the slaves cannot be started with following error:
[Host Controller] 17:44:01,967 WARN  [org.jboss.as.host.controller] (Controller Boot Thread) WFLYHC0001:
Could not connect to remote domain controller remote://vmjboss:9999 -- java.lang.IllegalStateException:
WFLYHC0043: Unable to connect due to authentication failure.
Because we haven’t properly set up the authentication between master and slave yet. we need to create the same user/password on master and slaves then use it for domain management authentication, let’s move to the security configuration.
Security configuration
On master and slaves, use the script add-user.sh to create the user as explained below:
[jboss@vmjboss ~]$ $JBOSS_HOME/bin/add-user.sh

What type of user do you wish to add?
 a) Management User (mgmt-users.properties)
 b) Application User (application-users.properties)
 (a): a

Enter the details of the new user to add.
Using realm 'ManagementRealm' as discovered from the existing property files.
Username : slave
Password recommendations are listed below. To modify these restrictions edit the add-user.properties configuration file.
 - The password should be different from the username
 - The password should not be one of the following restricted values {root, admin, administrator}
 - The password should contain at least 8 characters, 1 alphabetic character(s), 1 digit(s), 1 non-alphanumeric symbol(s)
Password :
Re-enter Password :
What groups do you want this user to belong to? (Please enter a comma separated list, or leave blank for none)[  ]: jboss
About to add user 'slave' for realm 'ManagementRealm'
Is this correct yes/no? yes
Added user 'slave' to file '/opt/install/eap-7.0.0/standalone/configuration/mgmt-users.properties'
Added user 'slave' to file '/opt/install/eap-7.0.0/domain/configuration/mgmt-users.properties'
Added user 'slave' with groups jboss to file '/opt/install/eap-7.0.0/standalone/configuration/mgmt-groups.properties'
Added user 'slave' with groups jboss to file '/opt/install/eap-7.0.0/domain/configuration/mgmt-groups.properties'
Is this new user going to be used for one AS process to connect to another AS process?
e.g. for a slave host controller connecting to the master or for a Remoting connection for server to server EJB calls.
yes/no? yes
To represent the user add the following to the server-identities definition <secret value="UGFzc3cwcmQh" />
Notice the four lines Added user ‘slave’, you will see that the user has been added to $JBOSS_HOME and note to the $DOMAIN. So we need to override files under $DOMAIN (for master and slaves):
cp -p $JBOSS_HOME/domain/configuration/mgmt* $DOMAIN/configuration/.
The user added will be used by the slaves to connect to the master and being registered. So, one further step remain to tell the slaves to use this user, update the $DOMAIN/configuration/host.xml onlz on slaves:
<domain-controller>
    <remote protocol="remote" host="${jboss.domain.master.address:vmjboss}" port="${jboss.domain.master.port:9999}" security-realm="ManagementRealm" username="slave"/>
</domain-controller>
And change the security-realms section as following:
<management>
    <security-realms>
        <security-realm name="ManagementRealm">
            <server-identities>
                    <secret value="UGFzc3cwcmQh" />
            </server-identities>
            <authentication>
			...
To confirm the configuration start the domain using the same below command (on master and slaves):
$JBOSS_HOME/bin/domain.sh -Djboss.domain.base.dir=$DOMAIN
You should see in the master log:
[Host Controller] 18:10:20,554 INFO  [org.jboss.as.domain.controller] (Host Controller Service Threads - 35) WFLYHC0019: Registered remote slave host "slave1", JBoss JBoss EAP 7.0.0.GA (WildFly 2.1.2.Final-redhat-1)
...
[Host Controller] 18:12:22,534 INFO  [org.jboss.as.domain.controller] (Host Controller Service Threads - 35) WFLYHC0019: Registered remote slave host "slave2", JBoss JBoss EAP 7.0.0.GA (WildFly 2.1.2.Final-redhat-1)
Connect to the domain created:
Using Command Line Interface:
[jboss@vmjboss ~]$ $JBOSS_HOME/bin/jboss-cli.sh -c --controller=vmjboss:9990
[domain@vmjboss:9990 /]
Using the console, url : http://vmjboss:9990/console
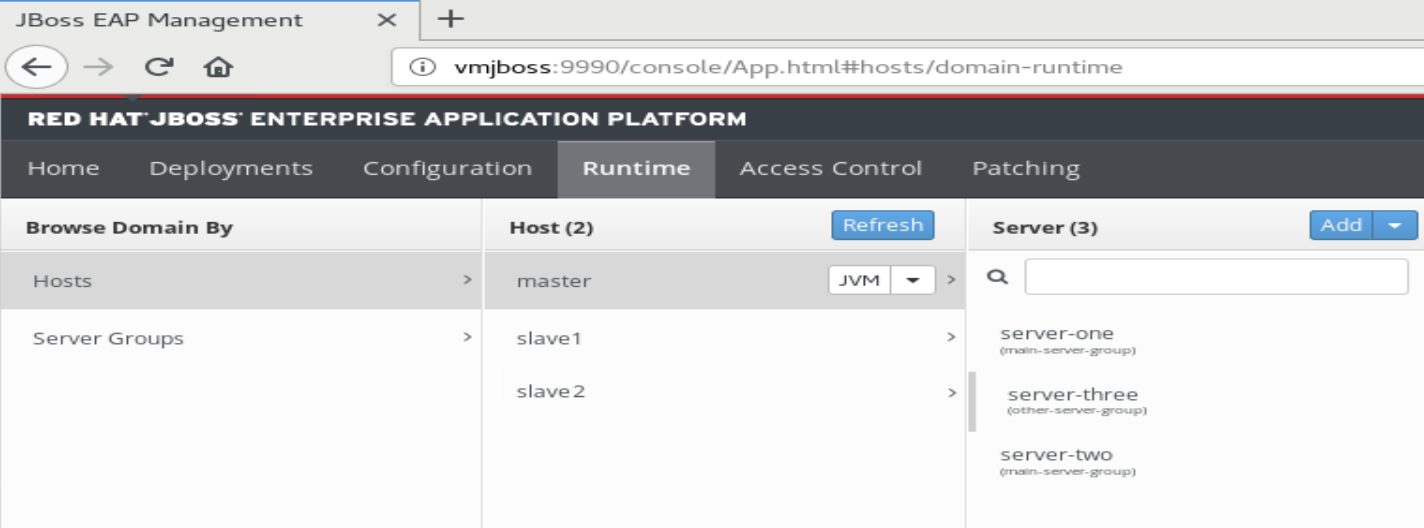
As you can see, some servers (and groups) have been created by default. This should be cleaned to create wanted servers and groups. This will be the topic of my next blog, see you there 😉
![Thumbnail [60x60]](https://www.dbi-services.com/blog/wp-content/uploads/2022/09/DDI_web-min-scaled.jpg)