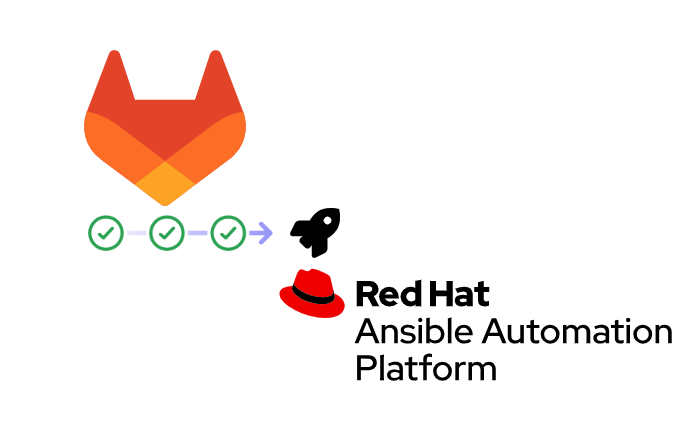
Are you utilizing Red Hat Ansible Automation Platform or its open-source version, AWX, to streamline your Ansible playbooks? If so, and you want to trigger a job template or a workflow template from a GitLab CI/CD pipeline, you’ve come to the right place.
While exploring the documentation of Red Hat Ansible Automation Platform, you might have read the section to trigger these templates using GitLab Webhooks. However, this method requires configuring GitLab to send the Webhook request based on various GitLab events, such as git push, tag creation, issue updates, or pipeline events. For the latter, there is one point to bear in mind: GitLab sends the request every time the state of the project pipelines changes. Consequently, it’s not directly integrated into your pipeline workflow, and you’ll need to tailor your Ansible playbook to accommodate the Webhook payload sent by GitLab. This approach might suffice in certain scenarios. Still, consider this: what if you need to execute an existing playbook that dynamically deploys a server on your infrastructure, with the server’s name determined by your GitLab pipeline? How would you manage that?
In this article, we will go through the process of configuring Ansible Automation Platform and GitLab to seamlessly deploy an AWS instance directly from your GitLab pipeline using YaK.
Enabling Webhook in your template
In Ansible Automation Platform (or AWX), edit the job or workflow you want to trigger from a pipeline and make these changes:
- Options: Check “Enable Webhook”
- Webhook Service: GitLab
- Webhook Credential: (optional, we won’t use it here)
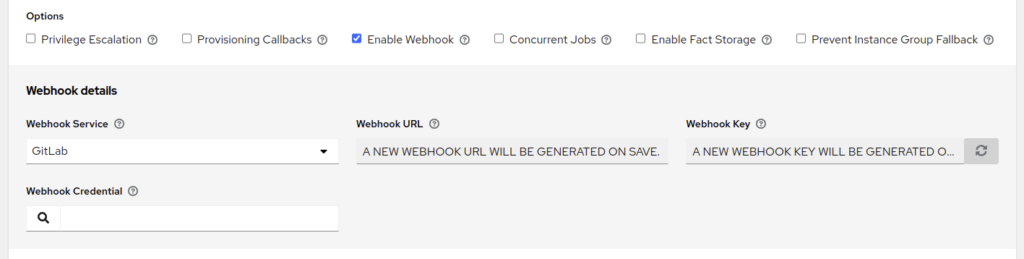
After saving this configuration, the Webhook URL and Webhook Key will be generated:
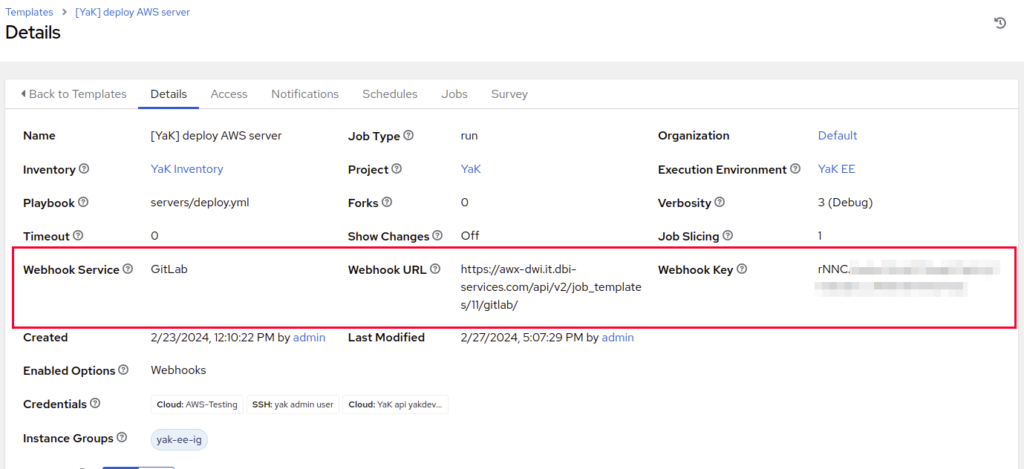
Keep this page open, we will need these values for the next steps.
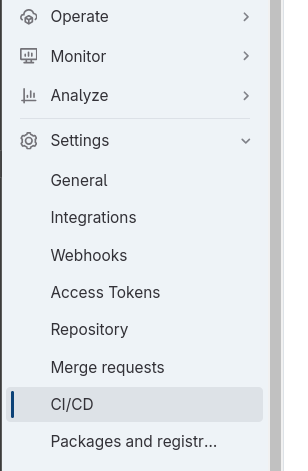
Declare the CI/CD variables
To use the previous Webhook URL and key in a GitLab pipeline, we will need to set them in the project’s CI/CD variables.
Go to your GitLab project Settings, then to CI/CD:
Expand the Variables section and click on Add variable
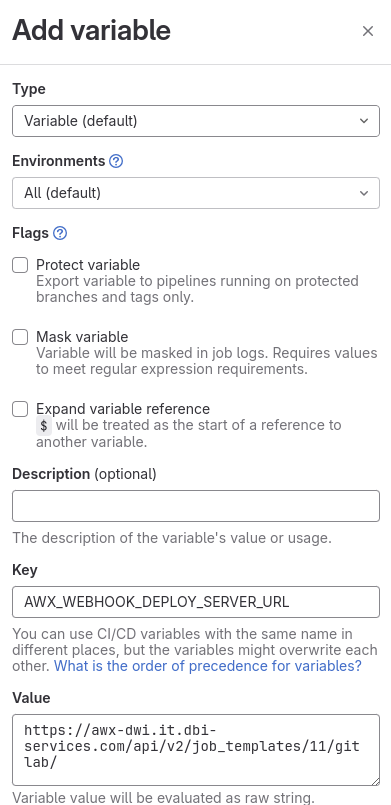
First one will be the Webhook URL:
- Type: Variable
- Flags: None
- Key: AWX_WEBHOOK_DEPLOY_SERVER_URL
- Value: <The Webhook URL value generated in step “Enabling Webhook in your template“>
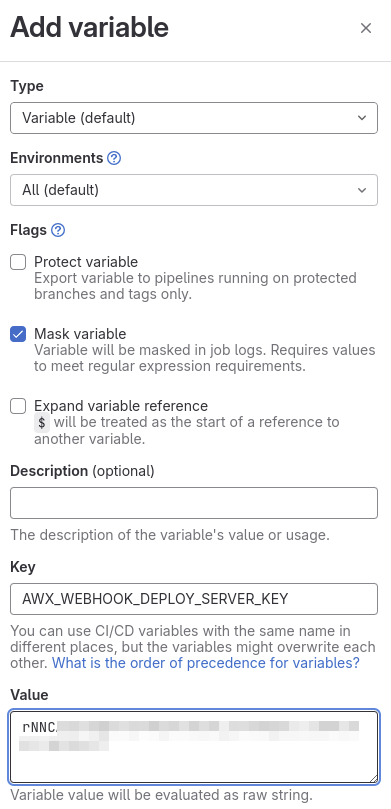
The second variable is the Webhook key:
- Type: Variable
- Flags: Mask variable
- Key: AWX_WEBHOOK_DEPLOY_SERVER_KEY
- Value: <The Webhook key value generated in step “Enabling Webhook in your template“>
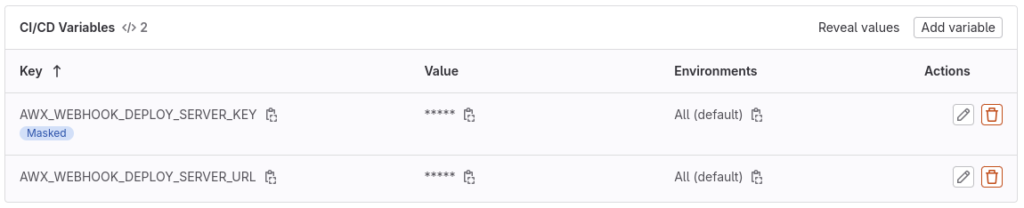
Once created, variables should be listed as follows:
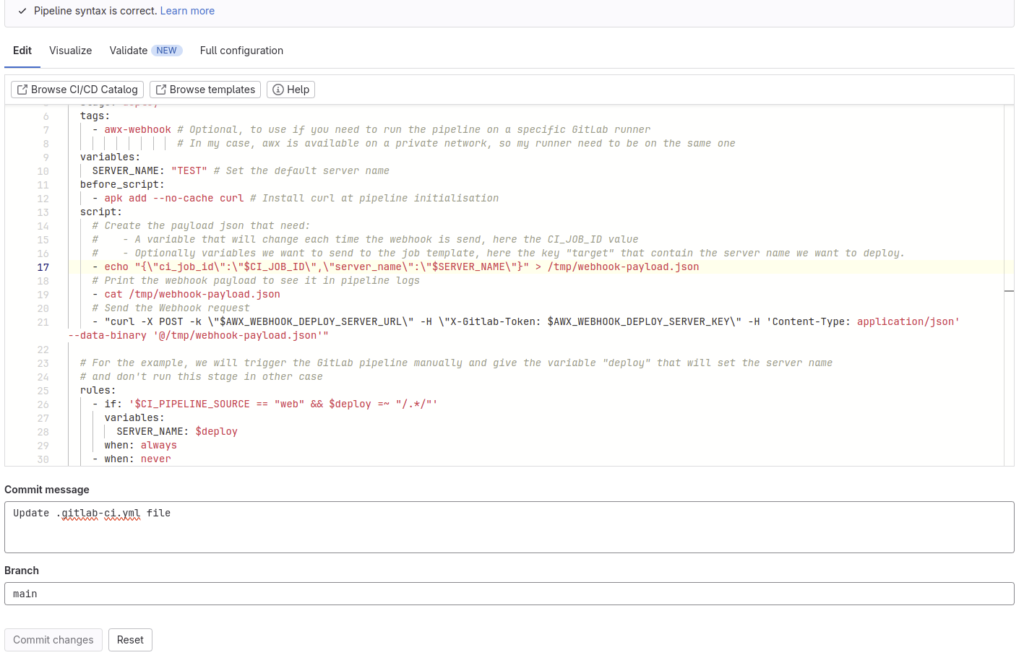
Create the GitLab CI/CD pipeline
For this example, we will create a pipeline with a deploy stage that we will trigger manually from GitLab GUI and send the Webhook to AWX containing the server name to deploy.
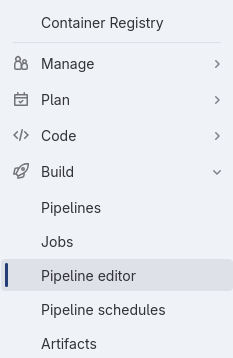
Go to the GitLab project pipeline editor, in left menu, go to Build, then Pipeline editor:
We will add this pipeline definition:
stages:
- deploy
deploy-aws-server:
stage: deploy
tags:
- awx-webhook # Optional, to use if you need to run the pipeline on a specific GitLab runner
# In my case, AWX is available on a private network, so my runner need to be on the same one
variables:
SERVER_NAME: "TEST" # Set the default server name
before_script:
- apk add --no-cache curl # Install curl at pipeline initialisation
script:
# Create the payload json that need:
# - A variable that will change each time the webhook is send, here the CI_JOB_ID value
# - Optionally variables we want to send to the job template, here the key "server_name" that contain the server name we want to deploy.
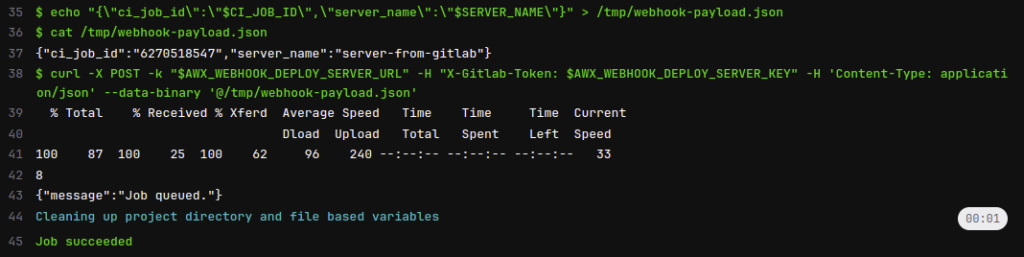
- echo "{\"ci_job_id\":\"$CI_JOB_ID\",\"server_name\":\"$SERVER_NAME\"}" > /tmp/webhook-payload.json
# Print the webhook payload to see it in pipeline logs
- cat /tmp/webhook-payload.json
# Send the Webhook request
- "curl -X POST -k \"$AWX_WEBHOOK_DEPLOY_SERVER_URL\" -H \"X-Gitlab-Token: $AWX_WEBHOOK_DEPLOY_SERVER_KEY\" -H 'Content-Type: application/json' --data-binary '@/tmp/webhook-payload.json'"
# For the example, we will trigger the GitLab pipeline manually and give the variable "deploy" that will set the server name
# and don't run this stage in other case
rules:
- if: '$CI_PIPELINE_SOURCE == "web" && $deploy =~ "/.*/"'
variables:
SERVER_NAME: $deploy
when: always
- when: neverCommit your changes:
Optional: Use the variables from GitLab pipeline in the job template
If you only need to trigger an Ansible Automation Platform job without providing any variables from your GitLab pipeline, this chapter is optional for you.
As you have seen in the pipeline definition, we add the variable server_name to the Webhook payload to define the server name to deploy. Now it’s time to use it in the job template definition.
The Webhook payload is directly added to the playbook extra_vars under the awx_webhook_payload key.
So to use it in a required Ansible variable without redeveloping the playbook:
Edit your job/workflow template definition.
In the “Variables” section:
- Optionally check Prompt on launch, to ask the values to set when the template is triggered manually from Ansible Automation Platform
- Add the variable definition like this:

By doing this, the playbook will define the variable target by getting the value server_name from the Webhook payload.
Save the changes.
Run the GitLab pipeline and see the magic appear
Before running the GitLab pipeline, we have defined a new server definition named server-from-gitlab in yak

We can see that this server is in declared state in YaK.
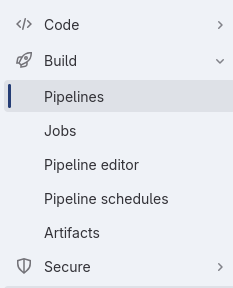
Go to your GitLab project that contains the pipeline. In, the left menu, go to Build, then Pipelines:
Click on Run pipeline:

Set a new variable
- key: deploy
- value: server-from-gitlab
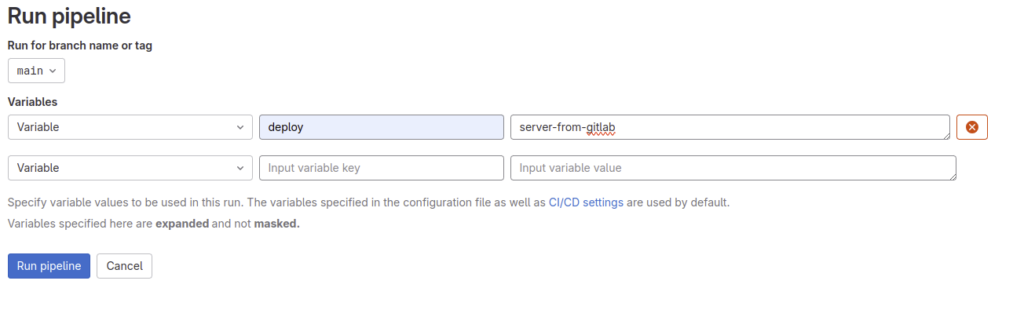
Click on Run pipeline.
Wait until the pipeline run has succeeded (Marked as “Passed“)

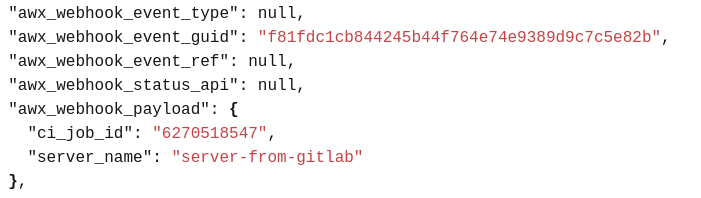
If we check the pipeline job logs, we can see that the Webhook payload is taking the CI job ID and the server name value that we gave before (server-from-gitlab):
Now we can return in Ansible Automation Platform
In the left menu, go to View/Jobs, we can see at the top that a new playbook is running:

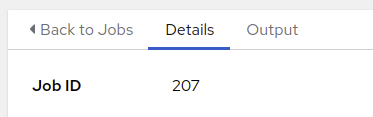
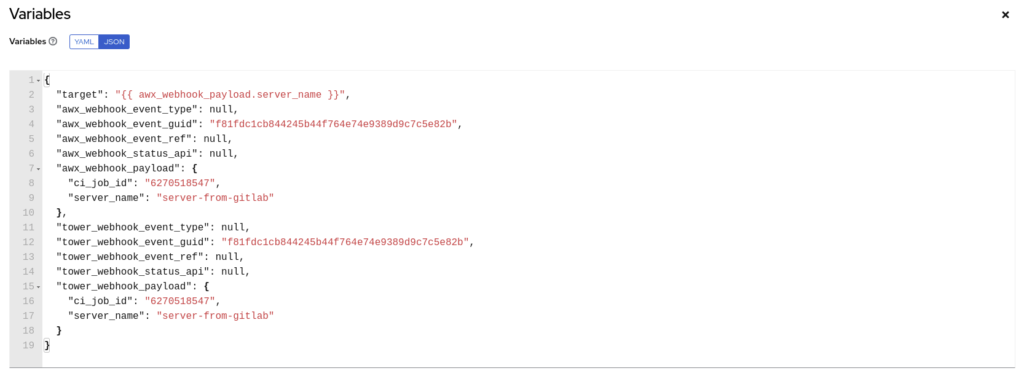
While the playbook is running, we can check the variables by clicking on the job, then Details tab:
In the Variables section, the variables target and awx_webhook_payload are correctly set:
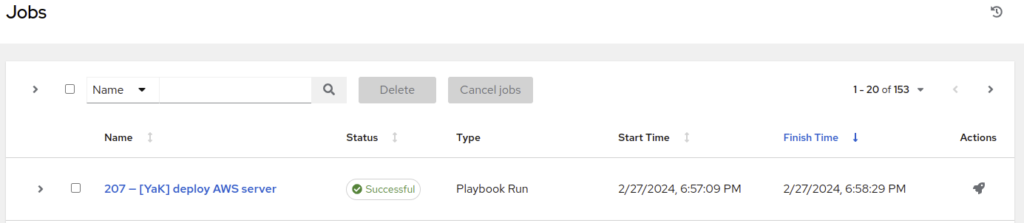
Now the playbook has ended with the status Successful:
In YaK, the server is now in running state:

Finally, let confirm that the AWS instance is well deployed by connecting to AWS Management Console:

Conclusion
Congratulations ! We correctly set a GitLab CI/CD pipeline to trigger a Red Hat Ansible Automation Platform job template 🎉
Now you can simply adapt these steps to your specific needs.
During this article, I didn’t explain in details how to use YaK with Ansible Automation Platform, but stay tuned, some other blogs will come soon 🥳
![Thumbnail [60x60]](https://www.dbi-services.com/blog/wp-content/uploads/2022/08/DWI_web-min-scaled.jpg)
![Thumbnail [90x90]](https://www.dbi-services.com/blog/wp-content/uploads/2022/08/GRE_web-min-scaled.jpg)
![Thumbnail [90x90]](https://www.dbi-services.com/blog/wp-content/uploads/2022/08/ADE_WEB-min-scaled.jpg)
![Thumbnail [90x90]](https://www.dbi-services.com/blog/wp-content/uploads/2022/08/NME_web-min-scaled.jpg)