Introduction
This documentation explains how to integrate Active Directory data in a Power BI report. It explains also how to link this data with another data source.
To illustrate the method, we will integrate Active Directory Computer data and link it with SCCM Server information.
We will only use 2 different data sources in this example.
You can find the list of available data sources and their caracteristics in the following link:
Power BI data sources – Power BI | Microsoft Docs
You can see in the Microsoft documentation that the Active Directory connector does not allow to use the direct query mode. We have use the import data mode.
Furthermore, when linking several data sources of different technologies , it is recommended to avoid the direct query mode, your report will certainly behave with bad performances.
Also, do not forget to choose the right Power BI Desktop client application depending where you want to publish your report. Power BI Desktop for publishing on Power BI Azure service and Power BI Desktop Report Server (Power BI Desktop RS) for publishing on Power BI Report Server.
Active Directory data integration
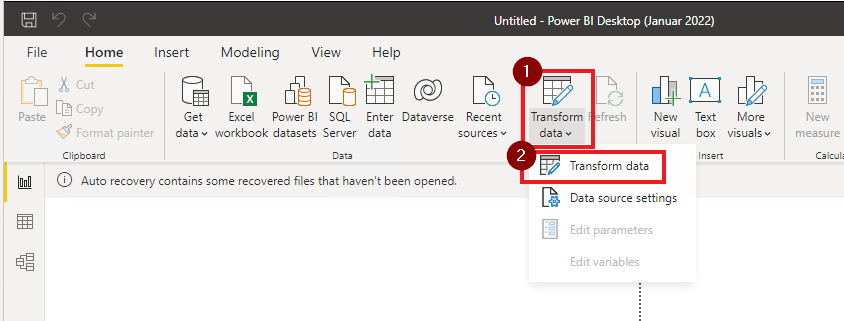
- Open Power BI Desktop
- Click the Transform data ribbon to open the Power Query Editor
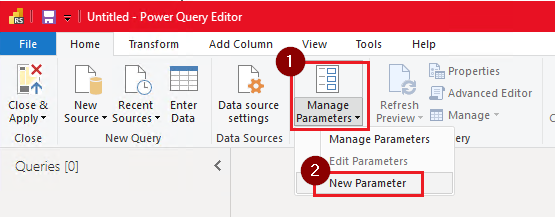
- Create a new parameter
- Note: I always recommend to use parameter for your data source, it will ease your work, either to make a template or to change the connection in one place when you use the same data source in several queries
- Click the Manage Parameter ribbon and select New Parameter
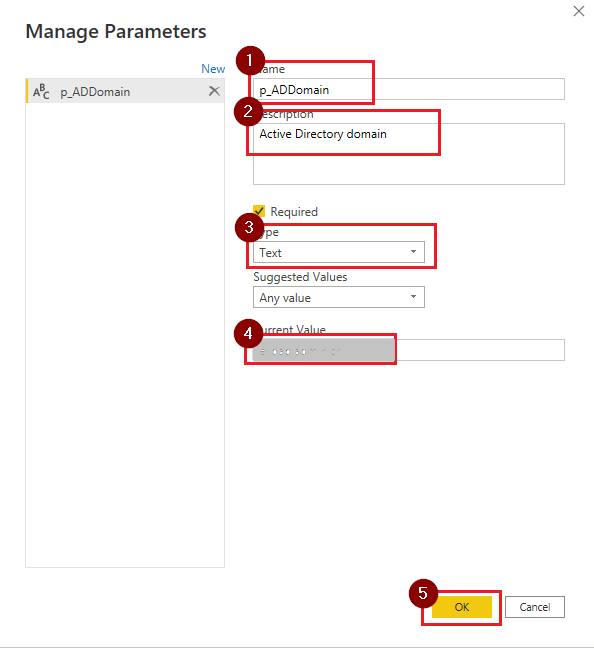
- Create a new parameter by capturing a name, description, its type and define an initial value and click OK to validate.
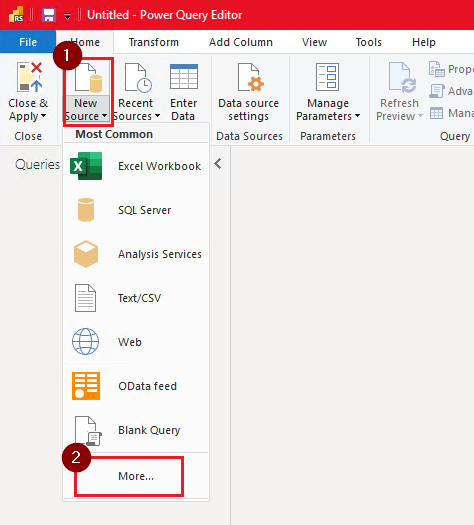
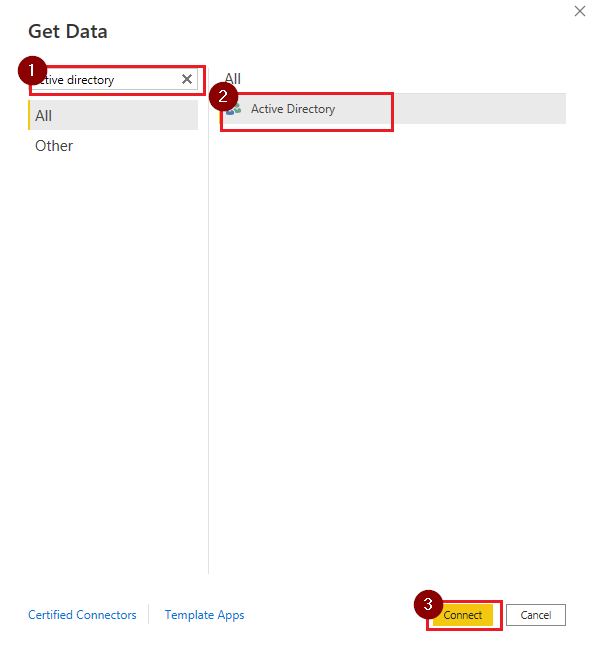
- Click the New Source ribbon and select the More option to open the connector list
- Search for the Active Directory connector and select it and click the connect button
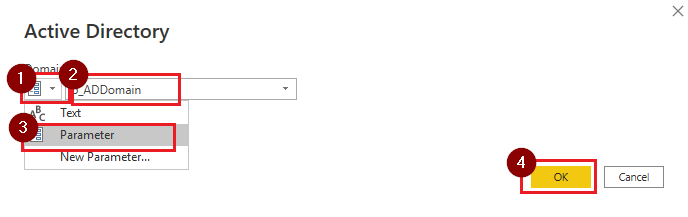
- In the Active Directory setting window select the domain by selecting the parameter you created previously and click the OK button
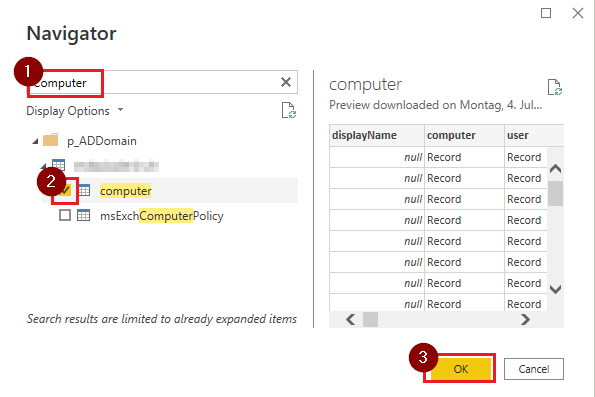
At this stage you are connected to the Active Directory service. You have to know where to find the data you need. For our example we will use the computer information and specifically the name of the servers and their descriptions.
- Search for the Computer object in the Active Directory data structure, check its checkbox and click the OK button
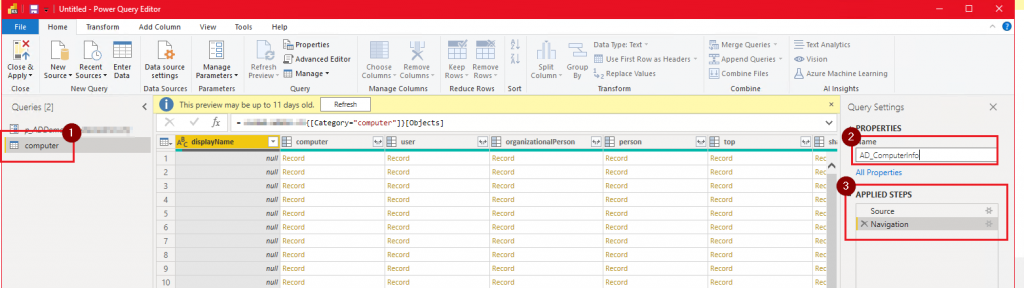
- You notice that a new query is appearing on the left pane with the original object name
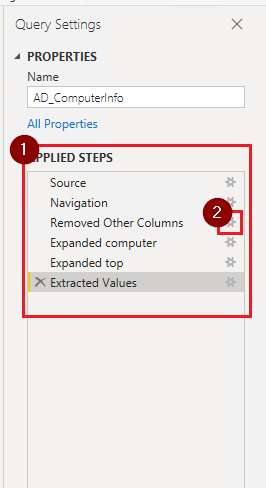
- You can change the name of the query in the Query Settings pane on the right side of the window
- You can also notice that in the APPLIED STEP information pane you have already 2 steps. The first for the source selection and the second for the object selection
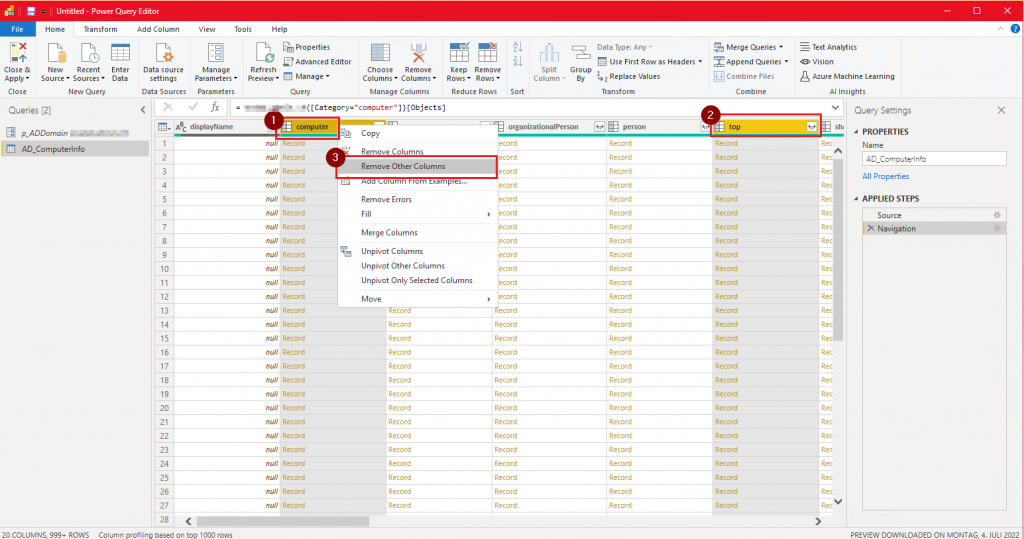
- Now to get the data we need, we select 2 columns. Select the column Computer than while pressing the CTRL key select the Top column.
- Right click on one of the column you selected and select Remove other columns. This will avoid to have unnecessary information in your report later
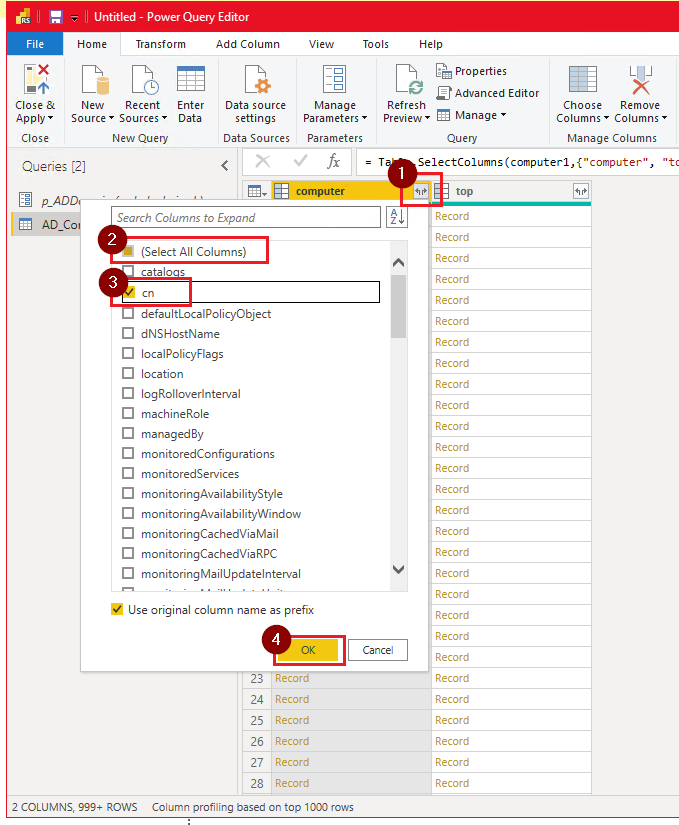
- Expand the Computer column to get to the data
- Unselect the (Select All Columns) to only select the information you need
- Select the checkbox of the cn info and click OK
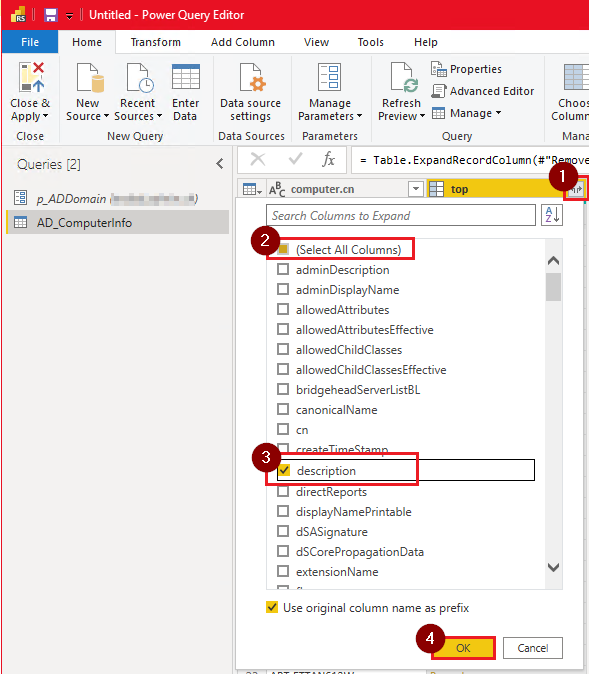
- Do the same by expanding the Top column and selecting the Description column
- The description information being a list datatype, you need to expand a second time this information to get to the data
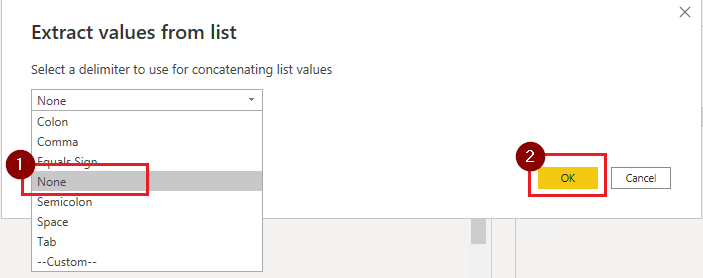
- Expand the top.description column and the select the option Extract Values…
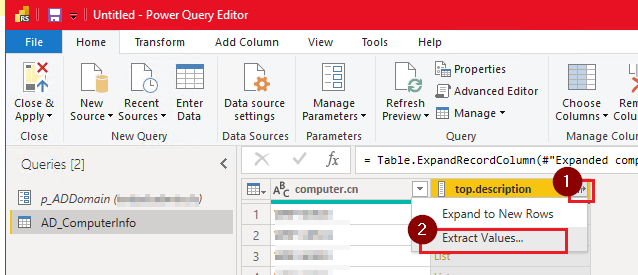
- In the window Extract the value from list I select None in the dropdown list as the description contains only 1 element in our case
We have now our Computer information we need
- Notice all the steps in the Apply Steps pane on the right
- By clicking on the gear icon you can see the details of the action done in the step
SCCM Server information integration
The data source is this time a SQL Server Database. We will apply the same method to get to the data.
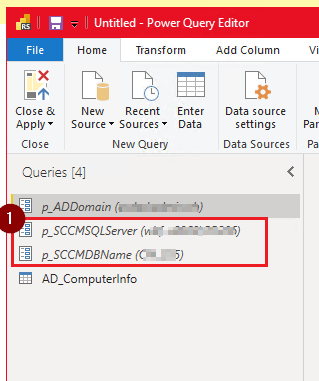
- Create first the parameter for the server connection
- Create a second parameter for the database name
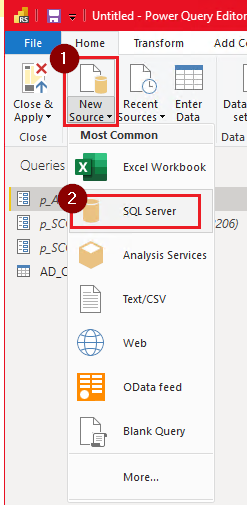
- Defined a new source by selecting SQL Server
- Choose the parameter your created previously for the server and database name
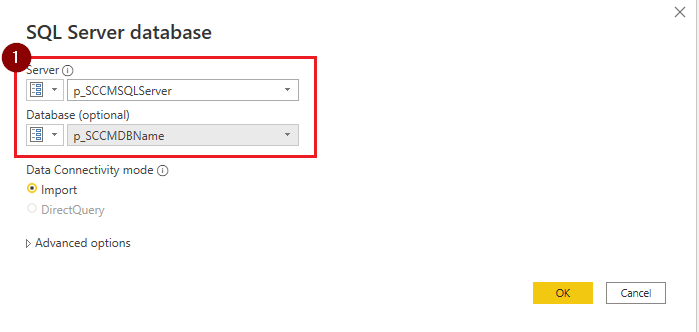
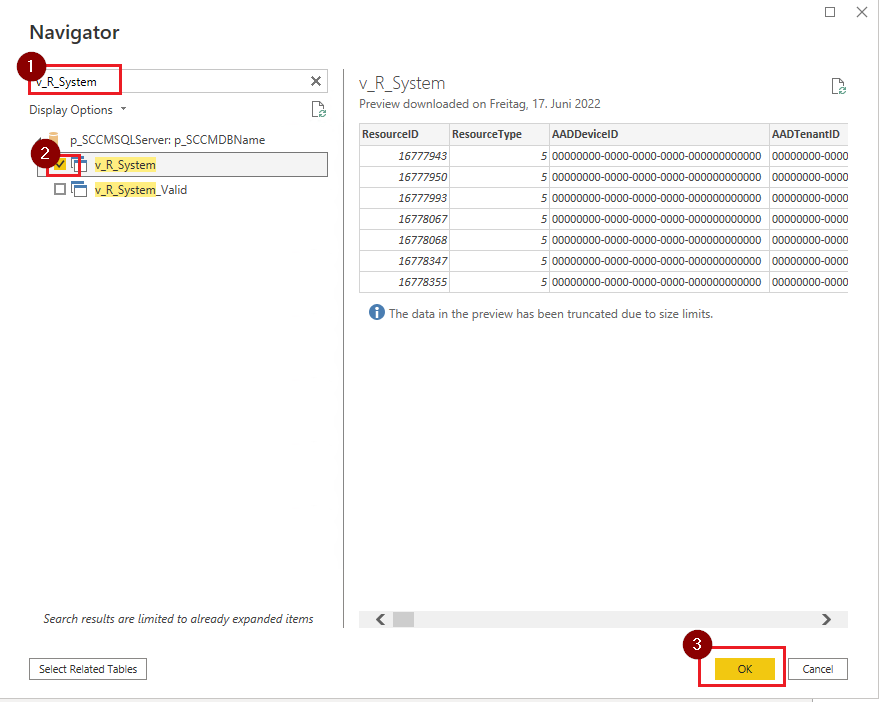
- Select an initial object to create the query with the SQL Server connector, but we will change it immediately and replace it by a custom query and click OK
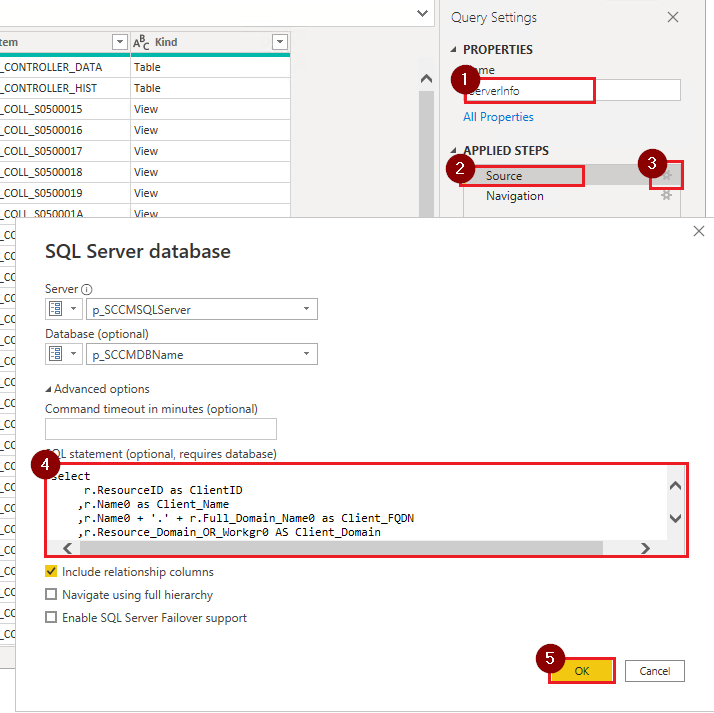
- In the query settings change the name
- Select the source in the steps and click the gear icon
- In the SQL statement textbox write the query needed for the server selection on the SCCM database
- Click OK
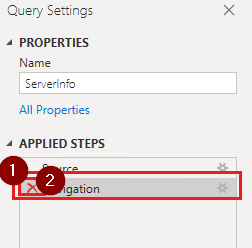
- You can now remove the Navigation step used for the object selection, it is no ore needed as we used a SQL Statement instead
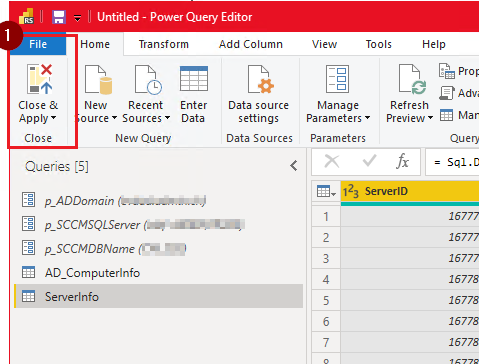
- We are done with the data source selection and import, so click the Close & Apply ribbon to integrate your data in the Power BI report
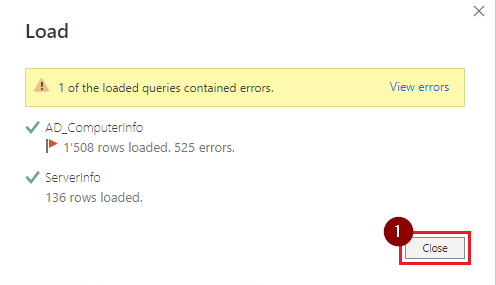
- The data will be loaded in the report
- In our case we have some error while loading the AD Computer info, due to the empty description on some servers
Link the data sources
Now that we have the data sources tables ready we can linked them
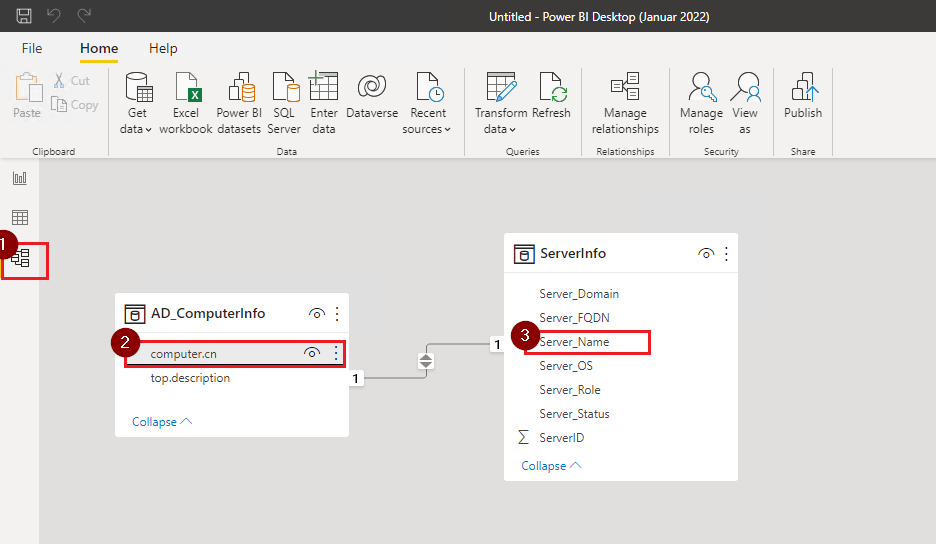
- Select the Model designer mode on the left of the screen
- Select the column computer.cn of the table AD_ComputerInfo, drag and drop it on the column Server_Name of the table ServerInfo. Automatically a 1:1 relationship will be determine
It is good for the user experience to group the information of the same type at the same location. Thus we can integrate the server description column with the other server information available
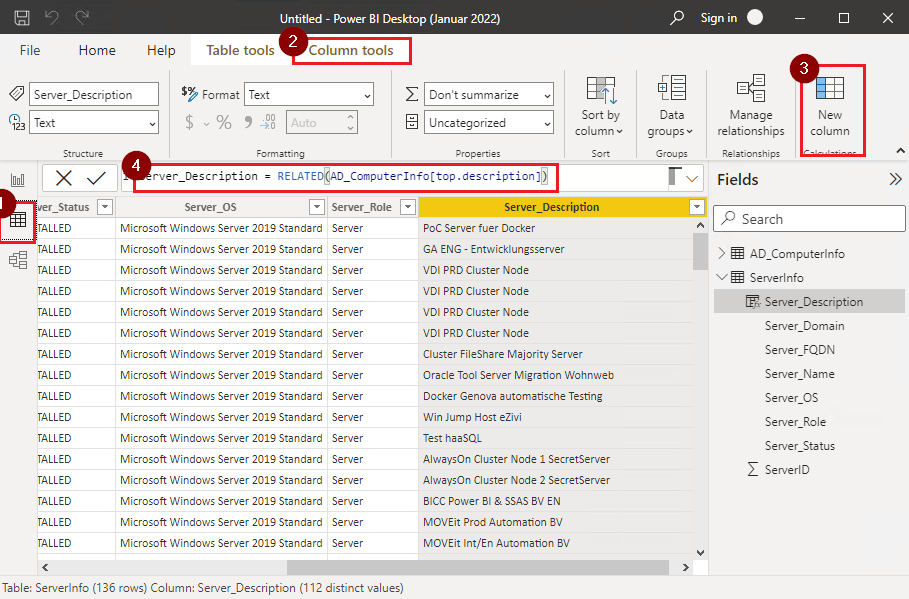
- Select the Data designer mode on the left of the screen
- Select the Column tools in the menu
- Select the New column ribbon
- Write the DAX formula to get the related information from the other table and validate with the Enter key
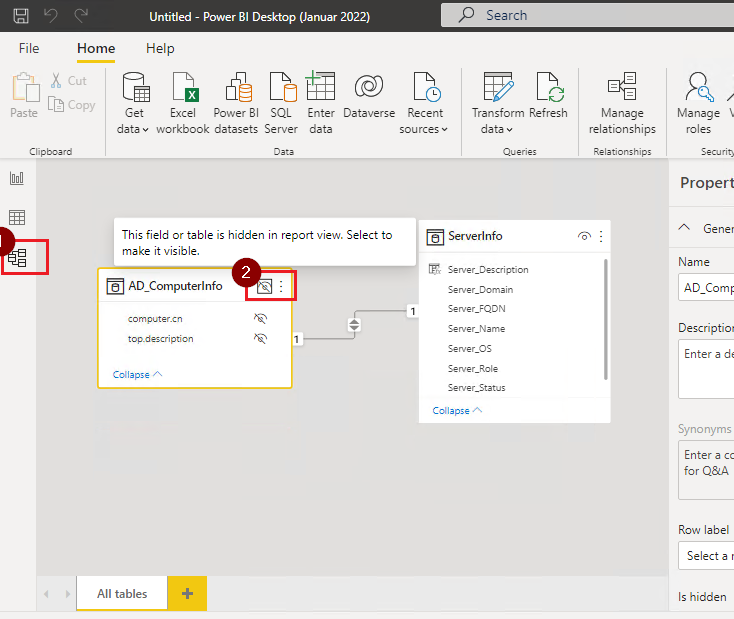
To avoid to confuse the report user with uneeded information, your can hide the AD_ComputerInfo table
- go to the Model designer mode
- Click on the eye icon to have it strikethrough
Design your report
Now you can create you report and use the data you have integrated
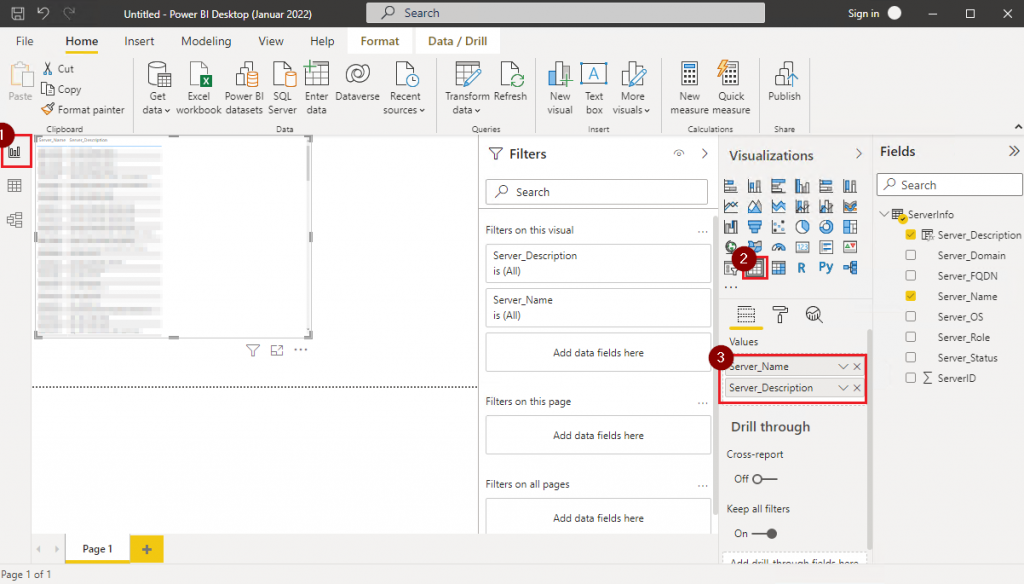
- go to the Report designer mode
- Select the table visualization object
- In the Values of the table visualization object drag and drop the Server_Name and Server_Description columns
Conclusion
This is of course only an introduction of what can be done with the Active Directory data integration into Power BI.
There are plenty of possibilities to follow your operation and Active Directory data is part of it.
The integration itself is pretty simple, the complexity you will face is to find the right information in the AD data structure.
![Thumbnail [60x60]](https://www.dbi-services.com/blog/wp-content/uploads/2022/09/CHC_web-min-min-scaled.jpg)
![Thumbnail [90x90]](https://www.dbi-services.com/blog/wp-content/uploads/2022/08/STH_web-min-scaled.jpg)
![Thumbnail [90x90]](https://www.dbi-services.com/blog/wp-content/uploads/2025/11/LTO_WEB.jpg)
![Thumbnail [90x90]](https://www.dbi-services.com/blog/wp-content/uploads/2023/01/APY_web-scaled.jpg)
![Thumbnail [90x90]](https://www.dbi-services.com/blog/wp-content/uploads/2022/08/FRJ_web-min-scaled.jpg)