
In a previous article, I have shown how to configure two servers in order to deploy a two-nodes 12c cluster. This time, I am going to describe the Grid Infrastructure 12c installation process using Oracle Universal Installer (OUI).
We assume that cluvfy tool has returned no errors (see previous blog).
Install Grid Infrastructure
Connect as grid and launch the Oracle Universal Installer (OUI) from /software/grid:
$ /software/grid/runInstaller.sh
Starting Oracle Universal Installer...
Checking Temp space: must be greater than 120 MB.   Actual 1214 MB    Passed
Checking swap space: must be greater than 150 MB.   Actual 3985 MB    Passed
Checking monitor: must be configured to display at least 256 colors.    Actual 16777216    Passed
Preparing to launch Oracle Universal Installer from /tmp/OraInstall2013-02-21_10-31-18AM. Please wait ...
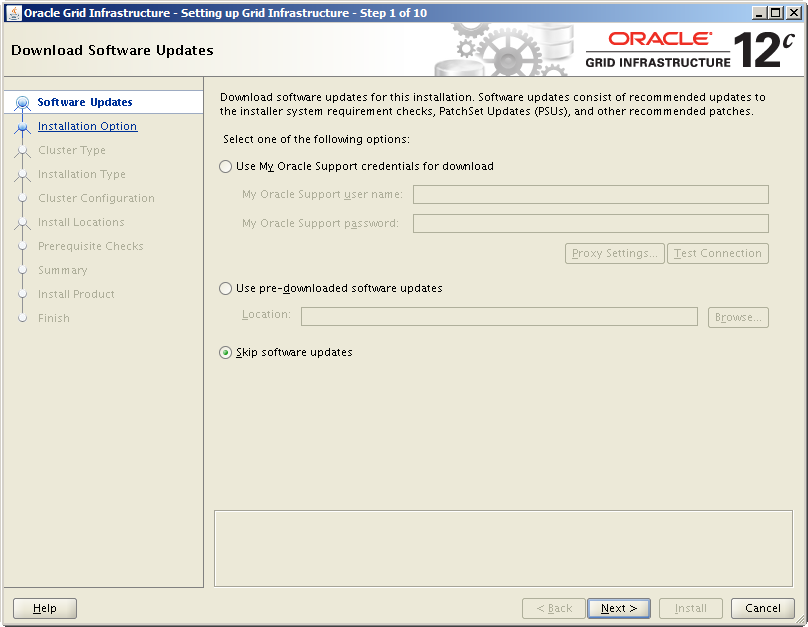
Then you get the loading screen:

Step 1 – Select Skip software updates and click Next >
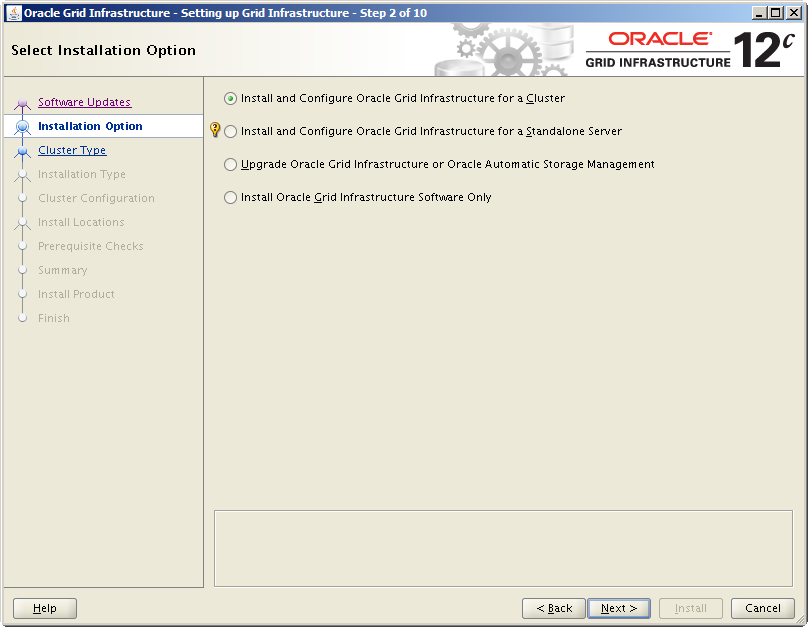
Step 2 – Select Install and Configure Grid Infrastructure for a Cluster and click Next >
Step 3 – Here you can configure a Standard or a Flex Cluster.
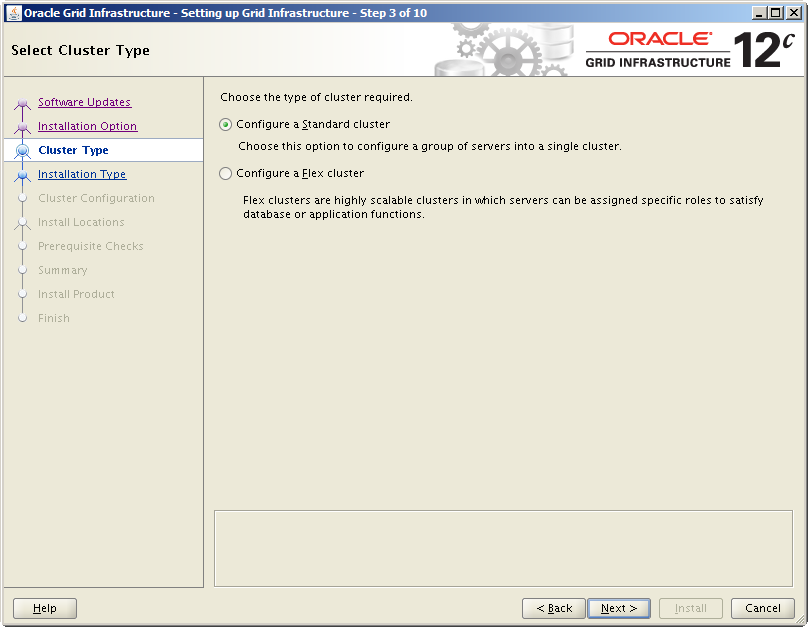
The Flex Cluster is a new feature introduced with Grid Infrastructure 12c. This new cluster architecture allows to create two types on nodes inside the cluster:
- Nodes with direct access to the shared storage (called Hub Nodes), meaning nodes with ASM and Grid Infrastructure software installed
- Nodes without direct access to the shared storage (called Leaf nodes), meaning nodes with only Grid Infrastructure software. These nodes connect to the Hub Nodes to get access to the ASM storage.
For this example, select Configure a Standard cluster and click Next >
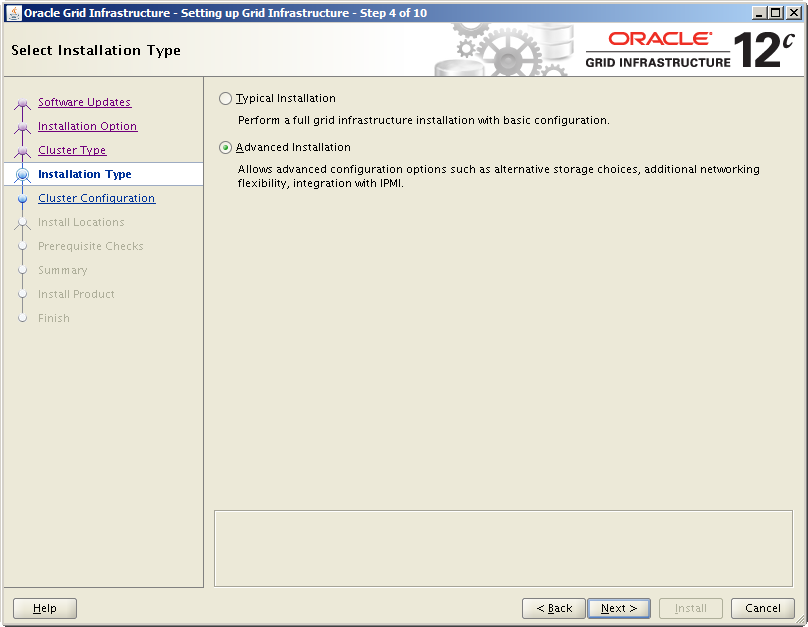
Step 4 – Select Advanced Installation and click Next >
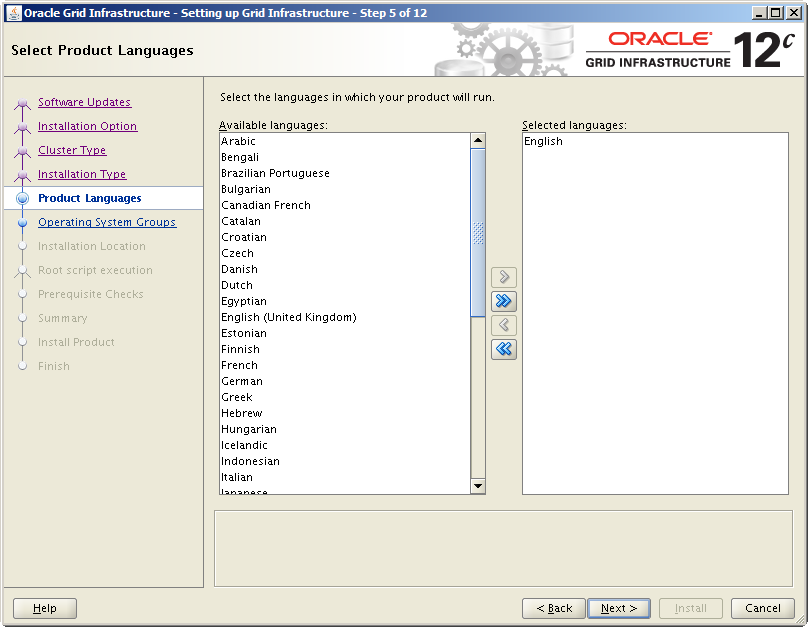
Step 5 – Select a language and click Next >
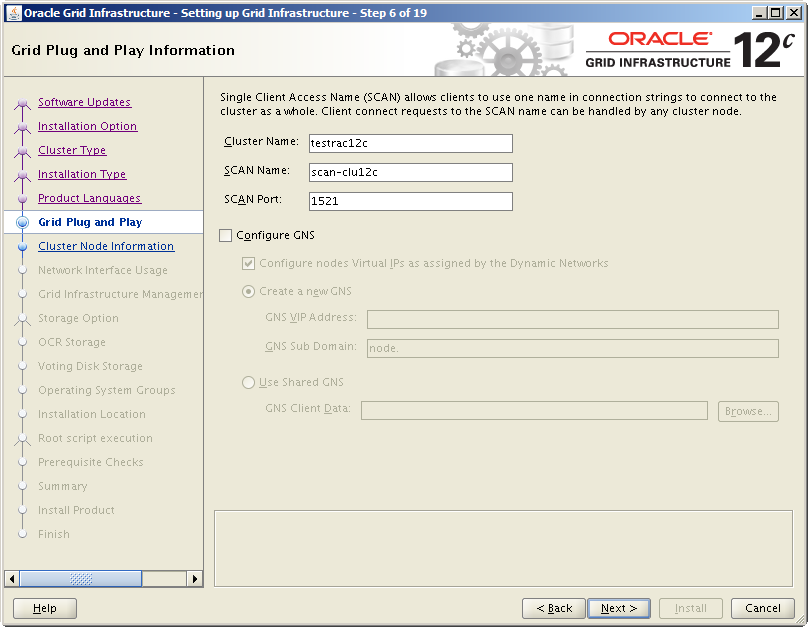
Step 6 – Enter a Cluster Name, a SCAN Name and a SCAN Port. Here, I do not configure GNS because I have chosen to use a DNS Server (see previous blog). I will develop GNS in another post.
Click Next > once finished
Step 7 – Add Hostname and Virtual Hostname of each node where you want to deploy Grid Infrastructure. Per default, the node from which the OUI run is already registered in the list, we just have to add the second one:
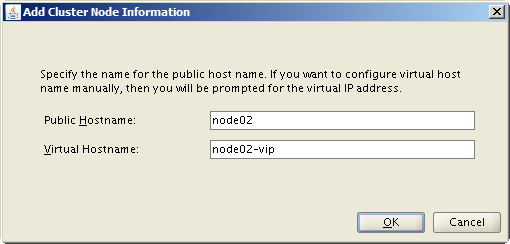
Click Next > once all nodes are listed
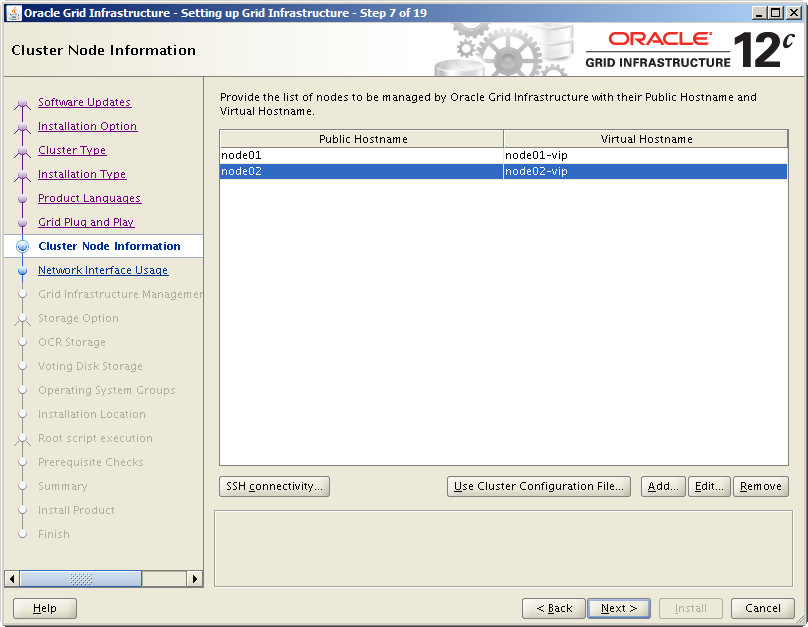
Note that if you followed my previous blog about Grid Infrastructure pre-requisites, you do not have to configure the SSH connectivity here. It has been done via the script provided by Oracle.
Step 8 – Starting with Oracle 12c, we can now choose at this step two new interfaces types for nodes communication in addition to classical Public and Private: ASM, and ASM & Private.


These two new options come from the new Flex Cluster feature, because we can now select on which nodes ASM will be installed.
Nodes where ASM is not installed (Leaf Nodes) must have a network interface to join the remote ASM nodes.
- ASM interface is used if a dedicated interface is used for ASM traffic. It means that at least 3 interfaces are available: one for Public, one for Private and one for ASM.
- ASM & Private is used if the same interface is used for both Cluster Interconnect traffic and ASM traffic. Useful if the server has only two network interfaces.
For this example, we will select a Public usage for eth0 and a Private (meaning Interconnect) usage for eth1, since Flex Cluster has not been selected.
Step 9 – At this step, we can configure a Grid Infrastructure Management Repository:
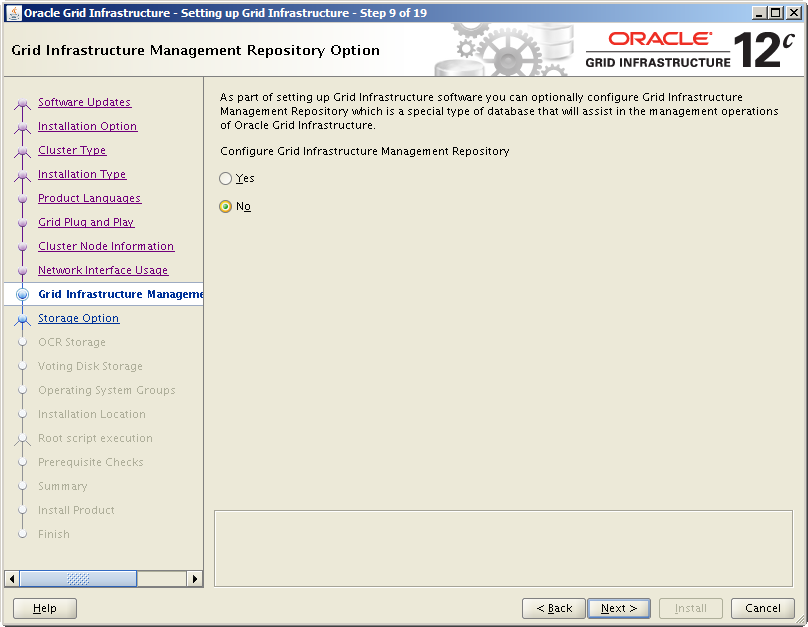
This is a new feature introduced with 12c. It provides access to Oracle Database Quality of Service, Memory Guard, and Cluster Health Monitor. I will not go into details here, but I will post a blog about this Management Repository shortly.
You have to know that the repository cannot be enabled after the Grid Infrastructure installation. If you want to enable the Management Repository later, you will have to completely redeploy Grid Infrastructure!
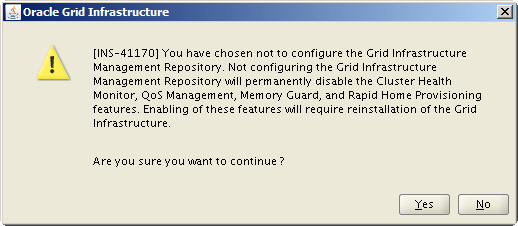
Select Yes to confirm because we don’t install the repository for this example.
Step 10 – This step allows you to select three storage types.
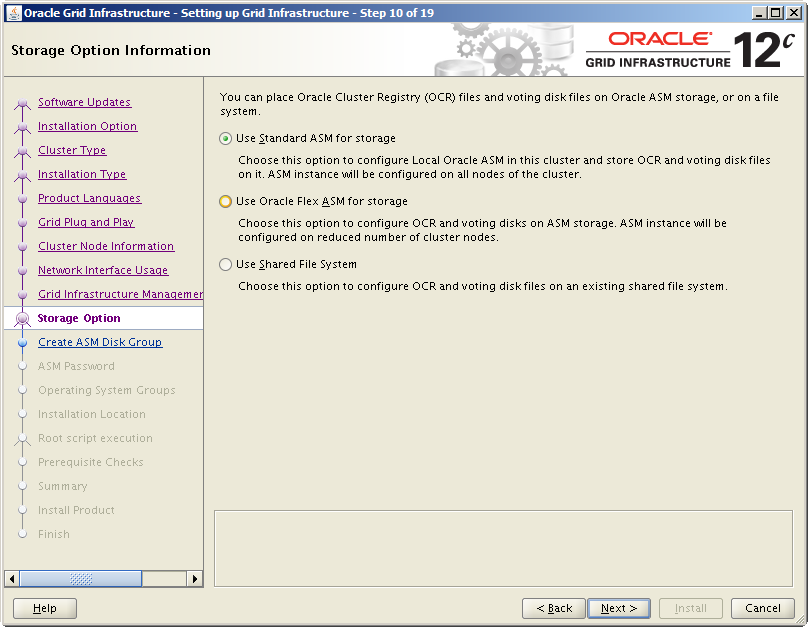
- With Standard ASM, ASM will be installed on each node of the cluster. You have to choose Private for eth1 at step 8. This is a typical configuration, used with the Standard Cluster we have selected.
- With Flex ASM, you will be able to select nodes where to install ASM. Flex ASM corresponds to the Flex Cluster configuration. Private & ASM or ASM must be selected at step 8 in order to use Flex ASM.
- With Shared Filesystem, you can use existing shared file systems
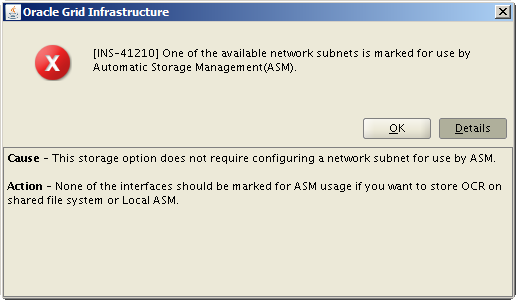
If you do not use the good combination between network interfaces selected at step 8 and ASM storage type, the OUI will display a warning and not let you continue until you make the good choice:
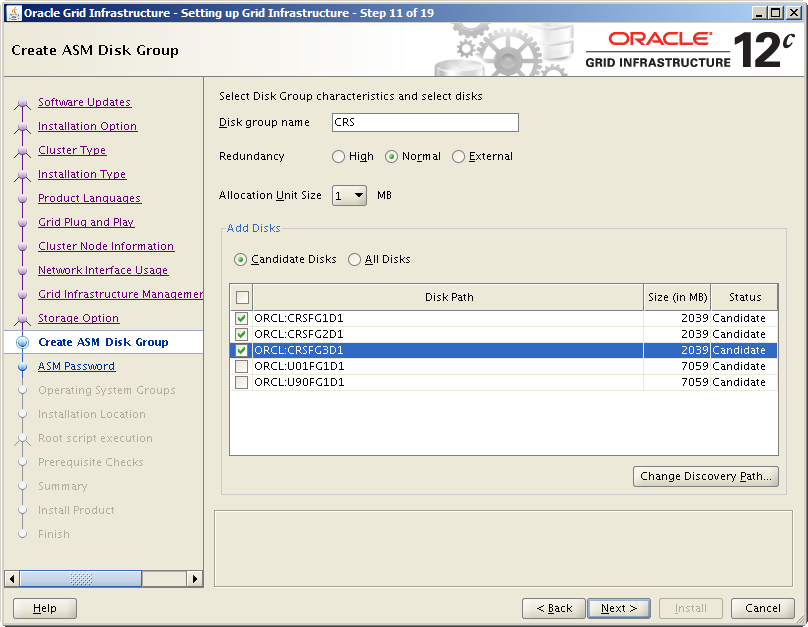
Step 11 – If you have followed my previous blog, you have configured multiple disks for ASM:
- Three disks for CRS
- Two disks for Database files and FRA.
You can now select which disks to include in the diskgroup for CRS. Enter a Disk Group Name for the voting disks, select a type of Redundancy, and select available disks (here, three for a normal redundancy). Then click Next >
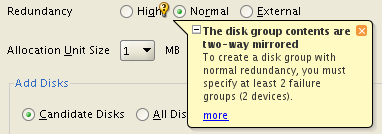
Note the mistake in the Oracle Universal Installer. The “Help” box says:
- At least two failure groups for normal redundancy
- At least three failure groups for a high redundancy
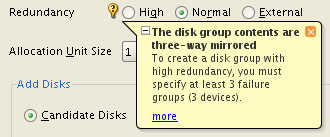
However, if we select two disks for a normal redundancy (meaning two failure groups) or three devices for the high redundancy (meaning three failure groups), as it is shown in the Help box, we have an error:
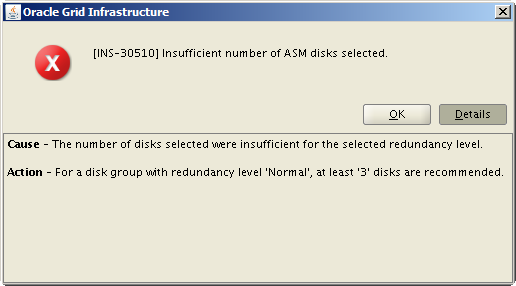
The reason is that for Voting Disks, normal redundancy requires at least three disks, and at least five disks are required for high redundancy. But for other disks (i. e. Oracle data files), two disks for normal redundancy and three disks for high redundancy are enough.
Do not forget this subtility…
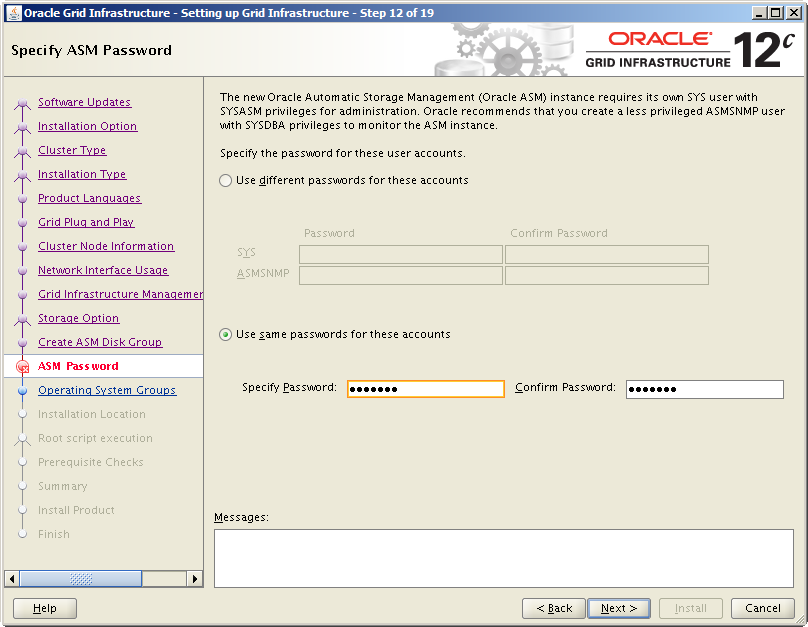
Step 12 – Enter passwords for SYS and ASMSNMP or use the same password for both accounts, and click Next >
Step 13 – Select Do not use Intelligent Platform Management Interface (IPMI) and click Next >
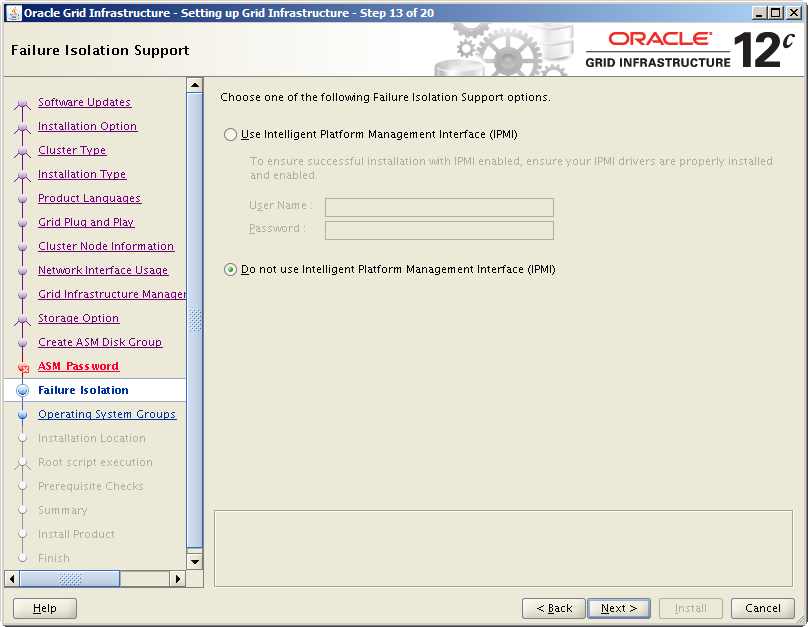
This feature was already present with Grid Infrastructure 11g, so I will not go into details.
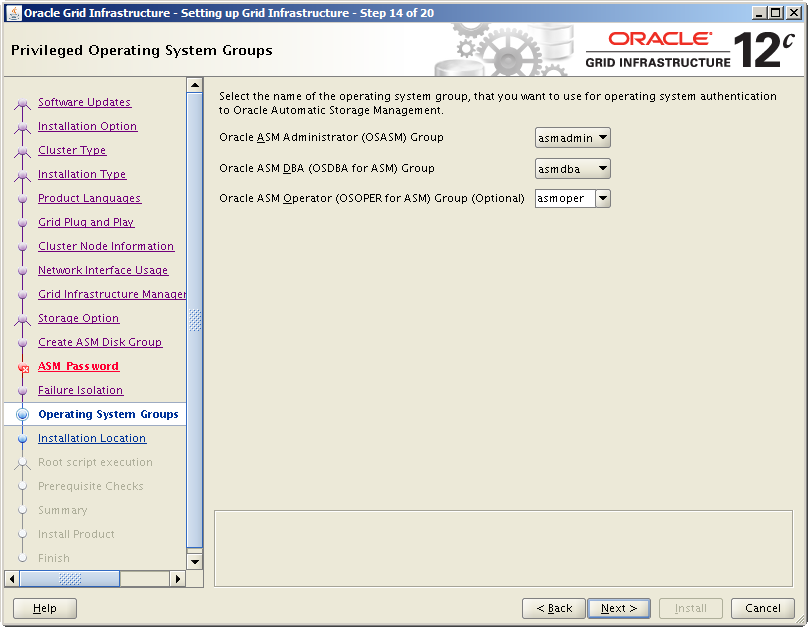
Step 14 – Select operating system groups for ASM administration and click Next >
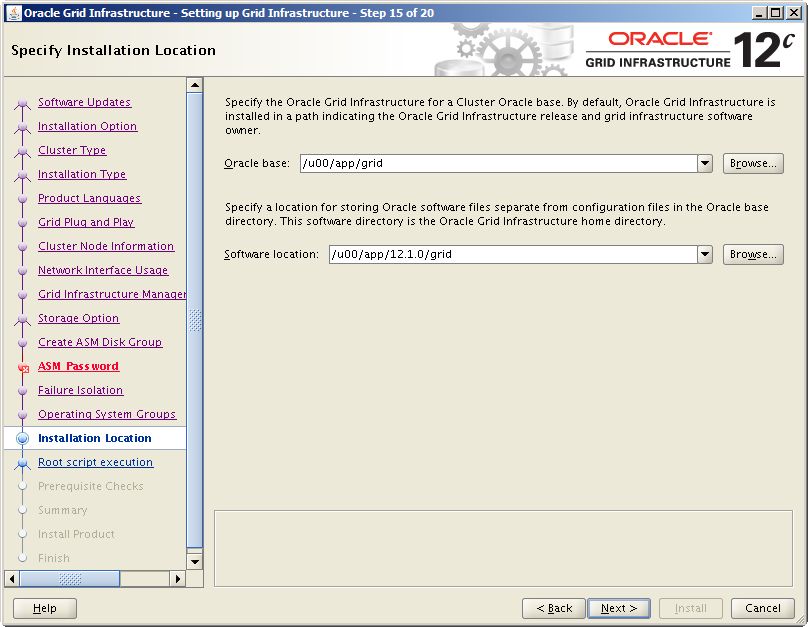
Step 15 – Provide path for Oracle Base and Software Location (meaning Grid Home) and click Next >
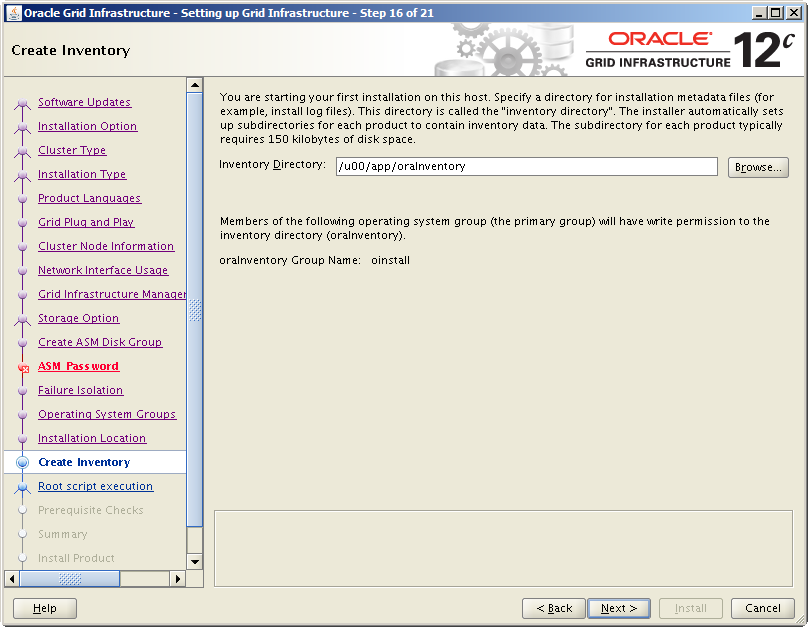
Step 16 – Enter path for the Inventory Directory (meaning oraInventory) and click Next >
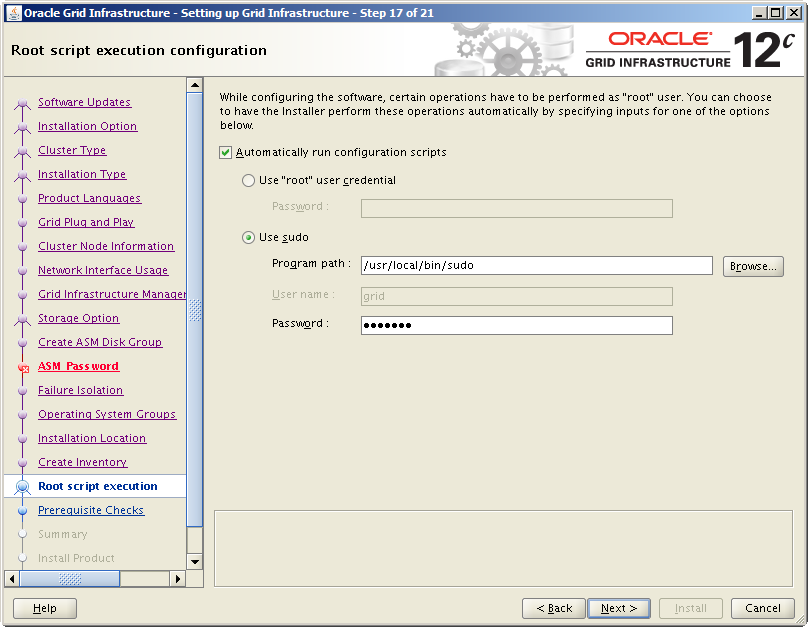
Step 17 – This new screen allows to enter a password for root account or for grid user with sudo, in order to automatically run root scripts at the end of installation.
Prior to Grid Infrastructure 12c, we had to execute manually root scripts on each nodes, one by one. It could be fastidious when we had several nodes, because we had to wait the script to be completely finished on one node before running it on another node.
Now, Oracle does it for us!
For security reasons, dbi services recommands to use the sudo methods instead of using the root account, as selected for this example. Provide the grid password and click Next >
Step 18 – The OUI performs some prerequisites.
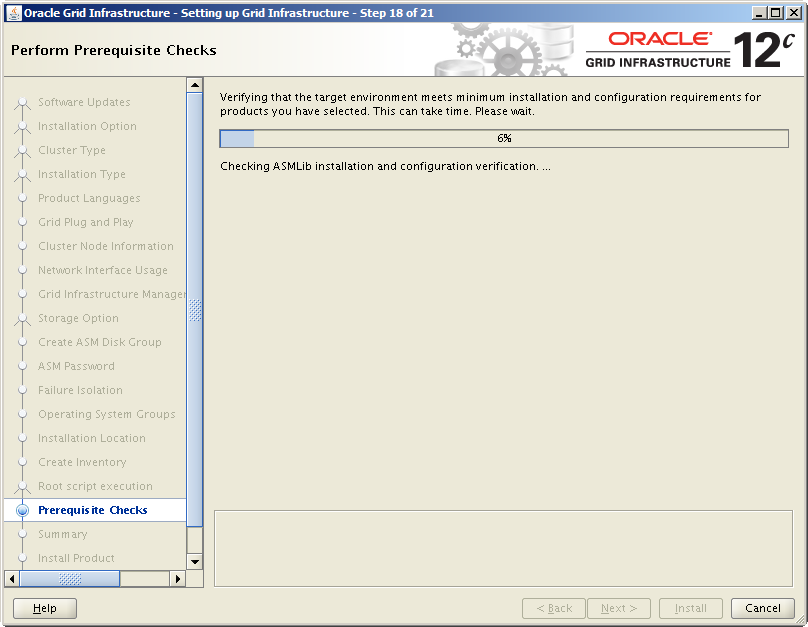
If all prerequisites are ok, you should have no error or warning messages. However, with 12.1.0.1 release you maye get an error about ASM disks:
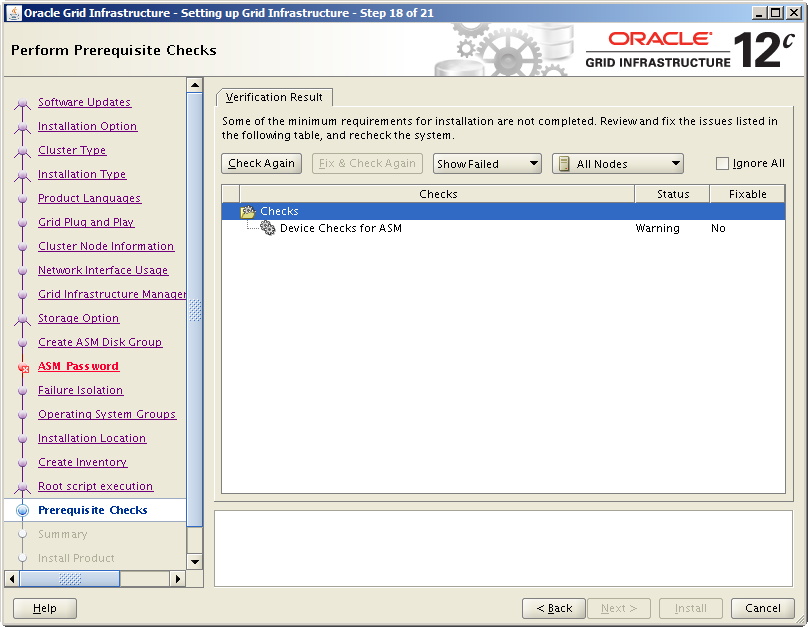
This is the detail of the error:
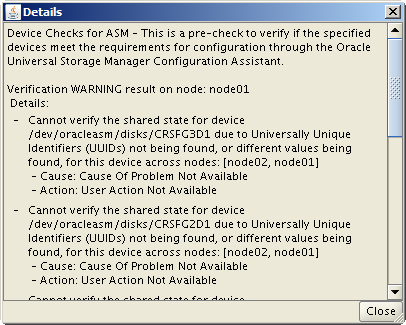
As you can see, Oracle tries to validate the shared state of the disks by using an UUID and the path “/dev/oracleasm/disks”. Normally, this path is used to discover disks when using block devices only.
But here we use Oracle ASMLib and the disks should normally be discovered with the “ORCL:” path, as you can see at Step 17 screen above.
It seems that the installer is still perfectible 🙂
Anyway, this issue is not blocking and can be safely ignored. You can check the Ignore All box in top right to ignore the warning and start the install process.
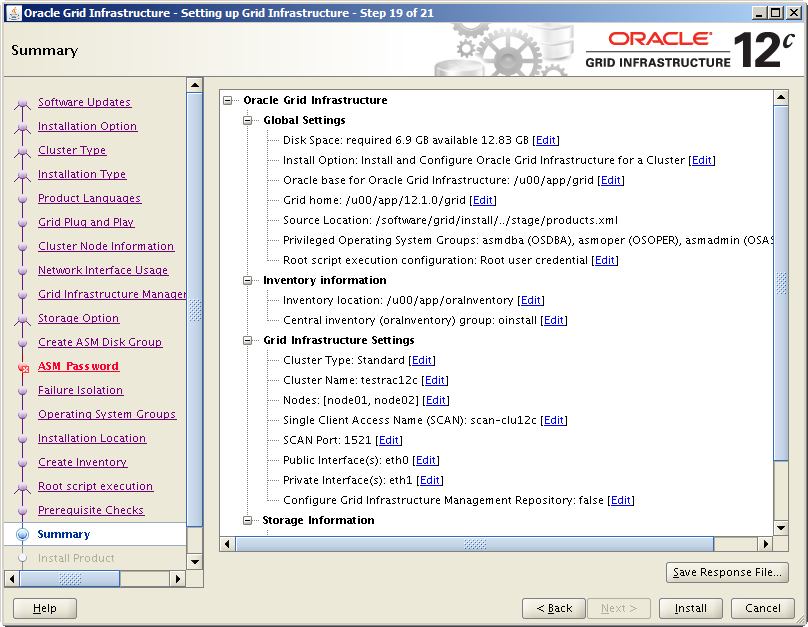
Step 19 – If all information displayed are correct, you can click on Install.
Step 20 – Installation is in progress, you must wait until completion.
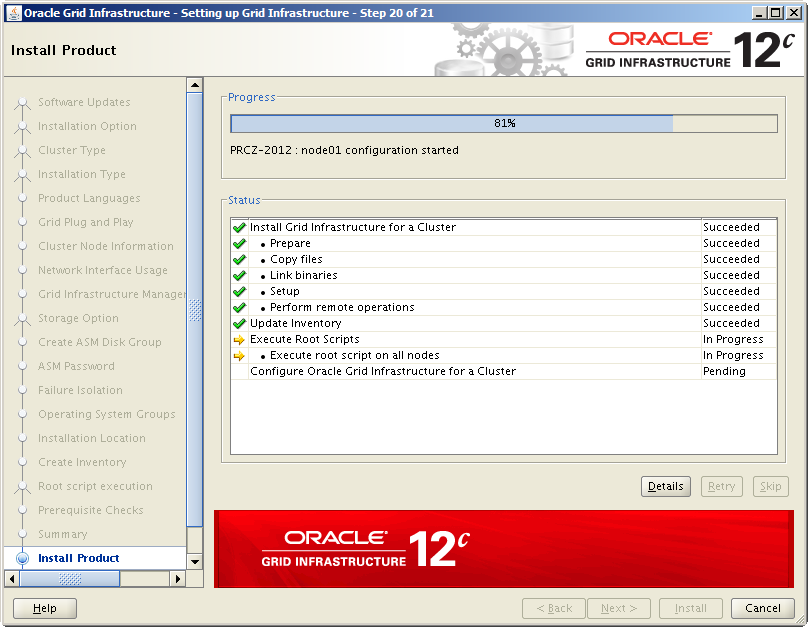
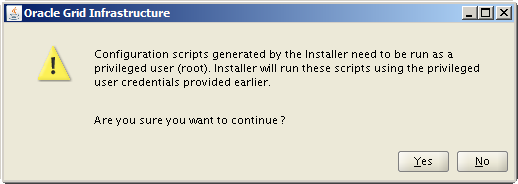
At the end of the installation process, the OUI asks you if you want to automatically run root scripts.
Just click Yes and Oracle will do the rest.
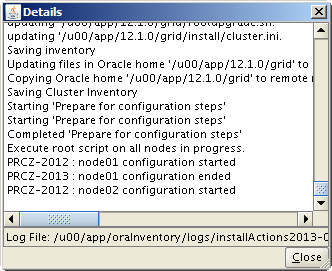
By clicking on Details, we see that Oracle is running root scripts on each node, one by one:
Step 21 – Congratulation: Grid Infrastructure 12c is now deployed on your two nodes! You can close the OUI.
Final check
If you run this command as grid user after Grid Infrastructure has been installed, you will see that services are up on both nodes (Grid Infrastructure binaries directory must be in the $PATH environment variable):
$ crsctl stat res -t
--------------------------------------------------------------------------------
Name           Target  State        Server                   State details
--------------------------------------------------------------------------------
Cluster Resources
--------------------------------------------------------------------------------
ora.LISTENER_SCAN1.lsnr
      1        ONLINE  ONLINE       node02            STABLE
ora.LISTENER_SCAN2.lsnr
      1        ONLINE  ONLINE       node01            STABLE
ora.LISTENER_SCAN3.lsnr
      1        ONLINE  ONLINE       node01            STABLE
ora.cvu
      1        ONLINE  ONLINE       node01            STABLE
ora.oc4j
      1        ONLINE  ONLINE       node01            STABLE
ora.scan1.vip
      1        ONLINE  ONLINE       node02            STABLE
ora.scan2.vip
      1        ONLINE  ONLINE       node01            STABLE
ora.scan3.vip
      1        ONLINE  ONLINE       node01            STABLE
ora.node01.vip
      1        ONLINE  ONLINE       node01            STABLE
ora.node02.vip
      1        ONLINE  ONLINE       node02            STABLE
--------------------------------------------------------------------------------
Now that Grid Infrastructure and ASM are installed, we can create our two diskgroups for database files and Flash Recovery Area, prior to the installation of the RDBMS and the databases.
Create ASM diskgroups for databases using ASMCA
To create the diskgroups, there are two ways: The first method is to use the ASM Configuration Assistant. We are going to create the U01 diskgroup with this method.
Run the tool with the following command as grid:
$ asmca
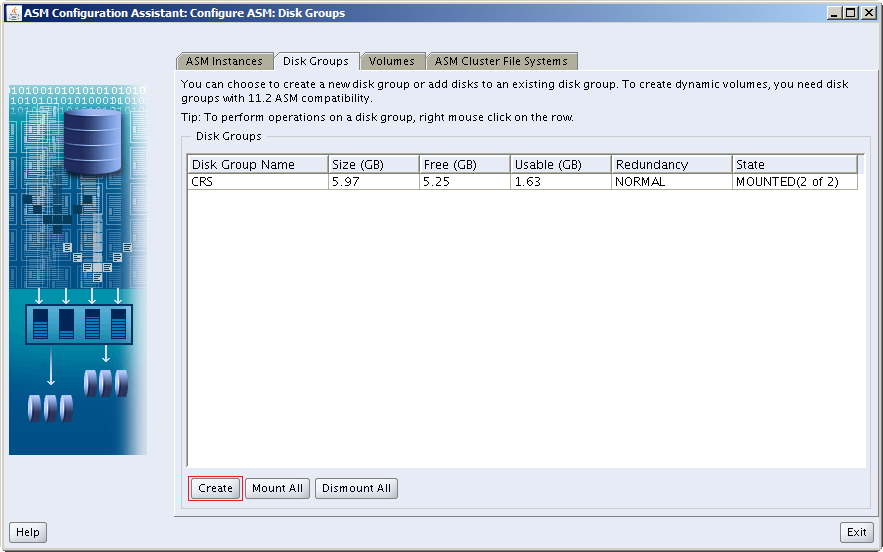
The ASMCA window opens and you can see the current diskgroups. Here, the CRS diskgroup created during Grid Infrastructure installation is shown as mounted on both nodes.
Click on Create to add a new diskgroup.
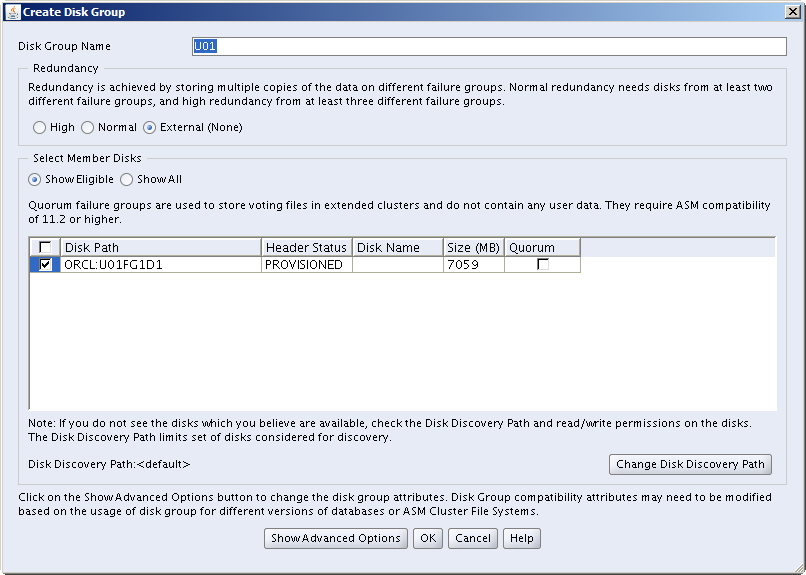
Enter the diskgroup name (U01), provide the redundancy level (external for one single device) and select an available disk to add to the diskgroup. Click OK once finished.
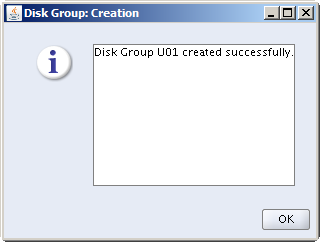
Wait until the diskgroup is created…
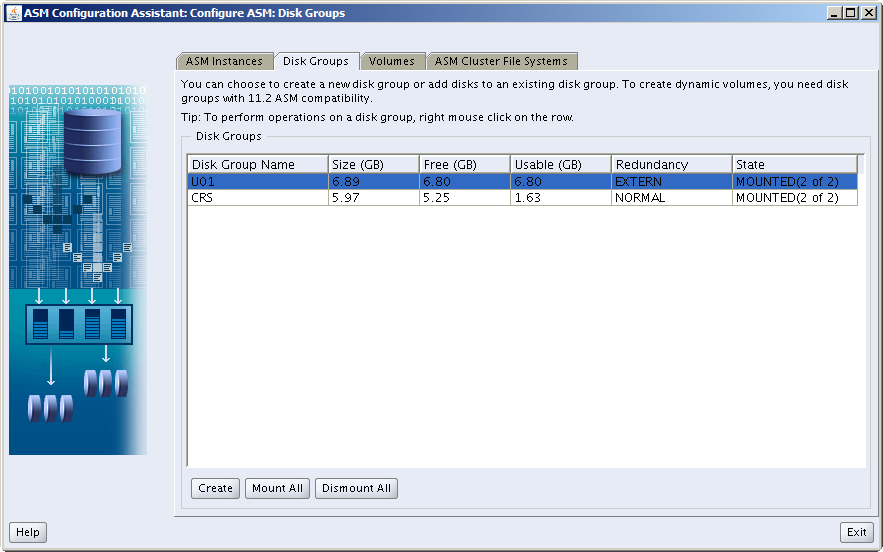
Once the new diskgroup is created, we can see it in the ASMCA main window. Note that when you create a diskgroup with ASMCA, it is automatically mounted on all nodes of the cluster.
Create ASM diskgroups for databases with sqlplus
The other way to create ASM diskgroups is to connect to the ASM instance using sqlplus. We are going to create the U90 diskgroup for FRA using this method.
- Set the ASM environment on first node, as grid user
$ export ORACLE_SID="+ASM1"
$ export ORACLE_HOME=/u00/app/12.1.0/grid
$ export PATH="$ORACLE_HOME/bin:$PATH"
- Connect to the ASM database as SYSASM
$ sqlplus / as sysasm
- Show path of ASM disks
SQL> select path from v$asm_disk;PATH
----------------------------------------------------------------------------
ORCL:U01FG1D1
ORCL:U90FG1D1
ORCL:CRSFG1D1
ORCL:CRSFG2D1
ORCL:CRSFG3D1
- Create the ASM diskgroup
SQL> create diskgroup U90 external redundancy disk 'ORCL:U90FG1D1' attribute 'compatible.asm'='12.1';
Diskgroup created.
* Per default, when you manually create a diskgroup, the compatible.asm attribute is set on 10.1.0.0.0. But, in order to install a 12c database on ASM, the parameter must be set on 12.1.0.0.0.
Create the diskgroup with the right parameter will prevent you to get an error when creating the database later 😉
- Show diskgroups mount status
Contrary to ASMCA, diskgroups created via sqlplus are only mounted on the node from where they were created. They must be manually mounted on the other nodes.
On node02, set the ASM environment, connect to the ASM database and show the mount status of ASM diskgroups:
SQL> select state, name from v$asm_diskgroup;
STATE       NAME
----------- ------------------------------
MOUNTED     CRS
MOUNTED     U01
DISMOUNTED  U90
- Mount diskgroup on all nodes
Mount the diskgroup from node02 only, because it was automatically mounted on the server from where it has been created:
SQL> alter diskgroup U90 mount;
Diskgroup altered.
- Check the asm.compatible attribute
You can check that the compatibility attribute has been correctly set by typing this command:
SQL> select name, compatibility from v$asm_diskgroup;

NAME           COMPATIBILITY
-------------- ---------------
CRS            12.1.0.0.0
U01            12.1.0.0.0
U90            12.1.0.0.0
Here, note that compatibility mode for both CRS and U01 was already configured with 12.1.0.0 with ASMCA.
Install Oracle RDBMS and create a database
If you want to know how to deploy RDBMS binaries and what are new features coming with the 12c release, read Gregory’s blog about the Oracle Database 12c: Binary Installation.
The installation process is similar, you just have to select a Real Application Cluster (RAC) installation mode in the OUI, and to create the database using the ASM storage.
It should be quite easy.
Good luck!
![Thumbnail [60x60]](https://www.dbi-services.com/blog/wp-content/uploads/2022/12/oracle-square.png)
![Thumbnail [90x90]](https://www.dbi-services.com/blog/wp-content/uploads/2022/11/TBR-web-min-scaled.jpg)
![Thumbnail [90x90]](https://www.dbi-services.com/blog/wp-content/uploads/2022/08/FRJ_web-min-scaled.jpg)
![Thumbnail [90x90]](https://www.dbi-services.com/blog/wp-content/uploads/2024/03/AHI_web.jpg)