Introduction
Hi team
I hope you are doing well, in a previous post, we have seen how to enable Windows Subsystem to install Linux distribution.
Create a folder to store your backups
- Connect to Powershell
- Create the directory to store data using command line
PS C:\Users\nso>mkdir "your directory"Example:
PS C:\Users\nso>mkdir "C:\Users\nso\BACKUP FOR WSL DISTRIBUTION"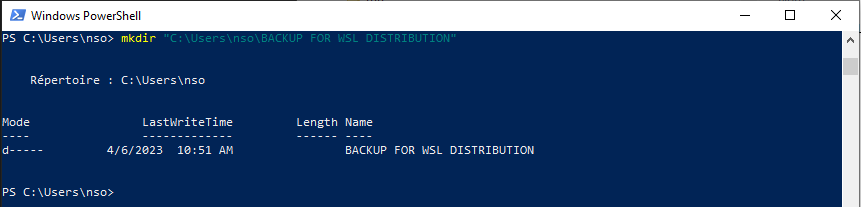
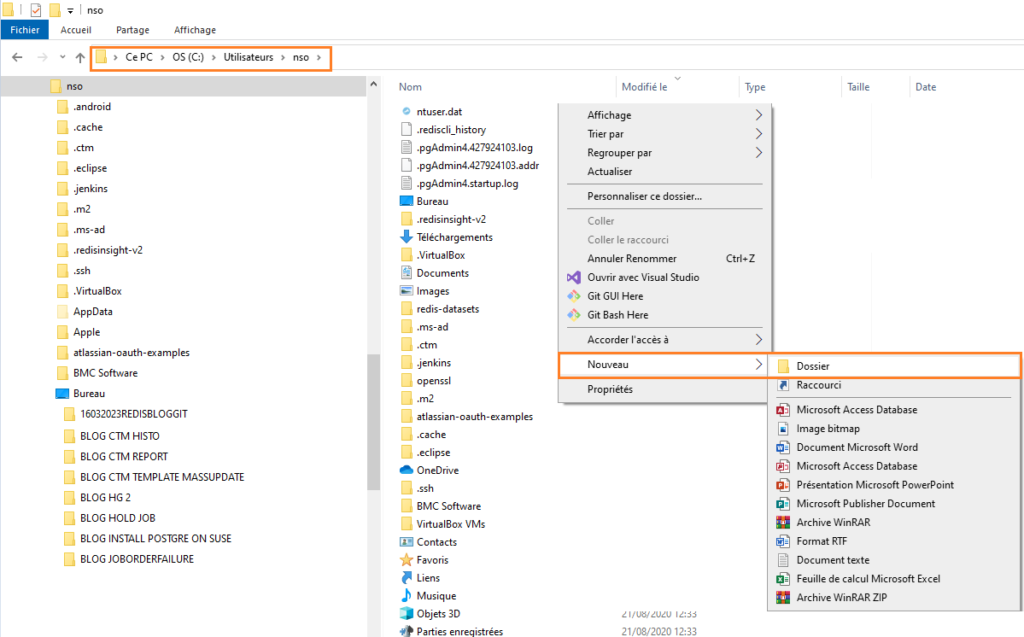
- Or create it manually by using the Windows browser
Right-click:
New/Folder/your directory name

Identify the distribution name you want to backup
In your Powershell prompt type the below command to display all installed distribution on WSL
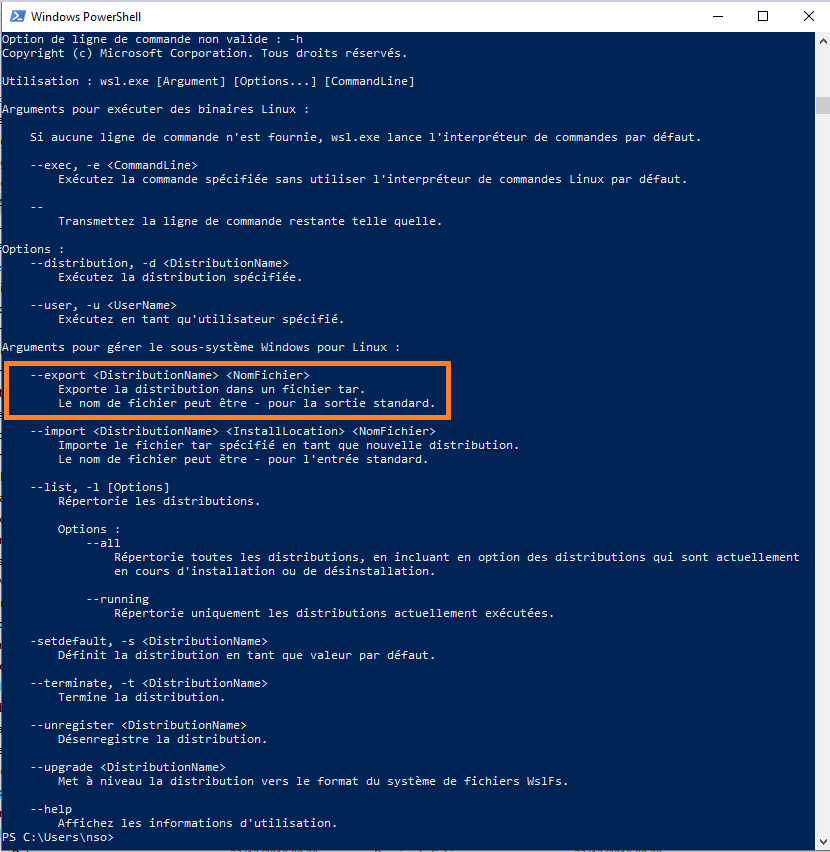
- See the wsl utility help:
PS C:\Users\nso> wsl -h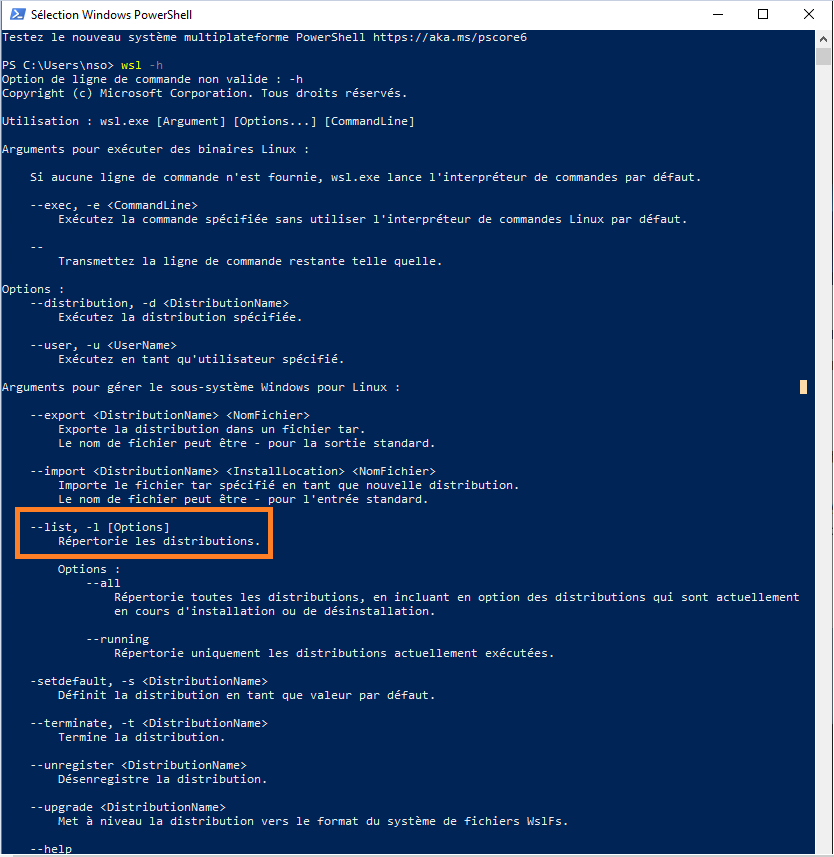
- As explained in the help part. the –list or -l will list the distribution , you can also list all the distribution – – all which are installing or uninstalling and also the – – running listing the current running distribution
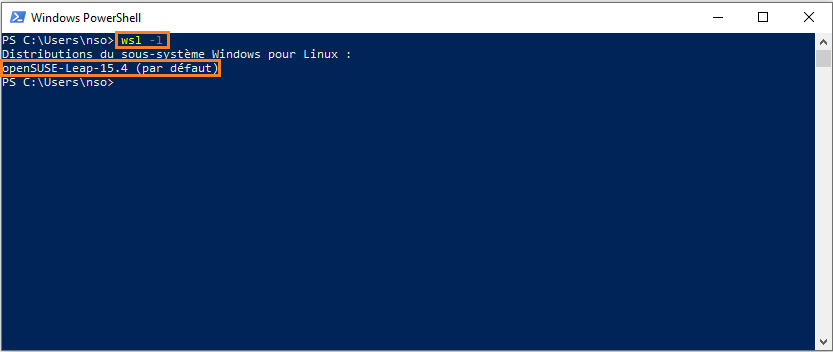
- Here we can see the distribution is openSUSE-leap-15.4 , we will use this specific name to perform our Backup
Export your distribution
- Use the export command listed in the wsl help
- Browse to the directory you created for you backups
PS C:\Users\nso> cd "C:\Users\nso\BACKUP FOR WSL DISTRIBUTION"

PS C:\Users\nso\BACKUP FOR WSL DISTRIBUTION>
- Use the export command
PS C:\Users\nso\BACKUP FOR WSL DISTRIBUTION> wsl --export openSUSE-Leap-15.4 openSUSE-Leap-15.4_BACKUP_03042023.tar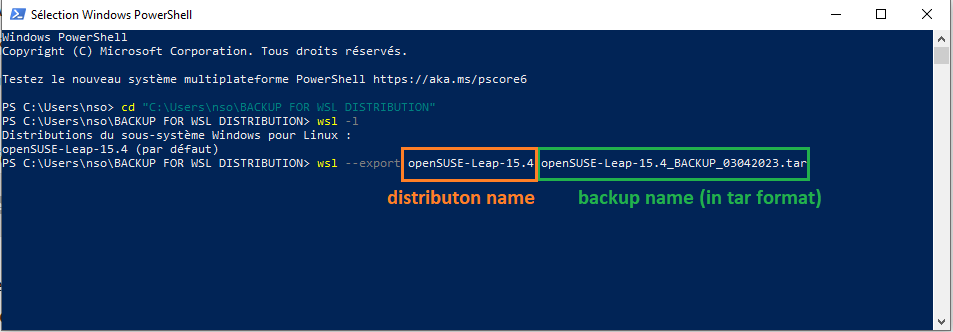
- Wait few minutes during the export
- Check if the Tar file is generated in the folder
PS C:\Users\nso\BACKUP FOR WSL DISTRIBUTION>dir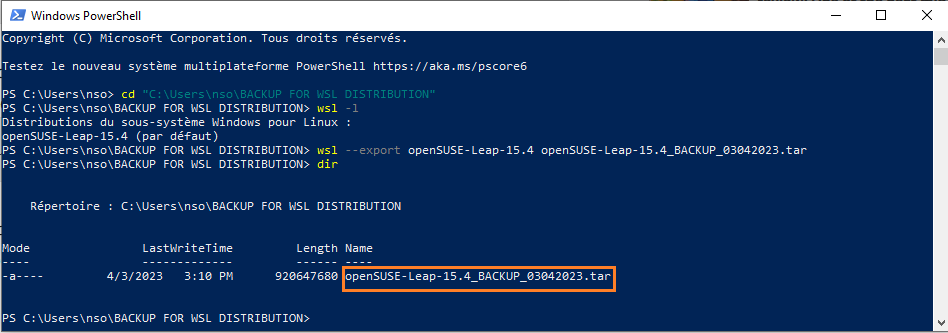
- Check on your browser also if you want to ensure if all is fine regarding the file size
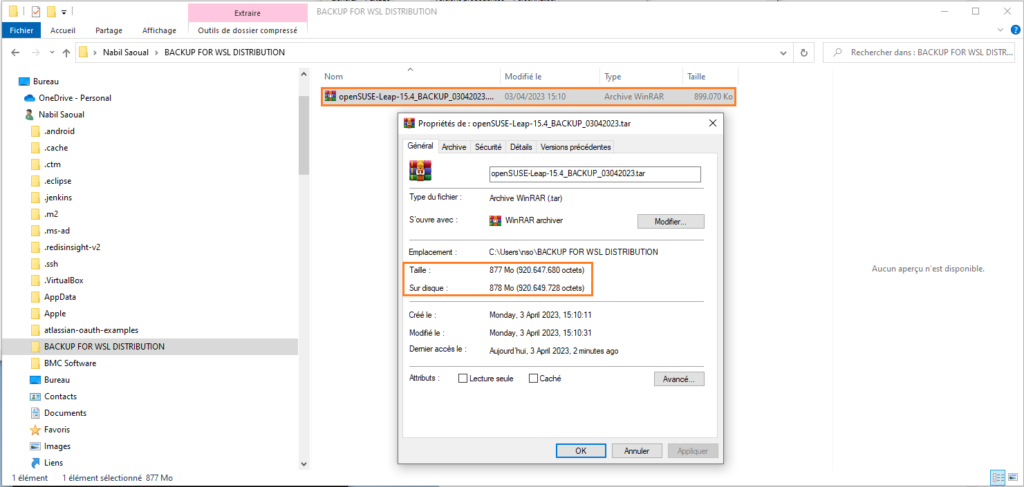
- Seems that all is OK and we have saved the status of our Distribution
It will be useful if something is going wring during your soft installations or simply using it to do some admin tasks.
How to remove the instance
- Prerequisite
if you are going to import this backup on another PC then you will not have no problem using the coming command
In the other case if you want to perform this import on the you own machine where the distribution is installed , you will have to remove the existing instance
- Remove the instance from the command line
wsl --unregister "distribution name"
Example:
PS C:\Users\nso\BACKUP FOR WSL DISTRIBUTION> wsl --unregister openSUSE-Leap-15.4 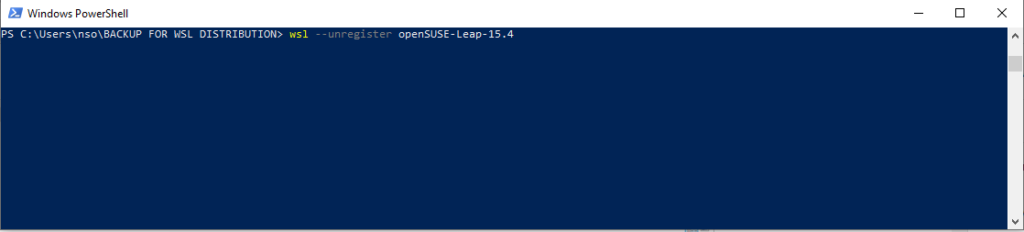
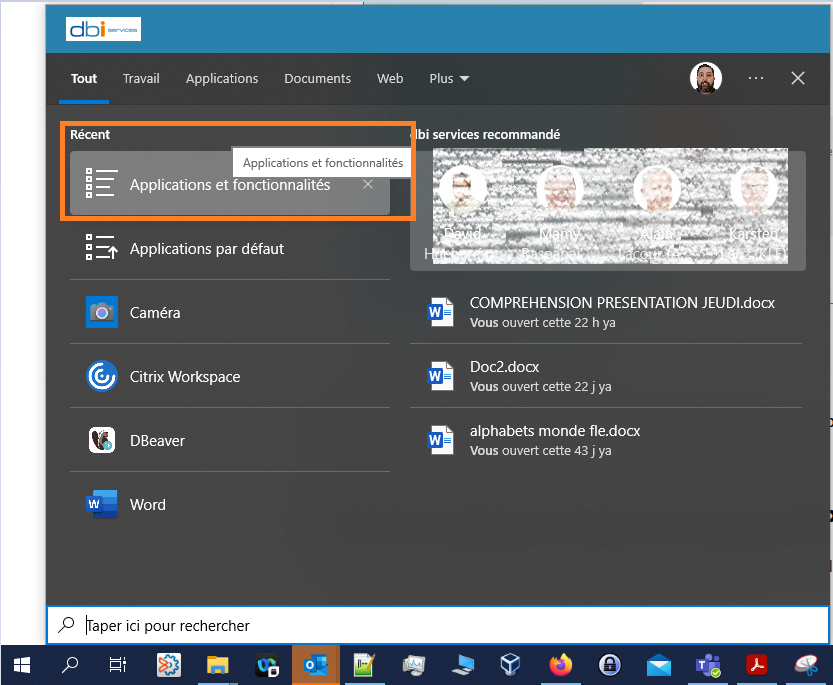
- Remove the instance from Windows GUI
Select “Applications and features” in the Windows search bar
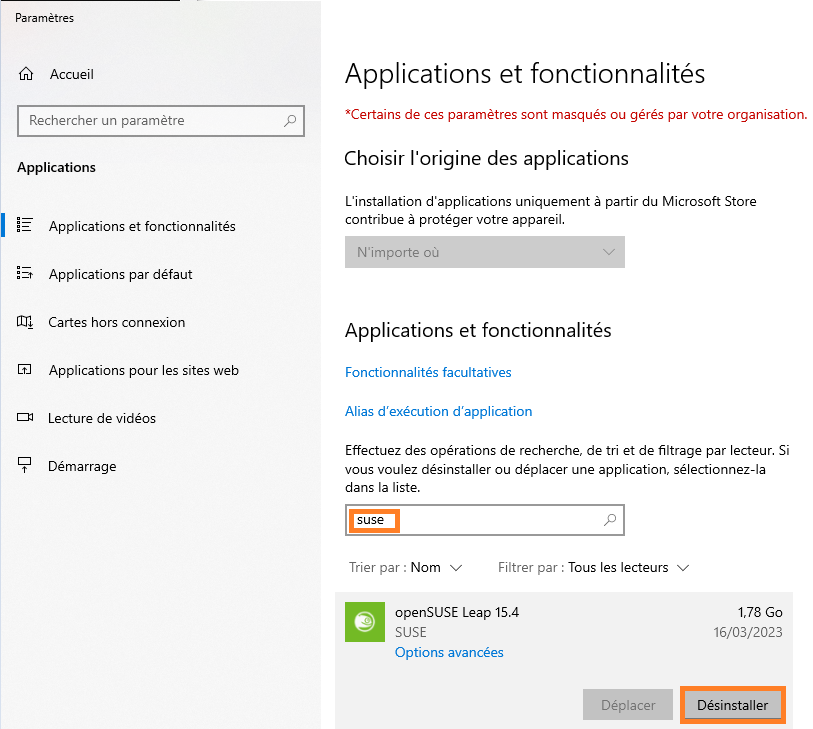
- Select the distribution you want to remove and click on uninstall
- Check if distribution is removed by using the below command
PS C:\Users\nso\BACKUP FOR WSL DISTRIBUTION> wsl -lImport your distribution
To import your file, you have to specificity the name and the location where you want to import your distribution
wsl --import (distribution_name) (install_location) (file_path)
Example:
PS C:\Users\nso\BACKUP FOR WSL DISTRIBUTION> wsl --import openSUSE-Leap-15.4_BACKUP_03042023.tar C:\wsl "C:\Users\nso\BACKUP FOR WSL DISTRIBUTION\openSUSE-Leap-15.4_BACKUP_03042023.tar"Wait few minute for your distribution to be installed and available to work.
- You can check if your distribution is now available
PS C:\Users\nso\BACKUP FOR WSL DISTRIBUTION> wsl -lConclusion:
Now you know how to backup and restore you distribution using WSL ( I made all these action on Windows 10 machine but it works also on Windows 11 )
By using export and import , you can have the same environment set up on multiple machines easily and within few minutes .
All Your credentials and user account will be saved, same for the packages you installed, it’s a kind of snapshot on VMWARE or VirtualBOX 🙂
Note that you can’t import a distribution you are already using ( same name , same file ) , otherwise you will have some conflicts, so bare in mind you will have to remove the previous distribution before making your import!
Feel free to visit , check and share the dbi bloggers and also my other topics!
![Thumbnail [90x90]](https://www.dbi-services.com/blog/wp-content/uploads/2022/08/FRJ_web-min-scaled.jpg)
![Thumbnail [90x90]](https://www.dbi-services.com/blog/wp-content/uploads/2024/03/AHI_web.jpg)