In the previous episode, we took a look together at an overview of Harvester. We looked at its components and explored the concepts behind Harvester, its cloud-native architecture, and the installation process. Now, let’s delve deeper into the main purpose of it: scheduling your workload. Let’s start!
Note: we expanded the Harvester cluster to three nodes. I would like to play with a bit of scheduling, so let’s add two worker nodes.
Virtual machine provisioning
Practical experience is the most effective method to grasp a concept, process, or product. I suggest that we proceed in the same manner.
As part of a larger consolidation and modernization project, imagine we just received the request to integrate a Microsoft Windows Server 2022 application into our new infrastructure. If you ever wonder how to control the quality of your data, there is, at dbi services, OMrun. OMrun is a Windows based application that includes test steps, scenarios, and of course, data adaptors. Let’s take this application as a workload example.
We are not going to automate anything here, as exploring the application is the main focus, so expect provisioning the virtual machine in a wizard based manner.
Log into Harvester web interface by entering the IP mentioned in the console of your node. Take the cluster URL, not the node’s IP.
In order to provision and run a Windows based application, you need first to add the ISO file of the operating system. I’ve already downloaded the file (using the following URL on the Microsoft web site).
For this, left-hand menu, select Images and then Create.
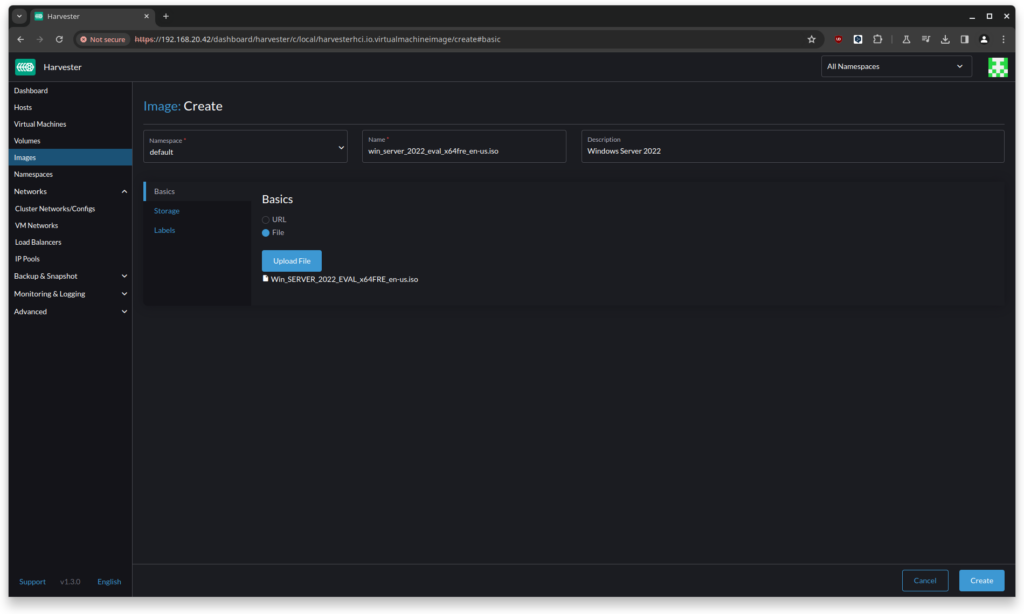
Upload the file and select Create.
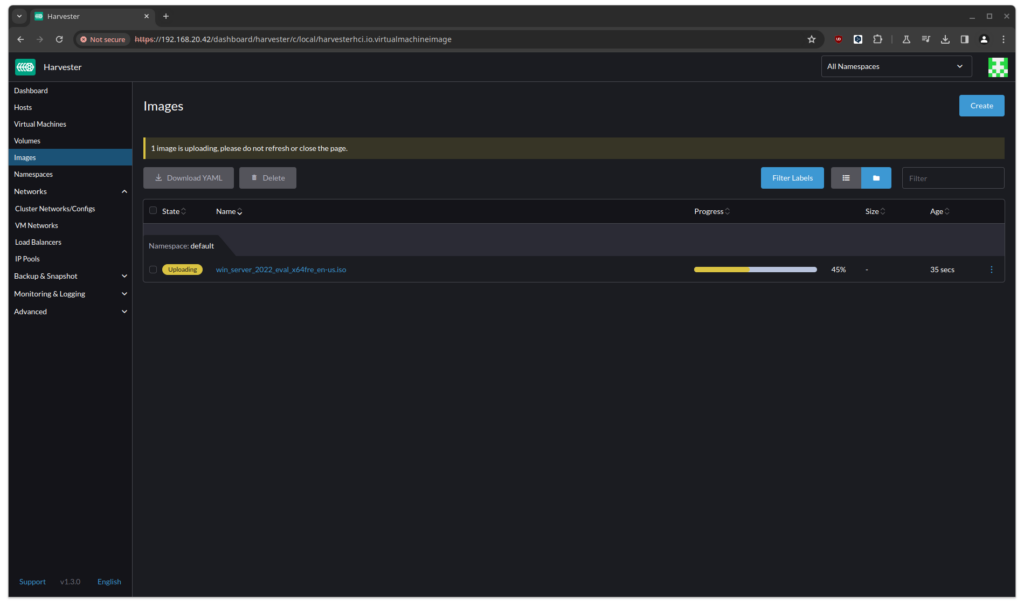

Once uploaded, any virtual machine using the infrastructure can use the file as of right now.
It is now time to create the VM. On the left-hand side, select “Virtual Machines”. You’ll be presented with a set of fields and options. First of all, as we are dealing here with a Windows-based VM, tick the box “Use VM Template:” and select the option “harvester-public/windows-iso-image-base-template”. As stated by SUSE in their documention, it is used to add a volume, a disk so, where all the necessary optimised drivers will be stored, so you can refer to that when installing the operating system. If you already used KVM for virtualization, you are on familiar ground. We are talking about paravirtualized VirtIO drivers.
We start to see some Kubernetes references: a namespace is required in order to group the corresponding Kubernetes objects. Reminder: The Kubernetes backend will be in charge of managing your VM. For that, a new set of CRDs (CustomResourceDefinition) were added to handle that.
For instance, here is the definition of a VM: VirtualMachineInstance.
We create a new namespace; let’s call it omrun. We also set the name, as well as a short description. Based on your application requirements, specify the CPU and memory resources.
Here, I’m not going to implement a production ready instance of OMrun, so I won’t be greedy on that: 4 CPUs and 8GB of memory.
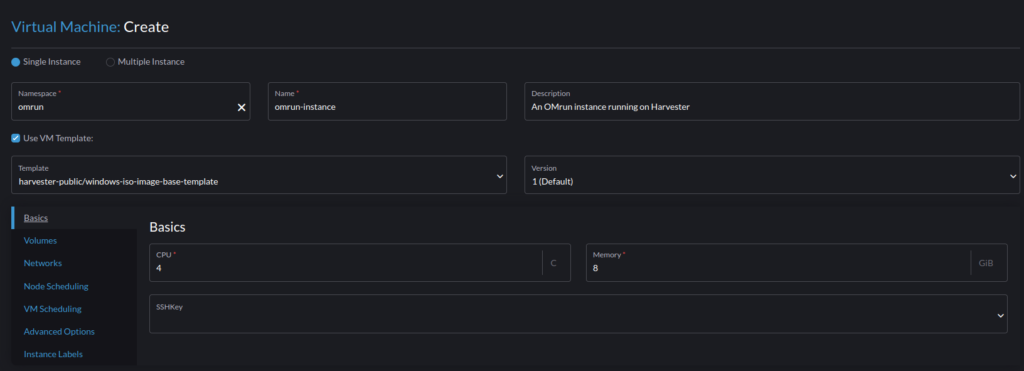
Move on to the storage. By selecting the “Volumes” item, we will be able to setup all disks and virtual CD-ROM. Since we use a VM template, we can see that Harvester already provisioned for us some storage devices:
- a cdrom-disk: obviously used for acting as virtual CD-ROM drive,
- Root disk: the main disk drive of your VM
- virtio-container-disk: an ephemeral type of storage, used when you don’t want any kind of persistence of data. For instance, read-only data, configuration files, or binaries, this is used here for the VirtIO drivers.
The next item is “Networks”. This part deserved its own blog; for ease of comprehension, we are going to leave this as default.
A scheduling strategy?
The following two options are showing, for sure, the connection with Kubernetes. The first one, “Node Scheduling” is there to specify the scheduling strategy of the VM across the cluster. Either on any available node, specific named nodes, or Kubernetes labels assigned to nodes. We would like to preferably run the VM only on nodes with the label omrun set to true.
First, we label the node:
harv01:~ $ kubectl label nodes harv02 omrun=true
node/harv02 labeled
Then, on Harvester interface, your inputs shoud look like this:

The next item is still related to scheduling, “VM Scheduling”. This time, you can specify, for instance, if your workload needs to run on the same node as already existing workloads (for an increase in performance, perhaps ?) or the opposite: you want to ensure that your workload is properly separated from other specific ones.
All this is managed using the same kind of affinity / anti-affinity concepts, dear to Kubernetes.
If you want to know more about that, jump here.
In the following configuration items, in Advanced Options, you’ll be ask to set the behavior of the scheduler, Kubernetes then, on the run strategy of your virtual machine. What would need to happen in case your VM crashed for instance. What should happen if you manually stop your VM. No need to carbon copying the SUSE Harvester documentation.
By the way, this is reminds me the restart policy in the Docker run command, we just discovered less than a decade ago 😉
Once done, you can go forward, and click on the Create button at the bottom right corner.

The spin up of the VM takes a bit of time. Especially on my home lab I’m currently using 😉
But wait.. We are running a Kubernetes cluster here.. Why not going directly on it and trying to see what’s going on? Using our lovely kubectl ?
Well, again it’s quite easy and straight forward. You remember the namespace we created initially ? I’m logged on my Harvester cluster, in SSH.
harv01:~ $ kubectl get vm -n omrun
NAME             AGE   STATUS     READY
omrun-instance   19d   Starting   False
harv01:~ $ kubectl get vmi -n omrun
NAME             AGE   PHASE       IP    NODENAME
omrun-instance   17s   Scheduled         harv02
The virtual machine is currently being started. The VirtualMachine object has status Starting, the VirtualMachineInstance got the Scheduled status.
State of your VM is reflected directly across Kubernetes objects.
We can add the usual -o yaml flag, as we do for pods:
harv01:~ $ kubectl get vm -n omrun -o wide -o yaml
apiVersion: v1
items:
- apiVersion: kubevirt.io/v1
 kind: VirtualMachine
 metadata:
   annotations:
     field.cattle.io/description: An OMrun instance running on Harvester
     harvesterhci.io/reservedMemory: 256Mi
...
        architecture: amd64
        domain:
          cpu:
            cores: 1
          devices:
            disks:
            - bootOrder: 1
              cdrom:
                bus: sata
              name: cdrom-disk
            - bootOrder: 2
              disk:
                bus: virtio
              name: rootdisk
...
All the configuration you’ve made in the UI, is there!
The virtual machine is running now, and as specified, on the second node. The time now is to install the operating system and then, the application. And for that, as we are dealing with a Windows-based virtual machine, it’s more than ssh-ing into a Linux box.
The first try is to use what is proposed by Harvester. Based on my experience with a previous cluster I’ve build with a KubeVirt stack on it, connecting to it on Harvester is a dream. In your list of virtual machines, select the “console” button, and then “Open in WebVNC”.
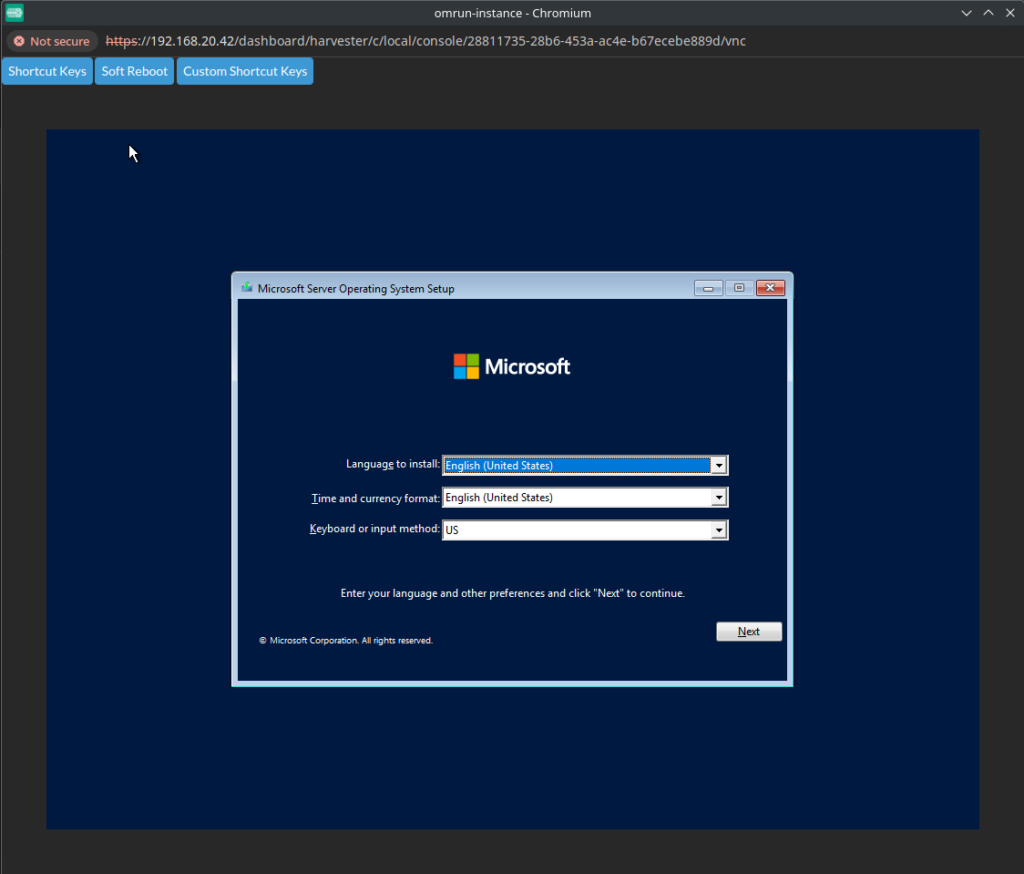
Then, what is following is nothing else but a standard Microsoft Windows Server 2022 installation. The only point of attention here would be to select the paravirtualized VirtIO drivers.
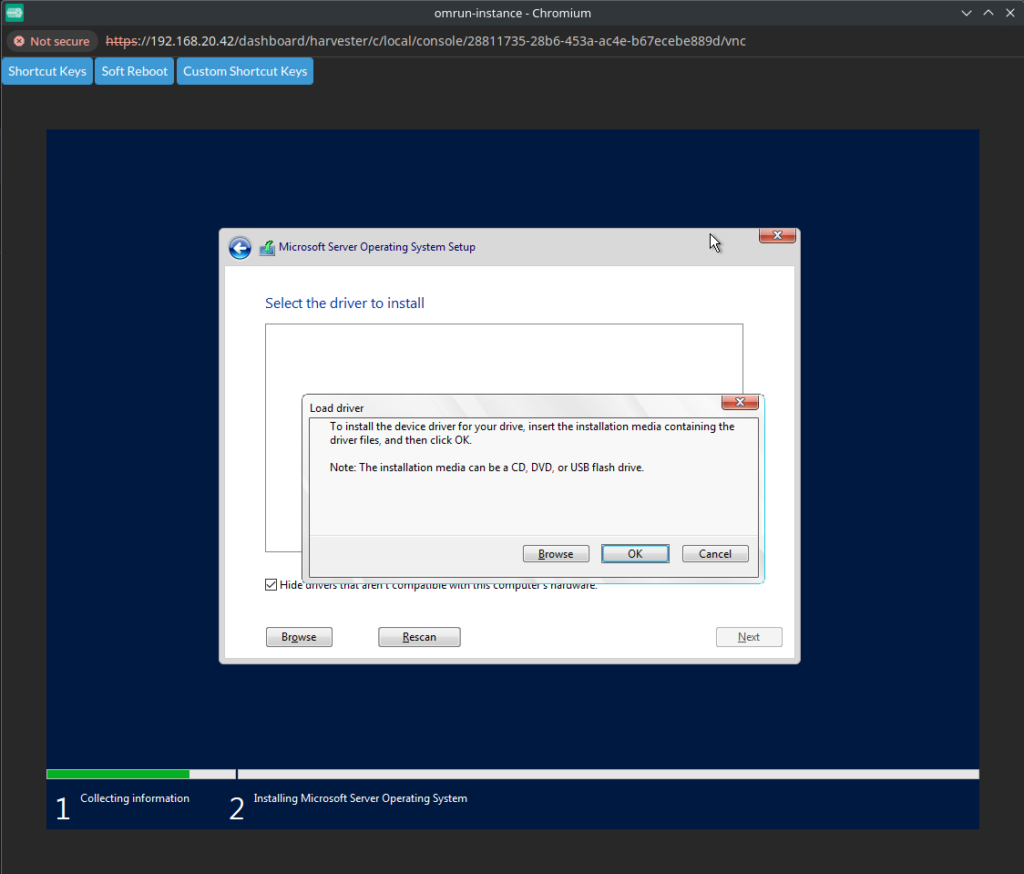
With the power of this blog and some magic, I will fast-forward the installation of OMRun and show you the running application.
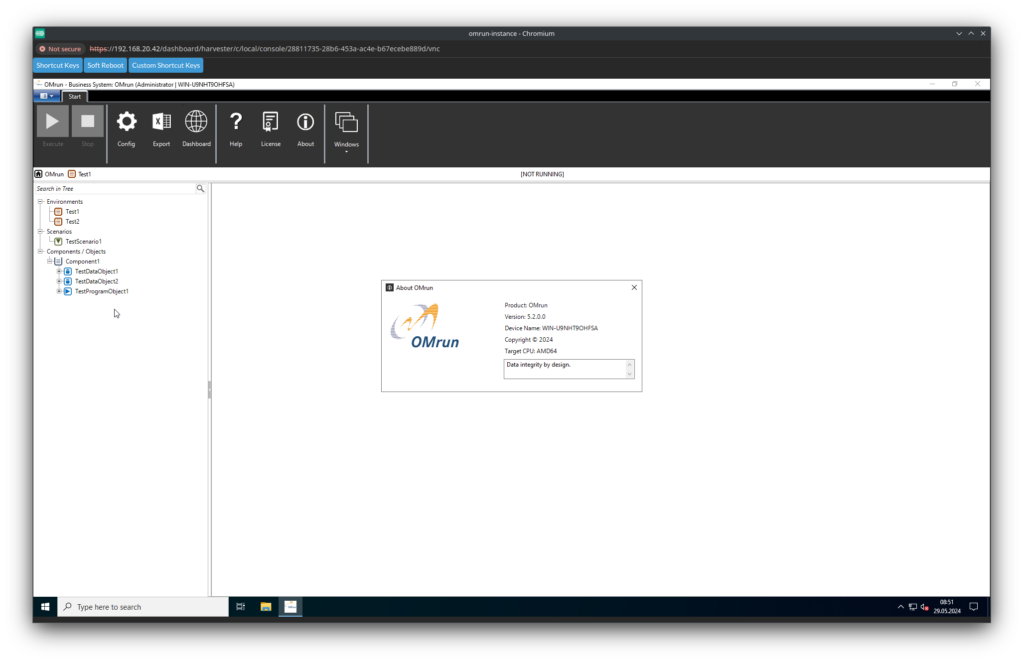
🤔 Strangely, I didn’t manage to get the RDP protocol available. This is probably due to the network settings I’ve left default at the creation. Something to look for in the next part of this blog series.
I haven’t installed the dashboard of OMRun for now, which is accessible from the client through a web browser.
The power of scheduling 💥
What if we mess around with this part? What if we simulate a downtime from one of the nodes in our cluster?
Sadly, this unexpected, unfortunate event could occur on the node that runs, specifically, our Windows Server instance. How will Harvester, KubeVirt, and Kubernetes react?
We can first assign the label omrun=true to our first node.
Then, we simply power off our second node, with the VM running (naughty, I know). And we watch 🙂
First, the second node is set unavailable, cordoned using Kubernetes terms.
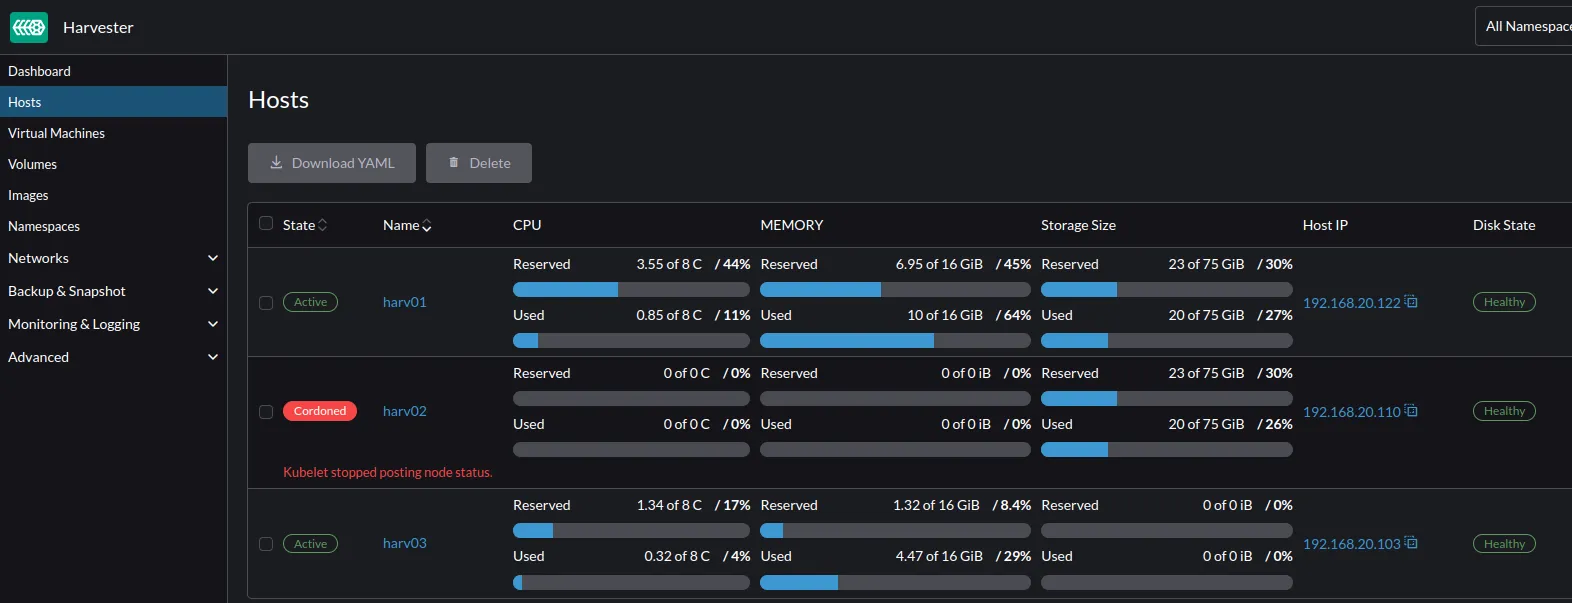
harv01:~ $ kubectl get nodes
NAME     STATUS     ROLES                       AGE   VERSION
harv01   Ready      control-plane,etcd,master   21d   v1.27.10+rke2r1
harv02   NotReady   <none>                      21d   v1.27.10+rke2r1
harv03   Ready      <none>                      21d   v1.27.10+rke2r1
At the same time, the virtual machine is set as not ready, but still, scheduled on harv02. On the Kubernetes side, the same.
harv01:~ $ kubectl get vm -n omrun
NAME             AGE   STATUS    READY
omrun-instance   20d   Running   False
harv01:~ $ kubectl get vmi -n omrun
NAME             AGE     PHASE     IP            NODENAME   READY
omrun-instance   6m32s   Running   10.52.1.122   harv02     False

Let’s wait for the timeouts do their jobs and wait a bit.
harv01:~ $ kubectl get vm -n omrun
NAME             AGE   STATUS    READY
omrun-instance   20d   Running   True
harv01:~ $ kubectl get vmi -n omrun
NAME             AGE   PHASE     IP           NODENAME   READY
omrun-instance   24m   Running   10.52.0.84   harv01     True
Harvester, Kubernetes and KubeVirt in the background, have rescheduled the virtual machine to the next node that fits the constraint we asked for (label omrun=true) which was the harv01 (the master node was not the best idea I had).
Thanks to the replication on the storage backend, Longhorn had replicas for each PersistentVolumes created (defaulted to 3). That means we didn’t lose any data when the second node failed.
We can try to start the VNC console. And voila!
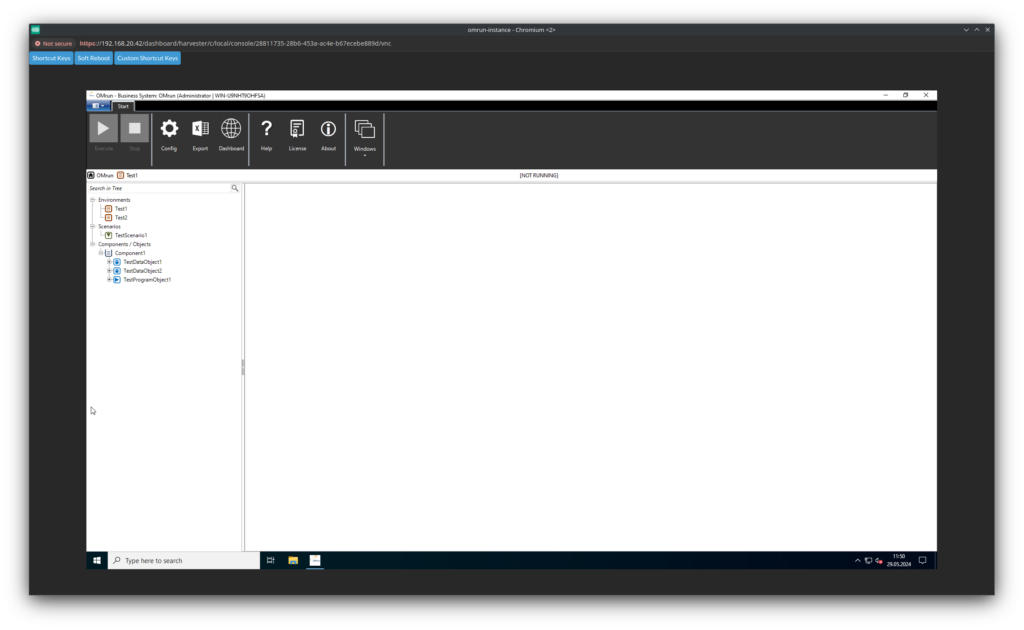
Our virtual machine is running, OMrun is still able to start.
I will for sure continue my exploration of Harvester, and probably, this time, explore the networking aspects of it!
![Thumbnail [90x90]](https://www.dbi-services.com/blog/wp-content/uploads/2025/05/martin_bracher_2048x1536.jpg)
![Thumbnail [90x90]](https://www.dbi-services.com/blog/wp-content/uploads/2024/03/AHI_web.jpg)
![Thumbnail [90x90]](https://www.dbi-services.com/blog/wp-content/uploads/2022/08/HER_web-min-scaled.jpg)