In my previous blog I’ve written about the no or low cost solutions to setup an OpenShift cluster to play with. I’ve detailed the installation of OpenShift Local on Azure. OpenShift Local is like a mini cluster that is installed on just one virtual machine (node). I’ve also shared the tips on how to properly stop the cluster before shutting done the Azure VM. In this blog I’ll share with you how you can connect to your cluster from your laptop. I’ll also share more tips & tricks I’ve gathered along the way that may be good to know.
Starting the Azure VM and the OpenShift Local cluster
Let’s continue where we left off in my previous blog. We were connected through ssh to our Azure VM. From there we were able to run commands to interact with our cluster. However this access is only command line and it would be nice to be able to connect to the OpenShift Web console and benefit fully from what we can do with OpenShift.
At this stage you may have stopped your Azure VM and so let’s start it again and ssh to it when it is running. As I said in my previous blog, you have to check the content of the file /etc/resolv.conf as it may change. I’ll explain more on that below but at this stage the content may be the same as the one you’ve noted when you’ve installed the cluster. Otherwise, just put back the original content. This is important because if the content has been changed, you’ll get the following DNS error when you try to start the cluster:
INFO Check DNS query from host...
WARN foo.apps-crc.testing resolved to [x.x.x.x] but 192.168.130.11 was expected
The DNS resolution point to the IP Address (x.x.x.x) of your interface eth0 instead of the fixed IP Address of the OpenShift Local instance (192.168.130.11) and the cluster will not start.
When this DNS topic is cleared we can then start our OpenShift cluster:
$ crc start
I didn’t mentioned it previously but crc is the embedded tool used to manage our OpenShift Local cluster. As during our installation, starting the cluster takes several minutes (around 10 minutes) and at the end you will get your credentials to connect to it. Let’s now see how to configure our Azure VM to be able to connect directly from our laptop.
Connect to OpenShift Local from your laptop
We need to configure three components in our Azure VM: Firewalld, HA Proxy and NetworkManager. Let’s start wit firewalld:
[enb@enb-OpenShift ~]$ sudo firewall-cmd --add-port=80/tcp --permanent
[enb@enb-OpenShift ~]$ sudo firewall-cmd --add-port=6443/tcp --permanent
[enb@enb-OpenShift ~]$ sudo firewall-cmd --add-port=443/tcp --permanent
[enb@enb-OpenShift ~]$ sudo systemctl restart firewalld
[enb@enb-OpenShift ~]$ sudo firewall-cmd --list-all
public (active)
  target: default
  icmp-block-inversion: no
  interfaces: eth0
  sources:
  services: cockpit dhcpv6-client ssh
  ports: 80/tcp 6443/tcp 443/tcp
  protocols:
  forward: no
  masquerade: no
  forward-ports:
  source-ports:
  icmp-blocks:
  rich rules:

[enb@enb-OpenShift ~]$ sudo semanage port -a -t http_port_t -p tcp 6443
So you just open the required port in the operating system firewall to connect to the cluster. In my previous blog, you may remember that we also opened those ports in the NSG of the public interface of our Azure VM. You now have access to those ports to connect directly to your cluster.
The next step is to install and configure HA Proxy which is used to receive the request from your laptop on those ports and direct them to the cluster:
[enb@enb-OpenShift ~]$ sudo dnf -y install haproxy policycoreutils-python-utils jq
[enb@enb-OpenShift ~]$ sudo cp /etc/haproxy/haproxy.cfg /etc/haproxy/haproxy.cfg.bak

[enb@enb-OpenShift ~]$ tee haproxy.cfg &>/dev/null <<EOF
global
        debug

defaults
        log global
        mode    http
        timeout connect 5000
        timeout client 5000
        timeout server 5000

frontend apps
    bind SERVER_IP:80
    bind SERVER_IP:443
    option tcplog
    mode tcp
    default_backend apps

backend apps
    mode tcp
    balance roundrobin
    option ssl-hello-chk
    server api.crc.testing CRC_IP:443 check

frontend api
    bind SERVER_IP:6443
    option tcplog
    mode tcp
    default_backend api

backend api
    mode tcp
    balance roundrobin
    option ssl-hello-chk
    server api.crc.testing CRC_IP:6443 check
EOF

[enb@enb-OpenShift ~]$ export SERVER_IP=$(hostname --ip-address)
[enb@enb-OpenShift ~]$ export CRC_IP=$(crc ip)
[enb@enb-OpenShift ~]$ sed -i "s/SERVER_IP/$SERVER_IP/g" haproxy.cfg
[enb@enb-OpenShift ~]$ sed -i "s/CRC_IP/$CRC_IP/g" haproxy.cfg
[enb@enb-OpenShift ~]$ sudo cp haproxy.cfg /etc/haproxy/haproxy.cfg
[enb@enb-OpenShift ~]$ sudo systemctl start haproxy
[enb@enb-OpenShift ~]$ sudo systemctl enable haproxy.service
After downloading the haproxy package, you create its configuration file and fill it with the appropriate IP Addresses of your VM as well as the cluster. At this stage HA Proxy is up and running!
The last component to configure is the NetworkManager of the Azure VM:
[enb@enb-OpenShift ~]$ sudo tee /etc/NetworkManager/conf.d/use-dnsmasq.conf &>/dev/null <<EOF
[main]
dns=dnsmasq
EOF

[enb@enb-OpenShift ~]$ tee external-crc.conf &>/dev/null <<EOF
address=/apps-crc.testing/SERVER_IP
address=/api.crc.testing/SERVER_IP
EOF

[enb@enb-OpenShift ~]$ export SERVER_IP=$(hostname --ip-address)
[enb@enb-OpenShift ~]$ sed -i "s/SERVER_IP/$SERVER_IP/g" external-crc.conf
[enb@enb-OpenShift ~]$ sudo cp external-crc.conf /etc/NetworkManager/dnsmasq.d/external-crc.conf
[enb@enb-OpenShift ~]$ sudo systemctl reload NetworkManager
We’ve configured NetworkManager to use dnsmasq and this is where the file /etc/resolv.conf is changed when you reload NetworkManager (or restart the VM). This configuration is OK as long as the cluster is running, however when you stop and restart it, you need to recover the initial configuration of /etc/resolv.conf as mentioned above.
Setting on your laptop
On your laptop you have to add the following in the file /etc/hosts (or \WINDOWS\system32\drivers\etc\hosts if you are using Windows) where x.x.x.x is the public IP Address of your Azure VM:
x.x.x.x api.crc.testing canary-openshift-ingress-canary.apps-crc.testing console-openshift-console.apps-crc.testing default-route-openshift-image-registry.apps-crc.testing downloads-openshift-console.apps-crc.testing oauth-openshift.apps-crc.testing
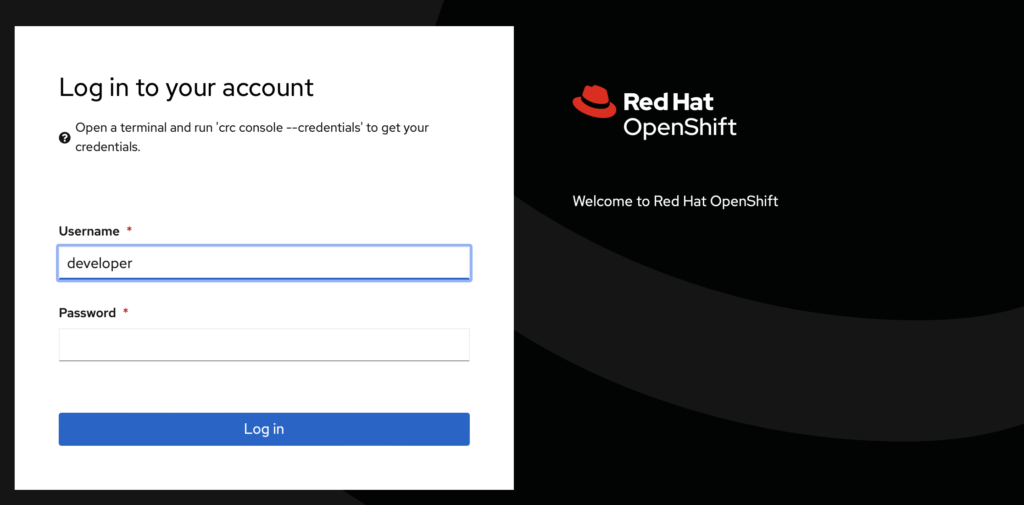
You have now an access to the OpenShift Web console when you enter https://console-openshift-console.apps-crc.testing in your web browser. Choose insecure connection when asked and you will see the login screen:
You can also use now the command line interface directly from your laptop:
% oc login -u kubeadmin -p <kubeadmin_password> https://api.crc.testing:6443 --insecure-skip-tls-verify=true
This is convenient if you want to apply some yaml file you have on your laptop directly to the cluster without the need to copy them to the Azure VM first.
Congratulations! You are now fully ready to test your OpenShift Local cluster!
Last words to keep your environment healthy: When you need to shut your Azure VM down, proceed as recommended in my previous blog first:
$ oc logout
$ crc stop
Then stop the VM. When you start it up again, proceed as follows after restoring first the /etc/resolv.conf file:
$ crc start
$ crc status
When crc start is completed, the cluster may not be immediately available so check its status with crc status and wait to see OpenShift: Running.
That’s all for today! I wish you much fun with OpenShift!
![Thumbnail [90x90]](https://www.dbi-services.com/blog/wp-content/uploads/2022/08/GRE_web-min-scaled.jpg)
![Thumbnail [90x90]](https://www.dbi-services.com/blog/wp-content/uploads/2022/08/ADE_WEB-min-scaled.jpg)
![Thumbnail [90x90]](https://www.dbi-services.com/blog/wp-content/uploads/2022/08/NME_web-min-scaled.jpg)