During my last blog-posts I tested the MARS (Microsoft Azure Recovery Service) through Windows Admin Center and how to use Azure Backup to recover files/folders or System State for protected servers.
To continue my Azure protection possibilities overview I will today installed a MABS on one of my virtual on-premise server and uses it to protect my others virtual on-premises servers.
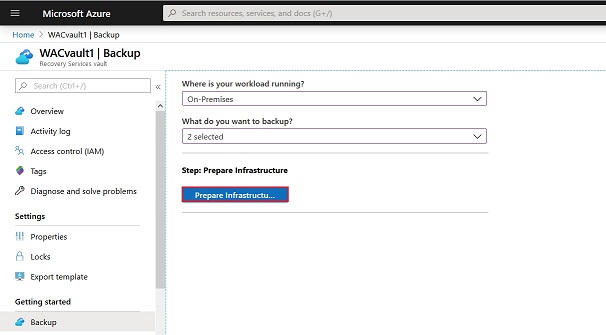
To do so you go to your Azure Recovery Services vault. A vault is indeed a place on Azure where backup will be stored. Recovery Service vault give the possibility to manage backup server, monitor backup, manage access to those backup and specify also how the vault will be replicated.
On your Recovery Service vault just go on Getting Started, Backup and select where your workload is running, here on-premises, and what do you want to backup, here select Hyper-V Virtual Machines and Microsoft SQL Server. This selection can be changed later when you will protect your Virtual Machine. Press the Prepare infrastructure button:
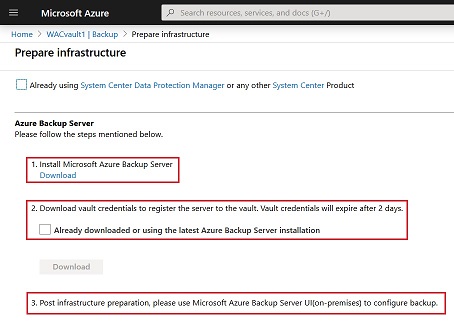
Once done you have to download installation files for the MABS and also credential to connect your MABS to your Azure Recovery Server vault:
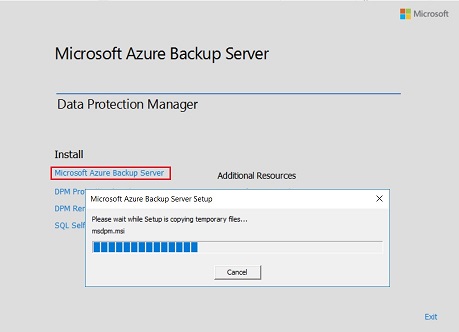
Next step is to copy downloaded files on your future MABS server and start installation.
This server should fit some minimum requirements:
- Two cores and 8GB RAM
- Windows server 2016 or 2019 64 bits
- Part of a domain
- .NET 3.5 has to be installed if you want to install SQL Server (will be required during the installation)
If requirements are fulfilled you can start the installation:
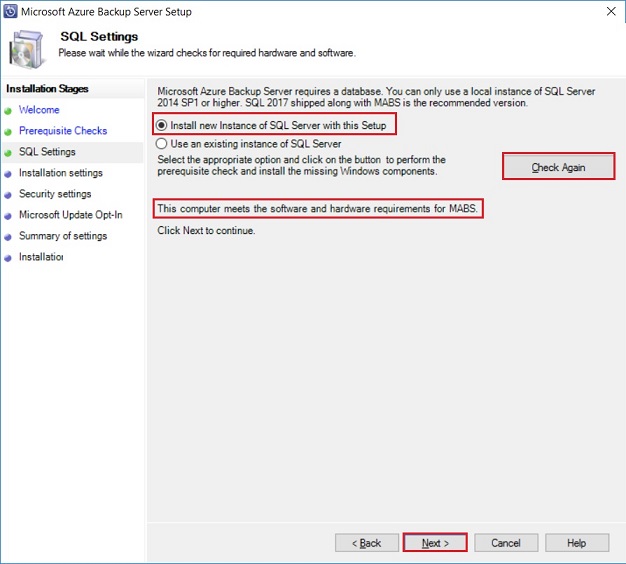
After a prerequisite check the wizard ask you if you want to install a new SQL Server 2017 instance which will be used with MABS, Reporting Service will be also installed for reporting capabilities or use an existing one. Here we will install a new one:
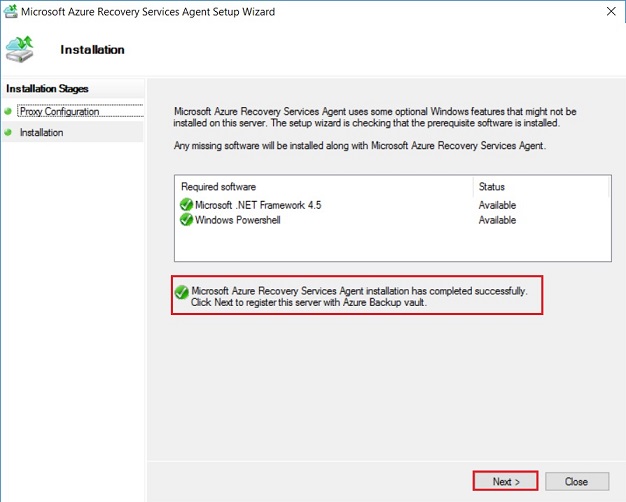
Installation settings will be displayed afterwards with space requirements and possibility to change files location for the MABS. A password will also be asked for the SQL Service accounts created during the SQL Server installation. A summary of the future installation is displayed and the install can start by first checking that necessary Windows Features are installed:
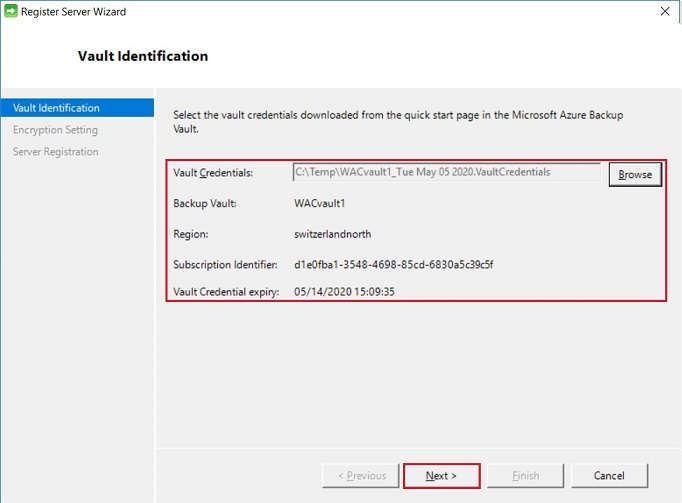
The next step is to connect your MABS to your Service Recovery Vault, you have to use the Vault credential file downloaded before:
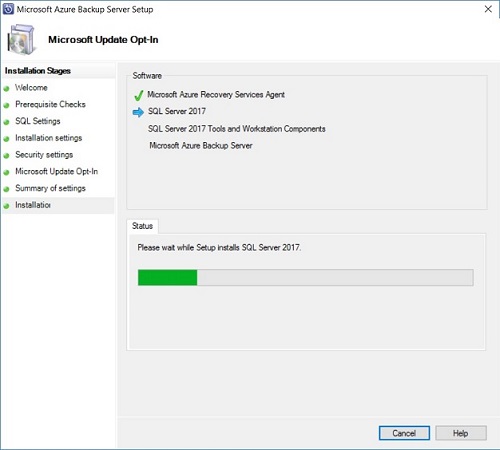
Backups are encrypted for security reason, a passphrase as to be typed or generated and as to be saved in a secure location like a keypass locally or in Azure on Key Vault. Once done the server is registered with the Microsoft Azure Backup and installation can start:
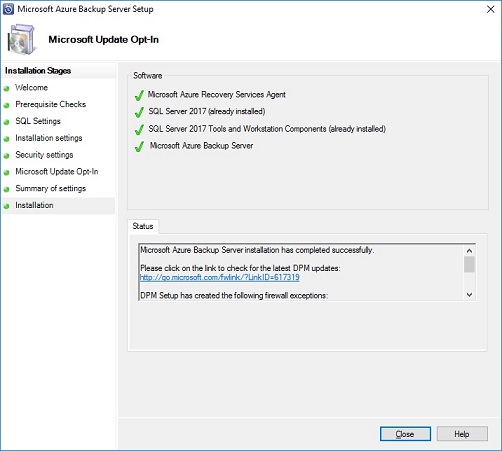
At the end all should be green, I had an issue when I tried to use an existing instance of SQL Server during another installation, the problem came because my instance didn’t have SQL Client tools installed, so if you use an existing SQL instance have a look before otherwise you will have to redo the complete installation. But here installation succeeded:
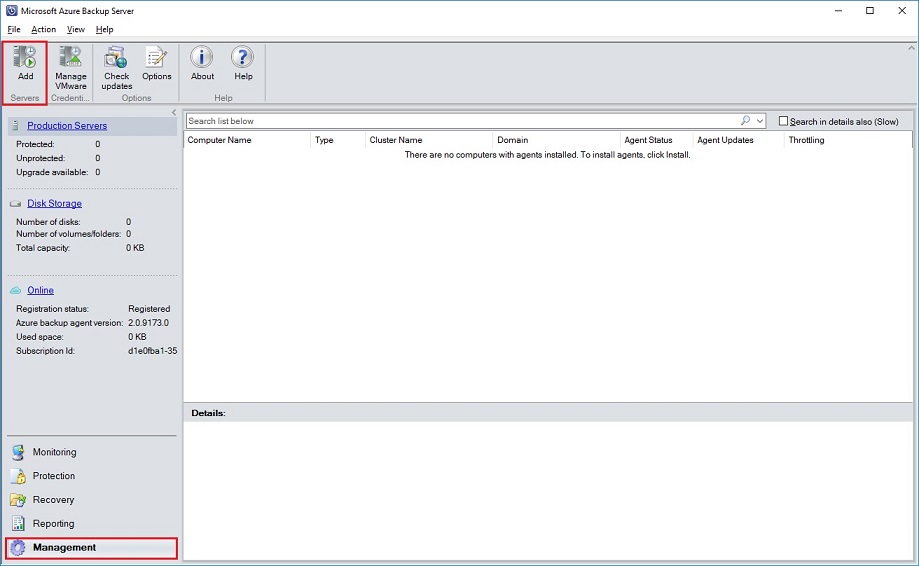
After installation you should find a shortcut on your desktop to open your MABS, let’s open it and go to the Management part in order to add new on-premise servers to your MABS to back up their workload:
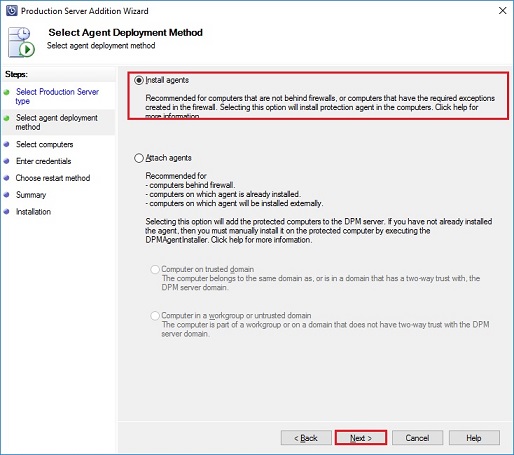
After you click on the Add button a wizard appears. You can select the type of server you want to protect, here Windows Servers and the deployment method you will use to deploy the agent, here agent installation:
A list of servers located in the same domain as you MABS are displayed and you can add the servers where you want to deploy the agent:
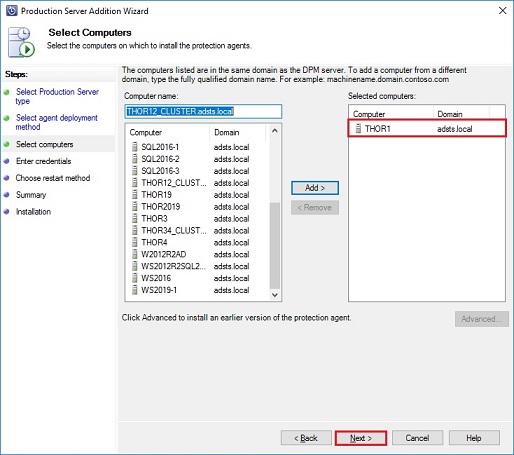
After you have to specify administrator credential for the servers where you want to install agent. DPM (Data Protection Manager, in fact your MABS) will use those credentials to install the agent on servers. Restart method is also requested in case a restart is necessary after the agent installation. Once those steps are finished, protection agents are installed on servers:
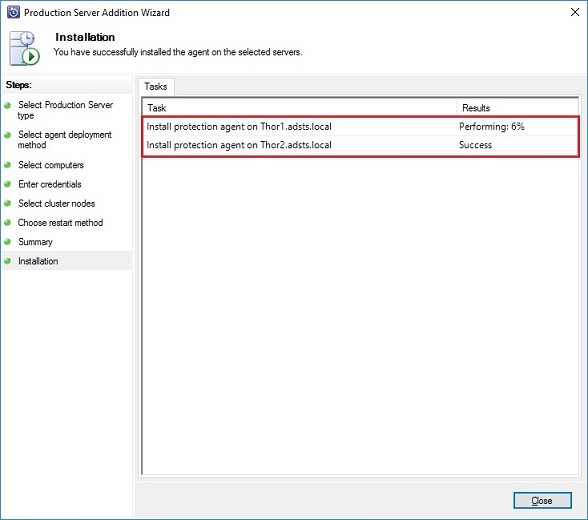
When installation complete successfully you have you selected server in your MABS:
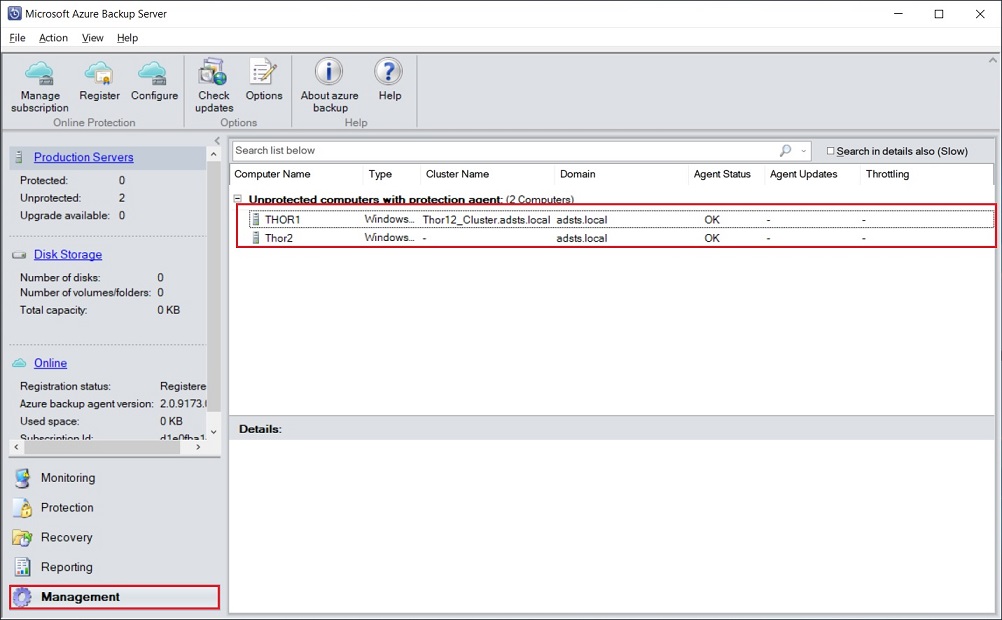
Those servers are marked as unprotected because for the moment you don’t create any rules to protect the workload running on those servers.
It will be the goal of my next blog-post.
See you soon!
![Thumbnail [60x60]](https://www.dbi-services.com/blog/wp-content/uploads/2022/10/STS_web-min-scaled.jpg)
![Thumbnail [90x90]](https://www.dbi-services.com/blog/wp-content/uploads/2022/08/STH_web-min-scaled.jpg)
![Thumbnail [90x90]](https://www.dbi-services.com/blog/wp-content/uploads/2022/11/TBR-web-min-scaled.jpg)
![Thumbnail [90x90]](https://www.dbi-services.com/blog/wp-content/uploads/2025/11/LTO_WEB.jpg)
![Thumbnail [90x90]](https://www.dbi-services.com/blog/wp-content/uploads/2023/01/APY_web-scaled.jpg)