In the previous post we’ve installed the DBVISIT StandbyMP agents on the database nodes, and the management console on third node. In this post we’re going to create our first PostgreSQL configuration. At the end of this post we should have a primary PostgreSQL instance replicating to a replica, and this configuration is managed by DBVISIT StandbyMP.
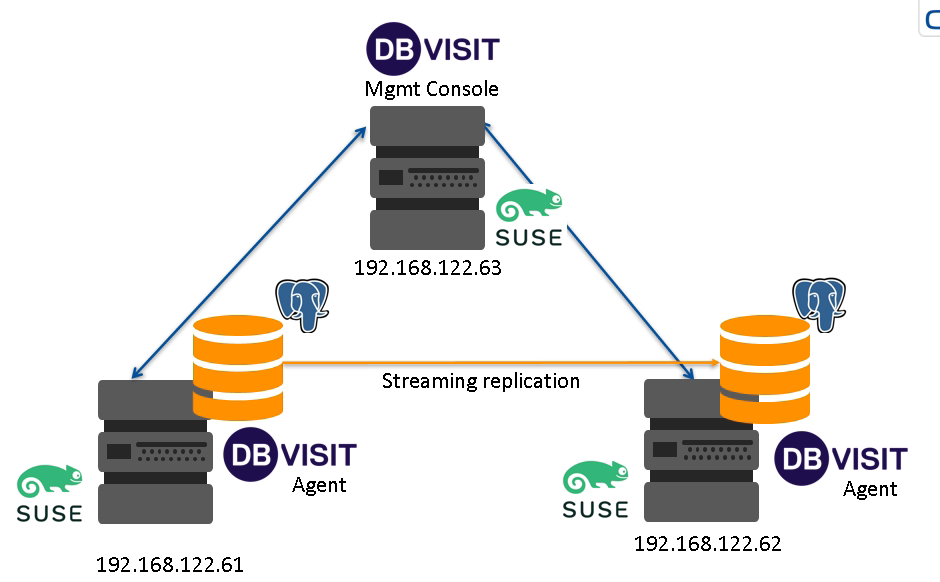
This is the same overview picture as in the last post and we should end up with something like this:
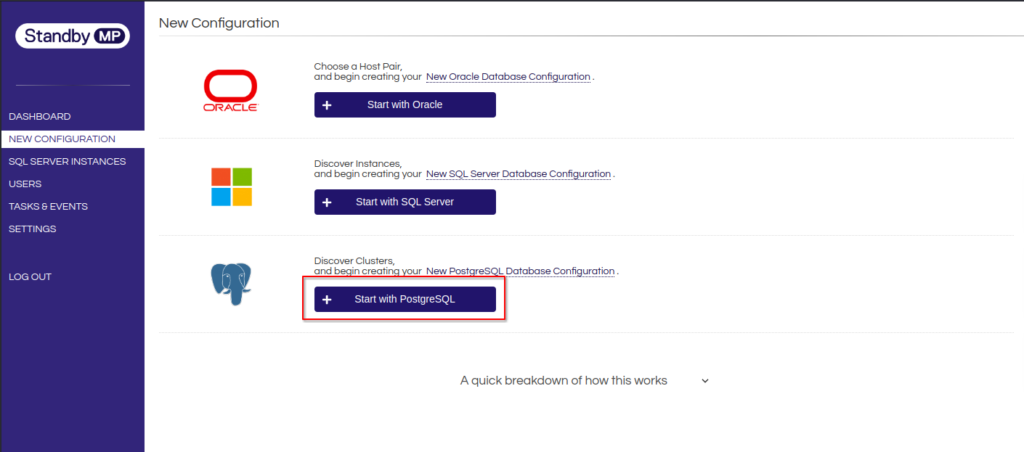
As stated in the previous post, a PostgreSQL instance should already be running on one of the database nodes, before a new configuration is created in the management console. Once this is ready, we can start to create the new configuration:
This will bring up a new dialog which presents the hosts we’ve installed the agents on. In this setup, the PostgreSQL instance is running on the first node, so we’ll go with that:
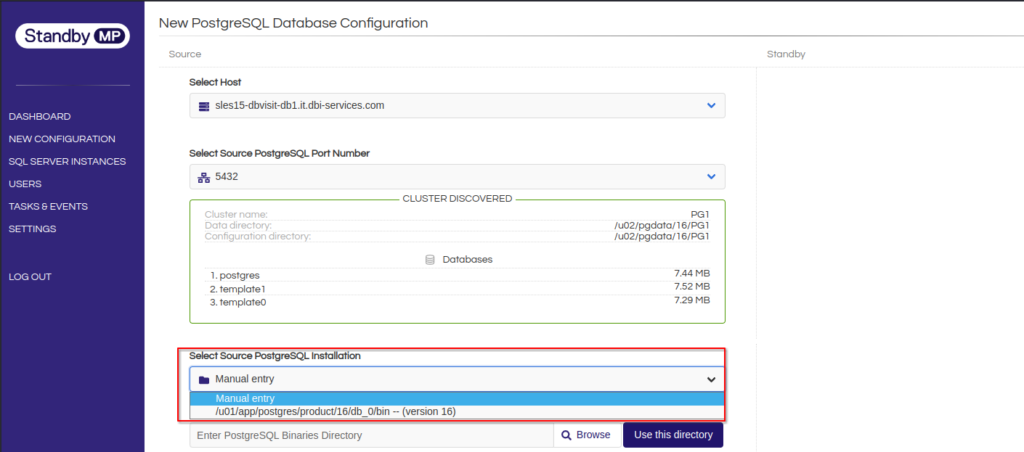
The agent already detected the data directory and the port of the running instance, and lists the available databases. Same for the binaries: Select the correct installation from the list and the screen will adapt and display the “Standby” section on the right:
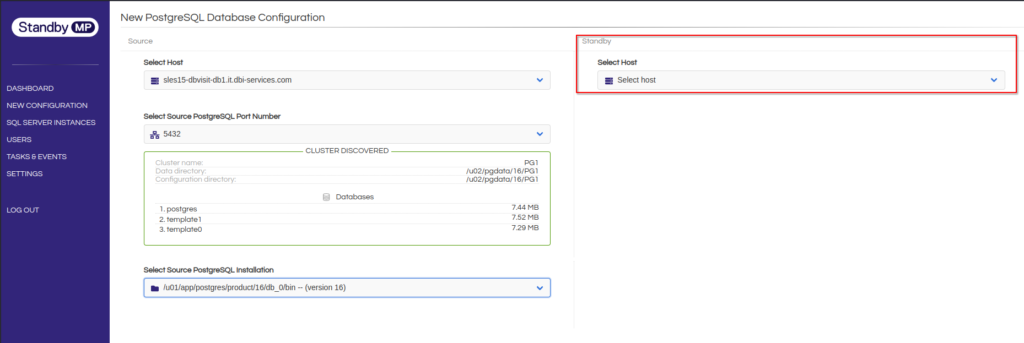
Same procedure: Select the second node and then manually provide the path to the PostgreSQL binaries. As no instance is running on the second node, this is not auto-detected:

Finally give your configuration a name and provide the license key you should have received right after downloading the software:
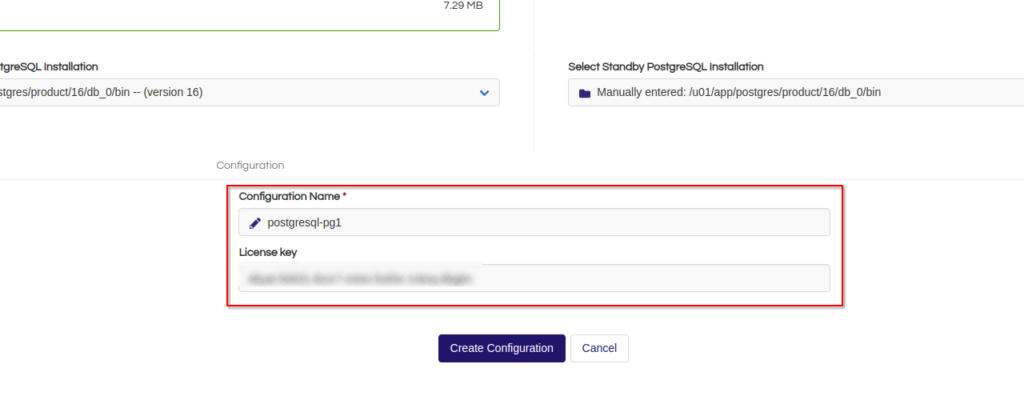
This created the configuration but did not yet create the replica:

Let’s create the replica. This will bring up the following screen:
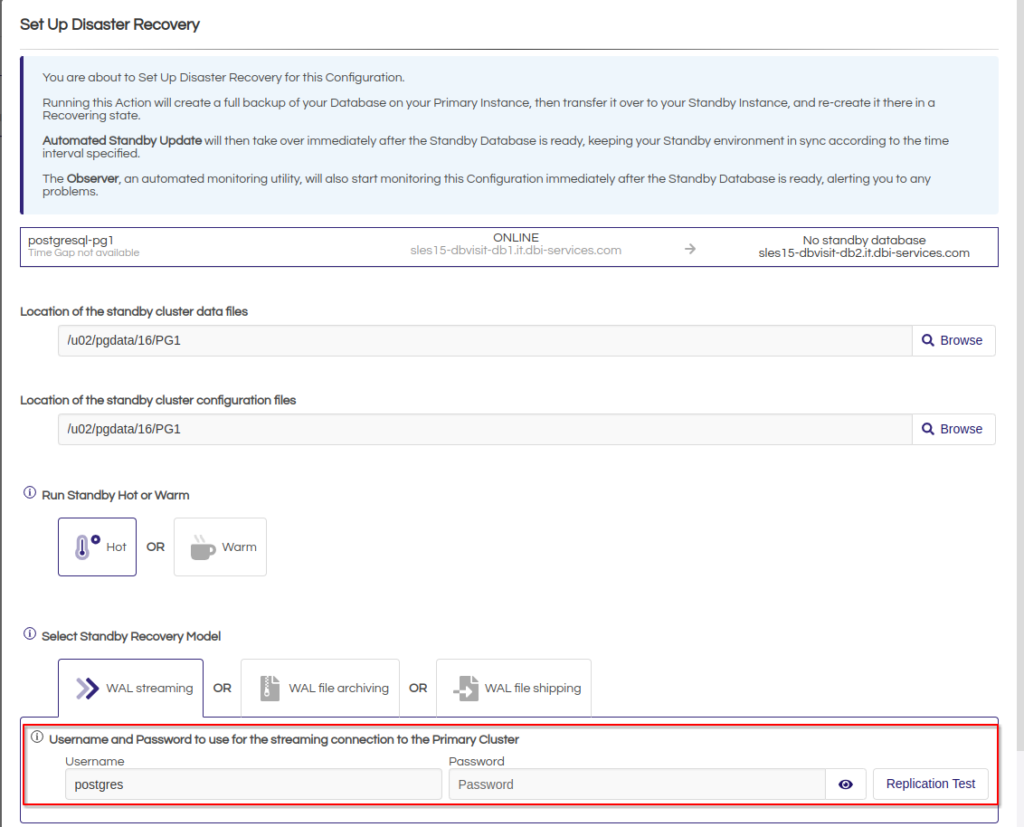
As we do not have any additional users in the instance and the “postgres” user does not have a password, we’ll just create an additional user we’ll use for the replication:
postgres=# create user replicator with password 'replicator' superuser;
CREATE ROLE
As soon as this information is provided the screen comes up with this message:

This means we need to pre-configure the pg_hba.conf (this is after the configuration change and reloading the configuration):
postgres=# select * from pg_hba_file_rules where user_name[1] = 'replicator';
 rule_number |           file_name            | line_number | type |   database    |  user_name   |    address     |     netmask     |  auth_method  | options | error
-------------+--------------------------------+-------------+------+---------------+--------------+----------------+-----------------+---------------+---------+-------
           7 | /u02/pgdata/16/PG1/pg_hba.conf |         127 | host | {replication} | {replicator} | 192.168.122.61 | 255.255.255.255 | scram-sha-256 |         |
           8 | /u02/pgdata/16/PG1/pg_hba.conf |         128 | host | {replication} | {replicator} | 192.168.122.62 | 255.255.255.255 | scram-sha-256 |         |
(2 rows)
Doing a quick “Replication Test” and starting the creation of the replica:
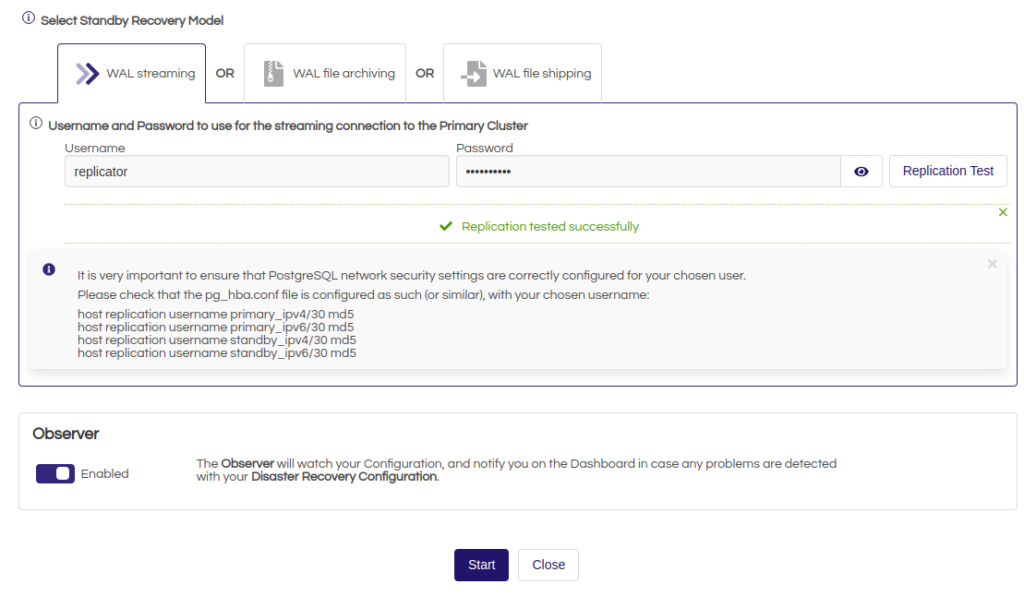

This looks fine. Checking the primary for the status of the replication and the replication slots confirms, that we have a replica attached:
postgres=# \x
Expanded display is on.
postgres=# select * from pg_stat_replication;
-[ RECORD 1 ]----+------------------------------
pid              | 1862
usesysid         | 16388
usename          | replicator
application_name | PG1
client_addr      | 192.168.122.62
client_hostname  |
client_port      | 43946
backend_start    | 2023-10-30 10:30:34.49343+01
backend_xmin     |
state            | streaming
sent_lsn         | 0/4000060
write_lsn        | 0/4000060
flush_lsn        | 0/4000060
replay_lsn       | 0/4000060
write_lag        |
flush_lag        |
replay_lag       |
sync_priority    | 0
sync_state       | async
reply_time       | 2023-10-30 10:31:24.515879+01

postgres=# select * from pg_replication_slots ;
-[ RECORD 1 ]-------+----------
slot_name           | dbvisit_1
plugin              |
slot_type           | physical
datoid              |
database            |
temporary           | f
active              | t
active_pid          | 1862
xmin                | 742
catalog_xmin        |
restart_lsn         | 0/4000060
confirmed_flush_lsn |
wal_status          | reserved
safe_wal_size       |
two_phase           | f
conflicting         |
That’s it for now, in the next post we’ll look at how the system behaves for controlled switch- and unplanned failovers.
![Thumbnail [60x60]](https://www.dbi-services.com/blog/wp-content/uploads/2022/08/DWE_web-min-scaled.jpg)
![Thumbnail [90x90]](https://www.dbi-services.com/blog/wp-content/uploads/2022/08/STH_web-min-scaled.jpg)
![Thumbnail [90x90]](https://www.dbi-services.com/blog/wp-content/uploads/2022/09/SNA_web-min-scaled.jpg)
![Thumbnail [90x90]](https://www.dbi-services.com/blog/wp-content/uploads/2024/01/HME_web.jpg)