You may have heard a few weeks ago, in France, more than 30 millions Security Social Numbers (SSN) have been stolen. These data have been exfiltrated from databases. In these modern days, you are probably running your website in a container and use Kubernetes for its autoscaling capabilities. You then need to take care of containers security.
A common method to exfiltrate data is to use a Command and Control (C&C also known as C2) attack. It existed before containerization but its principle is still the same. It is about infecting a machine with a malware. An external attacker can then leverage this malware to send command to and receive data from this compromised machine. As a Kubernetes Administrator you have to be able to thwart such attacks and tackle containers security. Let’s find out how in this blog post!
NeuVector observability for containers security
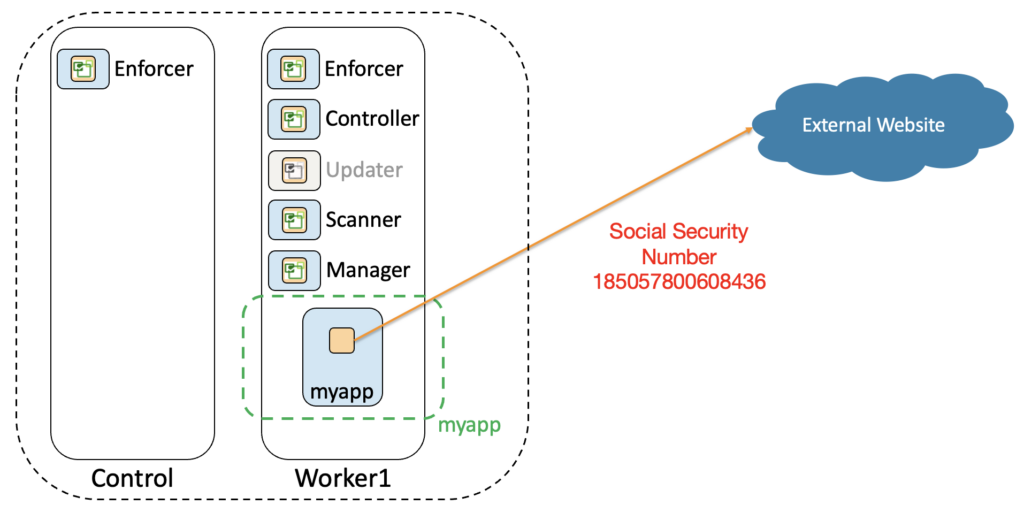
Often C2 tools are used by what we call script kiddies. They have no deep knowledge in security and are just messing around with tools when an opportunity arises. They could use a basic C2 tool to exfiltrate data without being encrypted. This is plain HTTP and with a L7-aware tool you would be able to see these data flowing out. However, by default Kubernetes doesn’t have such observability capacity and what you would see in your network is shown below:
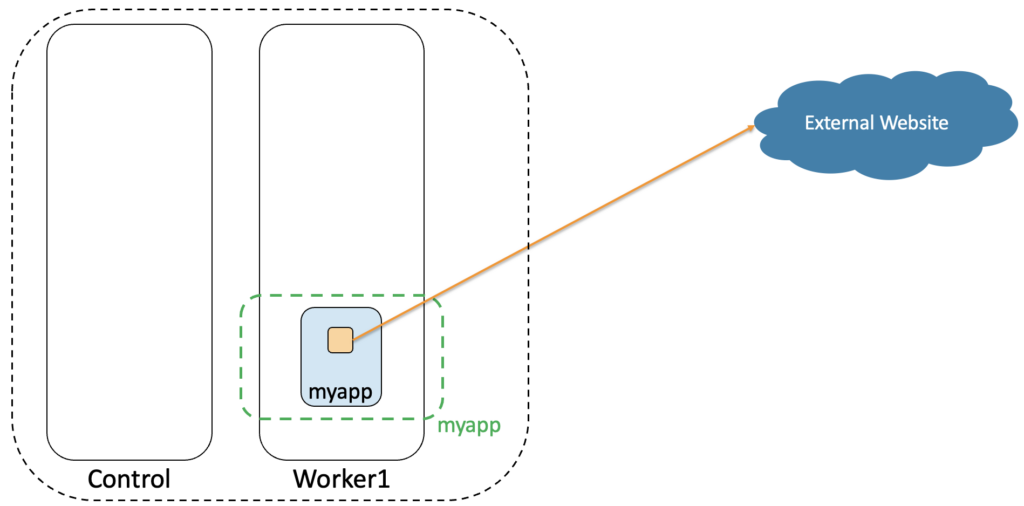
Exactly, you would see nothing! Our orange container in our blue pod myapp (in the green namespace myapp) doesn’t trigger any specific alarm in our Kubernetes cluster. All seems normal whereas this container has been compromised. It exfiltrates data to an external website that is under the control of an attacker.
To be able to detect such exfiltration we will install the application NeuVector from SUSE. It is very easy to install through an operator or with Helm. In a previous blog post, I’ve described how to install it in OpenShift. NeuVector is a Swiss Army knife for security in Kubernetes. It provides numerous features to protect your Kubernetes cluster and improve your overall containers security. Here we will use NeuVector capability to observe data in L7 (here HTTP) of a packet.
Data Loss Prevention (DLP) in NeuVector
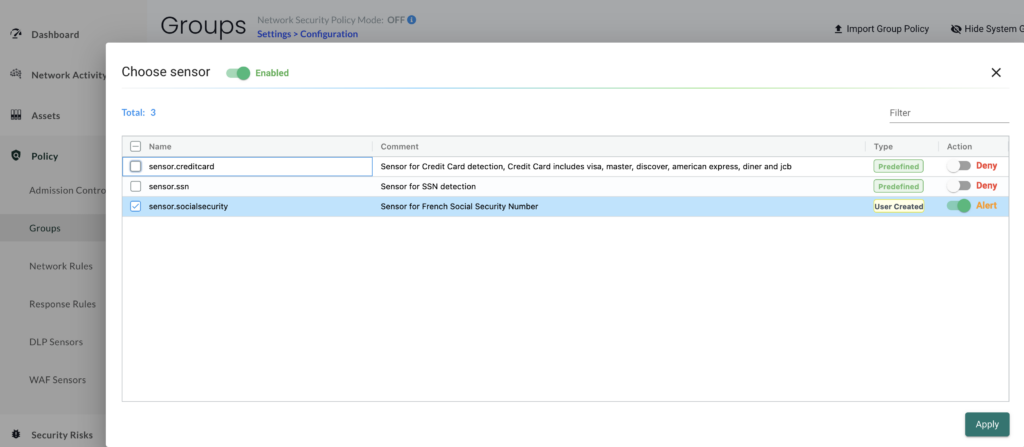
For this L7 observability to operate, we need to configure it in NeuVector. Let’s see how to do that. In NeuVector you can configure DLP sensors. A sensor is just a regex filter to will detect a patters in the L7 of each packet. By default there is a sensor for the American Social Security Number (SSN) and the Credit Card in various formats (visa, master, american express,…). A DLP sensor for the french SSN doesn’t exist so we first need to create it as shown below:
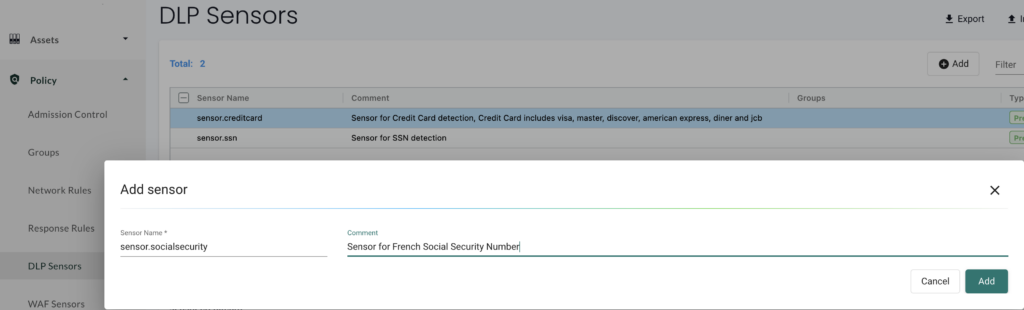
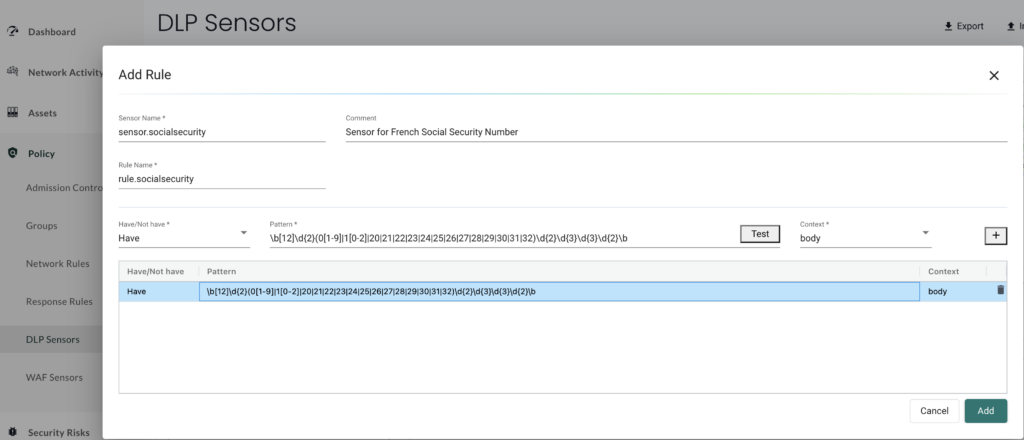
We give a name to our sensor and define the regex pattern that will find a french SSN in any packet. This SSN format is detailed here in French. The regex pattern used is the one below:
\b[12]\d{2}(0[1-9]|1[0-2]|20|21|22|23|24|25|26|27|28|29|30|31|32)\d{2}\d{3}\d{3}\d{2}\b
With this sensor created, we can now apply it to our pod as shown below:
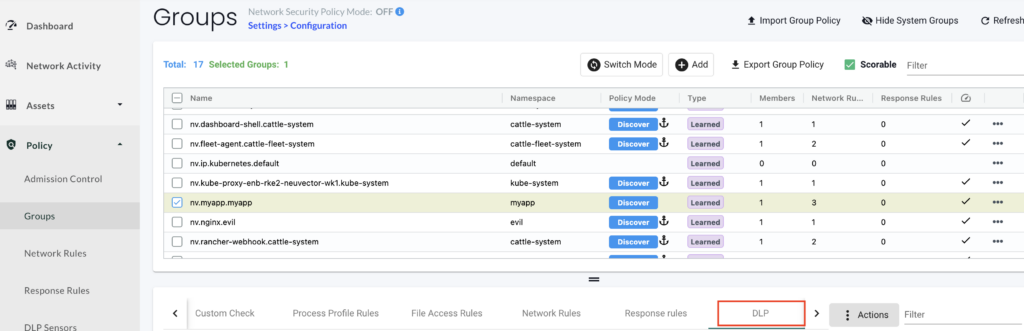
We select our container in our pod and add a DLP Policy to use the sensor we have just created:
We apply our sensor to detect any french SSN and set the action to Alert to just log any match found.
Data exfiltration detection
With NeuVector and this DLP in place, we have added L7 observability in our Kubernetes cluster and can now see the following regarding our pod myapp:
Yes! We can now detect a french SSN being exfiltrated from our Kubernetes cluster.
In NeuVector, we can use the graphical “Network Activity” view to observe the traffic in our cluster and we would see the following:
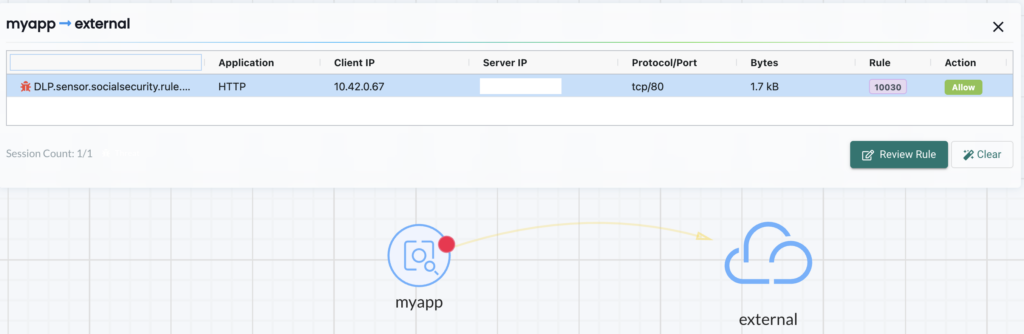
There is a traffic from myapp to the external world and this link is orange. If we click on it, we can see our DLP sensor has detected some traffic that matches our regex filter. We can also see that alert in the security events as shown below:
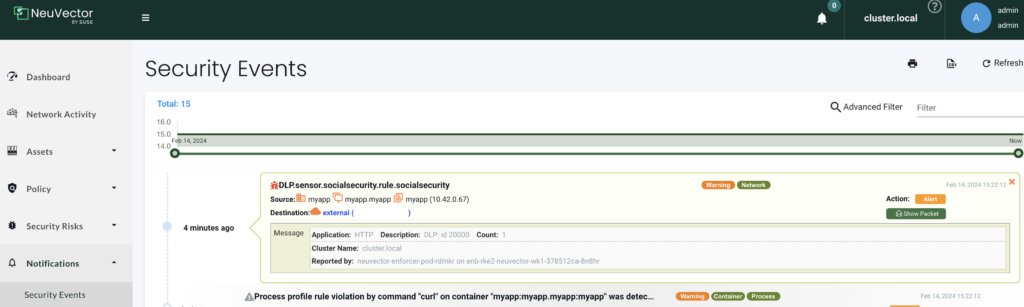
We can see the action is Alert as this is what we have configured. At this stage the traffic is not blocked so our data are still being exfiltrated but at least it is logged.
Remediation
Let’s now see how we could stop these data from being exfiltrated. We will switch the DLP sensor action to “Deny” and switch the pod in “Protect” mode to block that traffic:


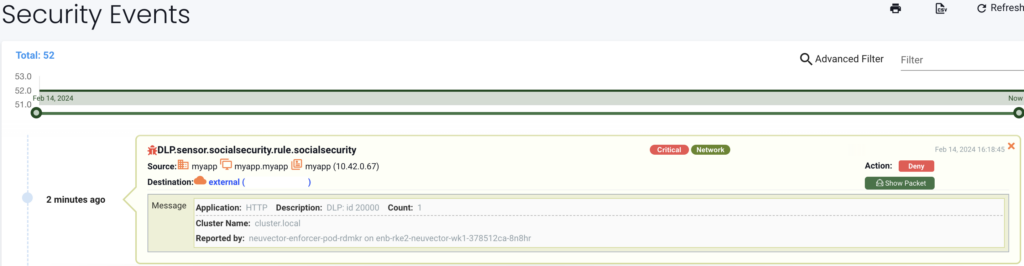
We can now see the deny action below in our security event:
Wrap up
We have seen how NeuVector can provide L7 visibility in your Kubernetes cluster. It can detect a pattern in HTTP packets such as a french SSN, log it and block it. We could also use this method to detect legit applications that would send data unencrypted. This would be a good way to improve your containers security by forcing the use of encryption with HTTPS. In case the data are exfiltrating by using HTTPS we could not use this DLP sensor method but would need to apply a different security strategy. Find out more in this blog post.
![Thumbnail [90x90]](https://www.dbi-services.com/blog/wp-content/uploads/2022/08/GRE_web-min-scaled.jpg)
![Thumbnail [90x90]](https://www.dbi-services.com/blog/wp-content/uploads/2022/10/STS_web-min-scaled.jpg)
![Thumbnail [90x90]](https://www.dbi-services.com/blog/wp-content/uploads/2024/03/AHI_web.jpg)
![Thumbnail [90x90]](https://www.dbi-services.com/blog/wp-content/uploads/2025/11/LTO_WEB.jpg)