Introduction
In one of my missions, I was requested to run performance and load tests on a ADF application running in a Oracle Fusion Middleware environment protected using Oracle Access Manager. For this task we decided to use Apache JMeter because it provides the control needed on the tests and uses multiple threads to emulate multiple users. It can be used to do distributed testing which uses multiple systems to do stress test. Additionally, the GUI interface provides an easy way to manage the load test scenarios that can be easily recorded using the HTTP(s) Test Script Recorder.
Prepare a JMeter test plan
A first start is to review the following Blog: My Shot on Using JMeter to Load Test Oracle ADF Applications
The blog above explains how to record and use a test plan in JMeter.
It provides a SimplifiedADFJMeterPlan.jmx JMeter test plan that can be used as a base for the JMeter test plan creation.
But this ADF starter test plan has to be reviewed for the jsessionId and afrLoop Extractors. As the regular expression associated with them might need to be adapted as they might change depending on the version of the ADF software.
In this environment, Oracle Fusion Middleware ADF 11.1.2.4 WebLogic Server 10.3.6 and Oracle Access Manager 11.2.3 were used.
The regular expressions for afrLoop and jsessionid needed to be updated as shown below:
| reference name | regular expression |
| afrLoop | _afrLoop\’, \’;([0-9]{13,16}) |
| jsesionId | ;jsessionid=([-_0-9A-Za-z!]{62,63}) |
Coming to the single Sign On layer, it appears that the Oracle Access Manager compatible login screen requires three parameters:
- username
- password
- request_id
First username and password pattern values will be provided by the recording of the test scenario. To run the same scenario with multiple users, a CSV file is used to store test users and passwords. This will be detailed later in this blog.
The request_id is provided by the Oracle Access Manager Single Sign On layer and needs to be fetched and re-injected to the authentication URL.
To resolve this, a new variable needed to be created and the regular expression below is used.
| reference name | regular expression |
| requestId | name=\’request_id\’ value=\'([&#;0-9]{18,25})\’; |
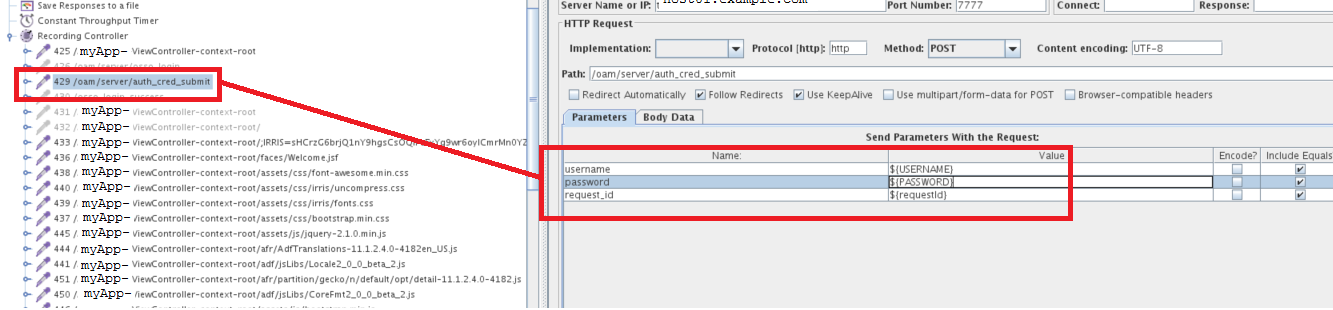
Once the test plan scenario is recorded, look for the OAM standard “/oam/server/auth_cred_submit” URL and change the request_id parameter to use the defined requestId variable.
** click on the image to increase the size

name: request_id value: ${requestId}
After those changes, the new JMeter test plan can be run.
Steps to run the test plan with multiple users
In JMeter,
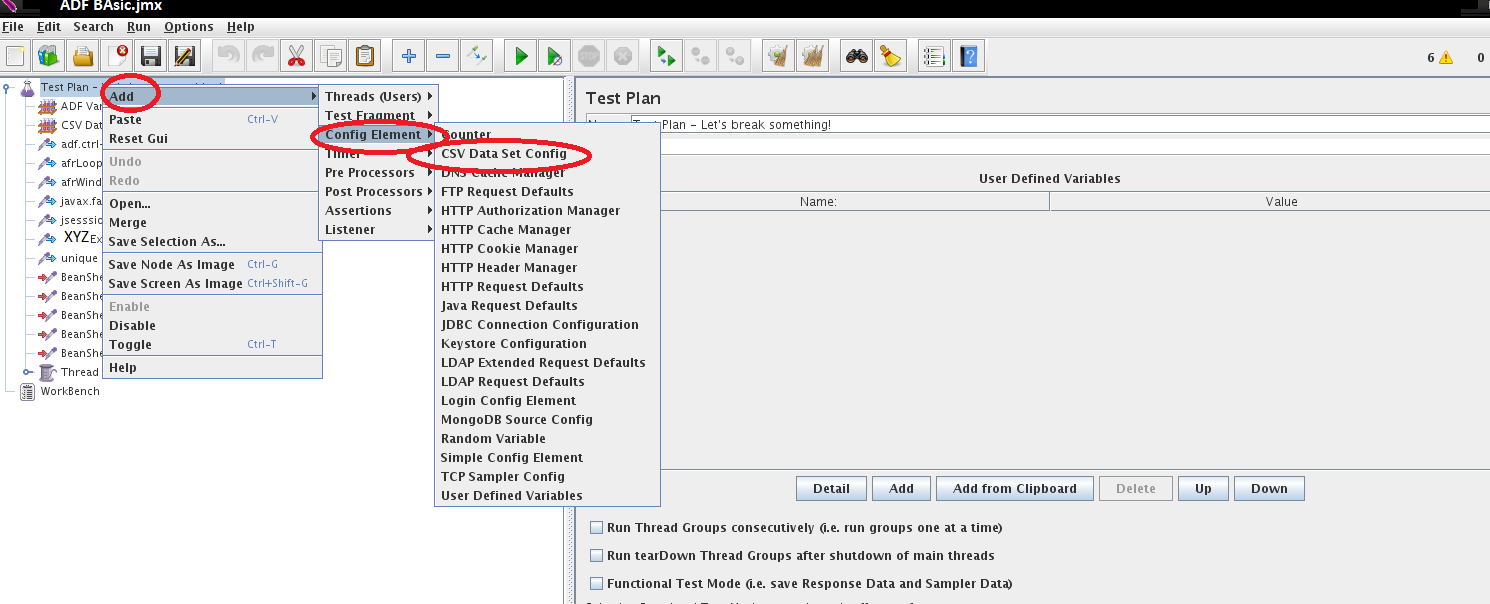
Right click on the “Thread Group” on the tree.
Select “Add” – “Config Element” – “CSV Data Set Config”.
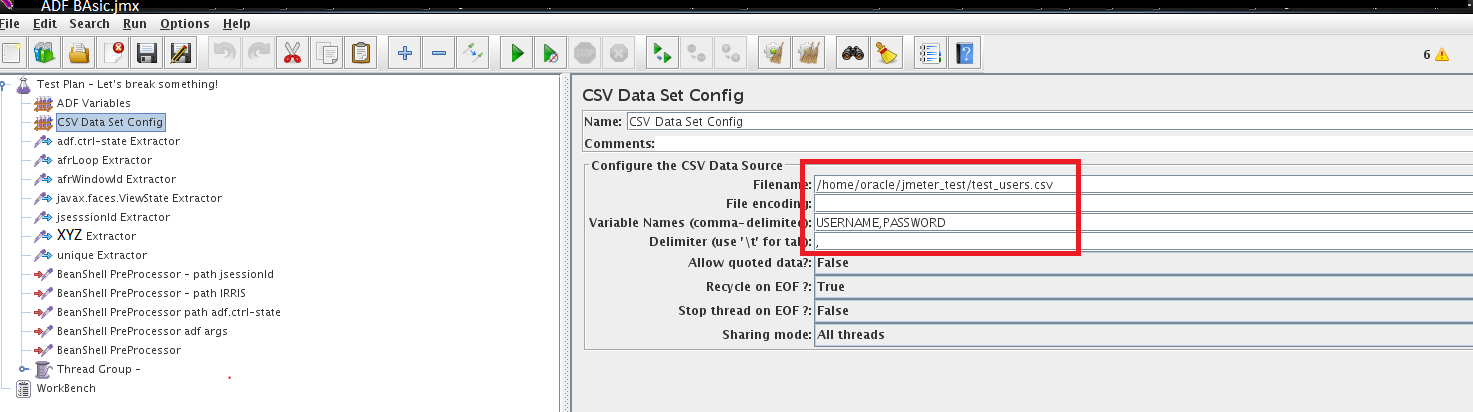
Create a CSV file which contains USERNAME,PASSWORD and saved it in a folder on your Jmeter server. Make sure the users exist in OAM/OID:
ahunold,welcome1
jcooper,welcome1
monty,welcome1
king,welcome1
scott,welcome1
Adapt the path in the “CSV Data Set Config” and define the variable values (USERNAME and PASSWORD) in “Variable Names comma-delimited”
Look for the URL that is submitting the authentication – /oam/server/auth_cred_submit- and click on it. In the right frame, replace the username and password got during the recording with respectively ${USERNAME} and ${PASSWORD} as shown below:
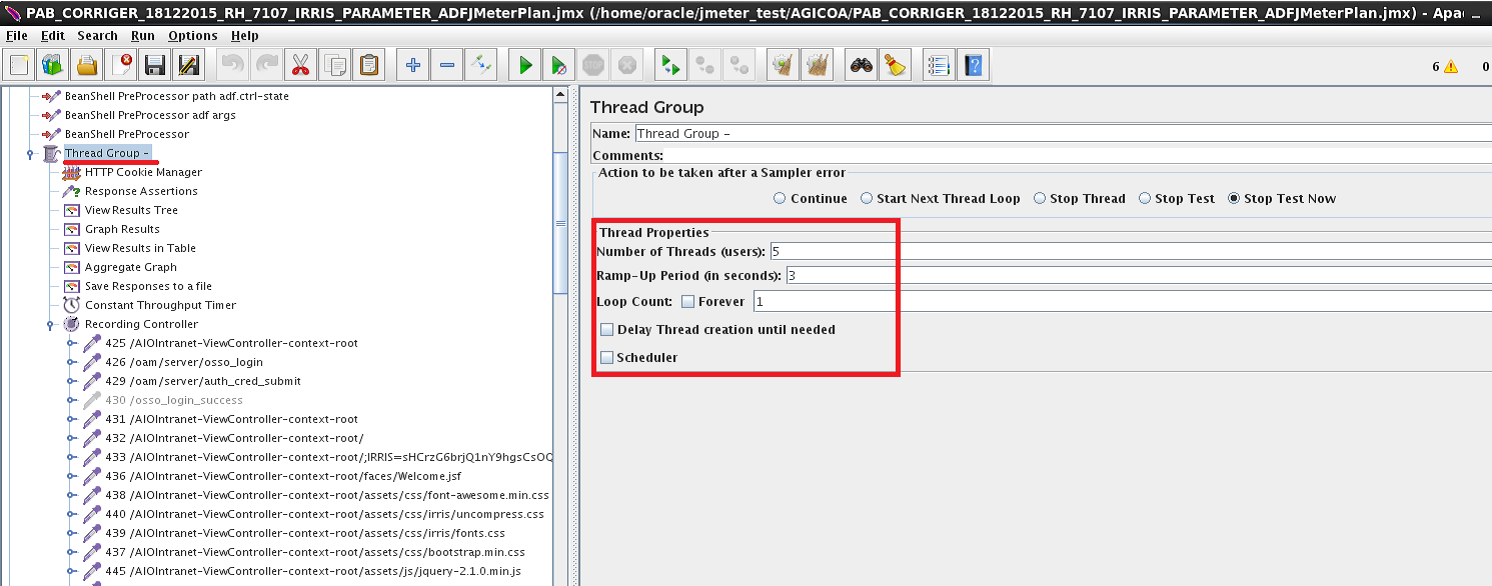
At last you can adapt the thread group of your test plan to the number of users (Number of Threads) and loop (Loop Count) you want to run and execute it. The Ramp-Up Period in Seconds is the time between the Threads start.
The test plan can be executed now and results visualised in tree, graph or table views.
![Thumbnail [90x90]](https://www.dbi-services.com/blog/wp-content/uploads/2022/09/DDI_web-min-scaled.jpg)