I wrote some months ago several blog posts about the new Container feature of Windows Server 2016. Here is the list:
Windows Server 2016: Containers
Windows Containers: Migration
Windows Container: installation and utilization
Today, I will install the Container feature, install Docker and deploy a container.
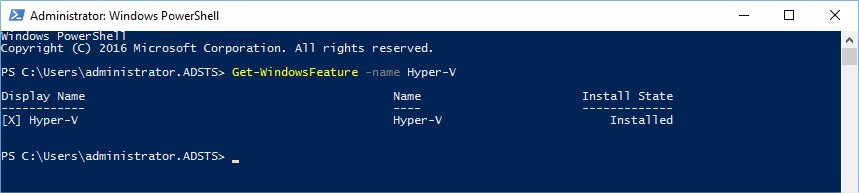
First of all, I need to enable the Container and the Hyper-V feature, take care if you use VirtualBox because after having enable Hyper-V this won’t work anymore.
Windows Server 2016 support only Hyper-V container and no more Windows Container. So I will check if those features are already enable on my server and if it is not the case enable its, don’t forget to map the Windows Server 2016 iso file to your Virtual Machine.
To do it just run this PowerShell cmdlet:
Now, both features are installed in my VM and I can install Docker.
To do so I will download the Docker Engine and Client from the Docker project library here to the folder c:\Temp and unzip the file into c:\ProgramFiles:

I have my Docker folder with Docker executable files and binaries. Dockerd.exe for the Docker engine and docker.exe for the client:

I add also the Docker path to the path environment variable:

Optionally, we could add it forever:

I will install Docker as a Service and start it:

Docker is installed and started, I’m now able to use it. I don’t have any images for the moment but the Microsoft/nanoserver image is available in the Docker Hub:

Let’s download this Nano Server base OS image from the Hub:

Now that I have my Docker OS image, I will start an interactive session with this image:

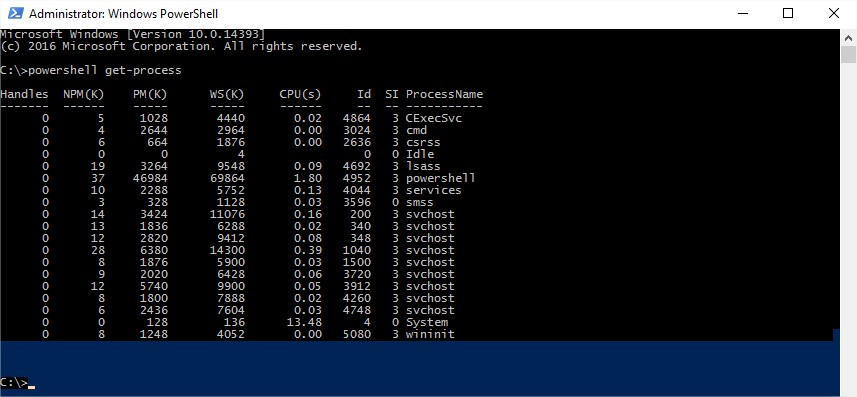
The container starts and we I accessed to the command prompt where I could check the processes running in my container like PowerShell, cmd…:
I will create a PowerShell script in my container to write a Welcome Container message and exit from my container:

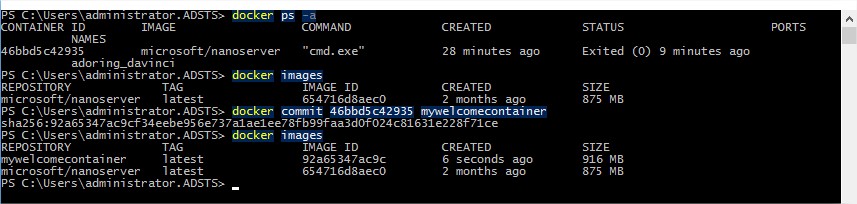
I can now see my new container with the following command:

I will now create a new image from my container’s changes named mywelcomecontainer (it’s not possible to use Upper case for the new container name otherwise you will receive this error “repository name must be lowercase”):
I can finally run my container, it means that a Hyper-V container will be created from my new image named mywelcomecontainer and my PowerShell script will be executed from my container:

As I avoid the Docker run option –rm, I still have my container available if I run a Docker ps –a command. In order to delete my container I can run a Docker rm <containerid>, rmi will delete images if needed.
To conclude, it looks very easy to create images and Hyper-V containers with Docker in Windows Server 2016. The power of Docker is now available in the Windows World and for sure will be used more and more commonly.
![Thumbnail [60x60]](https://www.dbi-services.com/blog/wp-content/uploads/2022/10/STS_web-min-scaled.jpg)
![Thumbnail [90x90]](https://www.dbi-services.com/blog/wp-content/uploads/2022/08/STH_web-min-scaled.jpg)