Nagios is an IT Infrastructure monitoring solution which is able to monitor SQL Server instances with a specific plugin.
I have installed this plugin to test those functionalities and I will explain here how to do it.
Prerequisites installation
FreeTDS installation
FreeTDS is a set of libraries for Unix and Linux that allows your programs to natively talk to Microsoft SQL Server and Sybase databases.
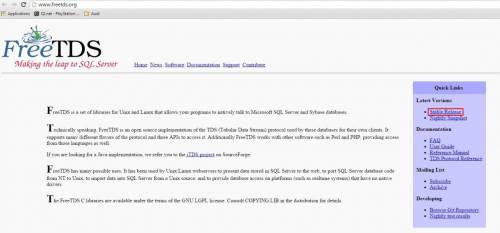
First we will download this set of libraries, for that go to the freetds website and click on Stable Release:
The file Freetds-stable.tgz will be downloaded.
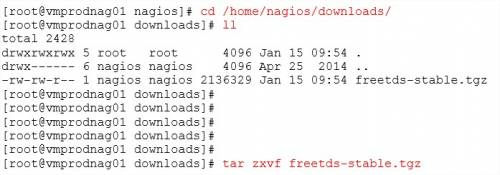
When the file is downloaded, go to the nagios download directory and uncompressed the tgz file:
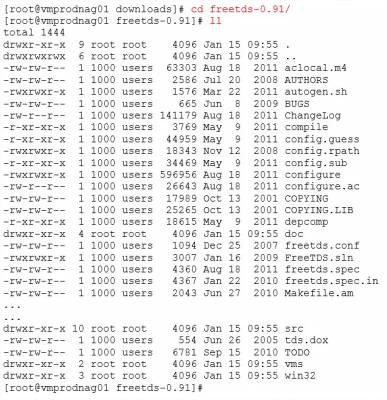
Go to the Freetds directory and list files:
Prepare and control libraries before compilation:
Now, we will compile and install the Freetds libraries:
Please, check if you don’t have any errors.
If not, Freetds is now installed.
Perl-module DBD::Sybase installation
DBD::Sybase is a Perl module which works with the DBI module to provide access to Sybase databases.
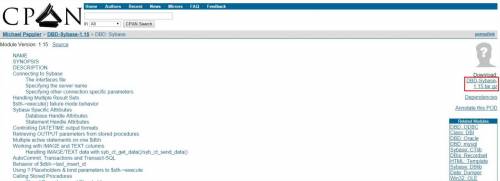
To download this module go to http://search.cpan.org/~mewp/DBD-Sybase-1.15/Sybase.pm and click the download link:
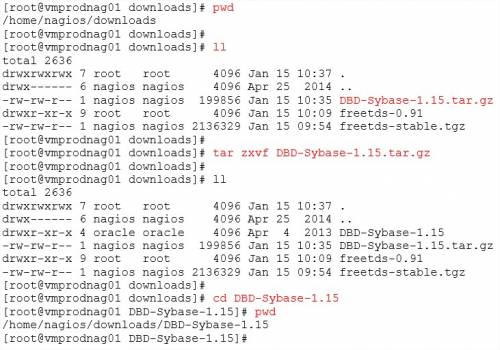
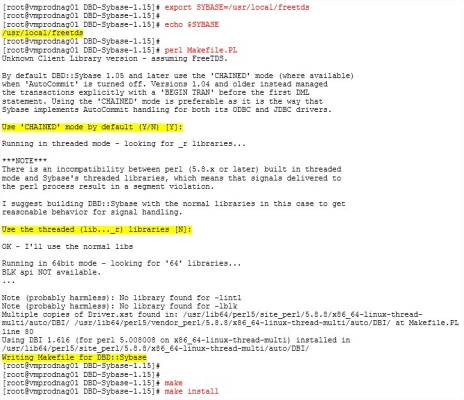
When the file DBD-Sybase-1.15.tar.gz is downloaded, go to the download directory, uncompressed the file and go to the new directory:
We will now compile and install this new module:
Now the module is installed. Check if you received errors.
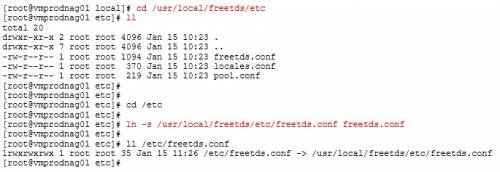
Create a symbolic link:
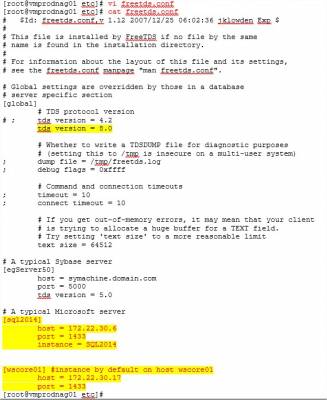
We are able now to edit the Freetds.conf file to change:
- the tds version due to security advice (follow the link and find the chapter Security Advice)
- add SQL Server parameters: IP Address, TCP/IP port, instance name if not default instance
The Perl module is installed.
Prerequisites are now installed and we have to install the SQL Server plugin.
Nagios SQL Server plugin
Installation
First, we have to download the SQL Server plugin of Nagios. To do it connect here and click the below link:
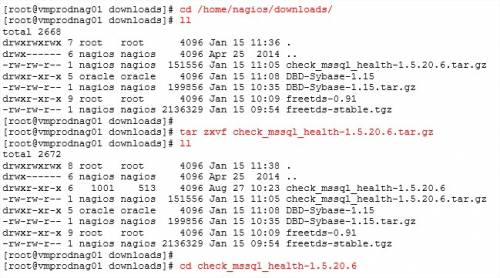
When the file is downloaded:
- go to the download directory
- list files
- uncompressed the file
- re-list files to see the new plugin directory
- change the location to the new directory
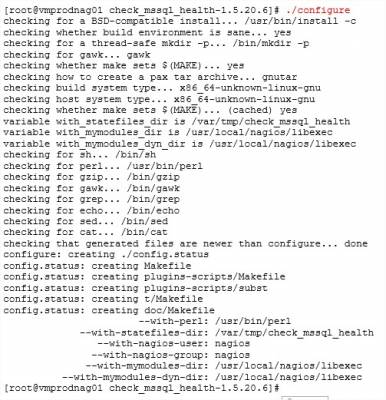
The next command to type is Configure which will check that all dependencies are present and configure & write a Makefile that will contain build orders.
After we will have to execute a make which will make the compilation (can be run as normal user):
The next command to run is a Make install which will install the plugin (as to be run as root):
The SQL Server Nagios plugin is successfully installed.
Set environment
As user root, change the permissions on file freetds.conf to be able to add server/instance from user nagios:
Add libraries /usr/local/freetds/lib to file /etc/ld.so.conf:
As user nagio, export the freetds libraries to the LD_LIBRARY_PATH environment variable:
Test the connection:
Connection failed due to wrong PERLLIB path…
To resolve this error, unset the PERLLIB variable.
We force the plugin named check_mssql_health to use the PERLLIB libraries of the OS instead of these of the Oracle client by unsetting the PERLLIB libraries of the check_oracle_health plugin:
Verification of the connection:
Verification succeeded.
The next steps will be now to test this plugin by checking which counters can be used, how to configure them, with which thresholds, how to subscribe to alerts…
Those steps will be covered by a next blog.




![Thumbnail [60x60]](https://www.dbi-services.com/blog/wp-content/uploads/2022/10/STS_web-min-scaled.jpg)
![Thumbnail [90x90]](https://www.dbi-services.com/blog/wp-content/uploads/2022/08/STH_web-min-scaled.jpg)
![Thumbnail [90x90]](https://www.dbi-services.com/blog/wp-content/uploads/2024/01/HME_web.jpg)