This blog will be the first of a series of blogs, to report about my experiences with Google Cloud SQL. In this blog we will setup a basic PostgreSQL instance in the Google Cloud.
If you’re new to Google Cloud, Google offers every new customer a amount of 300$/90 day trial (https://cloud.google.com/docs/get-started )to test their services.
Google Cloud will guide you through the setup of a project which is the starting point to create your own services. Once this is done, you can start with the setup of an instance
Setup the instance
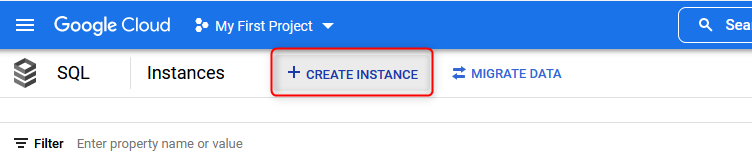
First we navigate to SQL in the Google Cloud menue and Click on “CREATE INSTANCE”
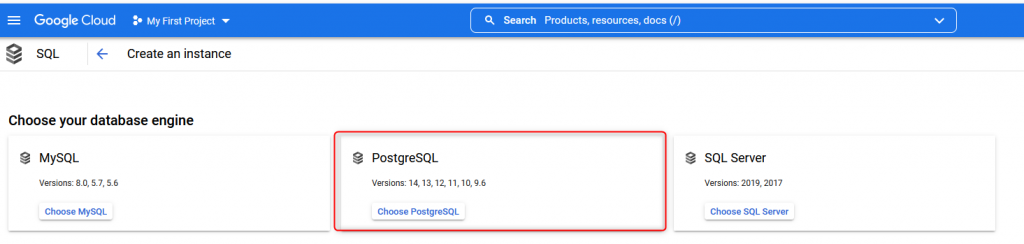
As a next step we have to opportunity to select which database software we want to use.
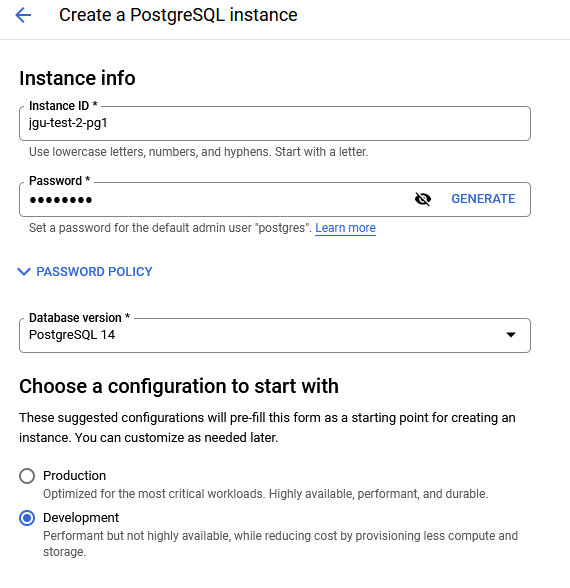
Once we selected PostgreSQL we can start to configure the instance. Of course we start with a name and a password for the postgres user. You can also choose the PostgreSQL Version you need. We will take PostgreSQL 14 in here.
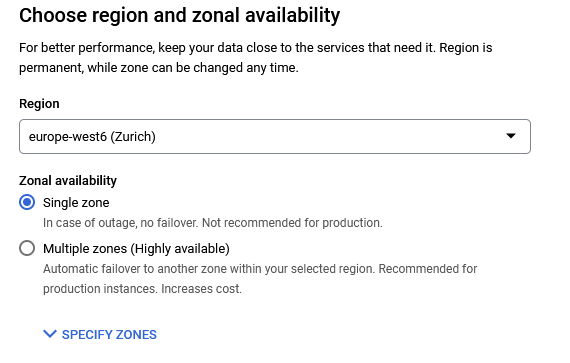
Further we have the opportunity to define in which region the instance should be created. I took Zurich as it is the closest region. You can also choose the opportunity to automatically failover your instance to another region in case of an outage of your zone. As I am just creating a test instance here, there is no need for multi zone.
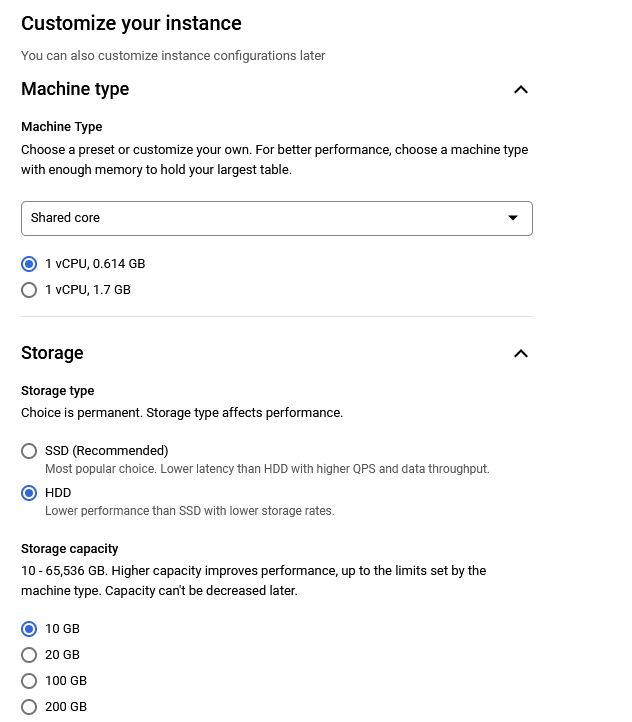
Afterwards we can go on with the customization of the machine type. It’s possible to choose a very small, lightweight setup but also up to 16 vCPU, 104 GB or configure your own memory settings. Last step in this section is the type of storage and the size. The size of your instance cannot be decreased later so maybe first start with a smaller amount of storage and grow it according to your changing needs.
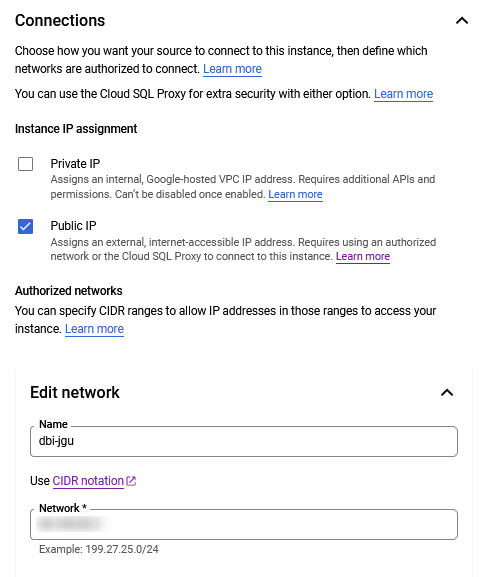
In the next section, we define if you want to make the instance accessible only insite a dedicated network (private IP) or if you want to make it accessible from several public IP addresses (public IP). Further you can add a “new network” to authorize specific IP addresses to connect to your Cloud SQL instance.
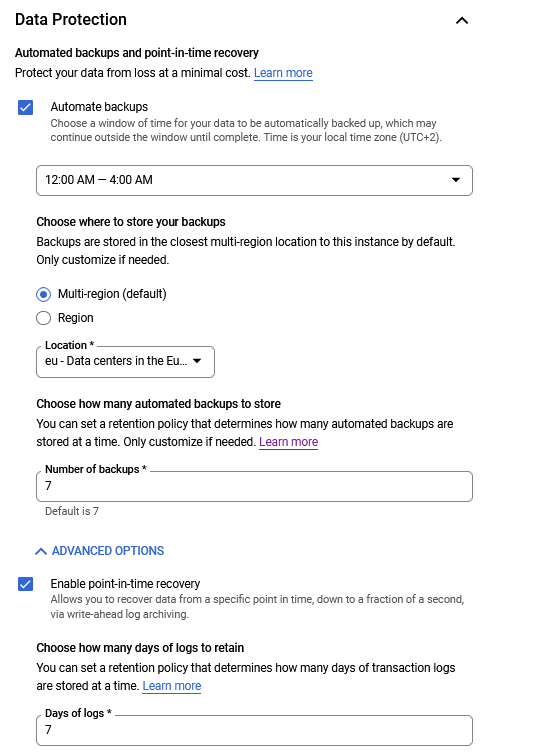
In the next section, we define the backup strategy. For the backups of the instance you have different possibilities. First you can decide at which time the backup should be taken. There are seveal timeslots to choose. You can further choose where to store your backups. Google chooses automatically the closest location to store your backups. It’s also possible to define the retention time of your backups. You can choose between 1 and 365 backups to keep. In case you’re going to enable point-in-time recovery, you can define up to 7 days to keep your WAL files.
One feature I really like with Cloud SQL instance is the “Deletion protection”. Once this feature is enabled, it’s impossible to delete the instance until you disable it again. Especially for critical instances it’s really a feature you choose. So in case your “DELETE” button is grey, you should definitley check the configuration of your instance

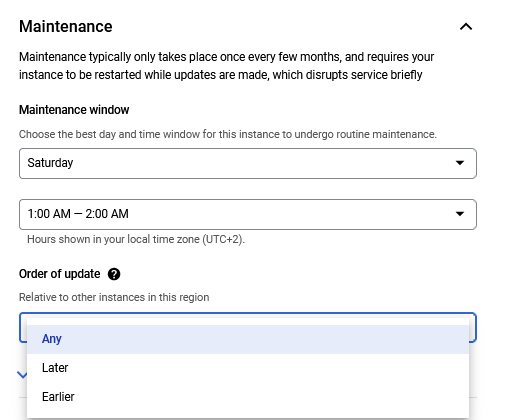
The configuration for the updates can also be defined at setup time. This will usually take place once per month with a short interruption for a restart. This time slot can be defined according to your needs. Especially the “Order of udpate” should be set carefully to make sure the test instances are updated before the productive instances. So e.g. choose “Later” for production instances and “Earlier” for development and/or test instances.
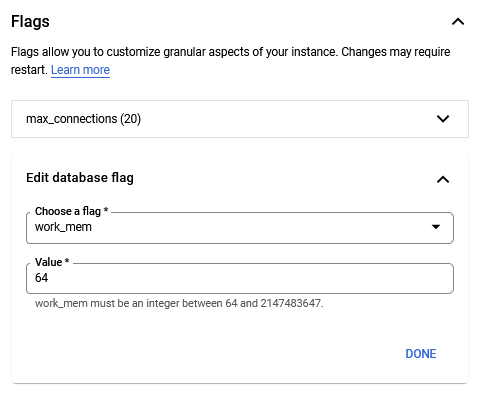
In the flags section the parameter of the instance can be set. You can choose out of a list and set the value according to your needs. So I want to set max_connections to 20 and work_mem to 64. With every parameter you choose, you get a small note under the value field, which values can be chosen. Unfortunately, it does not check if the inserted value is really in that range, when you click on DONE.
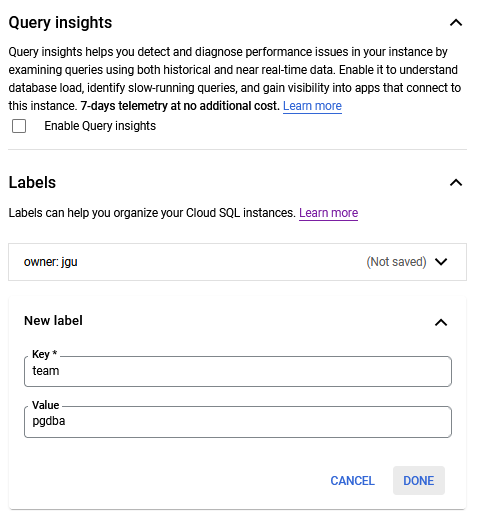
The last two options to define is the “Query insights” to detect, define and diagnose performance issues. You can also set some labels. They can e.g. help you to break down the billing costs to a departement or a team or an area. You can set up to 64 labels. Keys cannot be empty but values can.
Ready to go
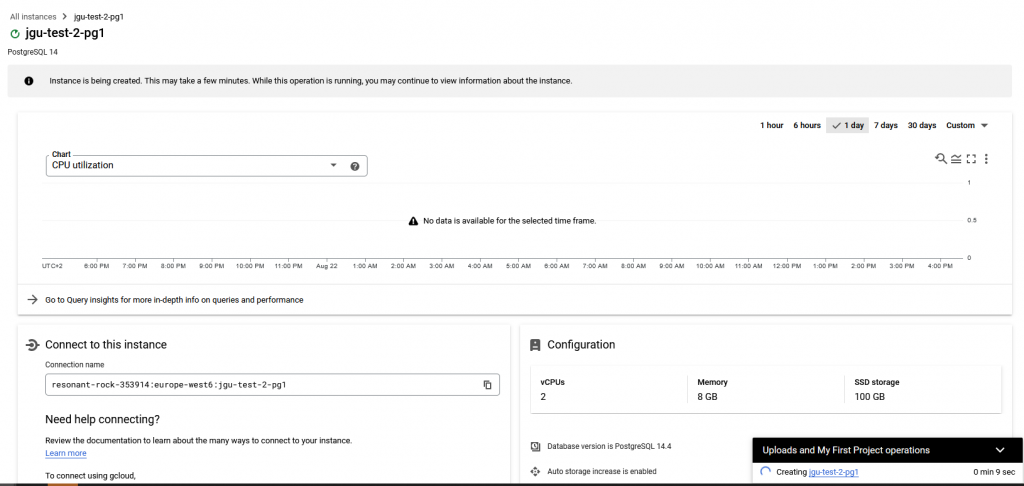
After configuring all these parameters and items we can finally create our instance. You will be redirected to an overview page automatically. But beside this you have to wait for a long time. The time may vary between 5 minutes and almost 25 minutes.
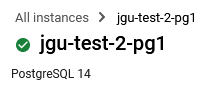
Once the setup is finished, the sign next to your instance name will be green and you can start using your instance
Changing parameters after creation
If you want to change the configuration later, you need to start the instance. It’s not possible to adjust the configuration of a stopped instance. Once the instance is started, you can click on EDIT on the instance overview.

Once the configuration is changed, Google Cloud is editing the instance, this takes a while again.
That’s it. The Cloud SQL Instance is up and running. This was quite easy and intuitive, you only have to watch out to catch all the configuration parameters you want to set. In the next blog we will have a look on the possibilites to connect to the instance.
![Thumbnail [60x60]](https://www.dbi-services.com/blog/wp-content/uploads/2022/05/open-source-author.png)
![Thumbnail [90x90]](https://www.dbi-services.com/blog/wp-content/uploads/2022/08/STH_web-min-scaled.jpg)
![Thumbnail [90x90]](https://www.dbi-services.com/blog/wp-content/uploads/2022/08/FRJ_web-min-scaled.jpg)
![Thumbnail [90x90]](https://www.dbi-services.com/blog/wp-content/uploads/2023/01/APY_web-scaled.jpg)