I recently deployed a new logging solution at a customer for their OCI tenancy. They wanted to manage their audit logs using Microsoft Azure Sentinel. The solution I deployed is using OCI Streaming Service to gather all the logs and create an endpoint. Microsoft Sentinel will then connect to the endpoint to collect the logs. Let me share with you how to set it up.
OCI Streaming service setup
First of all, you will need an OCI API Key to perform the connection between Azure and OCI. It’s the first thing you should create when you want to implement this solution.
Once your API Key is created you can create your streams. To completely setup the streams in OCI you will have to create three components : an OCI Stream Pool, an OCI Stream and an OCI Connector.
OCI Stream Pool creation
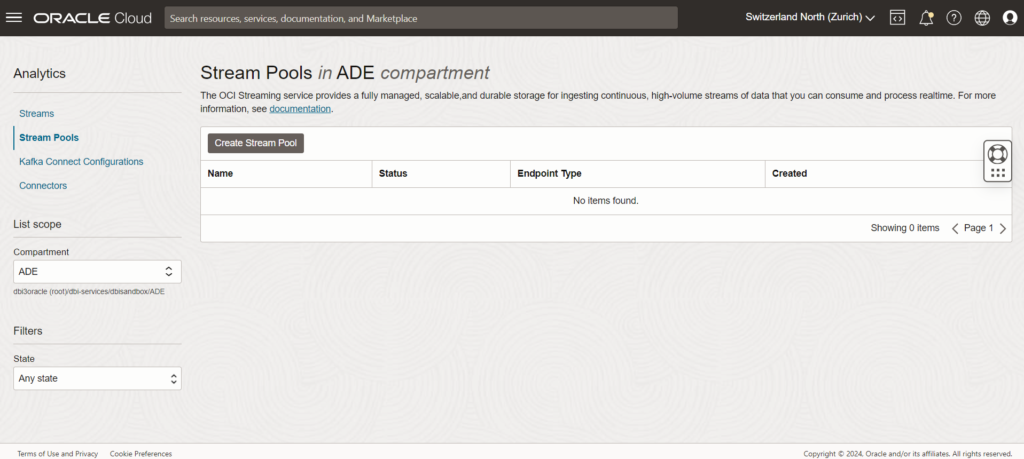
A stream can not exist without a Stream Pool, so the first step is to create one. Stream Pools are basically streams containers. As you will see in the screenshot below, our three components can be created from the same service page, just search for “Streaming” in your OCI search bar.
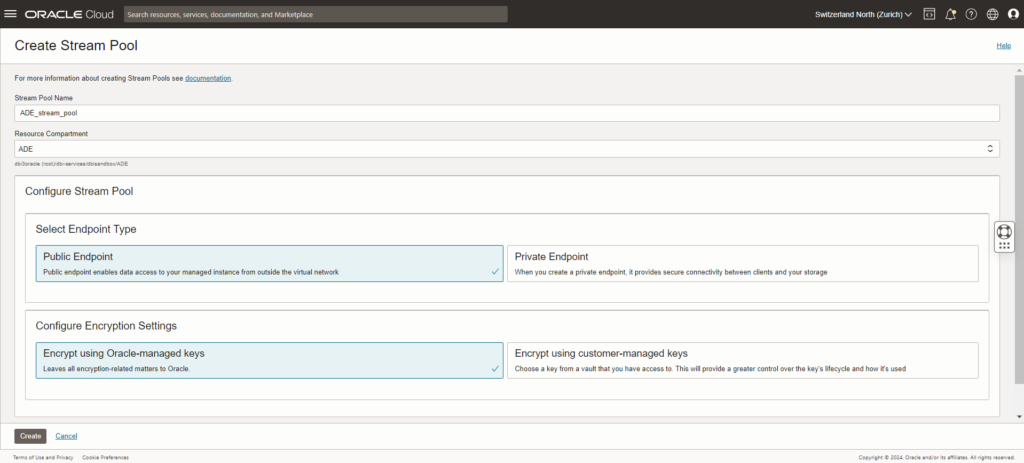
You can keep the defaults values here and then jump to creating the Streams.
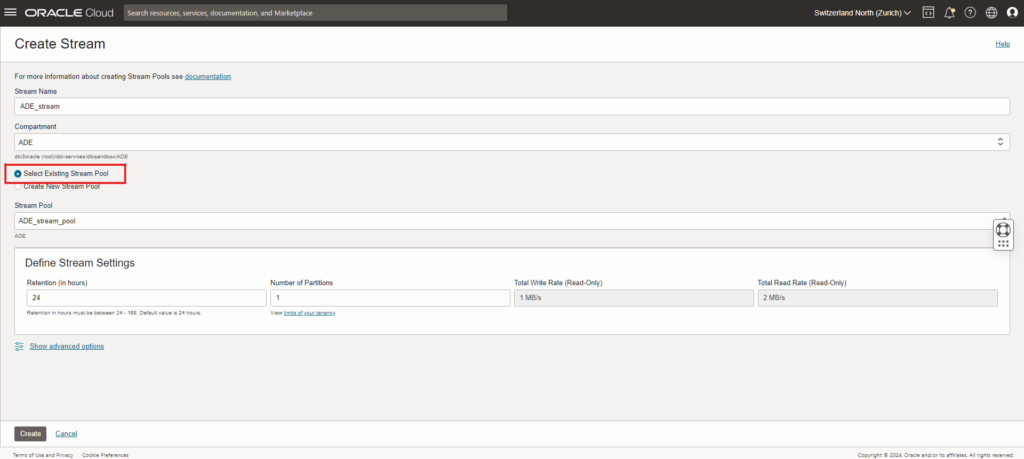
When creating the stream, be sure to select the Stream Pool you created just before. You can also modify the stream settings as you want but for this example we will keep the default values.
OCI Connector creation
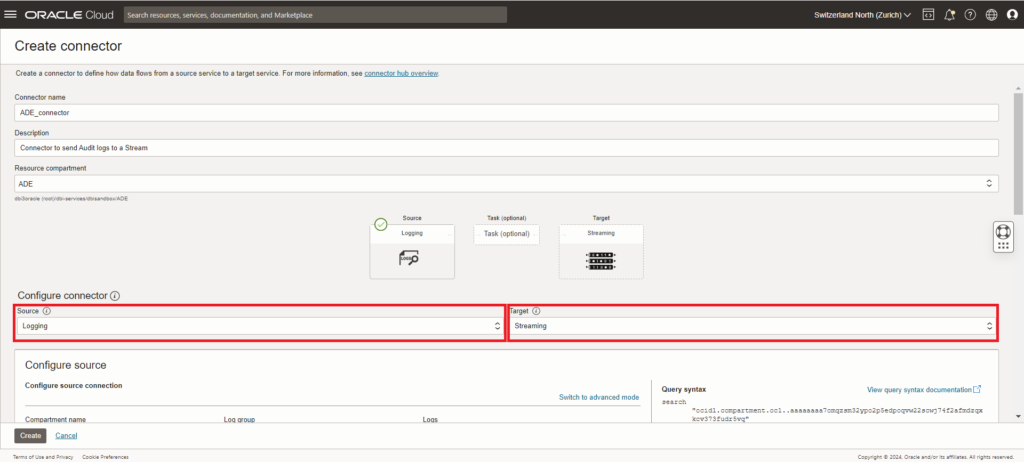
We can finally create the connector, this is used to transfer the logs from OCI logging service (OCI Logs) to our Stream.
Make sure that you select “Logging” as the source and “Streaming” as the target for the connector.
As source we want to select our “Audit” log group.
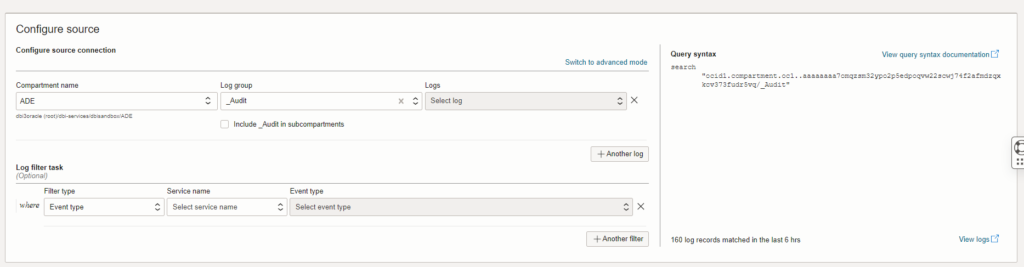
And as a target we want to select the stream we created earlier.
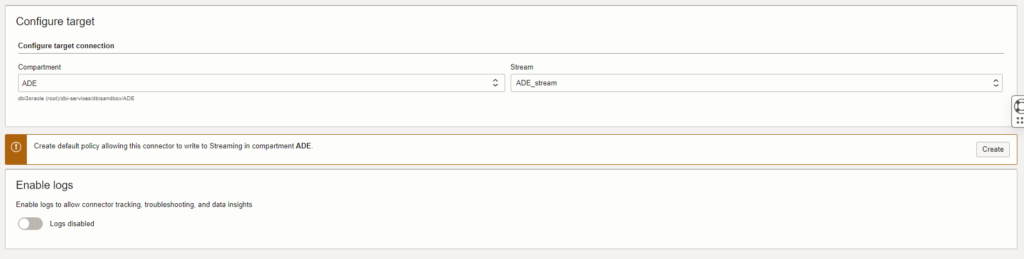
When creating the connector, you will see a message asking you to create a policy. This policy should be enough to make the connector work but during my tests it was not. As a workaround I had to allow all the users to use the streaming-service at the tenancy level.
You can enable logs in the connector to have a better view of what is happening for troubleshooting but it will require that you have created a Log group before. As you create the connector you might notice as well a “Function” block. This is can be used if you can to filter your logs before sending the to the Stream. In our case we will not use a Function.
Microsoft Azure Sentinel setup
Workspace setup
Now that OCI is fully setup we can jump to setting up the Azure part of this solution. In your Azure tenant, navigate to Sentinel via the search bar and create a new Sentinel workspace.
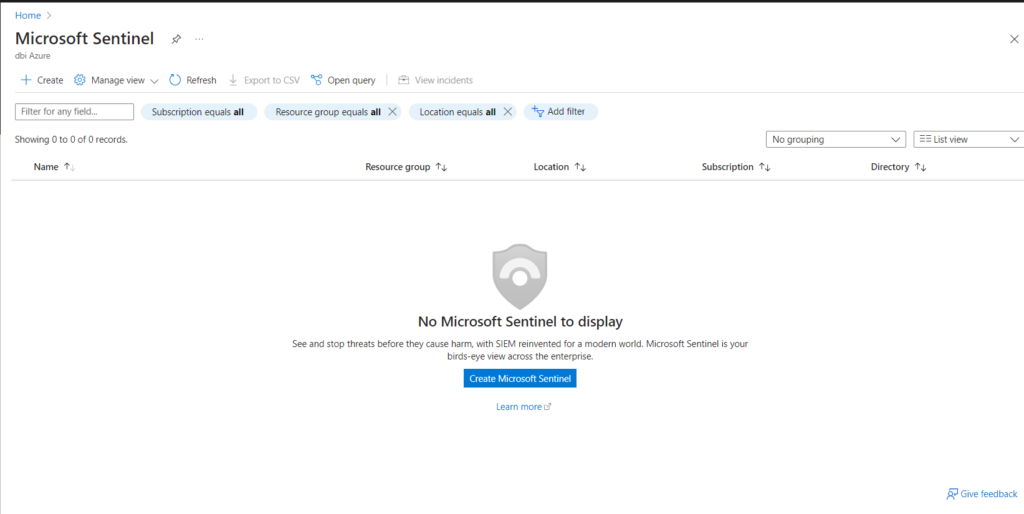
When clicking on Create Microsoft Sentinel, you will be prompted to choose a workspace. If you do not have one yet, create one. For this example I will use a newly created workspace.
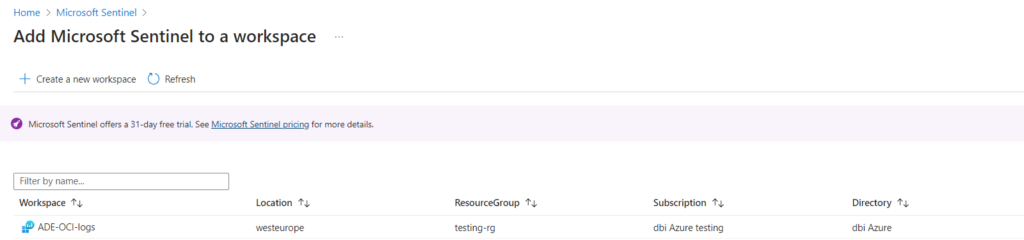
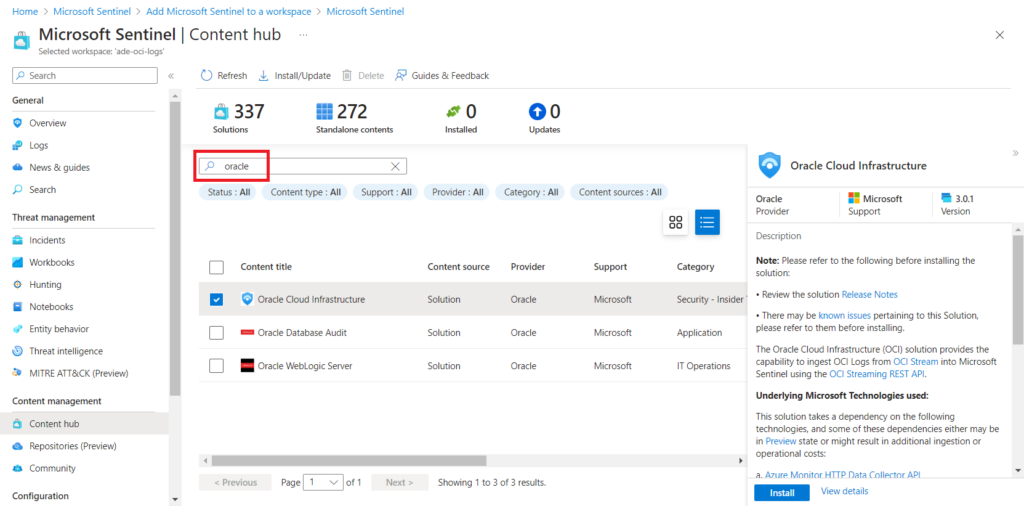
When the workspace is linked to Sentinel, we can go on and continue the setup. In the Sentinel page, select “Content Hub”, then search for “oracle” and select “Oracle Cloud Infrastructure”. Click on install to get the Sentinel plugin for OCI. When the installation is done, click again on “Oracle Cloud Infrastructure” to access the plugin setup page.
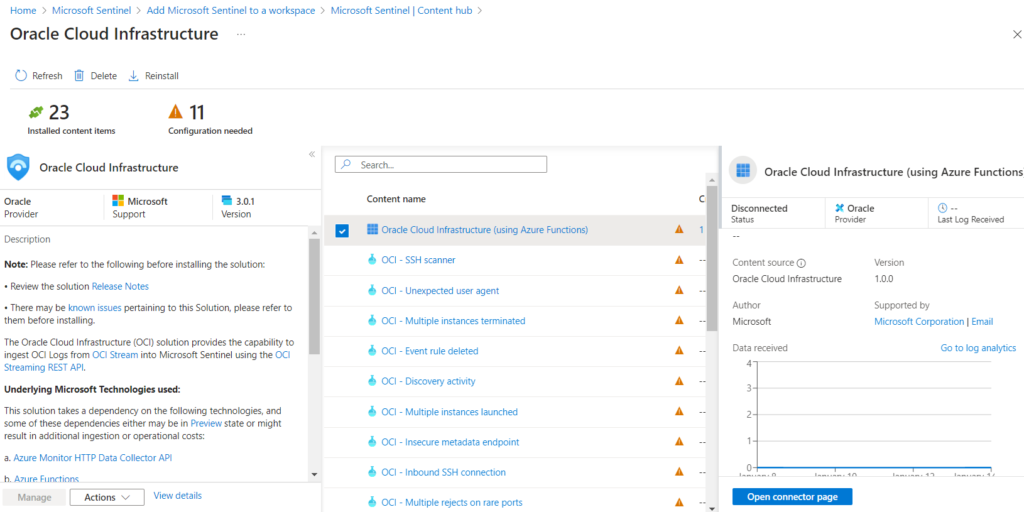
In the plugin setup, select “Oracle Cloud Infrastructure (using Azure Functions)” and click on “open connector page”
Azure Connector setup
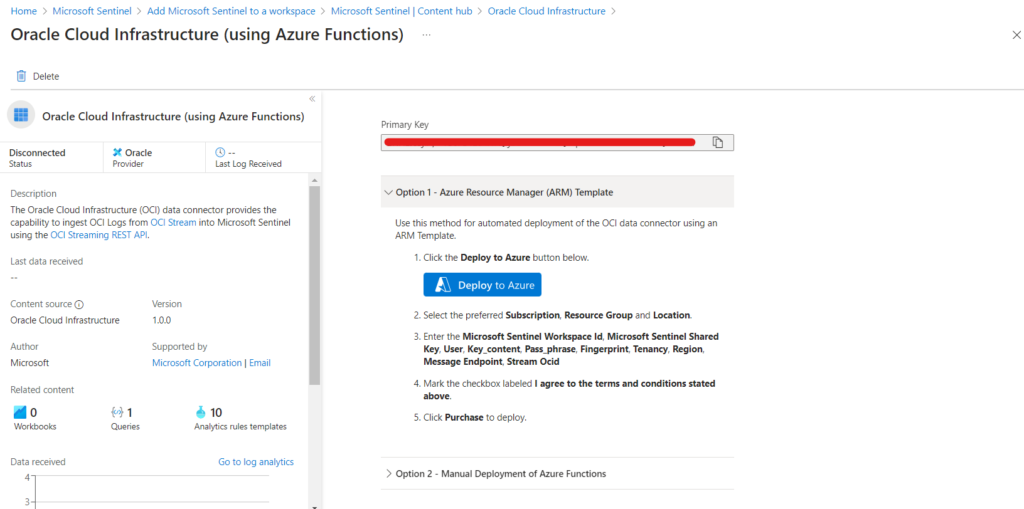
In the connector page, scroll down until you reach the deployment options the select the “Option 1” Azure Resource Manager Template then click on “Deploy to Azure”. The Azure template used here will deploy components to make the connector work.
In the template page, you have to fill in a few information to make it work. You can find the “Sentinel Workspace id” and “Sentinel Shared Key” variables in your Azure connector page. The “User”, “Key_Content”, “Pass_phrase”, “Fingerprint”, “Tenancy” and “Region” are all variables coming from the API Key file configured in OCI at the beginning, note that the “pass_phrase” is optional and that the “key_content” is the content of your private key file generated with the API Key. You can find the “Message_Enpoint” and “Stream_OCID” in your Stream page in OCI.
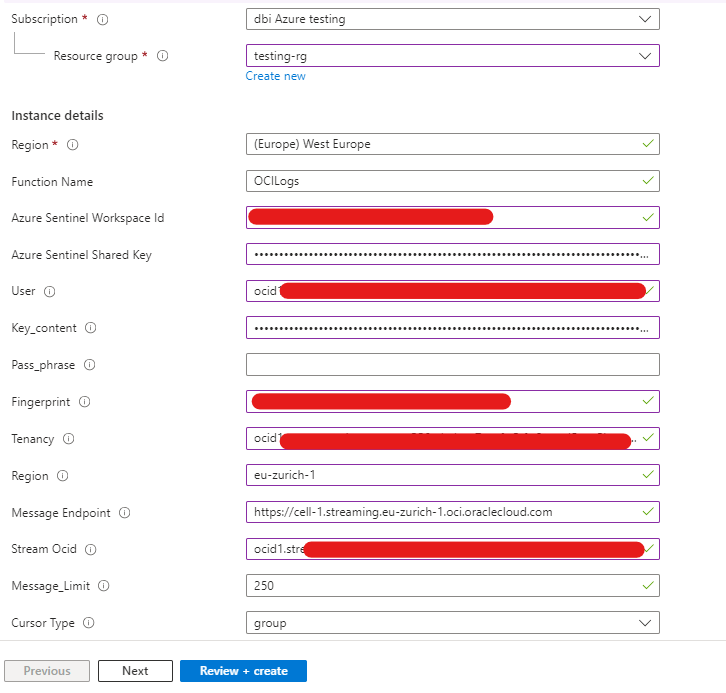
Once you have setup all your variables, click on “review+create” and wait for the Azure Function to deploy the other components. You can check if the Function is running by looking at Azure functions in your Azure Tenant.
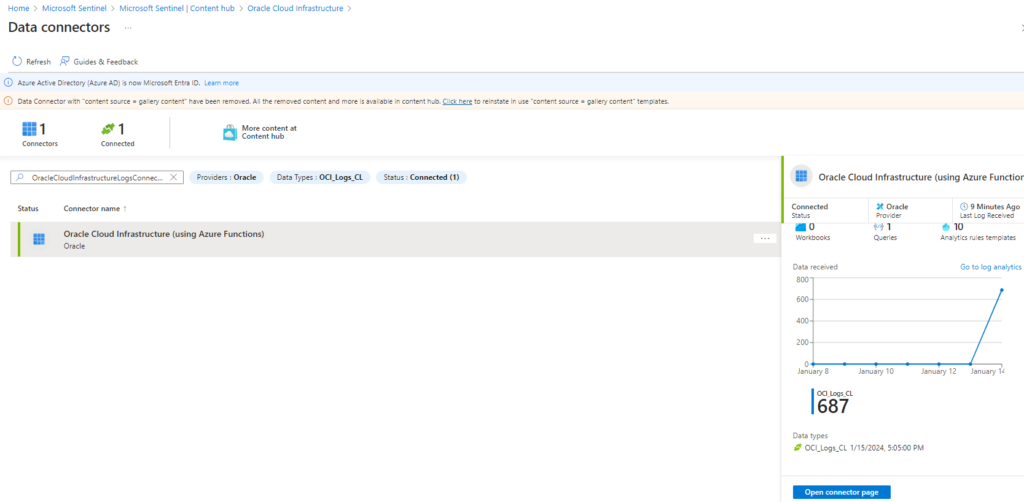
Once the connector is installed you should see it going up in your Azure page and you should see logs coming in.
To see the logs in your Azure Sentinel, go back to the Sentinel page, click on logs, select the custom table “OCI_logs_CL” and run the query.
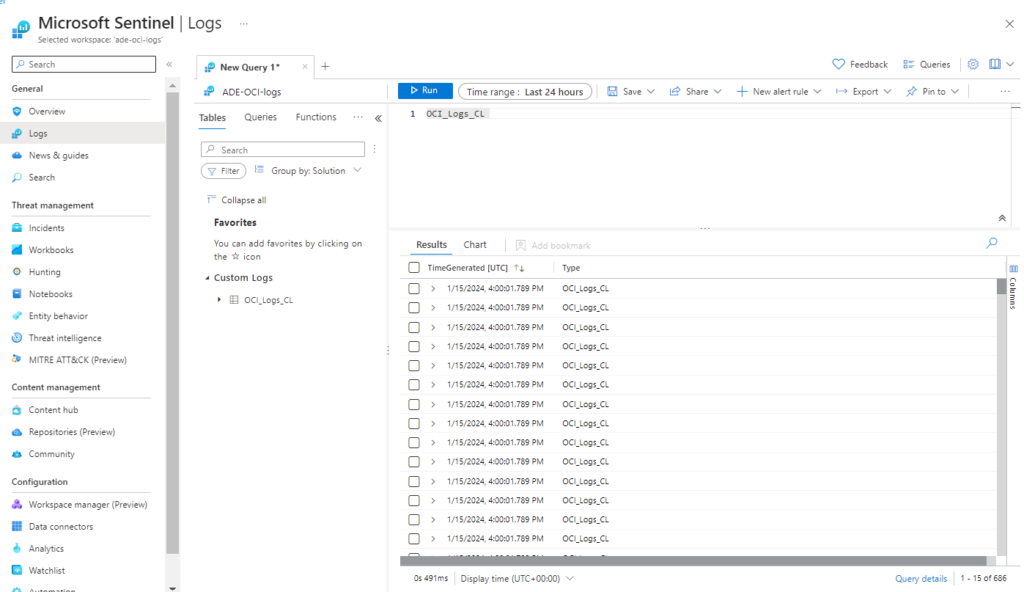
The configuration is done, you can now use this table to query your logs. Microsoft Azure Sentinel uses Kusto Query Language, if you need an introduction to this language I recommend that you visit this blog.
![Thumbnail [60x60]](https://www.dbi-services.com/blog/wp-content/uploads/2022/08/ADE_WEB-min-scaled.jpg)
![Thumbnail [90x90]](https://www.dbi-services.com/blog/wp-content/uploads/2024/03/AHI_web.jpg)
![Thumbnail [90x90]](https://www.dbi-services.com/blog/wp-content/uploads/2025/07/ALK_MIN.jpeg)
![Thumbnail [90x90]](https://www.dbi-services.com/blog/wp-content/uploads/2025/05/JDE_Web-1-scaled.jpg)