Kubernetes is a powerful container orchestration platform that allows you to deploy, manage, and scale containerized applications with ease. In this guide, we will walk you through the process of running .NET applications in a Kubernetes cluster. We will cover both console applications and web applications. Let’s get started!
Prerequisites
Before we begin, make sure you have the following prerequisites in place:
- .NET SDK: You’ll need .NET 6.0 or newer installed on your local machine. If you haven’t already, you can download and install it from the official .NET website.
- Docker: Ensure that Docker is installed on your local machine. You can download Docker Desktop for your operating system from the Docker website.
- Kubernetes Cluster: You should have a Kubernetes cluster up and running. If you don’t have one, you can set up a local Kubernetes cluster using tools like Minikube or use a cloud-based Kubernetes service.
Running a .NET console application in Kubernetes
Step 1: Create a .NET console application
Let’s start by creating a simple .NET console application. Open your terminal and run the following commands:
mkdir helloworld && cd helloworld
dotnet new console -o App -n helloworld
The command dotnet new console -o App -n helloworld is used to create a new .NET console application project with specific settings and options. Let’s break down the command and explain each part:
dotnet new: This is the base command for creating new projects in the .NET ecosystem. It allows you to create various types of projects, including console applications, web applications, class libraries, and more.console: This part of the command specifies the type of project template you want to use. In this case, it’s the “console” template, which is used for creating command-line applications.-o App: The-o(or--output) option is used to specify the output directory for the new project. In this example, it’s set to “App,” which means that the new project files and folders will be created in a directory named “App” within the current working directory.-n helloworld: The-n(or--name) option is used to specify the name of the new project. In this example, it’s set to “helloworld,” so the new project will be named “helloworld.”
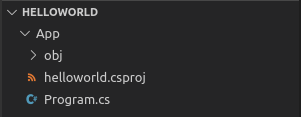
When you run this command, .NET will generate the necessary project files, including the project file (.csproj), source code files, and other project-related files, in the “App” directory with the name “helloworld.” This newly created project will be a basic console application template, which you can then customize and build upon to create your own command-line application in .NET.
Step 2: Modify the Program.cs
Edit the Program.cs file in your project directory (App) and replace its contents with the following code:
using System;
using System.Threading.Tasks;

var counter = 0;

while (true)
{
    Console.WriteLine($"Hello: {++counter}");
    await Task.Delay(TimeSpan.FromMilliseconds(1_000));
}
Step 3: Run the application in debug mode
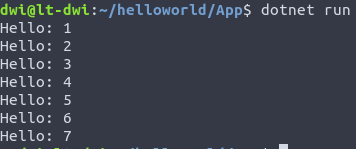
You can run your application in debug mode using the following command:
cd App
dotnet run
Step 4: Build a release version
Build a release version of your application by running:
dotnet publish -c Release
Let’s break down this command and explain each part:
dotnet publish: This is a .NET CLI (Command-Line Interface) command used to build and publish a .NET project. Publishing a project means generating the necessary files and assemblies that can be deployed and run on a target environment.-c Release: The-c(or--configuration) option is used to specify the build configuration for the project. In this case, it is set to “Release.” The build configuration determines how the project is built, and it can typically be one of the following:- Debug: This configuration is optimized for debugging and includes additional debugging information. It is suitable for development and testing environments.
- Release: This configuration is optimized for production deployment. It typically includes optimizations like code minification, removal of debug symbols, and other performance-related optimizations to make the application run efficiently in a production environment.
When you run dotnet publish -c Release, the .NET CLI will perform the following steps:
- Build the project: It compiles the source code, resolves dependencies, and generates intermediate build artifacts.
- Apply Release optimizations: The build process applies optimizations appropriate for a production environment. These optimizations may vary depending on the project type and the specific settings in the project file.
- Create a publish directory: It generates a directory (often named “publish” or “bin/Release/netX.X/publish”) containing all the files necessary to run the application. This includes the compiled application code, dependencies, configuration files, and any other required assets.
The output of the dotnet publish command is a self-contained, ready-to-deploy version of your .NET application, optimized for production use. You can then take the contents of the publish directory and deploy them to your production environment, whether it’s a server, container, or cloud platform.
Step 5: Create a Dockerfile
Create a Dockerfile named Dockerfile in the project directory with the following content:
FROM mcr.microsoft.com/dotnet/sdk:7.0 AS build-env
WORKDIR /App

# Copy everything
COPY . ./
# Restore as distinct layers
RUN dotnet restore
# Build and publish a release
RUN dotnet publish -c Release -o out

# Build the runtime image
FROM mcr.microsoft.com/dotnet/aspnet:7.0
WORKDIR /App
COPY --from=build-env /App/out .
ENTRYPOINT ["dotnet", "helloworld.dll"]
This Dockerfile is composed of two stages:
- Building stage: based on the official .NET 7.0 SDK image will build the released version of the project.
- Building runtime image stage: based on the official ASP.NET 7.0 image, copy the runtime files from the build stage and set the command
dotnet helloworld.dllas entrypoint.
Step 6: Build and push the Docker image
Build the Docker image for your application using the following commands:
docker build -t counter-image -f Dockerfile .
Then we will push the image to a local container registry (Harbor for this exemple)
docker tag counter-image harbor.dwi.local/dotnet/counter-image
docker push harbor.dwi.local/dotnet/counter-image
Step 7: Deploy to Kubernetes
Deploy your application to the Kubernetes cluster with the following command:
kubectl run helloworld --image=harbor.dwi.local/dotnet/counter-image
Step 8: Check the logs
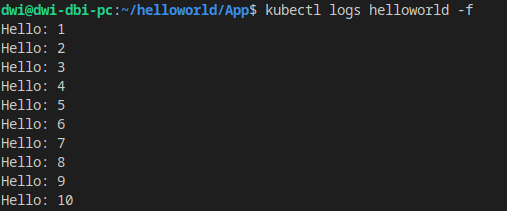
You can check the logs of your running application to see the counter increments:
kubectl logs helloworld -f
Congratulations! You have successfully deployed a .NET console application to Kubernetes.
Running a .NET web application in Kubernetes
Step 1: Create a .NET web application
Let’s create a .NET web application. Open your terminal and run the following commands:
mkdir WebApp && cd WebApp
dotnet new webapp -n AspNetWebApp
cd AspNetWebApp
The command dotnet new webapp -n AspNetWebApp is used to create a new ASP.NET web application project using the .NET CLI (Command-Line Interface). Let’s break down this command and explain each part:
dotnet new: This is the base command for creating new projects in the .NET ecosystem. It allows you to create various types of projects, including web applications, console applications, class libraries, and more.webapp: This part of the command specifies the type of project template you want to use. In this case, it’s the “webapp” template, which is used for creating ASP.NET web applications.-n AspNetWebApp: The-n(or--name) option is used to specify the name of the new project. In this example, it’s set to “AspNetWebApp,” so the new project will be named “AspNetWebApp.”
When you run this command, the .NET CLI will generate the necessary project files and folders for an ASP.NET web application with the name “AspNetWebApp.” This includes:
- A project file (usually named “AspNetWebApp.csproj”).
- Default source code files, including a Startup.cs file.
- A web configuration file (appsettings.json).
- Other project-related files and folders.
The newly created ASP.NET web application project is based on the template and is ready for further customization and development. You can use it as a starting point to build web applications using the ASP.NET framework.
Step 2: Create a Dockerfile
Create a Dockerfile named Dockerfile in the project directory with the following content:
FROM mcr.microsoft.com/dotnet/sdk:7.0 AS build-env
WORKDIR /app

# Copy csproj and restore as distinct layers
COPY *.csproj ./ RUN dotnet restore

# Copy everything else and build
COPY . ./
RUN dotnet publish -c Release -o out

# Build the runtime image
FROM mcr.microsoft.com/dotnet/aspnet:7.0
WORKDIR /app
COPY --from=build-env /app/out .
ENTRYPOINT ["dotnet", "AspNetWebApp.dll"]
This Dockerfile is composed of two stages:
- Building stage: based on the official .NET 7.0 SDK image will build the released version of the project.
- Building runtime image stage: based on the official ASP.NET 7.0 image, copy the runtime files from the build stage and set the command
dotnet AspNetWebApp.dllas entrypoint.
Step 3: Build and push the Docker image
Build the Docker image for your web application and push it to your container registry using the following commands:
docker build -t aspnetwebapp -f Dockerfile .
docker tag aspnetwebapp harbor.dwi.local/dotnet/aspnetwebapp
docker push harbor.dwi.local/dotnet/aspnetwebapp
Step 4: Deploy to Kubernetes
Deploy your web application to the Kubernetes cluster with the following commands:
kubectl run aspnetwebapp --image=harbor.dwi.local/dotnet/aspnetwebapp --image-pull-policy=Always
kubectl expose pod aspnetwebapp --port=80 --name aspnetwebapp-service
kubectl create ingress aspnetwebapp-ingress --rule=aspnetwebapp.dwi.local/*=aspnetwebapp-service:80,tls --class=nginx
kubectl run aspnetwebapp --image=harbor.dwi.local/dotnet/aspnetwebapp --image-pull-policy=Always:kubectl runis a command used to create a new deployment or pod in a Kubernetes cluster.aspnetwebappis the name given to the deployment or pod.--image=harbor.dwi.local/dotnet/aspnetwebappspecifies the container image to use for the deployment. It tells Kubernetes where to find the Docker image for the ASP.NET web application. In this case, the image is hosted at “harbor.dwi.local” and tagged as “dotnet/aspnetwebapp.”--image-pull-policy=Alwaysspecifies that Kubernetes should always pull the latest version of the specified container image, even if a previous version is already cached. This ensures that the deployment uses the most up-to-date image.
kubectl expose pod aspnetwebapp --port=80 --name aspnetwebapp-service:kubectl expose podis a command used to expose a pod as a service within the cluster.aspnetwebappis the name of the pod that you want to expose.--port=80specifies the port on which the service should listen within the cluster. Incoming traffic to this port will be directed to the pod.--name aspnetwebapp-serviceassigns a name to the service, making it accessible within the cluster using this name.
kubectl create ingress aspnetwebapp-ingress --rule=aspnetwebapp.dwi.local/*=aspnetwebapp-service:80,tls --class=nginx:kubectl create ingressis a command used to create an ingress resource in Kubernetes. Ingress resources are used to configure external access to services within the cluster.aspnetwebapp-ingressis the name assigned to the ingress resource.--rule=aspnetwebapp.dwi.local/*=aspnetwebapp-service:80,tlsdefines a routing rule for incoming traffic. It states that traffic arriving at the hostname “aspnetwebapp.dwi.local” should be directed to the service named “aspnetwebapp-service” on port 80, and it should use TLS (Transport Layer Security) encryption, as indicated by the “tls” option.--class=nginxspecifies the ingress controller class to use. In this case, it’s configured to use the Nginx ingress controller, which is a popular choice for managing ingress in Kubernetes.
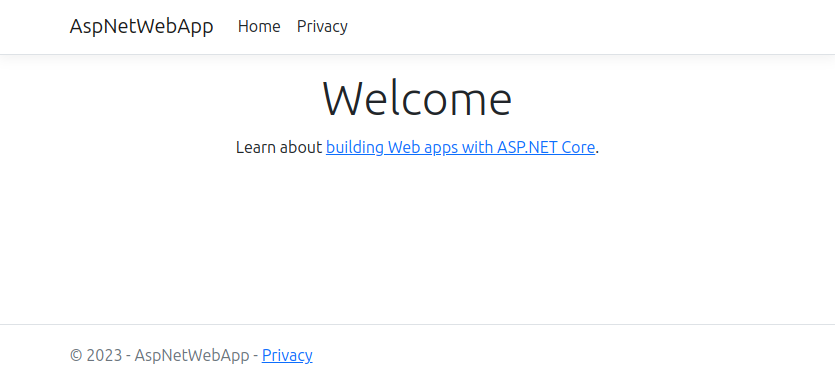
Now, your .NET web application is up and running in Kubernetes, and it’s accessible via the specified ingress route.
In this guide, we covered the steps to run both .NET console and web applications in a Kubernetes cluster. You can use these principles to containerize and deploy your .NET applications at scale. Happy coding!
![Thumbnail [60x60]](https://www.dbi-services.com/blog/wp-content/uploads/2022/08/DWI_web-min-scaled.jpg)
![Thumbnail [90x90]](https://www.dbi-services.com/blog/wp-content/uploads/2022/08/GRE_web-min-scaled.jpg)
![Thumbnail [90x90]](https://www.dbi-services.com/blog/wp-content/uploads/2022/08/ADE_WEB-min-scaled.jpg)
![Thumbnail [90x90]](https://www.dbi-services.com/blog/wp-content/uploads/2022/08/NME_web-min-scaled.jpg)