Introduction
Did you know that you can run MySQL on Microsoft Azure for free for 30 days with a $200 credit? In this first blog I’ll show how to create a MySQL Server and provide few information related to this service. In futures blogs I’ll present insights regarding MySQL performances and backup/recovery.
Let’s start by registering ourselves
The registration process lasts approximately 5 to 10 minutes. We simply have to enter our contacts details as well as our credit card details. Don’t worry, no fees are automatically charged. Once your 200$ credit limit used, Microsoft will ask us if we want to keep on with the payment of the additional fees.
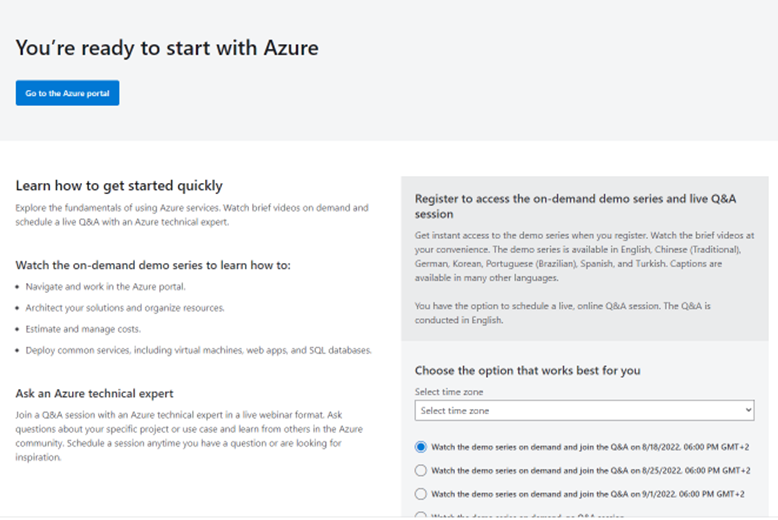
In order to register ourselves on Microsoft Azure, we can simply go on the following URL: https://azure.microsoft.com/en-us/services/mysql/ and click on “Try Azure Database for MySQL free” and “Start free”. Then we enter our contact details such as country, name, surname, phone number, e-mail address, address, aso… Once finished, we will see a screen looking like the one below. We simply have to select the time zone and if we want to join a Q&A session.
Our first MySQL Server on Azure
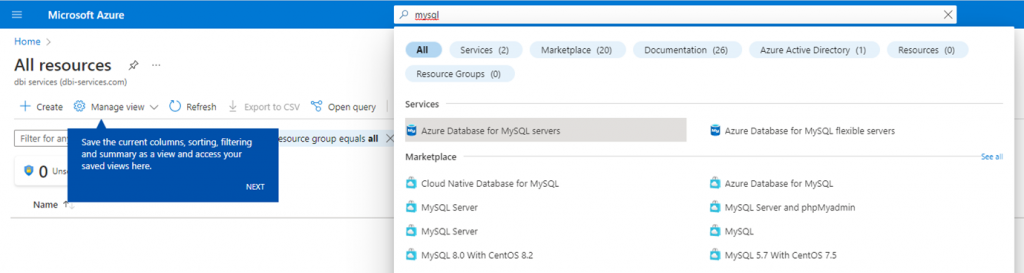
Once the registration process ended, it’s time to create our first MySQL Server on Azure. Log in into Microsoft Azure and enter “mysql” in the research field as shown below and select “Azure Database for MySQL servers”.
Once “Azure Database for MySQL servers” selected, we simply have to click on “Create Azure Database for MySQL Server” on the next screen. We now have to select the deployment option. As shown below, we have the choice between the two following options:
- Flexible Server (Recommended)
- Single Server
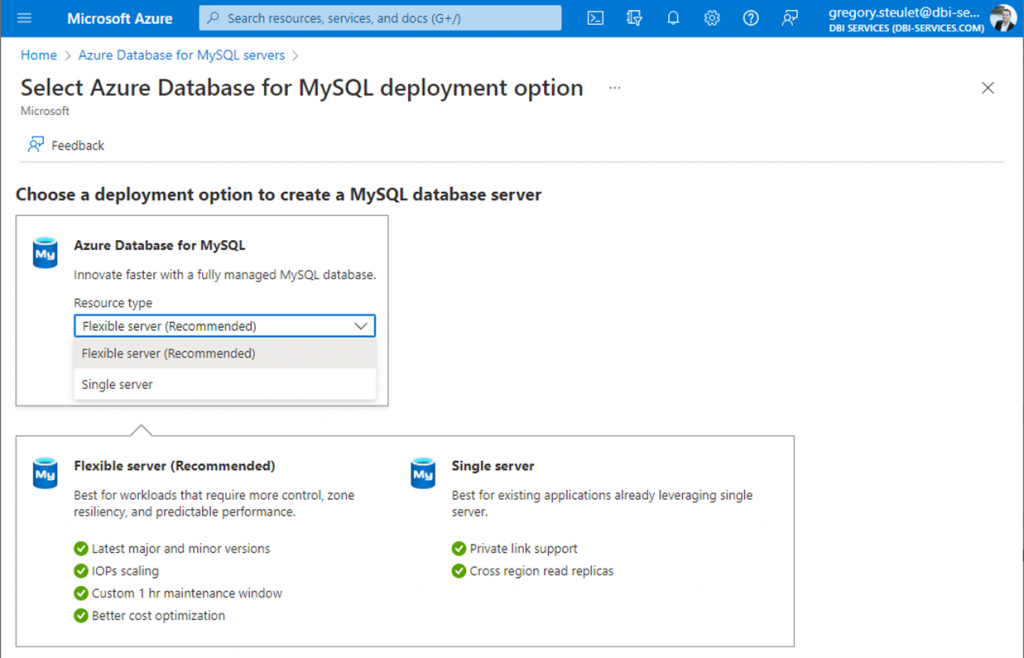
In the context of this blog, I chose the first option (Flexible server).
Before deploying our first MySQL Server we have to follow a straightforward process which requires 4 steps described below. As we will see, depending on the workload type retained (which will affect the CPU, memory and possible IOPS), the storage and IOPS, the monthly fees will vary between USD 18.98/month and USD >10’000/month.
What is really nice is to be able to see in real time the influence that each parameter has on the price estimate on the right hand side as we can see in the screenshot below.
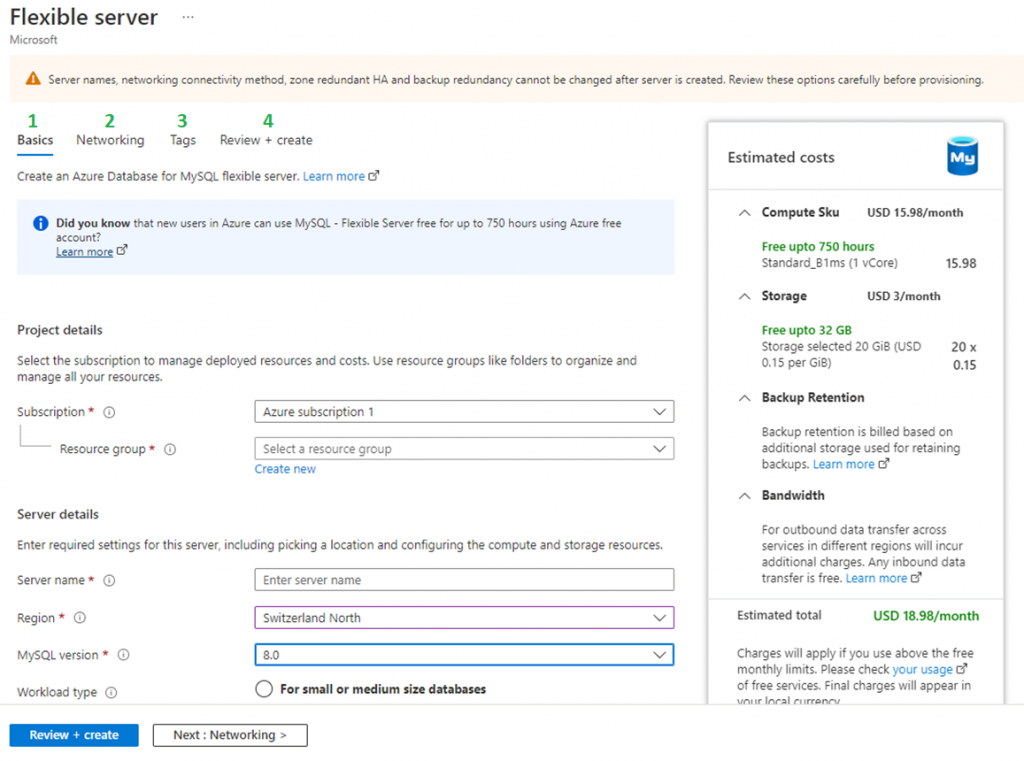
- Firstly, we have to enter basic information regarding our MySQL Server such as :
- Subscription details,
- Server name
- Region where you want to deploy your server
- MySQL Version (version 5.x or 8.x)
- Workload type (Small or Medium Size database, Tier 1 Business Critical Workloads, for development of hobby projects)
- Compute+Storage: Compute options – (Burstable 1-20 vCores, General purpose 2-64 vCores or Business Critical 2-96 vCores). Storage options – from 20GB up to 16384GB (no scale down possibility) and from 360 to 48000IOPS
- Availability Zone (optional)
- Enable High-Availability (optional)
- Administrator account
- Secondly, we have to fill in networking information regarding our MySQL Server such as:
- Network Connectivity (connect to your server through a public IP address or a Private Access)
- Firewall rules (you can automatically select your current IP address or allow any remote connection)
- Thirdly, we can enter tags. Tags are name/value pairs that enable you to categorize and view consolidated billing by applying the same tag to multiple resources and resource groups.
- We can finally review and create our server. Please note that we can also download a template for automation purpose.
In the compute option, you can select few options as presented below:
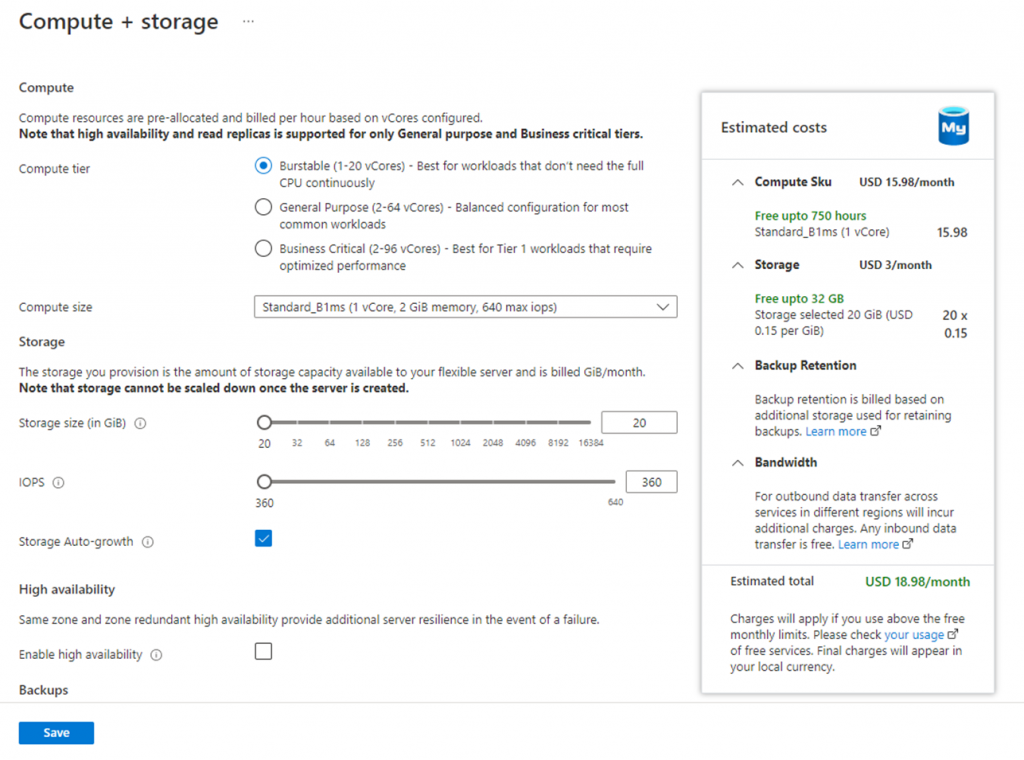
Once all the the fields completed we can create our server. It’s interesting to see that we also have the possibility to generate a template for automation purpose.
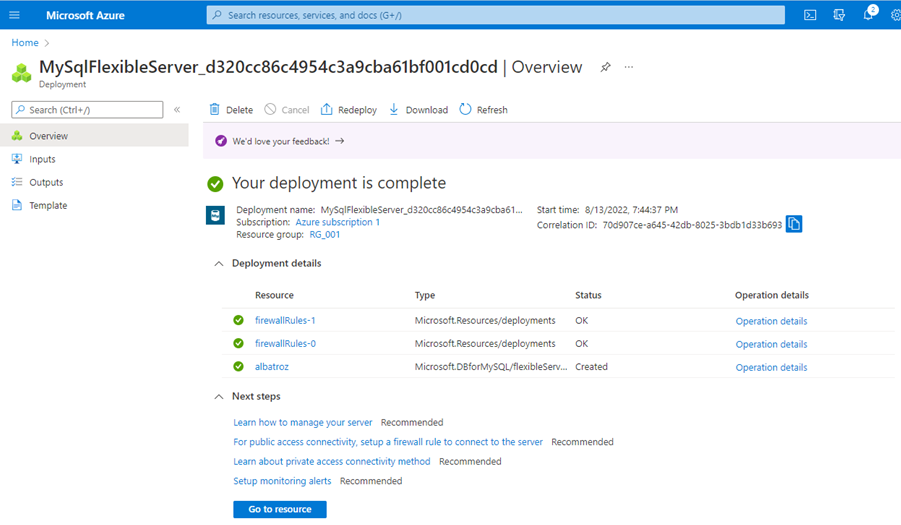
On the summary page, you can see that you have access to the Terms of Use and Privacy Policy. In the Terms of Use we can find a link to the SLA Conditions where we can find the guaranteed service time as well as the credit in case of non compliance with the SLA conditions.
The deployment and start-up of the server takes approximately 6 minutes.
We have a server, let’s use it now!
In order to use our brand new MySQL Server, I decided to use MySQL Shell. MySQL Shell is a MySQL Client that provides scripting capabilities in JavaScript and Python. You can download MySQL Shell on this link and find MySQL Documentation on this link.
When we run MySQL Shell on Windows, a cmd window opens with a command prompt as shown below. To connect to our MySQL Server, we can use the “connect” keyword. and then switch in sql mode with the “\sql” command.
MySQL  JS > \connect --mysql albatroz.mysql.database.azure.com
Creating a Classic session to '[email protected]'
Please provide the password for '[email protected]': *************
Save password for '[email protected]'? [Y]es/[N]o/Ne[v]er (default No): yes
Fetching schema names for autocompletion... Press ^C to stop.
Your MySQL connection id is 20
Server version: 8.0.28 Source distribution
No default schema selected; type \use <schema> to set one.
 MySQL  albatroz.mysql.database.azure.com:3306 ssl  JS > \sql
Switching to SQL mode... Commands end with ;
Using show variables like ‘%version%’; command provides us few information regarding the MySQL version as well as the Operating System in use. Version 8.0.28 is not the latest version but it is not old either since it dates from December 2021 and at the time of writing this blog, the latest version is 8.0.30.
MySQL  albatroz.mysql.database.azure.com:3306 ssl  SQL > show variables like '%version%';
+--------------------------+---------------------+
| Variable_name            | Value               |
+--------------------------+---------------------+
| admin_tls_version        | TLSv1.2             |
| immediate_server_version | 999999              |
| innodb_version           | 8.0.28              |
| original_server_version  | 999999              |
| protocol_version         | 10                  |
| replica_type_conversions |                     |
| slave_type_conversions   |                     |
| tls_version              | TLSv1.2             |
| version                  | 8.0.28              |
| version_comment          | Source distribution |
| version_compile_machine  | x86_64              |
| version_compile_os       | Linux               |
| version_compile_zlib     | 1.2.11              |
+--------------------------+---------------------+
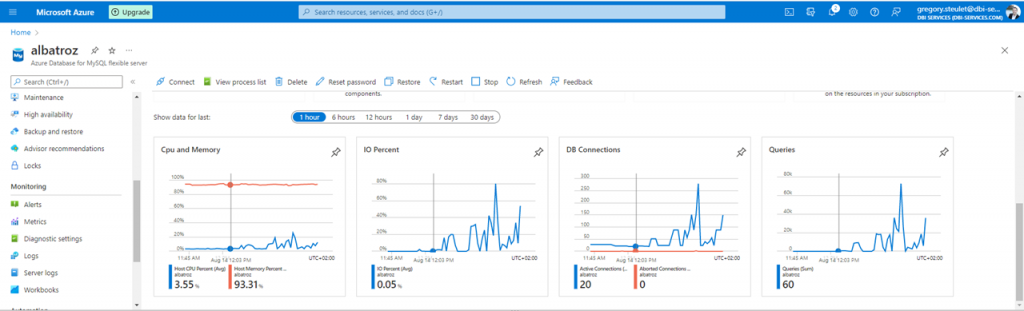
After few tests, we can see some performance graphs (CPU and Memory, IO Percent, DB Connections and Queries) through the Azure interface.
Conclusion
This first blog does not pretend to go into detail about the possibilities offered by Azure for the deployment of a MySQL server. It simply shows that deploying a MySQL server on the Azure Cloud is really simple. In addition, the $200 offered by Microsoft on the first 30 days of use allows you to have a first overview of the possibilities but also the costs related to a deployment in the Azure Cloud. The interface allows anyone to easily deploy a MySQL database in minutes.
The next blog will discuss MySQL performance on the Azure Cloud through stress tests performed with SysBench.
![Thumbnail [60x60]](https://www.dbi-services.com/blog/wp-content/uploads/2022/08/GRS_web-min-scaled.jpg)
![Thumbnail [90x90]](https://www.dbi-services.com/blog/wp-content/uploads/2022/08/ADE_WEB-min-scaled.jpg)
![Thumbnail [90x90]](https://www.dbi-services.com/blog/wp-content/uploads/2024/03/AHI_web.jpg)
![Thumbnail [90x90]](https://www.dbi-services.com/blog/wp-content/uploads/2025/07/ALK_MIN.jpeg)
![Thumbnail [90x90]](https://www.dbi-services.com/blog/wp-content/uploads/2025/05/JDE_Web-1-scaled.jpg)