In this blog post, we will quickly see what is required to monitor a Microsoft SQL Server with Zabbix.
Agent Setup
Agent setup is not required by MSSQL by ODBC template; thus this step can be skipped.
Setup Monitoring Account
The best practice is to create an account in the database dedicated to monitoring which will have limited permissions (view, select). Setup chapter of MS SQL integration on Zabbix web site explains it well.
In our example, this user will be named zbx_monitor.
ODBC Driver Linux
Zabbix server will trigger SQL queries directly against MS SQL Server. To achieve this, it requires ODBC to be set up locally.
You can refer to Microsoft web site (link here) which provides all the steps to install ODBC driver depending on your linux flavor. Roughly, installation is composed of following steps:
- Add MSSQL repository
- Uninstall any installed ODBC packages
- Install Microsoft driver
Setup Data Source Name (DSN)
Before being able to use driver, we must declare it in /etc/odbcinst.ini:
[ODBC Driver 17 for SQL Server]
Description=Microsoft ODBC Driver 17 for SQL Server
Driver=/opt/microsoft/msodbcsql17/lib64/libmsodbcsql-17.10.so.5.1
UsageCount=1
Next, we can declare DSN in /etc/odbc.ini:
[mssql-mfiles]
Description = MS SQL M-Files Database
Driver = ODBC Driver 17 for SQL Server
Server = <IP>
Port = 1433
User = zbx_monitor
Password = <password>
Database = msdb
The name between square bracket is the DSN that we will use later in the Zabbix configuration. Note that the ODBC driver does not use password from that file.
Finally, we can test our ODBC setup with the command:
isql -v mssql-mfiles zbx_monitor <password>
If all worked as expected, you should see this output and get a SQL prompt:
+---------------------------------------+
| Connected!                            |
|                                       |
| sql-statement                         |
| help [tablename]                      |
| echo [string]                         |
| quit                                  |
|                                       |
+---------------------------------------+
SQL>
To active ODBC poller on Zabbix, we must uncomment line in /etc/zabbix/zabbix_server.conf:
StartODBCPollers=5
Followed by a zabbix_server service restart.
Link MSSQL by ODBC Template
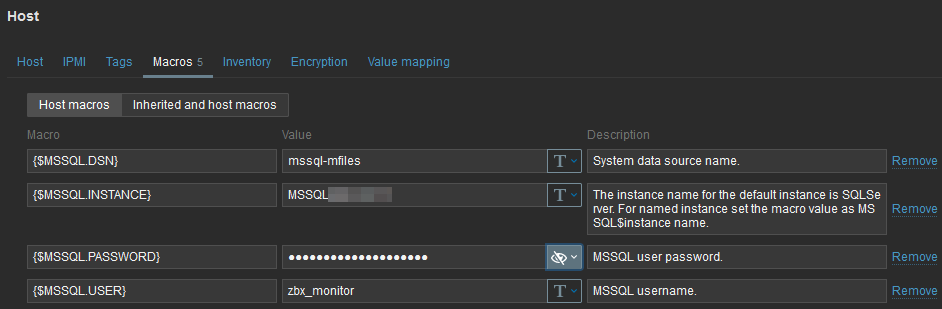
Next step is in the Zabbix UI. Link MSSQL by ODBC template to the host and set the following macros:
- {$MSSQL.USER}
- {$MSSQL.PASSWORD}
- {$MSSQL.DSN} as defined in
/etc/odbc.ini(ie. mssql-mfiles) - {$MSSQL.INSTANCE} if different from
SQLServer
As an example, it might look like this:
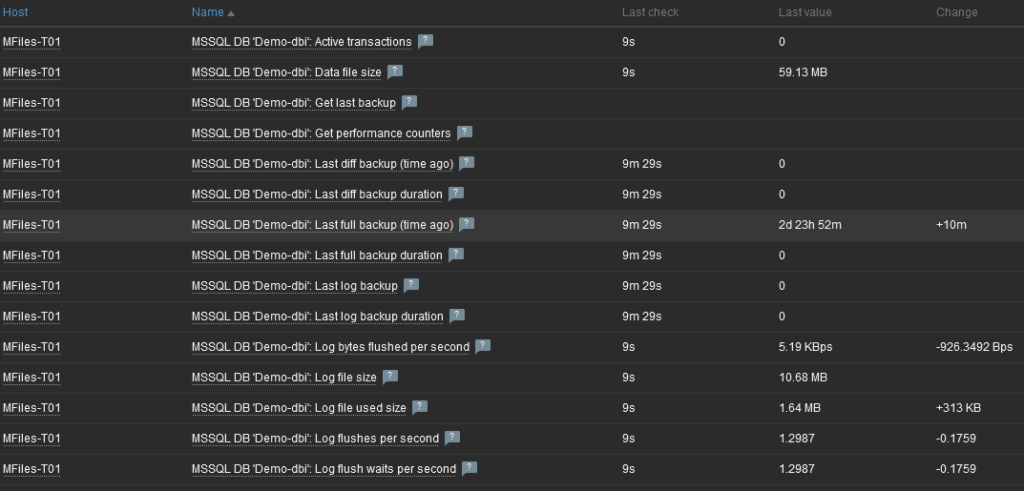
After few seconds, you should see discovered databases and new items:
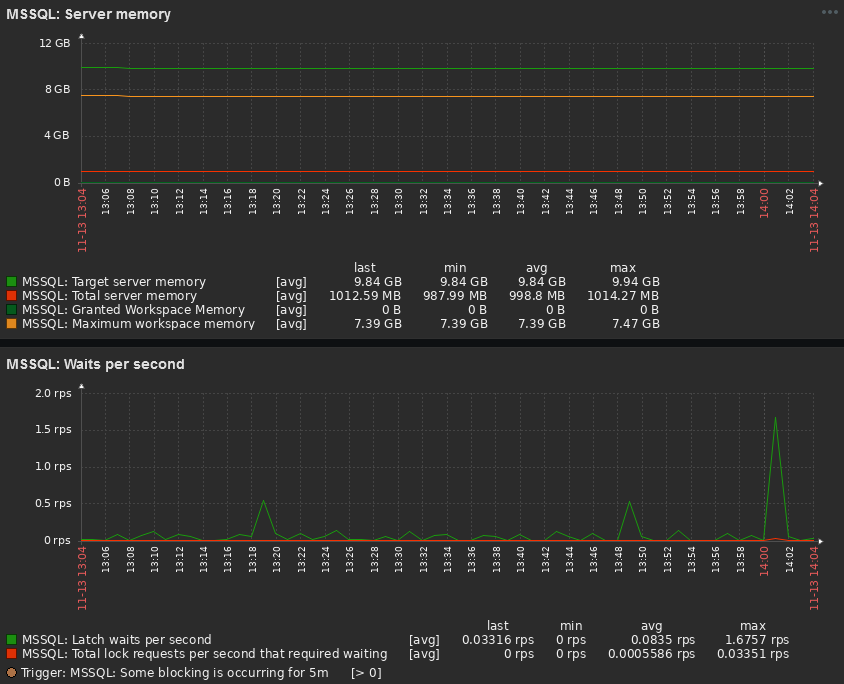
As well as pre-built dashboards:

![Thumbnail [90x90]](https://www.dbi-services.com/blog/wp-content/uploads/2023/01/APY_web-scaled.jpg)
![Thumbnail [90x90]](https://www.dbi-services.com/blog/wp-content/uploads/2022/08/FRJ_web-min-scaled.jpg)
Pavan
15.07.2024Hi Oliver,
Working after updating the ODBC driver from 17 to 18
Glad to learn you found a way. Thanks for the feedback.