In addition to my previous articles Add a UI to explore the Feathers.js API and Add authentication in a Feathers.js REST API, today, I will explain how to manage Feathers.js authentication in Swagger UI and make it simple for our users.
After enabling authentication on API methods, as a result, using Swagger UI for testing is difficult, if not impossible. To solve this problem, Swagger needs to support authentication.
In this article, I will reuse the code from my previous articles.
First step: add authentication specifications to the application
For Swagger UI to handle API authentication, I need to update the specifications in the app.ts file. Therefore, in the specs object, I add the components and security parts:
app.configure(
  swagger({
    specs: {
      info: {
        title: 'Workshop API ',
        description: 'Workshop API rest services',
        version: '1.0.0'
      },
      components: {
        securitySchemes: {
          BearerAuth: {
            type: 'http',
            scheme: 'bearer',
          },
        },
      },
      security: [{ BearerAuth: [] }],
    },
    ui: swagger.swaggerUI({
      docsPath: '/docs',
    })
  })
)
This new configuration, general to the API, tells Swagger that authenticated methods will use a Bearer token.
Second step: define documentation for authentication methods
The authentication service generated by the CLI does not contain any specifications for Swagger UI, which results in an error message being displayed on the interface. So I’m adding the specifications needed by Swagger to manage authentication methods:
export const authentication = (app: Application) => {
  const authentication = new AuthenticationService(app)

  authentication.register('jwt', new JWTStrategy())
  authentication.register('local', new LocalStrategy())

  // Swagger definition.
  authentication.docs = {
    idNames: {
      remove: 'accessToken',
    },
    idType: 'string',
    securities: ['remove', 'removeMulti'],
    multi: ['remove'],
    schemas: {
      authRequest: {
        type: 'object',
        properties: {
          strategy: { type: 'string' },
          email: { type: 'string' },
          password: { type: 'string' },
        },
      },
      authResult: {
        type: 'object',
        properties: {
          accessToken: { type: 'string' },
          authentication: {
            type: 'object',
            properties: {
              strategy: { type: 'string' },
            },
          },
          payload: {
            type: 'object',
            properties: {},
          },
          user: { $ref: '#/components/schemas/User' },
        },
      },
    },
    refs: {
      createRequest: 'authRequest',
      createResponse: 'authResult',
      removeResponse: 'authResult',
      removeMultiResponse: 'authResult',
    },
    operations: {
      remove: {
        description: 'Logout the current user',
        'parameters[0].description': 'accessToken of the current user',
      },
      removeMulti: {
        description: 'Logout the current user',
        parameters: [],
      },
    },
  };

  app.use('authentication', authentication)
}
The authentication.docs block defines how Swagger UI can interact with the authentication service.
Third step: add the security config into the service
At the beginning of my service file (workshop.ts), in the docs definition, I add the list of methods that must be authenticated in the securities array:
docs: createSwaggerServiceOptions({
  schemas: {
    workshopSchema,
    workshopDataSchema,
    workshopPatchSchema,
    workshopQuerySchema
  },
  docs: {
      // any options for service.docs can be added here
      description: 'Workshop service',
      securities: ['find', 'get', 'create', 'update', 'patch', 'remove'],
  }
Swagger UI authentication tests
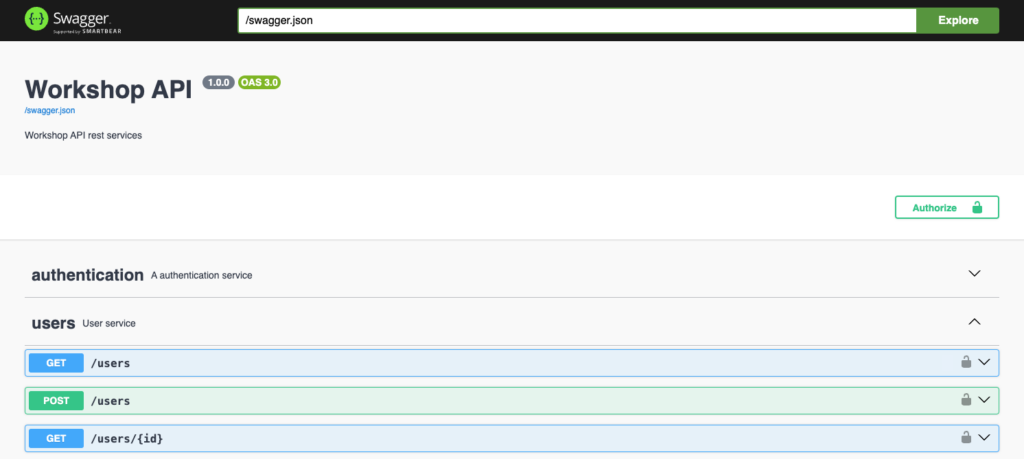
As a result of the configuration, new elements appear on the interface:
- The Authorize button at the top of the page
- Padlocks at the end of authenticated method lines
- A more complete definition of authentication service methods
Obtain an access token with the UI
First, I need to log in with my credentials to get a token. After that, the bearer token will be used in the next authenticated calls:
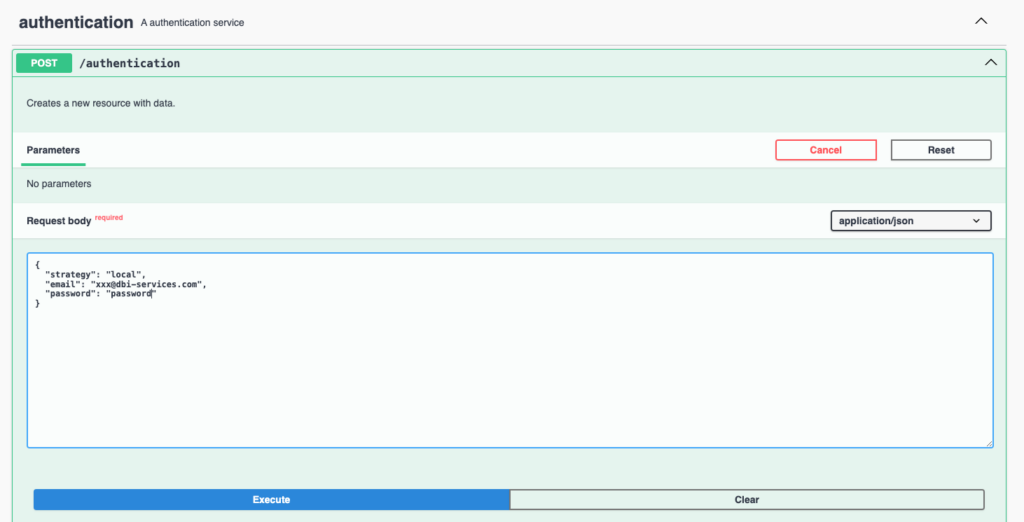
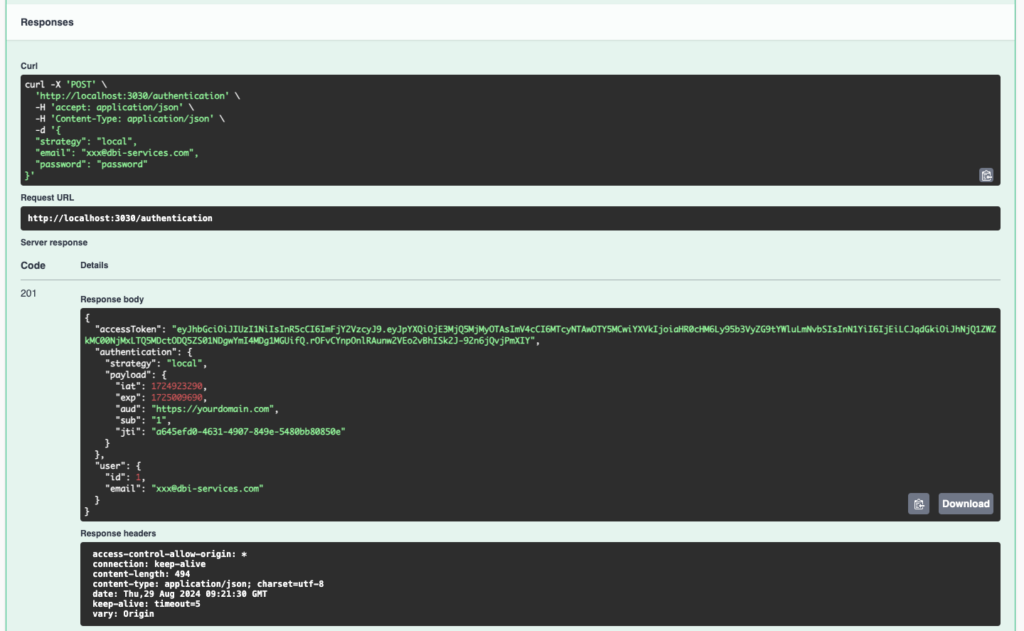
The JSON object sent in the request body contains the identification information. In return, we’ll get an accessToken useful for the next calls:
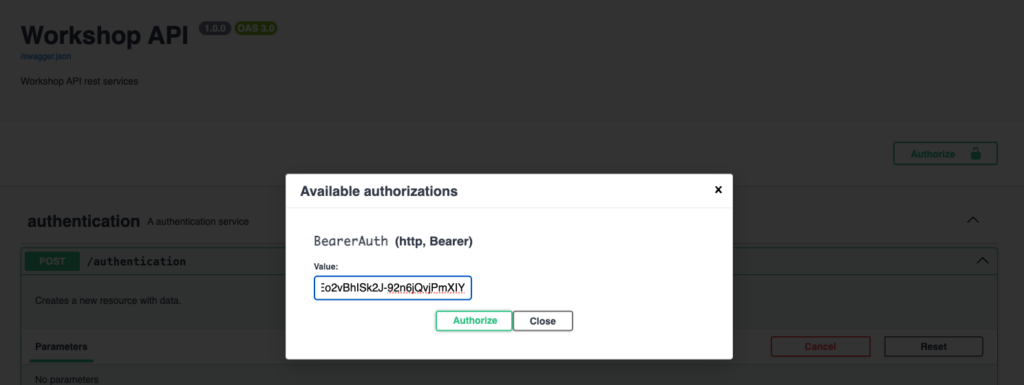
Second step, define the bearer token for authenticated requests
Each call to an authenticated method requires the token to be sent in the http headers. We therefore register the token in Swagger UI by clicking on the Authorize button and paste the token obtained during the authentication step:
Testing authenticated methods
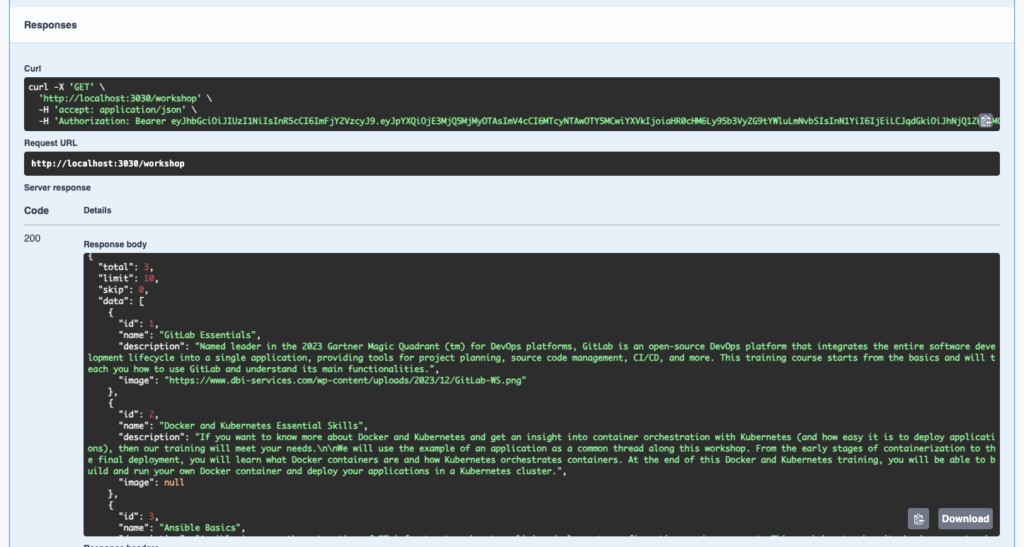
Once the token has been entered into Swagger UI, I use the methods without worrying about authentication:
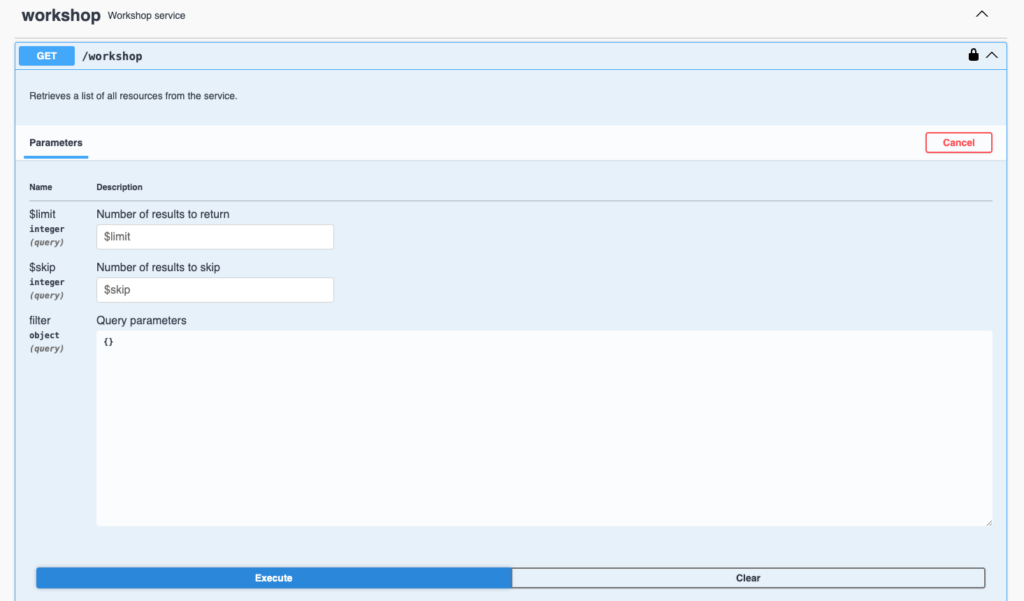
Swagger UI sends the token in the http headers to authenticate the request. Then the api returns the data:
Conclusion
Managing Feathers.js authentication in Swagger UI is entirely possible. With a little extra configuration, it becomes easy to use authentication and authenticated methods. It’s even simple to test all API methods and document their use.
![Thumbnail [60x60]](https://www.dbi-services.com/blog/wp-content/uploads/2022/08/NME_web-min-scaled.jpg)
![Thumbnail [90x90]](https://www.dbi-services.com/blog/wp-content/uploads/2022/08/DWE_web-min-scaled.jpg)