In this blog I will show you how to restore a Nutanix virtual machine in AWS using HYCU R-CLOUD, formerly HYCU Protege.
Context
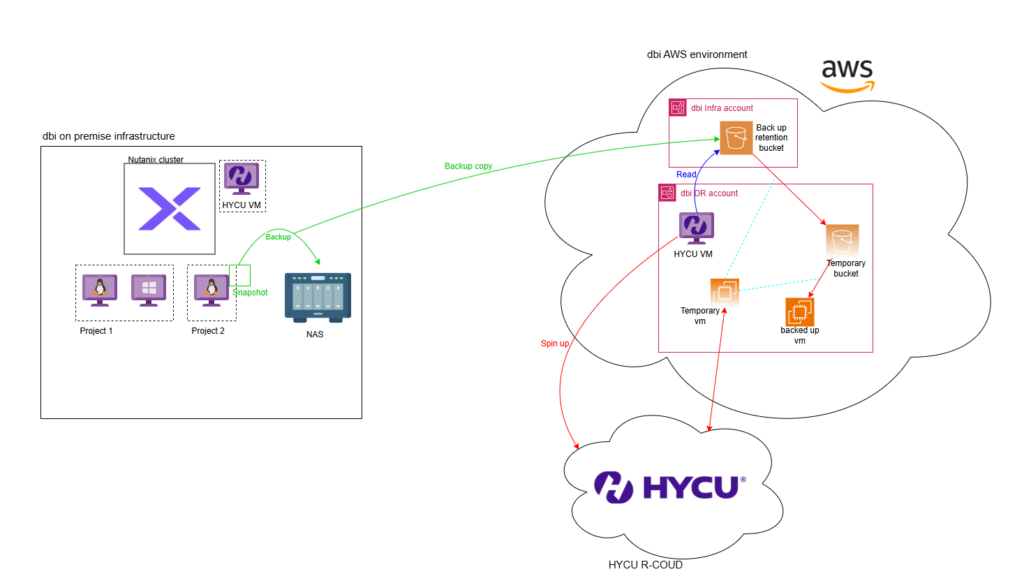
Our HYCU setup is composed of multiple environments, on premise in our datacenter and in the cloud in our AWS accounts. We have a HYCU instance deployed on our Nutanix cluster which is the “master” instance, meaning that all the backups are created by this instance. The backups are saved in two environment, they are saved in our NAS server and a copy of each backup is also transferred to an AWS S3 bucket in one of our AWS accounts. We also have a secondary HYCU instance in AWS, this one is in “Restore mode” meaning that it can only restore instances and can not do any backup.
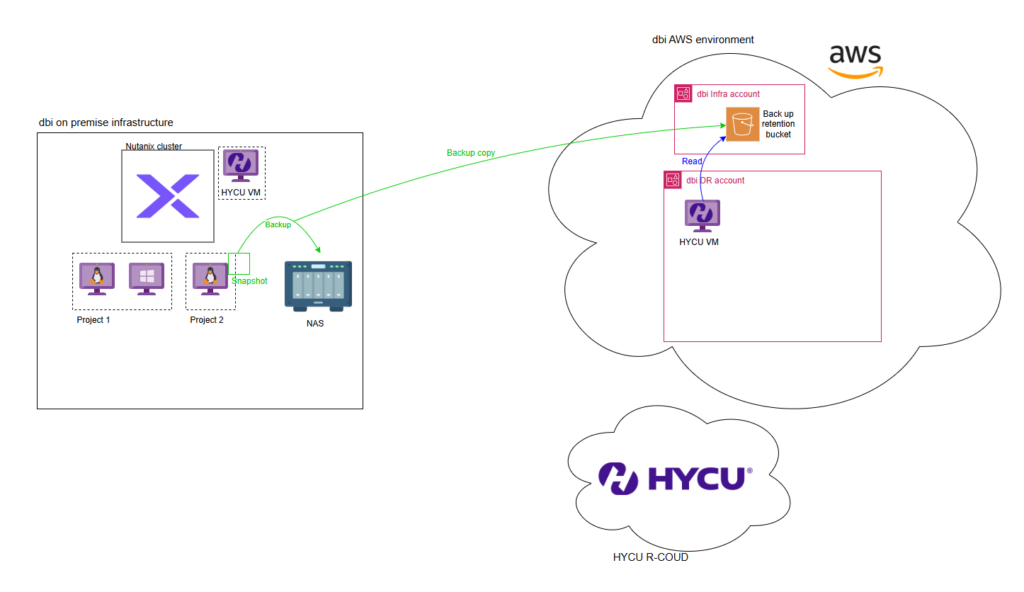
We created this setup with two environments and two HYCU instances to be able to restore our environment in case we lose our whole Nutanix cluster. The schema above represents the infrastructure with an example of restored instance with all the temporary resources created by HYCU during the process.
HYCU setup
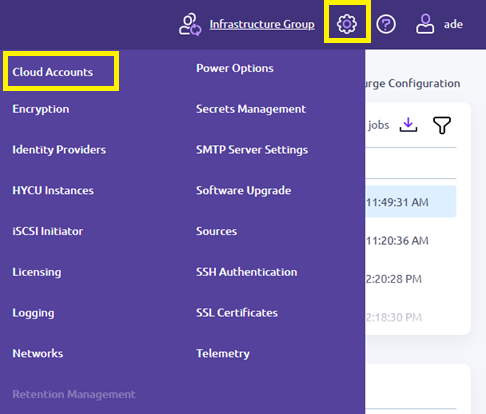
In the HYCU console we have two parameters to configure so that the restore operations works.
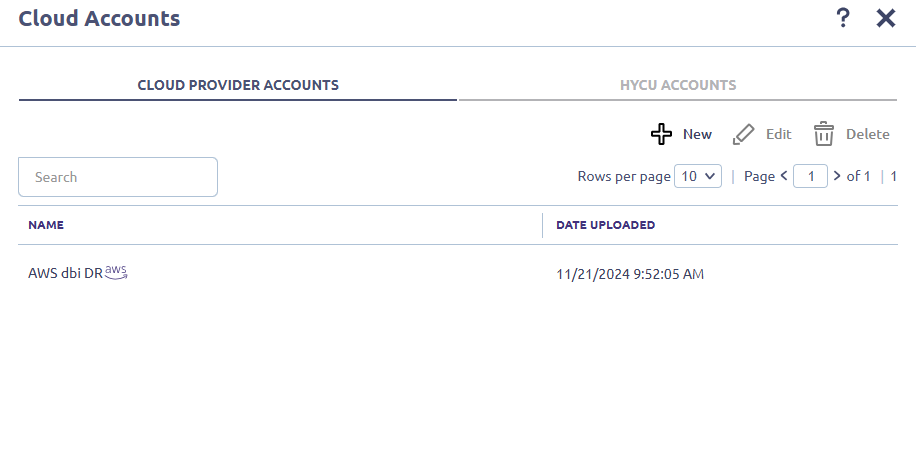
First we have to configure the Cloud Account :
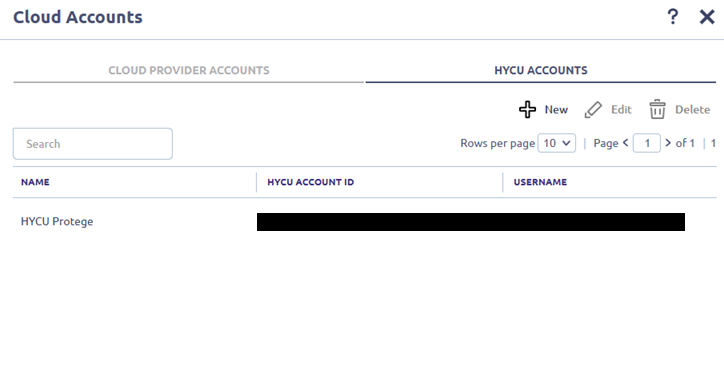
We also have to configure the HYCU R-CLOUD account:
When this is done, we can start the restore operations.
Virtual machine Spin-up
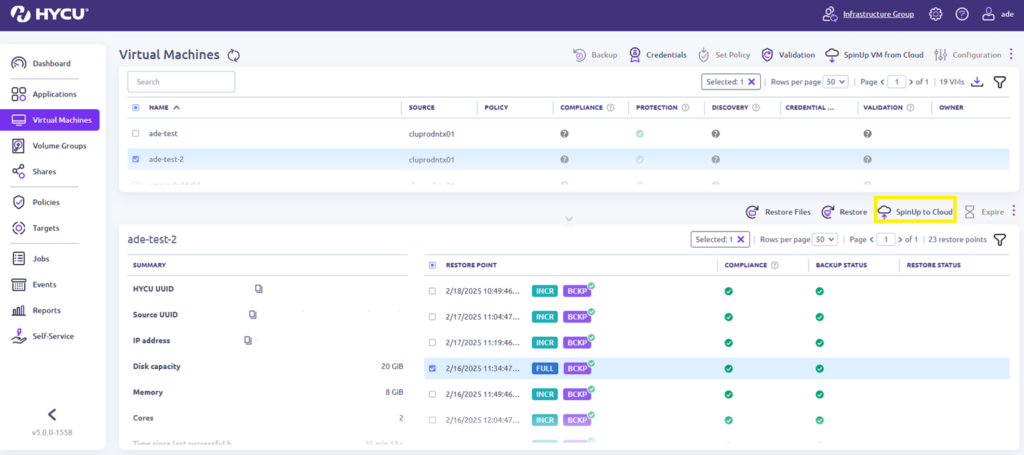
First step: select the virtual we want to restore:

Then we must select the restore point and click on “SpinUp to cloud”:
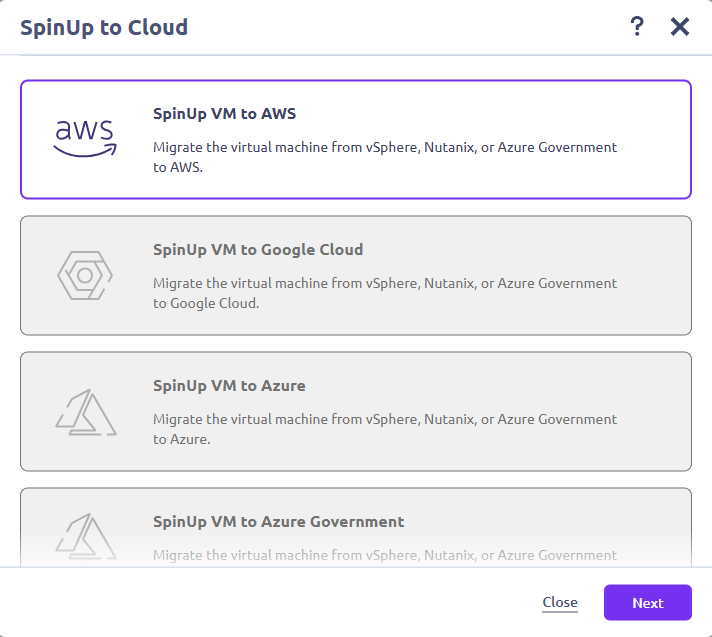
Then we select our cloud provider:
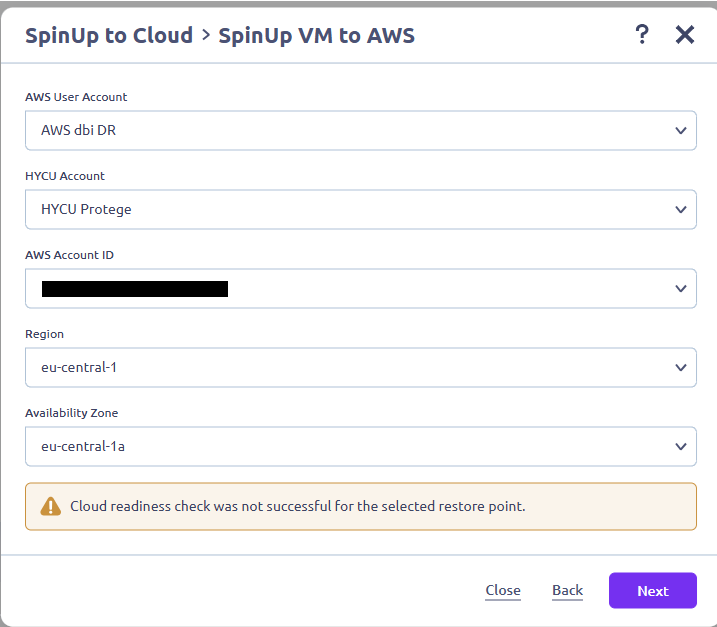
In this window, we select the information about the AWS account we want to use and give some detail on the region and availability zone. The AWS account ID is gathered from the HYCU R-CLOUD configuration.
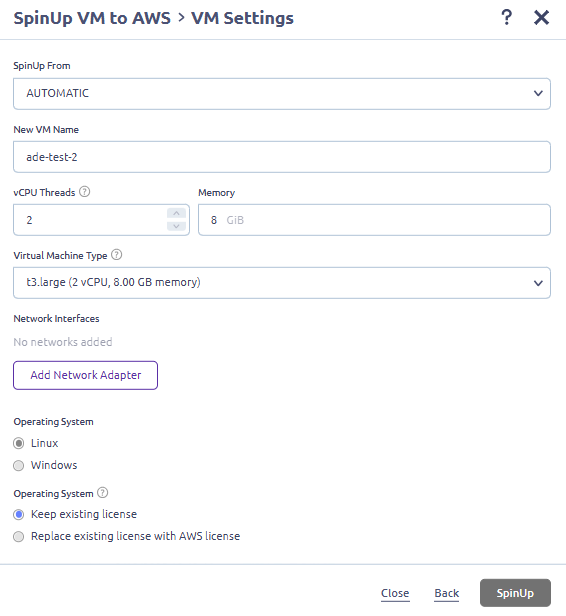
Then we have to give some more details about the virtual machine such as the shape:
We also have to give the virtual machine a network adapter, so from the previous panel we click on “Add Network Adapter” and fill the following form:

The machine needs an internet access to communicate with R-CLOUD, it doesn’t need to have a public IP if you have a VPN and routing to Internet configured. In our case, we will give our test machine a public IP since our DR VPC does not have a running NAT gateway. Once we are done with the network setup, we click on “Add” and on “SpinUp” from the previous window.
In the Jobs tab in our console, a new restore job has started:
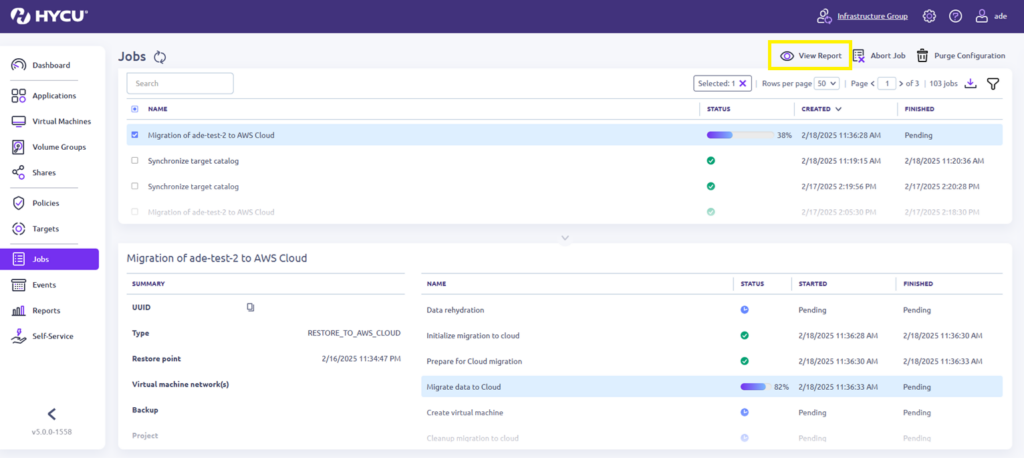
From here you can follow every step of the restore such as the creation of the temporary S3 bucket. To get information, click on “View report” at the top right:
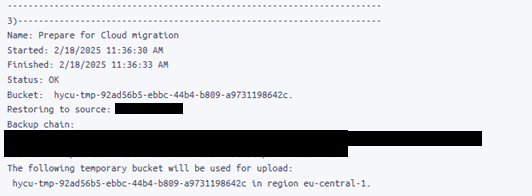
During the SpinUp, HYCU creates a temporary virtual machine that will orchestrate the cloud operations such as the creation of a temporary S3 bucket to store your virtual machine backup data. The SpinUp will also create a snapshot based on the temp S3 bucket data, then an AMI based on this snapshot and finally recreate the virtual machine based on the AMI.

Here you can see the HYCU virtual machine and the temporary machine booted by the restore operation. The infrastructure schema would now look like this with all the temporary resources running:
After the SpinUp job is done, we see in the AWS console that my virtual machine is here:

Note that the temporary HYCU instance is automatically deleted as well as the S3 bucket created earlier. We noticed during our tests that one factor has a big impact on restore time: the temporary virtual machine shape. The bigger the shape, the lower the restore time. Just note that only the HYCU support can change this parameter for you so if you want faster restores you should raise them a ticket.
![Thumbnail [60x60]](https://www.dbi-services.com/blog/wp-content/uploads/2022/08/ADE_WEB-min-scaled.jpg)
![Thumbnail [90x90]](https://www.dbi-services.com/blog/wp-content/uploads/2025/05/JDE_Web-1-scaled.jpg)
![Thumbnail [90x90]](https://www.dbi-services.com/blog/wp-content/uploads/2025/07/ALK_MIN.jpeg)