In the two first blogs, I installed the Fuel environment and deployed OpenStack in the Fuel slave nodes and all of that from the Fuel Master node.
In this blog, I will show you all the steps to follow in order to create an instance in OpenStack. All is going to be done via the Command Line Interface and not via Horizon – the OpenStack Dashboard (I will explain this in an other blog) .
Let’s begin!
First of all let’s connect to the Fuel Master node and list all the nodes :
[root@fuel ~]# fuel2 node list
+----+------------+--------+-------------+-----------------+-----------+-------------------+---------+---------------+--------+
| id | name | status | os_platform | roles | ip | mac | cluster | platform_name | online |
+----+------------+--------+-------------+-----------------+-----------+-------------------+---------+---------------+--------+
| 1 | Storage | ready | ubuntu | [u'cinder'] | 10.20.0.5 | 08:00:27:80:04:e8 | 1 | None | True |
| 2 | Compute | ready | ubuntu | [u'compute'] | 10.20.0.4 | 08:00:27:cc:85:69 | 1 | None | True |
| 3 | Controller | ready | ubuntu | [u'controller'] | 10.20.0.3 | 08:00:27:35:b0:77 | 1 | None | True |
+----+------------+--------+-------------+-----------------+-----------+-------------------+---------+---------------+--------+
Now, I connect to the controller node
[root@fuel ~]# ssh 10.20.0.3
Warning: Permanently added '10.20.0.3' (ECDSA) to the list of known hosts.
Welcome to Ubuntu 14.04.5 LTS (GNU/Linux 3.13.0-98-generic x86_64)

* Documentation:  https://help.ubuntu.com/
Last login: Tue Oct 11 09:55:54 2016 from 10.20.0.2
root@node-3:~#
Let’s put an alias for each of the Fuel slave nodes :
[root@fuel ~]# cat /etc/hosts
127.0.0.1   localhost localhost.localdomain localhost4 localhost4.localdomain4
::1         localhost localhost.localdomain localhost6 localhost6.localdomain6
10.20.0.2       fuel.domain.tld fuel
10.20.0.3       fuel.domain.tld controller
10.20.0.4       fuel.domain.tld compute
10.20.0.5       fuel.domain.tld storage
Now I can connect with the aliases:
[root@fuel ~]# ssh controller
The authenticity of host 'controller (10.20.0.3)' can't be established.
ECDSA key fingerprint is 01:b5:15:22:03:d0:f9:bb:86:3a:06:a7:8c:19:bd:22.
Are you sure you want to continue connecting (yes/no)? yes
Warning: Permanently added 'controller,10.20.0.3' (ECDSA) to the list of known hosts.
Welcome to Ubuntu 14.04.5 LTS (GNU/Linux 3.13.0-98-generic x86_64)

* Documentation: https://help.ubuntu.com/
Last login: Tue Oct 11 10:12:34 2016 from 10.20.0.2
root@node-3:~# exit
logout
Repeat this step for the two left nodes (compute & storage)
I connect to the controller node :
[root@fuel ~]# ssh controller
Welcome to Ubuntu 14.04.5 LTS (GNU/Linux 3.13.0-98-generic x86_64)

* Documentation:  https://help.ubuntu.com/
Last login: Tue Oct 11 11:24:16 2016 from 10.20.0.2
root@node-3:~#
I try to enter an OpenStack Command Line (list the instances for example) :
root@node-3:~# nova list
 ERROR (CommandError): You must provide a username or user ID via --os-username, --os-user-id, env[OS_USERNAME] or env[OS_USER_ID]
 root@node-3:~#
It is normal because using OpenStack Clients Command Line requires before to get a token from Keystone.
In order to do that, you have to specify where the controller node can reach Keystone and get the required informations from the OpenStack API’s. Because it is an authentification process you will also need to specify a username and a password.
But doing this at each time you use the OpenStack Command Lines clients can quickly become inconvenient. Hopefully, in OpenStack, there is a way to avoid this. The solution is to create a file with all environments variables that need to be exported for getting this token from Keystone.
Mirantis creates this file for us:
root@node-3:~# ls
openrc
Let’s see what this file contains :
root@node-3:~# cat openrc
#!/bin/sh
export OS_NO_CACHE='true'
export OS_TENANT_NAME='admin'
export OS_PROJECT_NAME='admin'
export OS_USERNAME='admin'
export OS_PASSWORD='admin'
export OS_AUTH_URL='http://192.168.0.2:5000/'
export OS_DEFAULT_DOMAIN='Default'
export OS_AUTH_STRATEGY='keystone'
export OS_REGION_NAME='RegionOne'
export CINDER_ENDPOINT_TYPE='internalURL'
export GLANCE_ENDPOINT_TYPE='internalURL'
export KEYSTONE_ENDPOINT_TYPE='internalURL'
export NOVA_ENDPOINT_TYPE='internalURL'
export NEUTRON_ENDPOINT_TYPE='internalURL'
export OS_ENDPOINT_TYPE='internalURL'
export MURANO_REPO_URL='http://storage.apps.openstack.org/'
export MURANO_PACKAGES_SERVICE='glance'
I source the file to export the environment variables :
root@node-3:~# source openrc
I check if the variables were exported. It is via the OS_AUTH_URL that the controller node can reach Keystone
root@node-3:~# echo $OS_USERNAME
admin
root@node-3:~# echo $OS_PASSWORD
admin
root@node-3:~# echo $OS_AUTH_URL
http://192.168.0.2:5000/
Now I can list if there are some instances running :
root@node-3:~# nova list
+----+------+--------+------------+-------------+----------+
| ID | Name | Status | Task State | Power State | Networks |
+----+------+--------+------------+-------------+----------+
+----+------+--------+------------+-------------+----------+
Let’s create the first instance
In order to create this instance, I need :
- a flavor
- an OS
- a network
- a keypair
- a name
I list the available flavors
root@node-3:~# nova flavor-list
 +--------------------------------------+-----------+-----------+------+-----------+------+-------+-------------+-----------+
 | ID                                   | Name      | Memory_MB | Disk | Ephemeral | Swap | VCPUs | RXTX_Factor | Is_Public |
 +--------------------------------------+-----------+-----------+------+-----------+------+-------+-------------+-----------+
 | 1                                    | m1.tiny   | 512       | 1    | 0         |      | 1     | 1.0         | True      |
 | 2                                    | m1.small  | 2048      | 20   | 0         |      | 1     | 1.0         | True      |
 | 3                                    | m1.medium | 4096      | 40   | 0         |      | 2     | 1.0         | True      |
 | 4                                    | m1.large  | 8192      | 80   | 0         |      | 4     | 1.0         | True      |
 | 5                                    | m1.xlarge | 16384     | 160  | 0         |      | 8     | 1.0         | True      |
 | d942587a-c48b-48ca-9c96-cad3c358eb6e | m1.micro  | 64        | 0    | 0         |      | 1     | 1.0         | True      |
 +--------------------------------------+-----------+-----------+------+-----------+------+-------+-------------+-----------+
Then, I list the Operating Systems or images available. There is only one image created by default by Fuel which is a mini Linux, it is called Cirros.
root@node-3:~# nova image-list
+--------------------------------------+--------+--------+--------+
| ID                                   | Name   | Status | Server |
+--------------------------------------+--------+--------+--------+
| a3708fe7-60f7-49c9-91ed-a6eee1ab8ba4 | TestVM | ACTIVE |        |
+--------------------------------------+--------+--------+--------+
I list also the networks (they had been created by Fuel during the deployment of OpenStack)
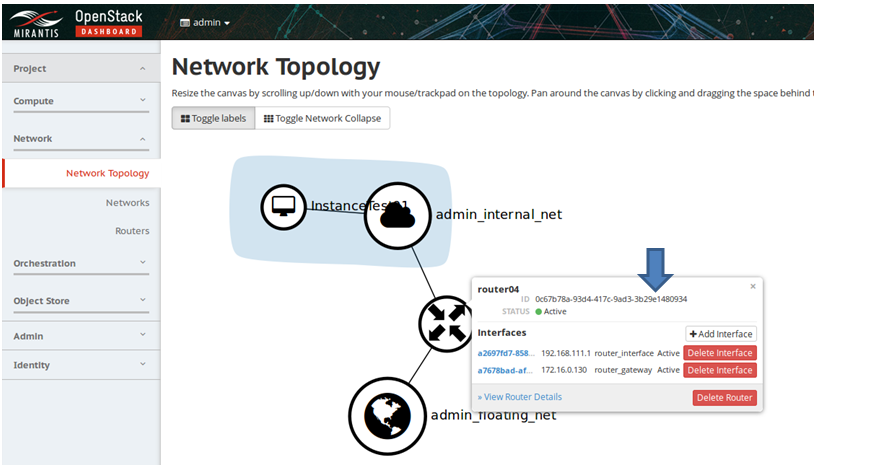
root@node-3:~# neutron net-list
+--------------------------------------+--------------------+-------------------------------------------------------+
| id                                   | name               | subnets                                               |
+--------------------------------------+--------------------+-------------------------------------------------------+
| b22e82c9-df6b-4580-a77e-cde8e93f30d8 | admin_floating_net | 7acc6b15-1c00-4447-b4f7-0fcced7a594b 172.16.0.0/24    |
| 09b1e122-cb63-44d5-af0b-244d3aa06331 | admin_internal_net | aea6fc29-dfb6-4586-9b09-70ce5c992315 192.168.111.0/24 |
+--------------------------------------+--------------------+-------------------------------------------------------+
I create a keypair that will be injected in the future instance in order to avoid a password authentification (unless if a password authentification was set up).. This step is not useful for this case because the Cirros image provides a password by default. But it can be helpful if you use other cloud images (ubuntu, centos, etc..)
root@node-3:~# nova keypair-add --pub-key ~/.ssh/authorized_keys mykey
root@node-3:~# nova keypair-list
+-------+------+-------------------------------------------------+
| Name  | Type | Fingerprint                                     |
+-------+------+-------------------------------------------------+
| mykey | ssh  | ee:56:e6:c0:7b:e2:d5:2b:61:23:d7:76:49:b3:d8:d5 |
+-------+------+-------------------------------------------------+
Now I got all the informations that I need, let’s create the instance which I will name InstanceTest01
root@node-3:~# nova boot \
> --flavor m1.micro \
> --image TestVM \
> --key-name mykey \
> --nic net-id=09b1e122-cb63-44d5-af0b-244d3aa06331 \
> InstanceTest01
+--------------------------------------+-------------------------------------------------+
| Property | Value |
+--------------------------------------+-------------------------------------------------+
| OS-DCF:diskConfig | MANUAL |
| OS-EXT-AZ:availability_zone | |
| OS-EXT-SRV-ATTR:host | - |
| OS-EXT-SRV-ATTR:hostname | instancetest01 |
| OS-EXT-SRV-ATTR:hypervisor_hostname | - |
| OS-EXT-SRV-ATTR:instance_name | instance-00000001 |
| OS-EXT-SRV-ATTR:kernel_id | |
| OS-EXT-SRV-ATTR:launch_index | 0 |
| OS-EXT-SRV-ATTR:ramdisk_id | |
| OS-EXT-SRV-ATTR:reservation_id | r-dyo0086w |
| OS-EXT-SRV-ATTR:root_device_name | - |
| OS-EXT-SRV-ATTR:user_data | - |
| OS-EXT-STS:power_state | 0 |
| OS-EXT-STS:task_state | scheduling |
| OS-EXT-STS:vm_state | building |
| OS-SRV-USG:launched_at | - |
| OS-SRV-USG:terminated_at | - |
| accessIPv4 | |
| accessIPv6 | |
| adminPass | bUQJDtwM3vjr |
| config_drive | |
| created | 2016-10-11T13:08:34Z |
| description | - |
| flavor | m1.micro (d942587a-c48b-48ca-9c96-cad3c358eb6e) |
| hostId | |
| host_status | |
| id | b84b49f1-1b01-4aa9-bd9c-c8691fca9298 |
| image | TestVM (a3708fe7-60f7-49c9-91ed-a6eee1ab8ba4) |
| key_name | mykey |
| locked | False |
| metadata | {} |
| name | InstanceTest01 |
| os-extended-volumes:volumes_attached | [] |
| progress | 0 |
| security_groups | default |
| status | BUILD |
| tenant_id | abfec6fc54c14da28f9971e04c344ec8 |
| updated | 2016-10-11T13:08:36Z |
| user_id | d0e1e11f84064f4c8aa02381f0d42ed2 |
+--------------------------------------+-------------------------------------------------+
Here is the instance running :
root@node-3:~# nova list
+--------------------------------------+----------------+--------+------------+-------------+----------------------------------+
| ID | Name | Status | Task State | Power State | Networks |
+--------------------------------------+----------------+--------+------------+-------------+----------------------------------+
| b84b49f1-1b01-4aa9-bd9c-c8691fca9298 | InstanceTest01 | ACTIVE | - | Running | admin_internal_net=192.168.111.3 |
+--------------------------------------+----------------+--------+------------+-------------+----------------------------------+
So the instance is up and running
We connect to the compute node to check if the instance is really running on it:
Connection to controller closed.
[root@fuel ~]# ssh compute
Welcome to Ubuntu 14.04.5 LTS (GNU/Linux 3.13.0-98-generic x86_64)

* Documentation: https://help.ubuntu.com/
Last login: Tue Oct 11 18:07:23 2016 from 10.20.0.2
root@node-2:~# virsh list
Id Name State
----------------------------------------------------
2 instance-00000001 running

root@node-2:~#
Yes, the instance is running.
I need to add the ssh rule for accessing the instance, I will add also the icmp one. These rules are managed by security groups.
Let’s try to ping the instance just created, from now all the operations are done on the controller node :
 root@node-3:~# ip netns exec qrouter-0c67b78a-93d4-417c-9ad3-3b29e1480934 ping 192.168.111.3
 PING 192.168.111.3 (192.168.111.3) 56(84) bytes of data.
 ^C
 --- 192.168.111.3 ping statistics ---
 3 packets transmitted, 0 received, 100% packet loss, time 2004ms
I can not ping my instance, let’s see what rules are currently in the default security group created by OpenStack:
root@node-3:~# nova secgroup-list
 +--------------------------------------+---------+------------------------+
 | Id                                   | Name    | Description            |
 +--------------------------------------+---------+------------------------+
 | 954e4d85-ea38-4a4b-bbe6-e355946fdfb0 | default | Default security group |
 +--------------------------------------+---------+------------------------+
root@node-3:~# nova secgroup-list-rules 954e4d85-ea38-4a4b-bbe6-e355946fdfb0
+-------------+-----------+---------+-----------+--------------+
| IP Protocol | From Port | To Port | IP Range | Source Group |
+-------------+-----------+---------+-----------+--------------+
|                                             | | | | default |
|                                             | | | | default |
+-------------+-----------+---------+-----------+--------------+
There are no rules. So, I add the icmp rule in this default security group
root@node-3:~# nova secgroup-add-rule 954e4d85-ea38-4a4b-bbe6-e355946fdfb0 icmp -1 -1 0.0.0.0/0
 +-------------+-----------+---------+-----------+--------------+
 | IP Protocol | From Port | To Port | IP Range | Source Group |
 +-------------+-----------+---------+-----------+--------------+
 | icmp | -1 | -1 | 0.0.0.0/0 | |
 +-------------+-----------+---------+-----------+--------------+
I check if the rule was added
root@node-3:~# nova secgroup-list-rules 954e4d85-ea38-4a4b-bbe6-e355946fdfb0
 +-------------+-----------+---------+-----------+--------------+
 | IP Protocol | From Port | To Port | IP Range  | Source Group |
 +-------------+-----------+---------+-----------+--------------+
 |             |           |         |           | default      |
 |             |           |         |           | default      |
 | icmp        | -1        | -1      | 0.0.0.0/0 |              |
 +-------------+-----------+---------+-----------+--------------+
Let’s test if I can ping the instance, we need to use the network namespace qrouter which is basically the router that the controller node will use to reach the instance on the compute node
root@node-3:~# ip netns list
qdhcp-09b1e122-cb63-44d5-af0b-244d3aa06331
qrouter-0c67b78a-93d4-417c-9ad3-3b29e1480934
haproxy
vrouter
root@node-3:~# ip netns exec qrouter-0c67b78a-93d4-417c-9ad3-3b29e1480934 ping 192.168.111.3
 PING 192.168.111.3 (192.168.111.3) 56(84) bytes of data.
 64 bytes from 192.168.111.3: icmp_seq=1 ttl=64 time=2.29 ms
 64 bytes from 192.168.111.3: icmp_seq=2 ttl=64 time=0.789 ms
 ^C
 --- 192.168.111.3 ping statistics ---
 2 packets transmitted, 2 received, 0% packet loss, time 1001ms
I do the same with the ssh rule
First, I test if I can access my instance
root@node-3:~# ip netns exec qrouter-0c67b78a-93d4-417c-9ad3-3b29e1480934 ssh [email protected] -v
 OpenSSH_6.6.1, OpenSSL 1.0.1f 6 Jan 2014
 debug1: Reading configuration data /etc/ssh/ssh_config
 debug1: /etc/ssh/ssh_config line 19: Applying options for *
 debug1: Connecting to 192.168.111.3 [192.168.111.3] port 22.
 ^C
No I can not, so I add the rule
root@node-3:~# nova secgroup-add-rule  954e4d85-ea38-4a4b-bbe6-e355946fdfb0 tcp 22 22 0.0.0.0/0
+-------------+-----------+---------+-----------+--------------+
| IP Protocol | From Port | To Port | IP Range  | Source Group |
+-------------+-----------+---------+-----------+--------------+
| tcp         | 22        | 22      | 0.0.0.0/0 |              |
+-------------+-----------+---------+-----------+--------------+
I check if the rule was added :
root@node-3:~# nova secgroup-list-rules 954e4d85-ea38-4a4b-bbe6-e355946fdfb0
+-------------+-----------+---------+-----------+--------------+
| IP Protocol | From Port | To Port | IP Range | Source Group |
+-------------+-----------+---------+-----------+--------------+
| | | | | default |
| tcp | 22 | 22 | 0.0.0.0/0 | |
| | | | | default |
| icmp | -1 | -1 | 0.0.0.0/0 | |
+-------------+-----------+---------+-----------+--------------+
I connect to my instance, the username by default is cirros
root@node-3:~# ip netns exec qrouter-0c67b78a-93d4-417c-9ad3-3b29e1480934 ssh [email protected] -v
OpenSSH_6.6.1, OpenSSL 1.0.1f 6 Jan 2014
debug1: Reading configuration data /etc/ssh/ssh_config
debug1: /etc/ssh/ssh_config line 19: Applying options for *
debug1: Connecting to 192.168.111.3 [192.168.111.3] port 22.
debug1: Connection established.
debug1: permanently_set_uid: 0/0
debug1: identity file /root/.ssh/id_rsa type -1
debug1: identity file /root/.ssh/id_rsa-cert type -1
debug1: identity file /root/.ssh/id_dsa type -1
debug1: identity file /root/.ssh/id_dsa-cert type -1
debug1: identity file /root/.ssh/id_ecdsa type -1
debug1: identity file /root/.ssh/id_ecdsa-cert type -1
debug1: identity file /root/.ssh/id_ed25519 type -1
debug1: identity file /root/.ssh/id_ed25519-cert type -1
debug1: Enabling compatibility mode for protocol 2.0
debug1: Local version string SSH-2.0-OpenSSH_6.6.1p1 Ubuntu-2ubuntu2.8
debug1: Remote protocol version 2.0, remote software version dropbear_2015.67
debug1: no match: dropbear_2015.67
debug1: SSH2_MSG_KEXINIT sent
debug1: SSH2_MSG_KEXINIT received
debug1: kex: server->client aes128-ctr hmac-md5 none
debug1: kex: client->server aes128-ctr hmac-md5 none
debug1: sending SSH2_MSG_KEX_ECDH_INIT
debug1: expecting SSH2_MSG_KEX_ECDH_REPLY
debug1: Server host key: ECDSA 1b:f1:1c:34:13:83:cd:b1:37:a9:e4:32:37:65:91:c4
The authenticity of host '192.168.111.3 (192.168.111.3)' can't be established.
ECDSA key fingerprint is 1b:f1:1c:34:13:83:cd:b1:37:a9:e4:32:37:65:91:c4.
Are you sure you want to continue connecting (yes/no)? yes
Type yes, and the password is cubswin:)
Warning: Permanently added '192.168.111.3' (ECDSA) to the list of known hosts.
debug1: ssh_ecdsa_verify: signature correct
debug1: SSH2_MSG_NEWKEYS sent
debug1: expecting SSH2_MSG_NEWKEYS
debug1: SSH2_MSG_NEWKEYS received
debug1: SSH2_MSG_SERVICE_REQUEST sent
debug1: SSH2_MSG_SERVICE_ACCEPT received
debug1: Authentications that can continue: publickey,password
debug1: Next authentication method: publickey
debug1: Trying private key: /root/.ssh/id_rsa
debug1: Trying private key: /root/.ssh/id_dsa
debug1: Trying private key: /root/.ssh/id_ecdsa
debug1: Trying private key: /root/.ssh/id_ed25519
debug1: Next authentication method: password
[email protected]'s password:
debug1: Authentication succeeded (password).
Authenticated to 192.168.111.3 ([192.168.111.3]:22).
debug1: channel 0: new [client-session]
debug1: Entering interactive session.
debug1: Sending environment.
debug1: Sending env LANG = en_US.UTF-8
$
$ # "I am connected to my instance"
$
So now, I am connected to my instance
Let’s check if I can ping google
$ ping www.google.com
PING www.google.com (172.217.18.100): 56 data bytes
64 bytes from 172.217.18.100: seq=0 ttl=59 time=29.485 ms
64 bytes from 172.217.18.100: seq=1 ttl=59 time=9.089 ms
64 bytes from 172.217.18.100: seq=2 ttl=59 time=27.027 ms
64 bytes from 172.217.18.100: seq=3 ttl=59 time=9.992 ms
64 bytes from 172.217.18.100: seq=4 ttl=59 time=26.734 ms
This ended this series. Mirantis made OpenStack very simple to install but it requires good skills in Puppet and Astute if you want to customize the installation (like create a network node role or customize the installation of MySQL database in the controller node for example)
In other blogs, I will show you how to add nodes to the Fuel environment to make the cloud more powerful.
![Thumbnail [60x60]](https://www.dbi-services.com/blog/wp-content/uploads/2022/05/open-source-author.png)
![Thumbnail [90x90]](https://www.dbi-services.com/blog/wp-content/uploads/2024/03/AHI_web.jpg)
![Thumbnail [90x90]](https://www.dbi-services.com/blog/wp-content/uploads/2025/07/ALK_MIN.jpeg)
![Thumbnail [90x90]](https://www.dbi-services.com/blog/wp-content/uploads/2025/05/JDE_Web-1-scaled.jpg)
![Thumbnail [90x90]](https://www.dbi-services.com/blog/wp-content/uploads/2022/08/ADE_WEB-min-scaled.jpg)