AWS comes with the great service of auto scaling, that gives the possibility to automatically adapt the environment to the changing needs.
This helps to optimize costs and performance. With rising needs, your environment scales up and as soon as the needs decrease again, your environment will scale down again.
The benefits of EC2 Auto Scaling are quite simple:
1. Right-sized resources at any time
2. Controlled costs, because unneeded resources are removed automatically
And the best: Auto Scaling itself is free. You only pay for the costs your generate using the application resources and CloudWatch.
In this article we gonna build a really basic Auto Scaling Group that helps to have (at least) one instance running all the time.
To setup the Autoscaling Group we ned two main steps:
1. Build the Launch Configuration
2. Create the EC2 Auto Scaling Group
Build the Launch Configuration
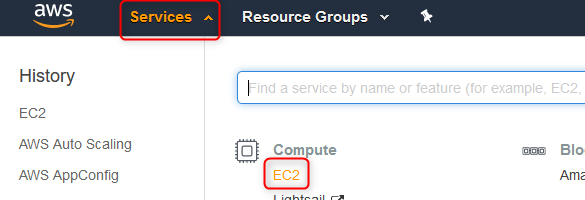
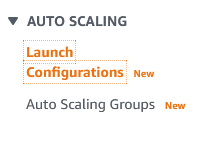
So let’s have a look on how we can setup an EC2 auto scaling group to get the environment more flexible and elastic. Therefore navigate to the EC2 service and on the left bar, scroll down to the bottom on the left and click on “Launch Configuration”
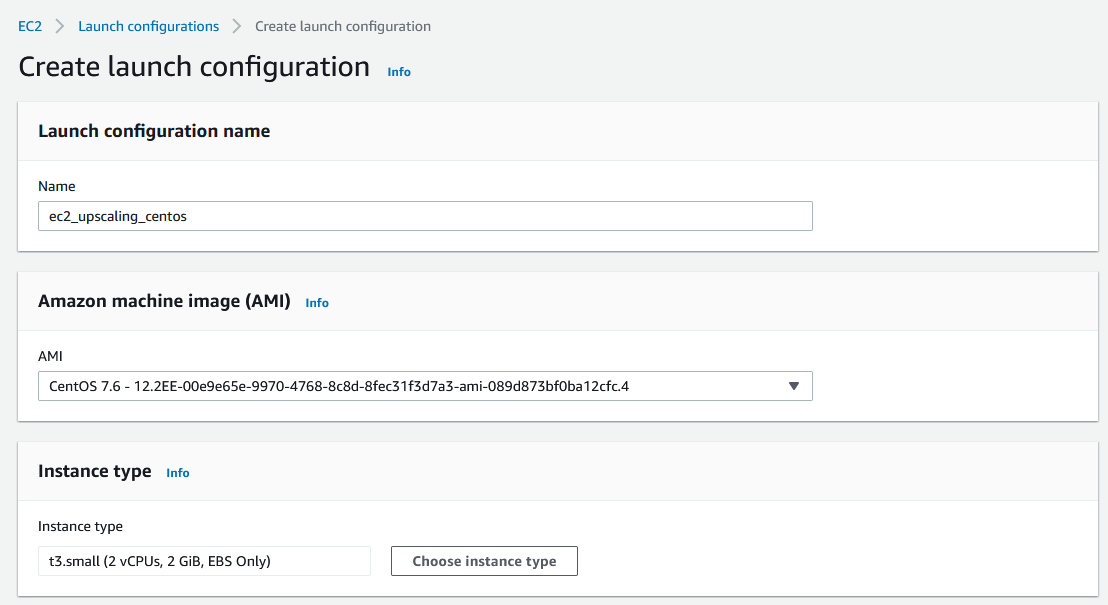
Now you can configure what you want to launch during the auto-scaling.
1. Give the configuration a name and select the AMI needed for launch of a new EC2 Instance. Also select the instance type which should be launched.
2. Next the EBS volumes can be defined and/or the size could be adjusted.
In this example, we only select the root volume.

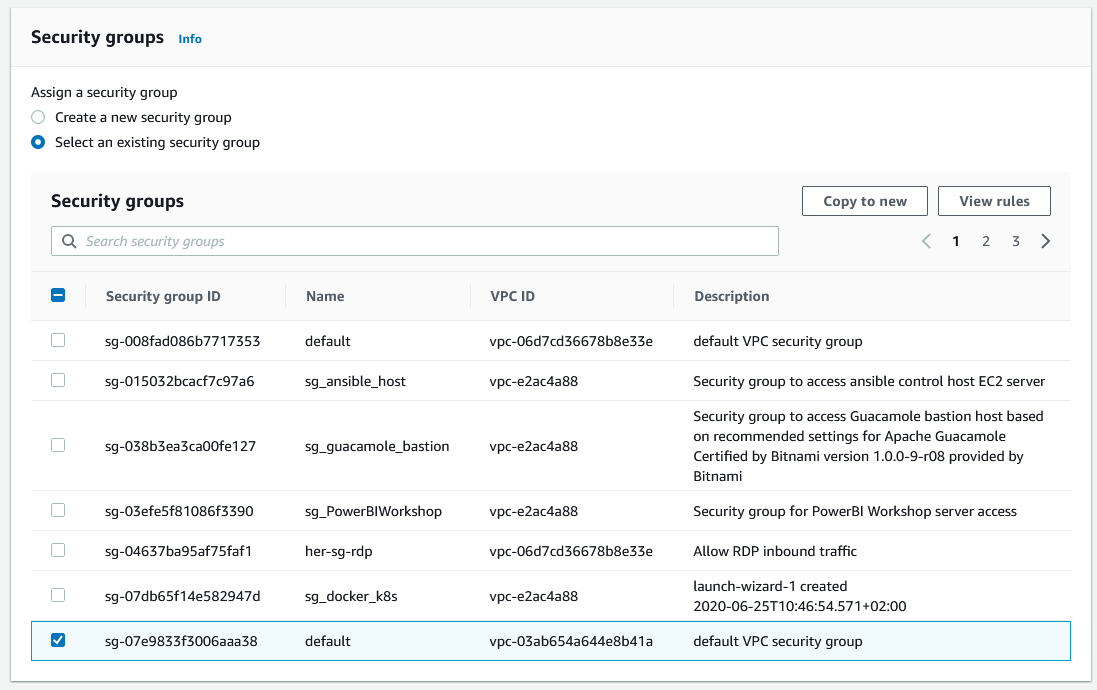
3. Choose the Security Group (for more information, click here) .
In this example we choose the default one, but also own security groups can be selected.
4. Select the key pair which should be used to connect to the instance. Be sure to select the checkbox as well.
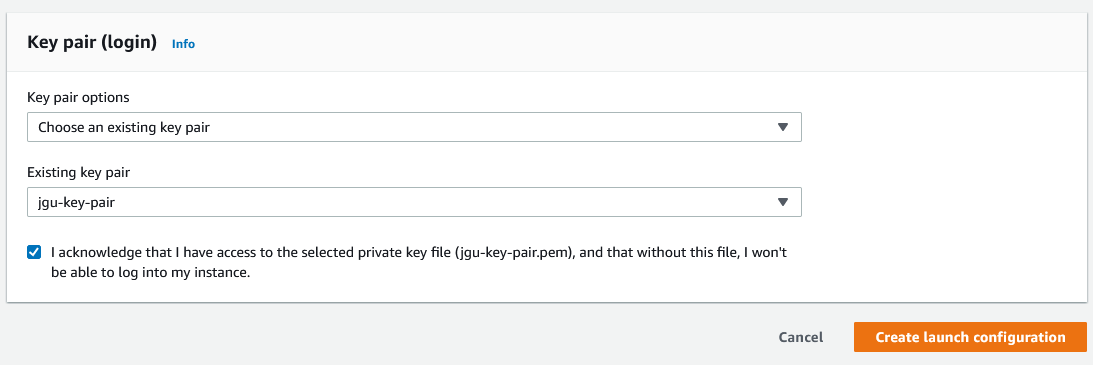
As soon as the “Create launch configuration” button is clicked, you are redirected to the overview page and see the newly created launch configuration.

Create the EC2 Auto Scaling Group
Now we can go on with the Auto Scaling group.
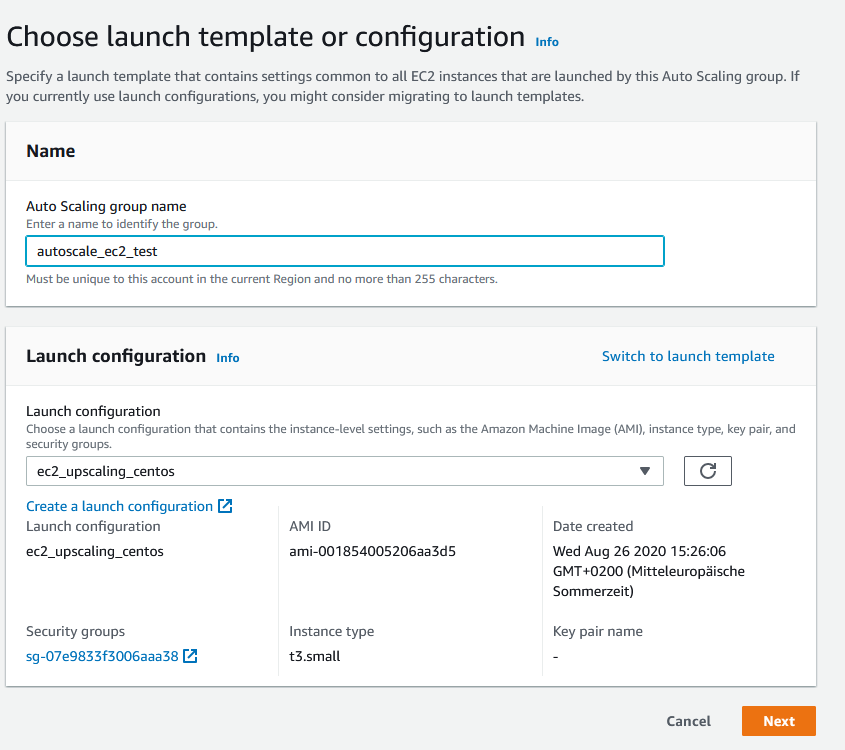
Therefore select the configuration created in the above step and go on with configuring the auto scaling group.
Click on “Actions” on the right corner and afterwards on “Create Auto Scaling group”.

While creating the group we have to go through different steps. The first two steps are mandatory all others are optional.
In this article we go with the defaults to keep it simple. Of course you can configure the size of the group and notifications fitting to your needs.
1. In the first step we need to give a name to the group and check, if the launch configuration is the correct one. It’s auto filled.
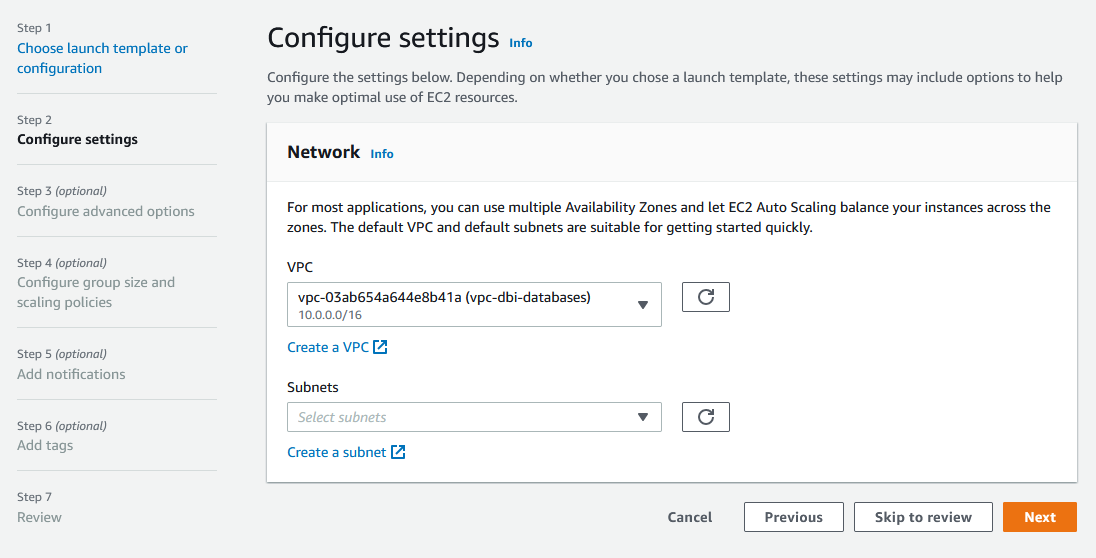
2. Next step is to select the VPC or create a new one. We select an existing in here.
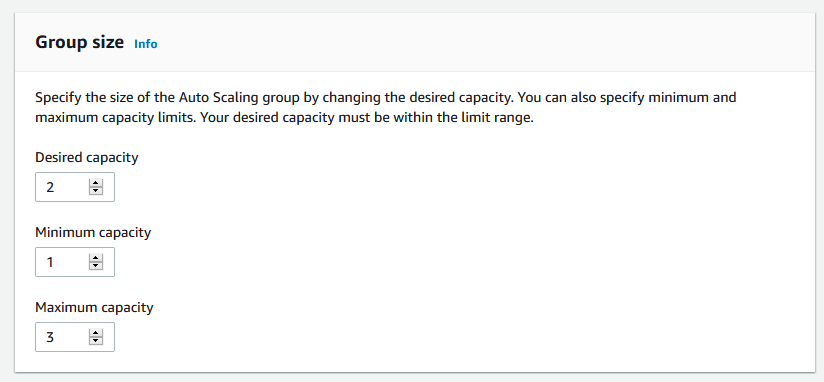
3. We jump over the step “Load balancing, Health checks” and go with the configuration of the group size.
In this example we want at least one instance running all the time, but not more than three.
At the end you get a summary of your configuration. Check if everything fits your needs. Keep in mind, in case of errors or changes, you’re still able to adjust things later.
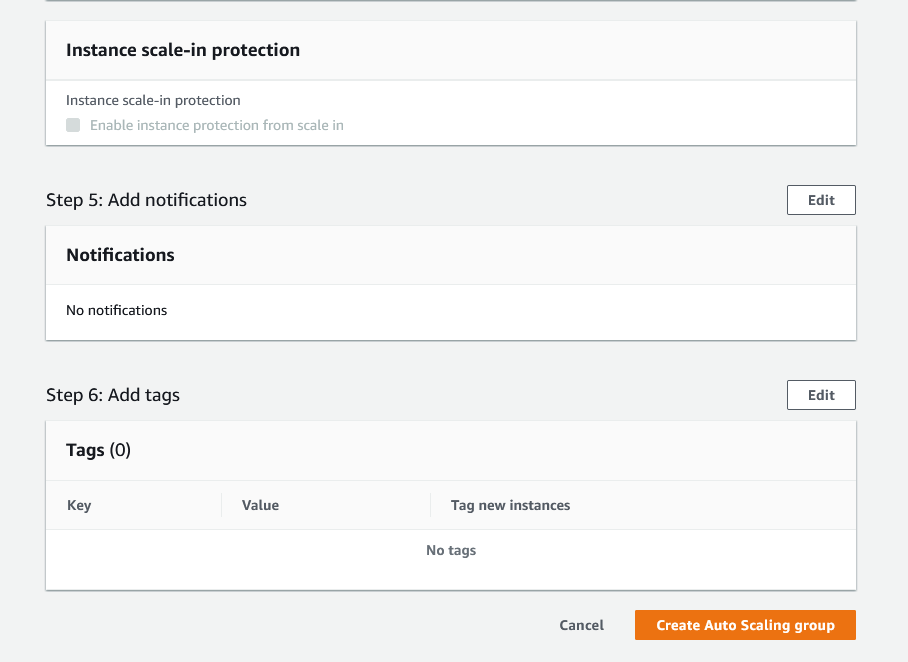
Click on “Create Autoscaling group”.
Once Scaling Group is ready to use. The launch of the instance and any errors can be checked using the “Activity tab”.
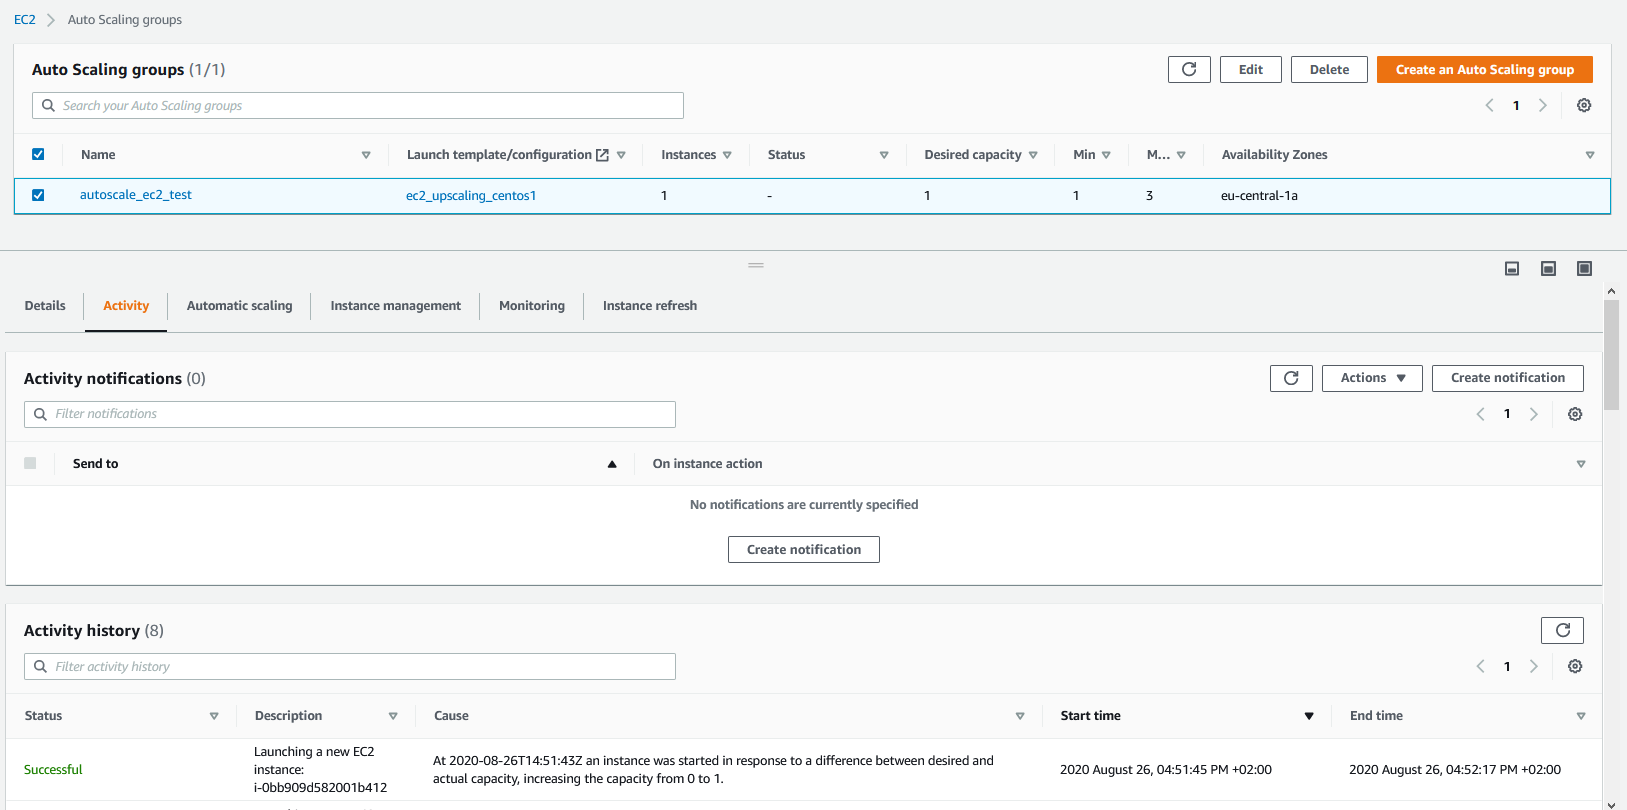
That’s it. The scaling group is ready and running.
Annotations:
– As soon as you terminate your instance, you can see a new instance launching automatically.
– To check which instances belong to your created scaling group, just go to the EC2 Dashboard – running instances and select for aws:autoscaling:groupName and you’ll get the overview of all instances belonging to that group.
![Thumbnail [60x60]](https://www.dbi-services.com/blog/wp-content/uploads/2022/05/open-source-author.png)
![Thumbnail [90x90]](https://www.dbi-services.com/blog/wp-content/uploads/2023/01/APY_web-scaled.jpg)
![Thumbnail [90x90]](https://www.dbi-services.com/blog/wp-content/uploads/2022/08/FRJ_web-min-scaled.jpg)