Creating A Recovery Services Vault In Azure
To create a recovery services vault, we first need to create a resource group by using either the CLI or the Azure interface.
Creating a resource group using the command line interface
$resourceGroup = “recovvault”
$location = “westeurope”
az group create -n $resourceGroup -l $location
The resource recovvault has been created successfully.
Now we need to setup the recovery services vault.
From Azure portal, select the resource group created then click on Add, and search for Backup and Site recovery (OMS), click on it and hit create.
Specify the following information as described in the image below:
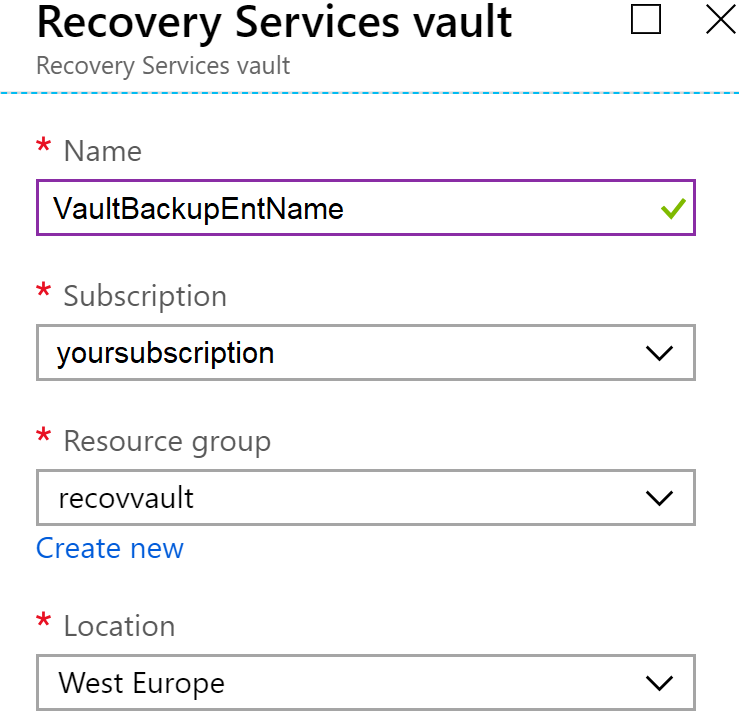
Hit create.
The recovery services vault has been created successfully.
Set the vault storage redundancy to Locally-redundant
- Select the recovery vault created
- From the options column, select Properties, then Backup configuration
- Choose Locally-redundant (cost effective than Geo-redundant)
- Hit save
Configuring the Azure Backup Agent.
We need to create a virtual machine in order to simulate an on-premise server, so click on Backup from the left menu.
For the purpose of this example, we will choose On-premises for simulation and File and Folders to backup.
Hit Prepare the infrastructure.
Then download the agent for windows server and the vault credentials by clicking on the link provided (see below):
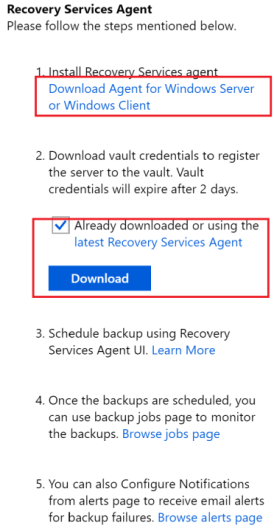
Open the Azure Recovery Services Agent service, leave the sections Installation Settings and Proxy Configuration by default then click on Install.
When the installation is done, click on Proceed to Registration.
Let’s associate the vault credential with the agent.
Browse to select the agent credential in order to associate the server with the backup vault in Azure.
Enter and confirm the passphrase, choose a location to save it then hit finish.
The server is now registered with the Azure backup and the agent properly installed.
Schedule backup for Files and Folders.
- Click on close to launch Microsoft Azure Recovery Services Agent.
- Click on Schedule Backup from the right column
- Select items to backup (my docs folder)
- Specify backup schedule (outside normal working hours)
- Leave by default the retention policy
- In our example, we choose over the network due to our small data.
- Hit Finish.
If you have small data, choose the option Over the network, otherwise choose Offline for large data.
The backup schedule is now successful.
Executing the backup.
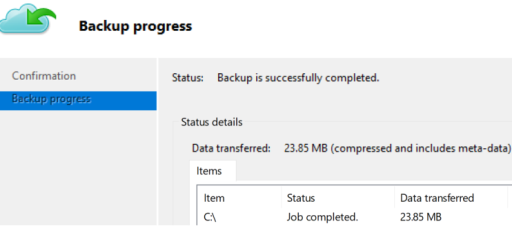
Click on Back up Now from the right column
Hit back up and close (see below):
Recovering Data
- Click on Recover data from the right column of the window backup
- Choose This server
- Choose Volume
- Select the volume and date
- Choose another recovery destination
- Hit recover
The recovery is now successful, the folder has been properly recovered.
Information related to the cost of resources used during the implementation of the recovery vault:
Use the below PowerShell command to get an overview of the cost of the resources used:
Get-AzConsumptionUsageDetail -BillingPeriodName 201903 -ResourceGroup recovvault
If you are in a test environment, to avoid paying extra cost, make sure to delete the resource group (command-line below) created if not used.
- az group delete -n $resourceGroup -y
Need further details about managing and monitoring a recovery service vault, click here.
Need further details about deleting a recovery service vault, click here.
![Thumbnail [60x60]](https://www.dbi-services.com/blog/wp-content/uploads/2022/12/microsoft-square.png)
![Thumbnail [90x90]](https://www.dbi-services.com/blog/wp-content/uploads/2024/03/AHI_web.jpg)
![Thumbnail [90x90]](https://www.dbi-services.com/blog/wp-content/uploads/2025/07/ALK_MIN.jpeg)
![Thumbnail [90x90]](https://www.dbi-services.com/blog/wp-content/uploads/2025/05/JDE_Web-1-scaled.jpg)
![Thumbnail [90x90]](https://www.dbi-services.com/blog/wp-content/uploads/2022/08/ADE_WEB-min-scaled.jpg)