Initially I wanted to write about Backup and Restore of Exasol databases but I quickly ran into issues, and this is the reason why this post is coming first. When you import the Exasol Community OVA as described in the first post, the VM is running with host only adapters and you can not connect to anything outside the Exasol system. This is however required if you want to store the backups outside the cluster. I’ve tried various things, like adding an additional NAT interface, but in the end I decided to do a clean re-installation from scratch using the ISO. Doing it that way gives you more information how the installation actually works and how the network is going to be set up. Better do it right from the beginning.
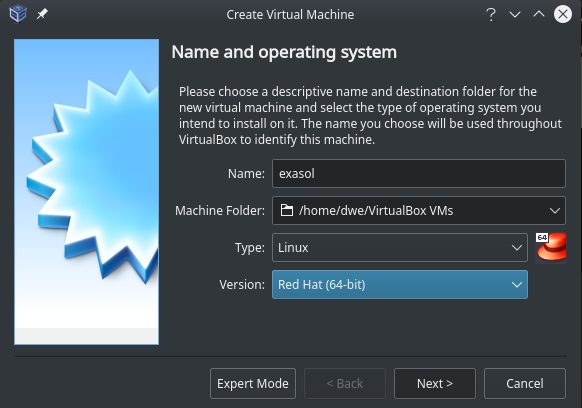
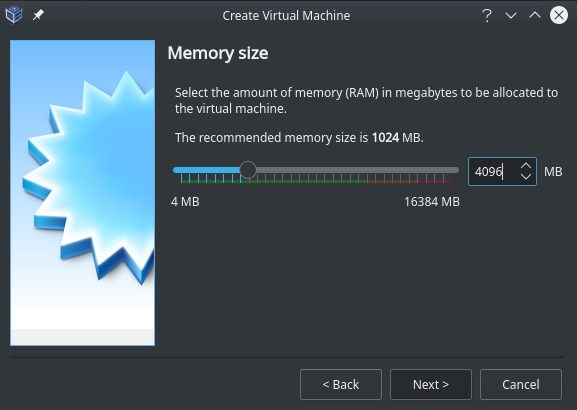
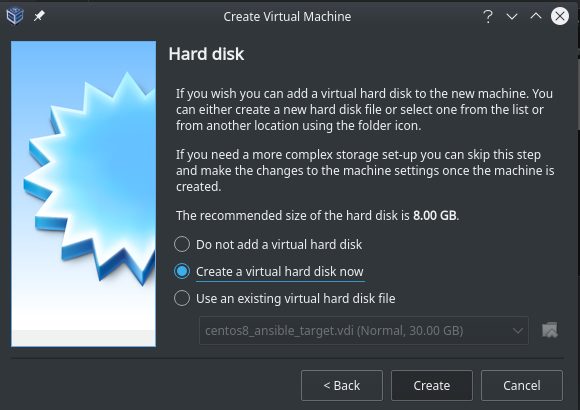
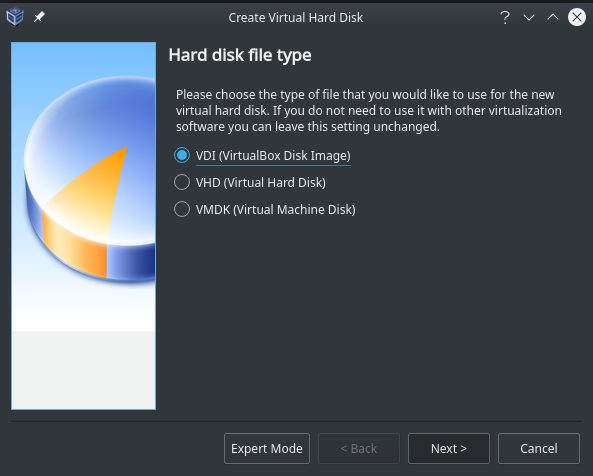
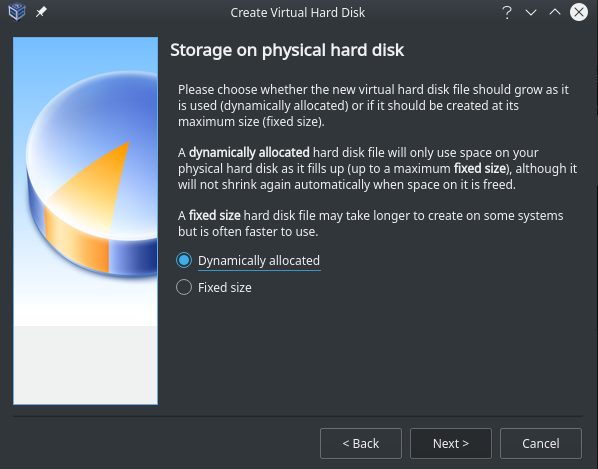
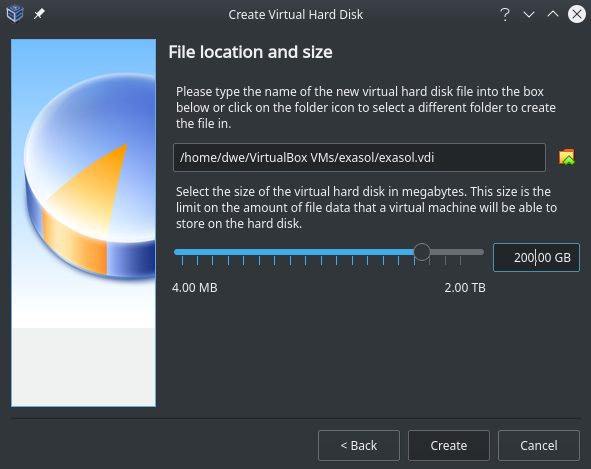
I’ve configured the Virtual Machine like this in Virtual Box:
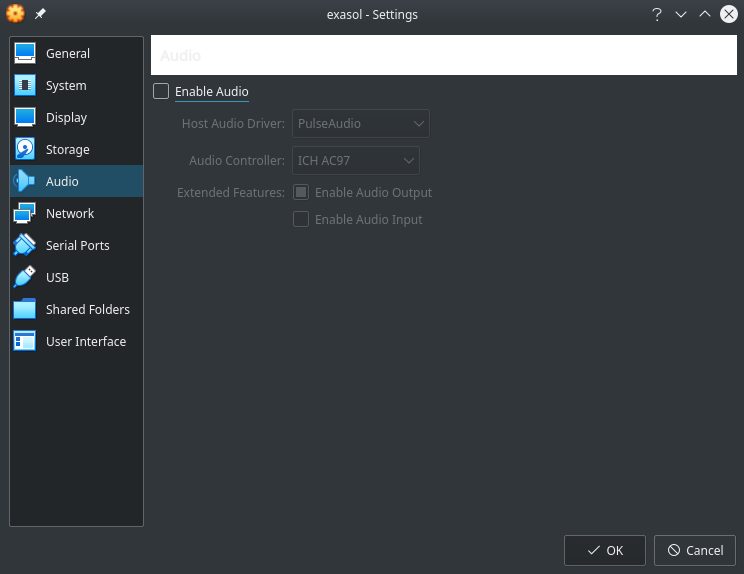
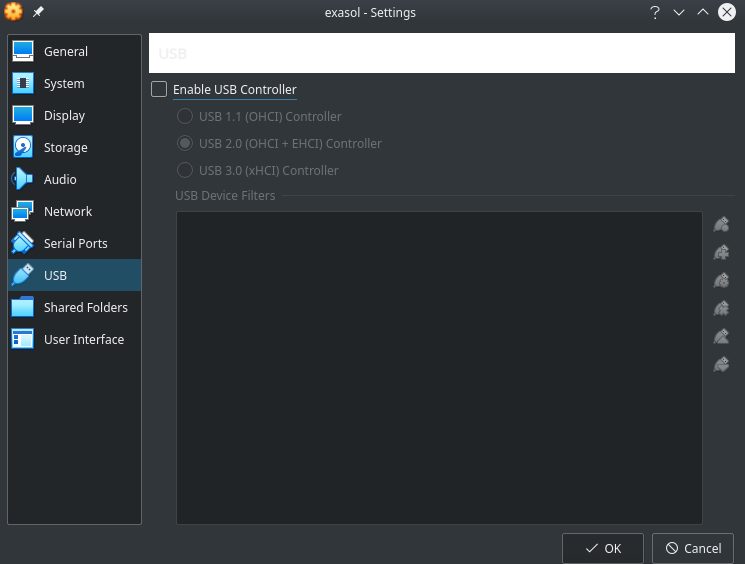
As I do not need any audio or USB support in the Exasol system I’ve disabled that:
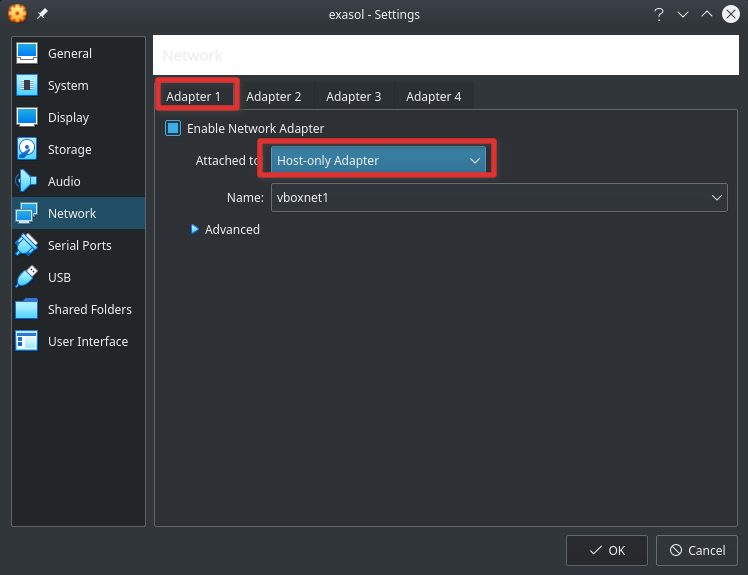
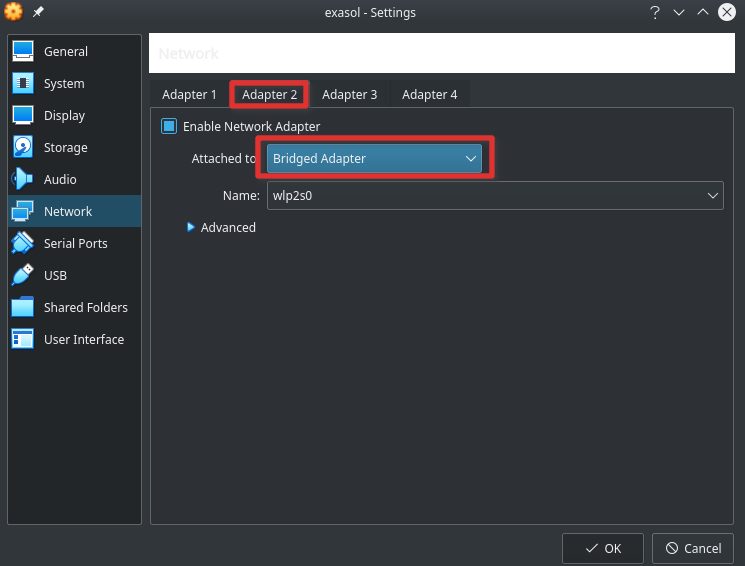
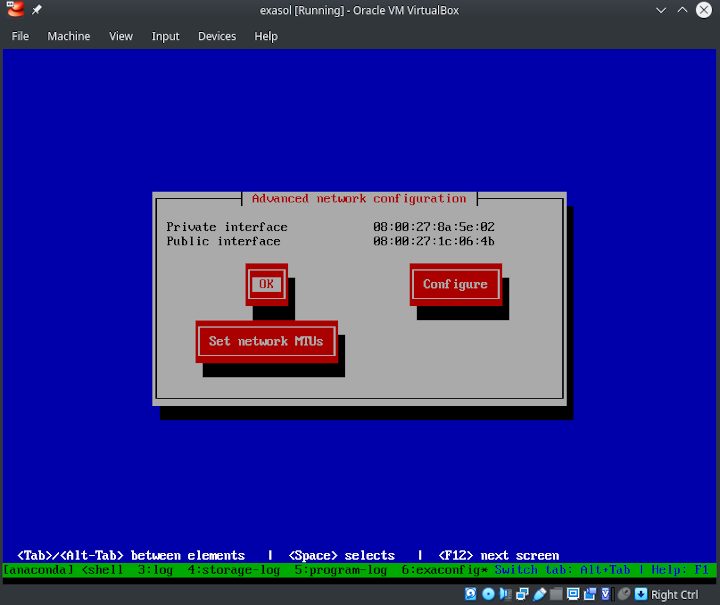
Now comes the important part: Exasol uses an internal network for communication between the nodes and a public network for the clients to connect to, and for communication out side of the Exasol system. That means you need at least two adapters configured in VirtualBox for that. The first one will be used for the internal network, and the second one will be used for the public network. I decided to go for host only for the internal network (no need for communication outside of the cluster) and for bridged for the public one (NAT would also be possible but then you need to configure port forwarding):
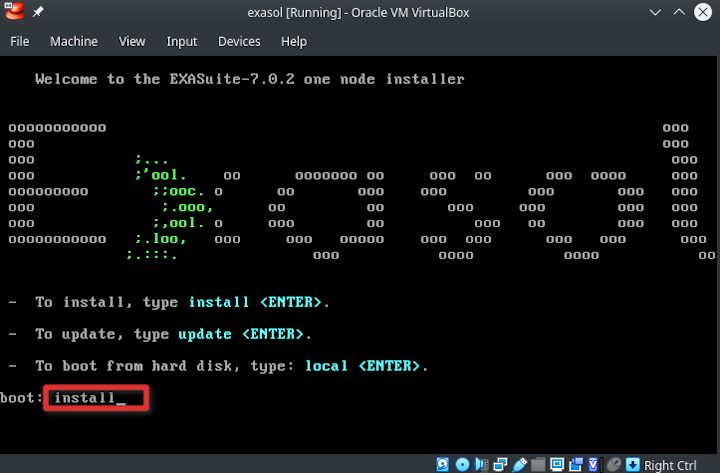
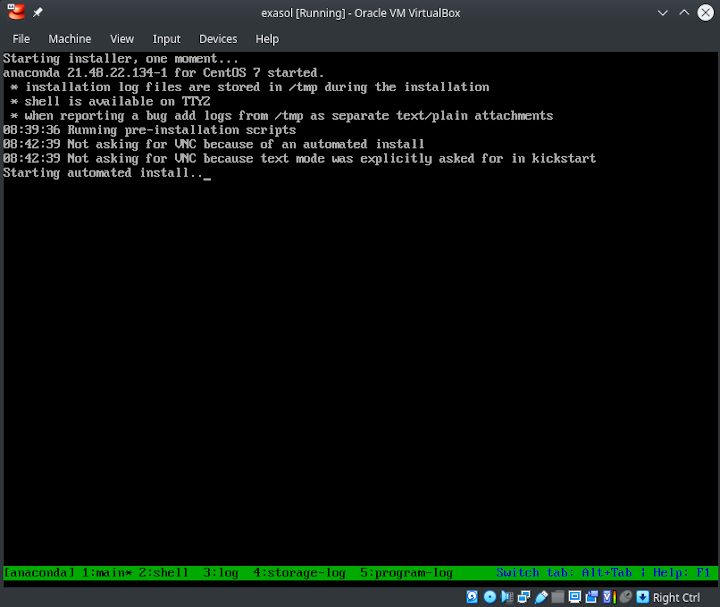
The installation is quite easy: Once you’ve attached the ISO and booted the VM it looks like this (you’ll quickly notice that the operating system is based on Red Hat, actually it is CentOS 7):

This needs to match your first adapter (the host only one in my case):

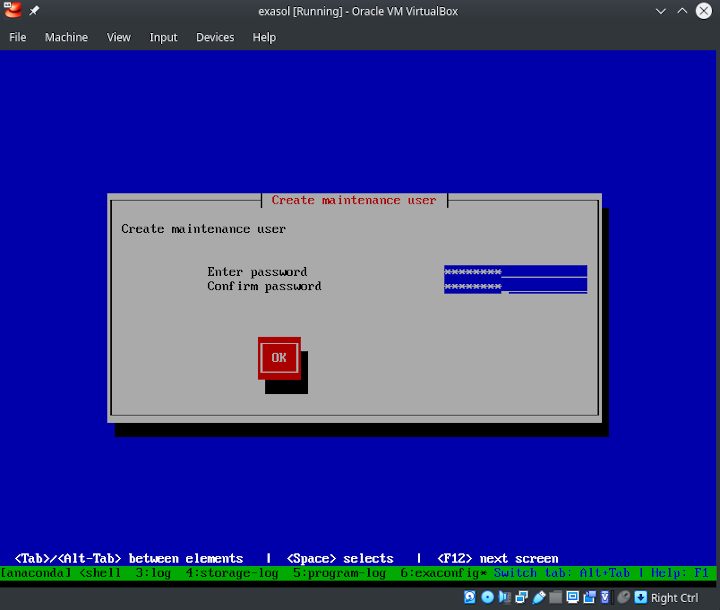
The password you specify will be used later to logon to the system in the VirtualBox console:
This is the configuration for the public network. On my workstation the bridged network is this one:
4: virbr0:  mtu 1500 qdisc noqueue state DOWN group default qlen 1000
    link/ether 52:54:00:2e:0f:94 brd ff:ff:ff:ff:ff:ff
    inet 192.168.122.1/24 brd 192.168.122.255 scope global virbr0
       valid_lft forever preferred_lft forever
… and it is bridged to this one:
3: wlp2s0:  mtu 1500 qdisc noqueue state UP group default qlen 1000
    link/ether e4:70:b8:93:2a:6f brd ff:ff:ff:ff:ff:ff
    inet 192.168.178.42/24 brd 192.168.178.255 scope global dynamic noprefixroute wlp2s0
       valid_lft 851419sec preferred_lft 851419sec
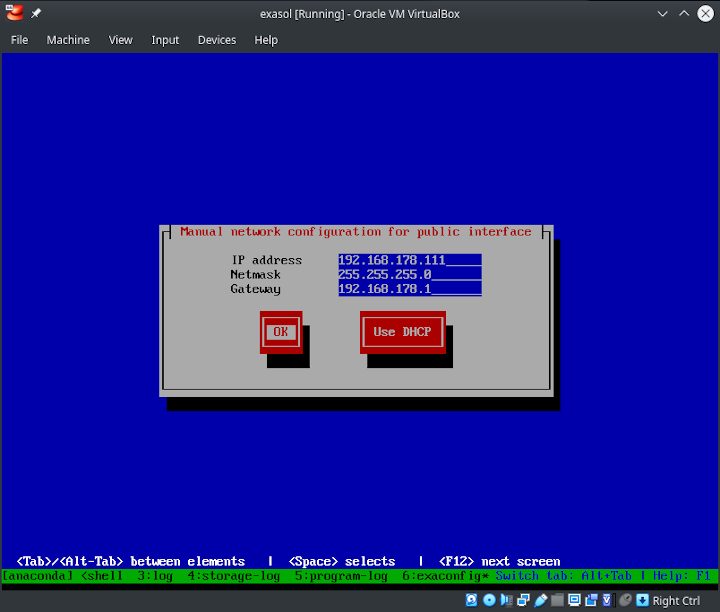
… so I need an IP address from that network and the gateway for that network:
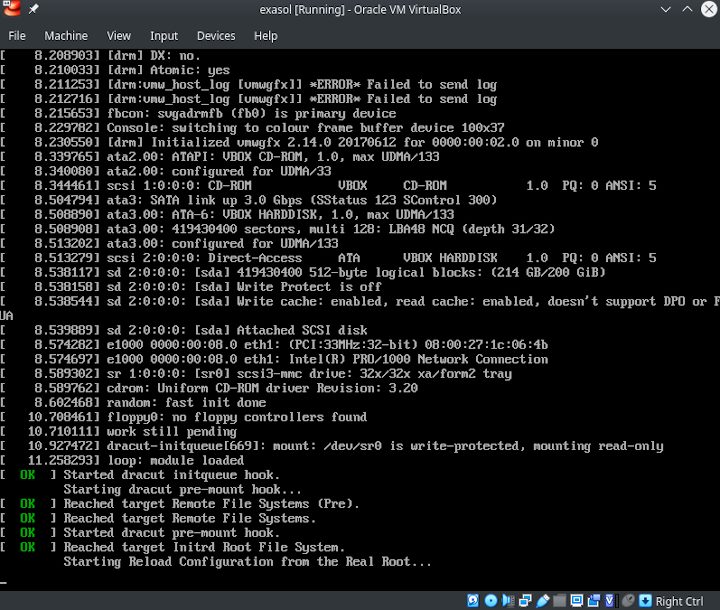
You’ll see a standard Red Hat / CentOS (kickstart) installation going on:
… until it finally completes:
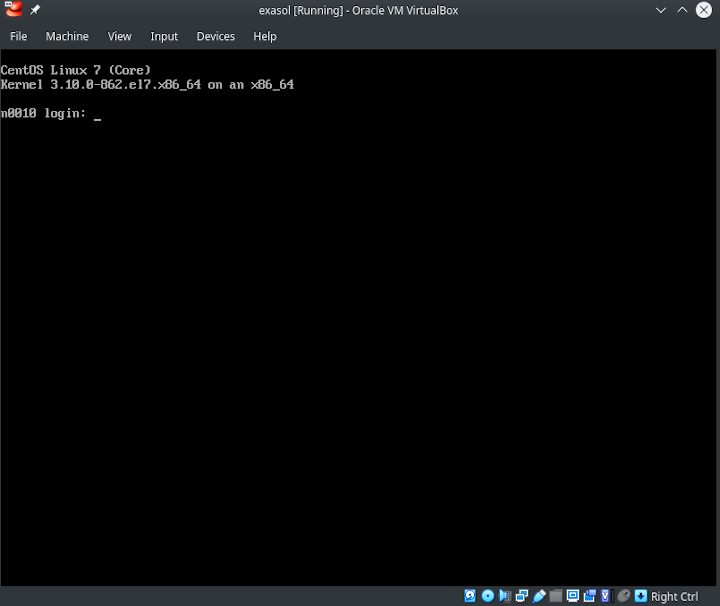
You can now login with the user “maintenance” and the password you specified during the installation:
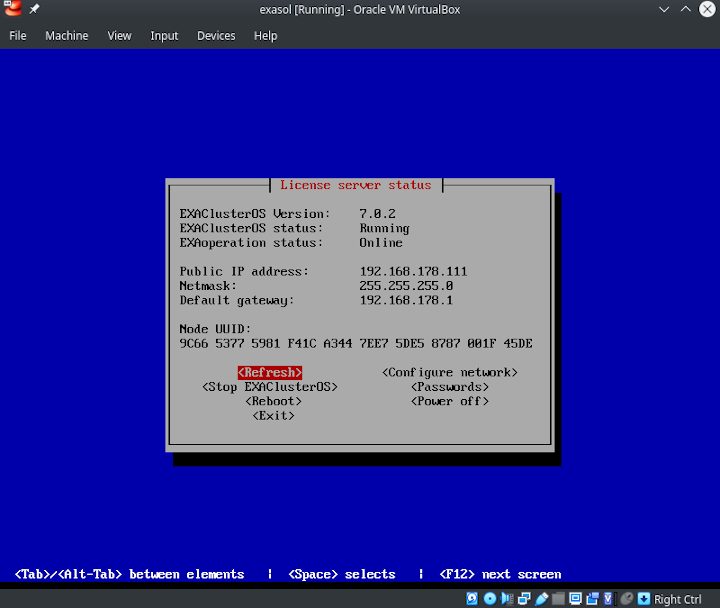
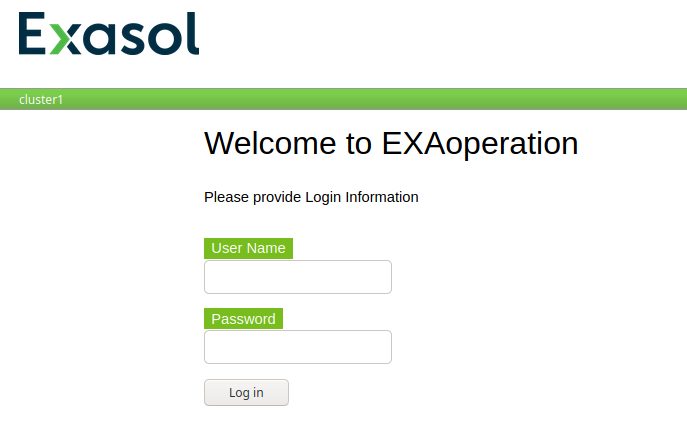
If everything went fine, the web console should be up and running (in my case http:/192.168.178.111, user=admin, password=admin):
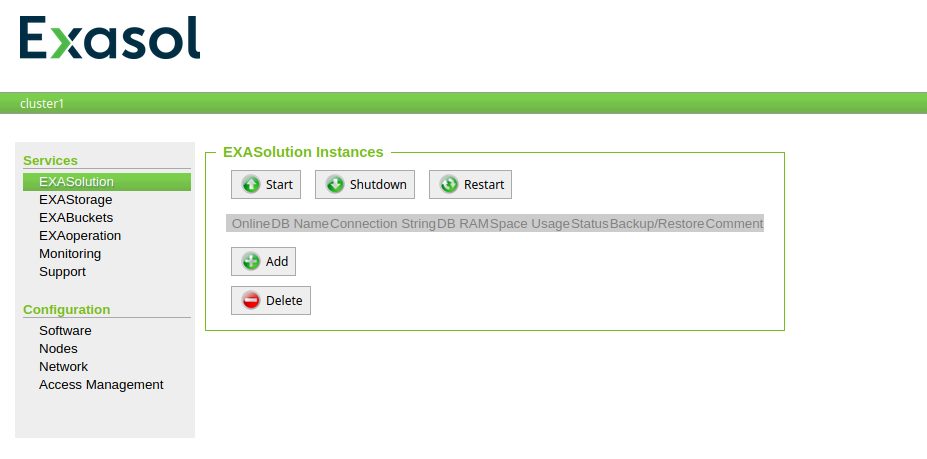
You’ll notice that no database is running, so we need to do a bit more work, compared to the OVA installation where a database already is there:
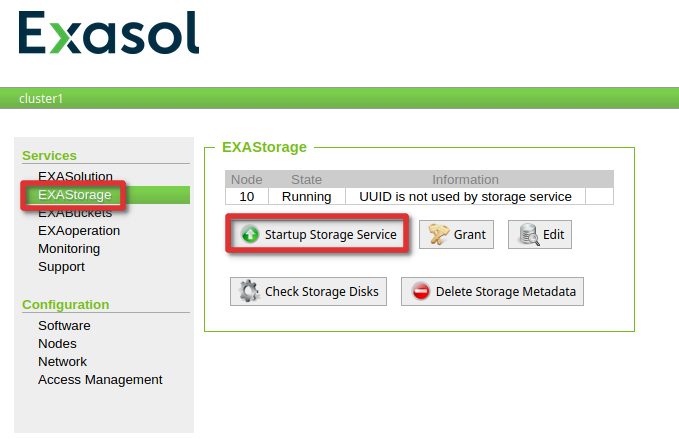
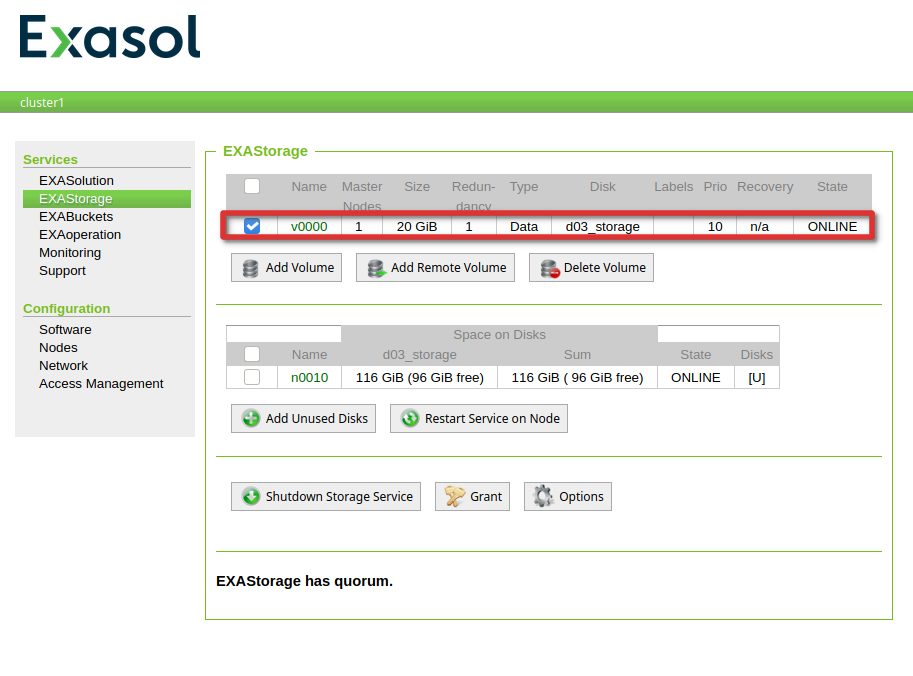
Before we can bring up the database, storage needs to be configured. Basically there are two options:
- data volumes: used for the databases
- archive volumes: used for backup purposes
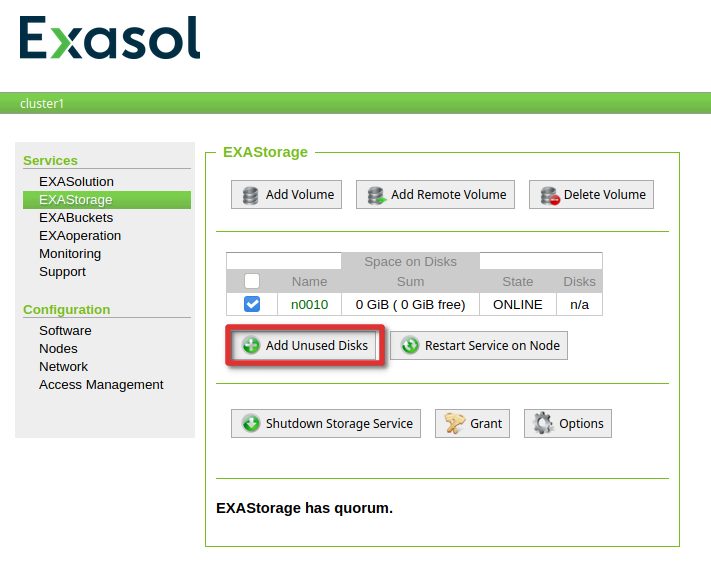
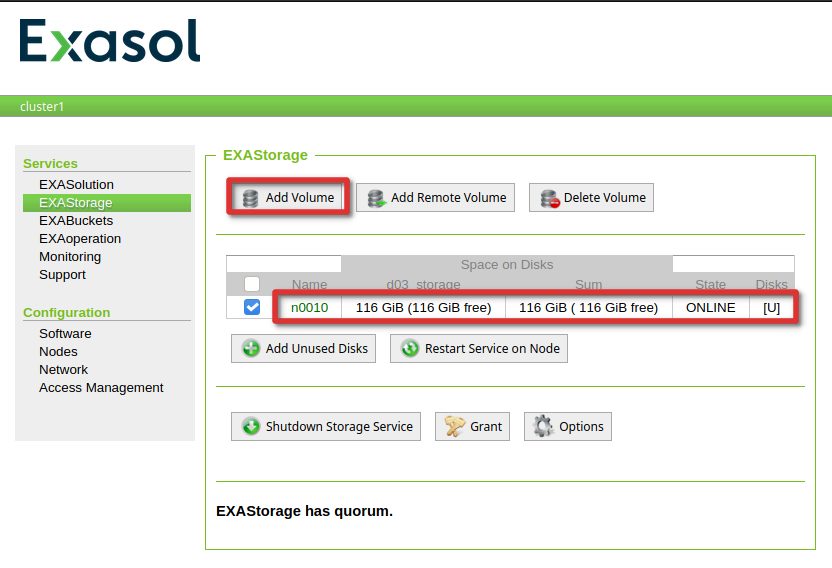
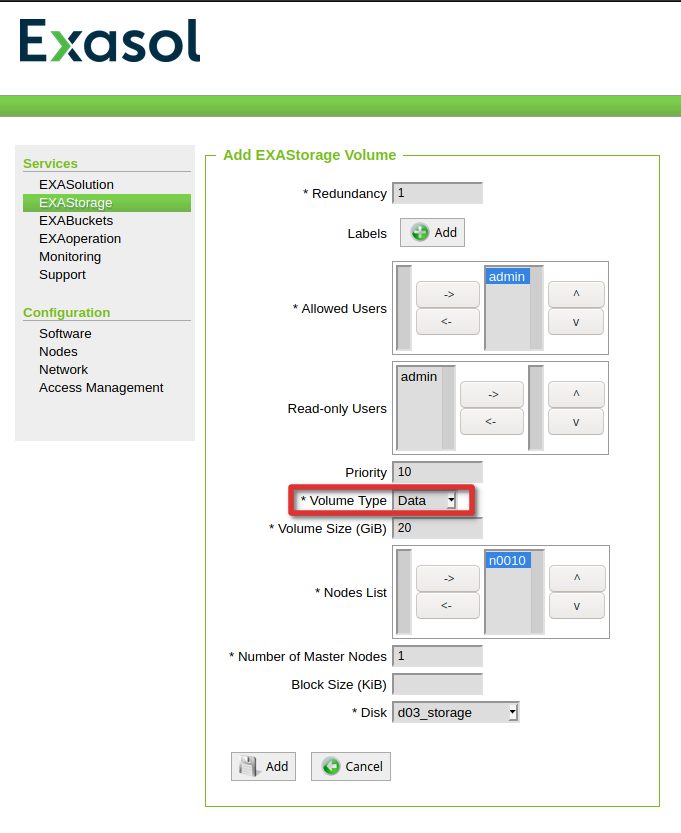
Storage can be configured in the storage section, so let’s create a new data volume:
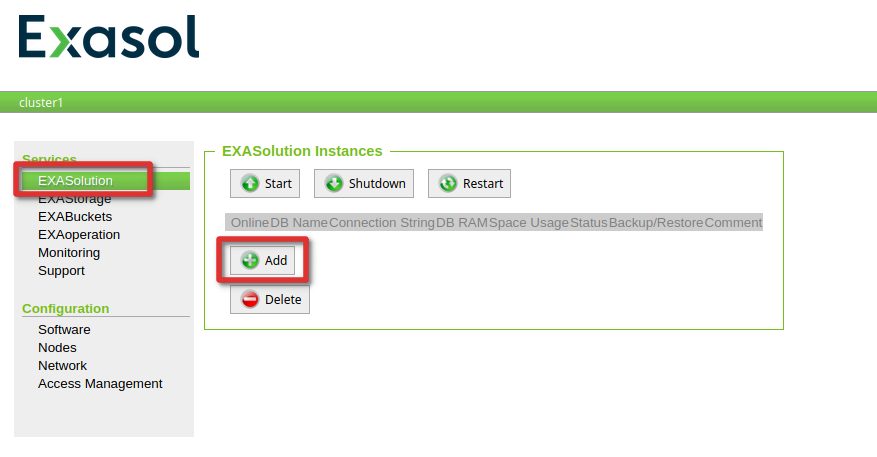
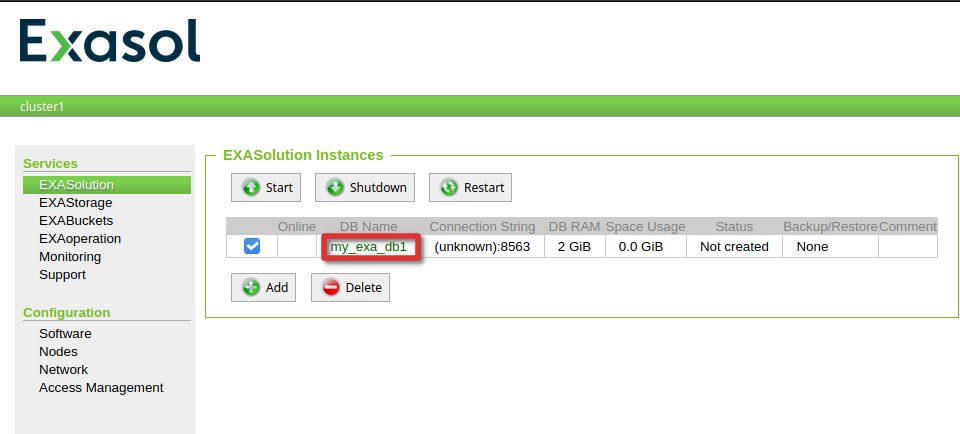
Having the storage ready, we can go ahead and create the first database:
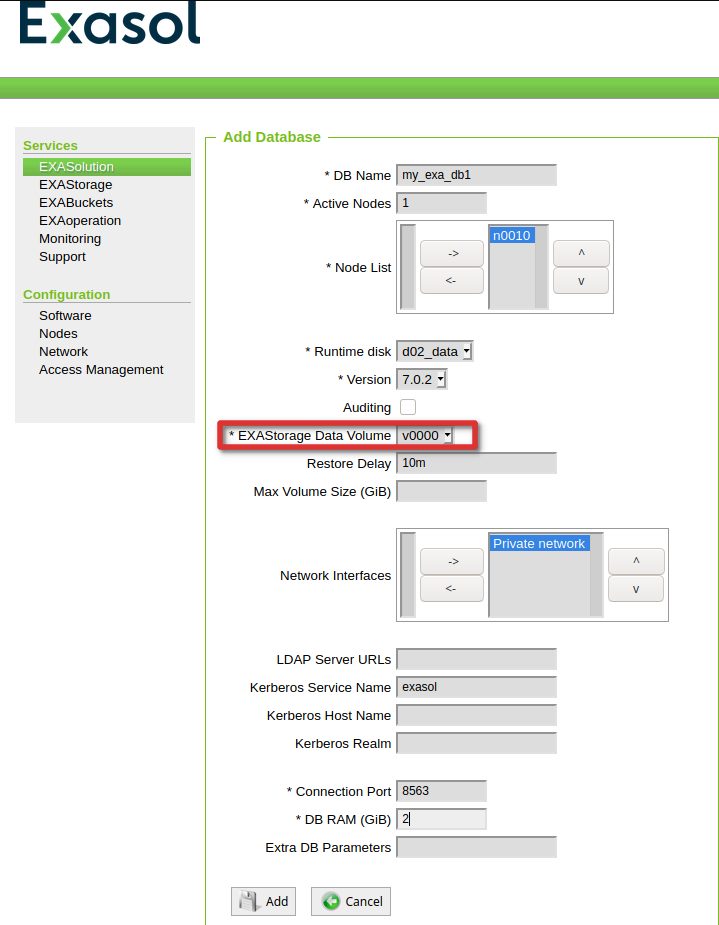
At this stage the database is not yet created, we’ve only created the specifications the database will run in:
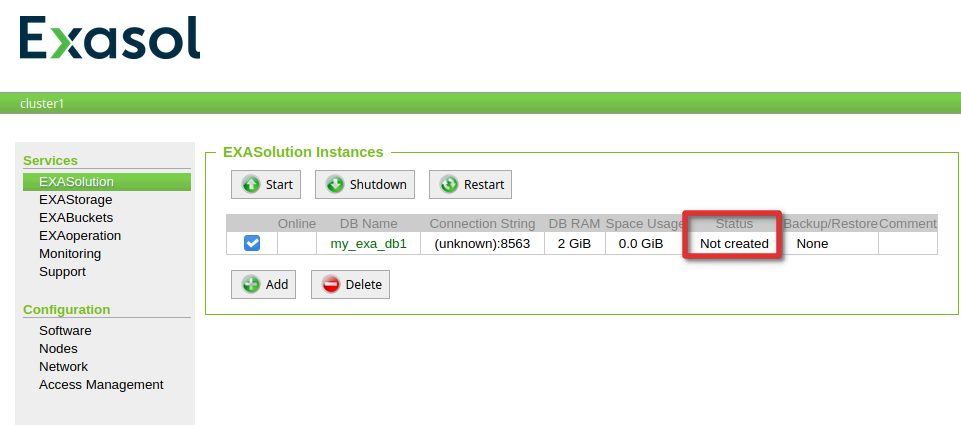
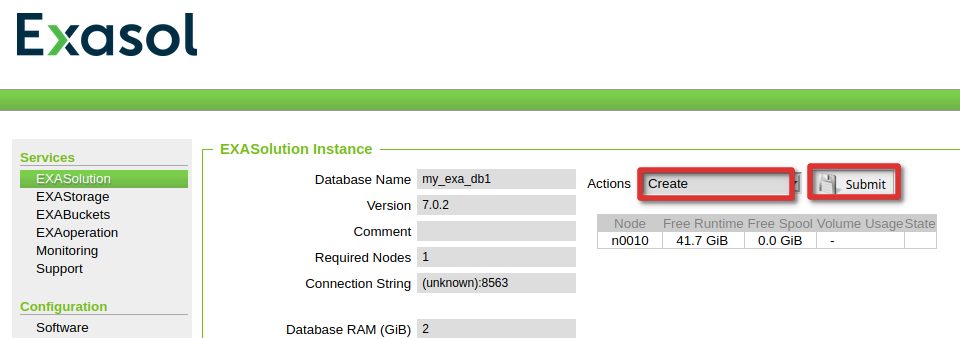
We can do that by selecting the name of the database:
In the upper right corner switch from “Startup” to “Create” and then create the database:

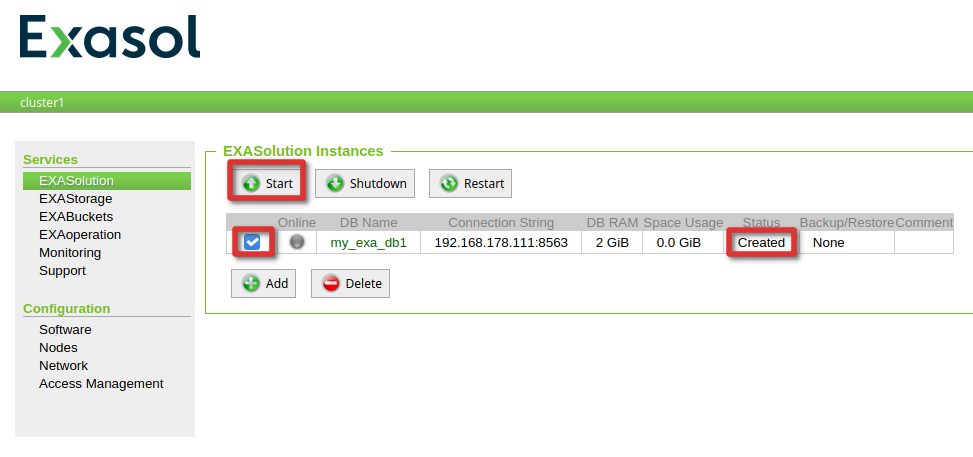
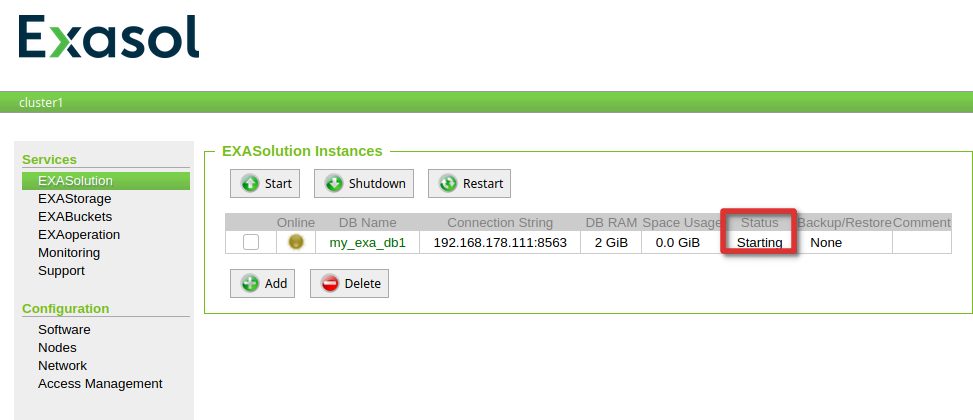
On the overview page the status is now “Created” and we can start it up:
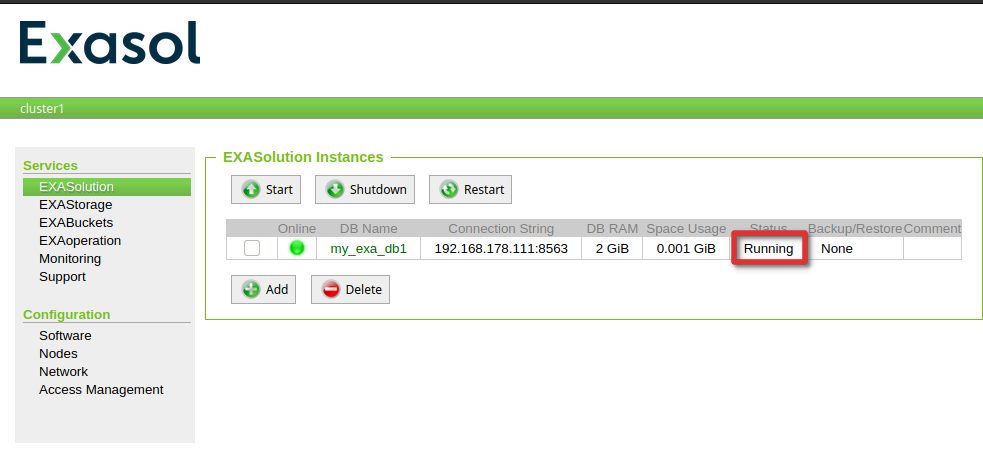
Finally, to confirm everything is fine, test that you can connect with EXAPlus (or whatever tool you prefer):
dwe@dwe:~/EXAplus-7.0.0$ /home/dwe/EXAplus-7.0.0/exaplus -c 192.168.178.111:8563 -u sys -p exasol
EXAplus 7.0.0 (c) EXASOL AG

Thursday, October 8, 2020 at 1:38:46 PM Central European Summer Time
Connected to database my_exa_db1 as user sys.
EXASolution 7.0.2 (c) EXASOL AG

COLUMN   user_name ON
FORMAT   a30
COLUMN   sql_text ON
FORMAT   a30
COLUMN   effective_user ON
FORMAT   a30
COLUMN   limit_value ON
FORMAT   a30
COLUMN   status ON
FORMAT   a15
COLUMN   index_schema ON
FORMAT   a30
COLUMN   index_table ON
FORMAT   a30
COLUMN   index_type ON
FORMAT   a15
COLUMN   column_name ON
FORMAT   a30
COLUMN   column_comment ON
FORMAT   a50
COLUMN   CONSUMER_GROUP_COMMENT ON
FORMAT   a30
COLUMN   SYS_CONSUMER_GROUP ON
FORMAT   a30
COLUMN   CONSUMER_GROUP_NAME ON
FORMAT   a30
SQL_EXA>
Btw: The formatting stuff you see here comes from the “exaplus.sql” script that is executed automatically (very much like SQL*Plus from Oracle):
dwe@dwe:~/EXAplus-7.0.0$ cat exaplus.sql
col user_name for a30;
col sql_text for a30;
col effective_user for a30;
col limit_value for a30;
col status for a15;
col index_schema for a30;
col index_table for a30;
col index_type for a15;
col column_name for a30;
col column_comment for a50;
col CONSUMER_GROUP_COMMENT for a30;
col SYS_CONSUMER_GROUP for a30;
col CONSUMER_GROUP_NAME for a30;
Finally all is setup, and we are really ready for the next post: Backup and Restore.
![Thumbnail [60x60]](https://www.dbi-services.com/blog/wp-content/uploads/2022/08/DWE_web-min-scaled.jpg)
![Thumbnail [90x90]](https://www.dbi-services.com/blog/wp-content/uploads/2023/01/APY_web-scaled.jpg)
![Thumbnail [90x90]](https://www.dbi-services.com/blog/wp-content/uploads/2022/08/FRJ_web-min-scaled.jpg)