By Mouhamadou Diaw
In Oracle documentation we can find following lines about Oracle Autonomous Database
Autonomous Database provides an easy-to-use, fully autonomous database that scales elastically, delivers fast query performance, and requires no database administration.
You will need an account for Oracle cloud but you can get one free for testing (see in Oracle documentaion)
In this blog I describe the basic steps you need to create an autonomous database and to connect to it
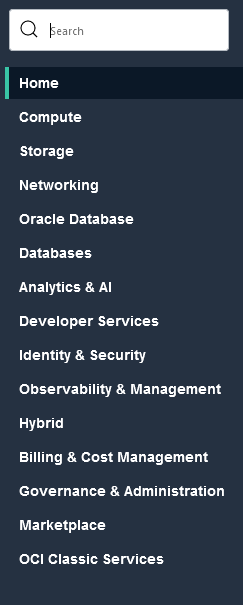
Once connected go the overview tab choose oracle Database
Click on Autonomous Database
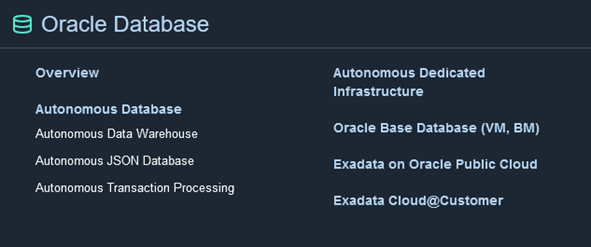
I choose the Autonomous Transaction Processing
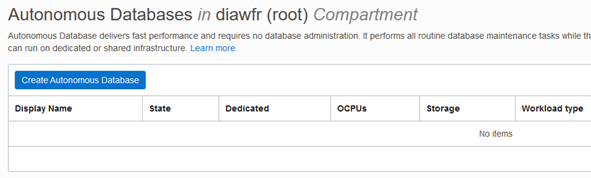
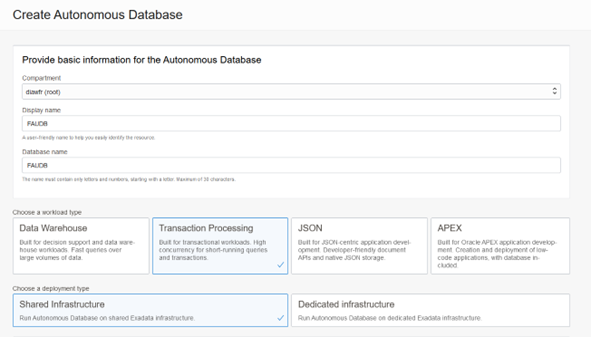
Click on Create Autonomous Database and fill the info
For the Network Access, I decide to use this option and I add my IP in the dedicated box

You have some advanced options where you can manage your keys, change your character sets and so on

Once all info complete please click on Create Autonomous Database. You should have a window like following
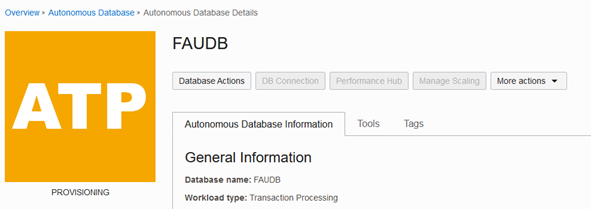
And once done you have following

How to connect
The connection to the autonomous can be done via sqlplus or any other tool. We will need to download the wallet for the client credentials if not already done
For this click on the DB Connection tab

And click on the Download wallet and keep your zip file in your workstation.
-Example of connection with Sql Developer
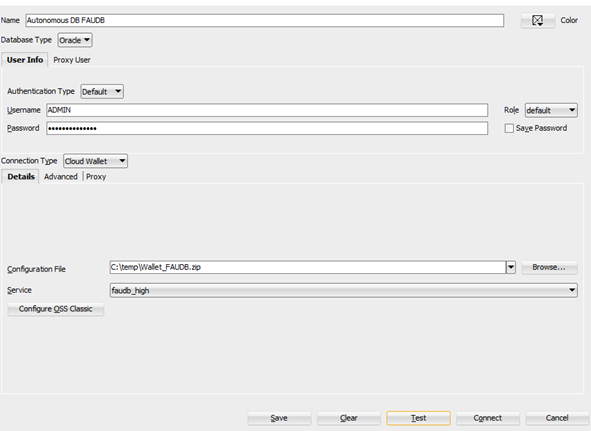
Choose cloud Wallet as type, enter the user and the password and give the wallet zip file downladed earlier. If everything is fine, you should connect.
-Example of connection with sqlplus
If you don’t have an oracle client installed, you can install the Oracle Instant Client
In my case I downloaded following files
instantclient-basic-windows.x64-21.6.0.0.0dbru.zip
instantclient-sqlplus-windows.x64-21.6.0.0.0dbru.zip
- Unpack both zip files
- Copy the contents
I copy the sqlplus folder contents into the following directory
instantclient-basic-windows.x64-21.6.0.0.0dbru\instantclient_21_6
The default is in the directory instantclient-basic-windows.x64-21.6.0.0.0dbru\instantclient_21_6\network\admin
- unzip the downloaded wallet, you should already have a sqlnet.ora and a tnsnames.ora files inside
You should already have a sqlnet.ora and a tnsnames.ora files inside
- Configure the TNS_ADMIN for your Oracle instant client
The default is in the directory
instantclient-basic-windows.x64-21.6.0.0.0dbru\instantclient_21_6\network\admin
I keep the default and I just copy the sqlnet.ora and the tnsnames.ora from the wallet directory to the network/admin directory
After edit the sqlnet.ora and specify the location of your wallet like this
WALLET_LOCATION = (SOURCE = (METHOD = file) (METHOD_DATA = (DIRECTORY="C:\temp\Wallet_FAUDB")))- Test your connection
C:\Users\mdi>C:\Mouhamadou\Oracle_ACE\cloud\instantclient-basic-windows.x64-21.6.0.0.0dbru\instantclient_21_6\sqlplus.exe

SQL*Plus: Release 21.0.0.0.0 - Production on Thu Sep 29 10:58:00 2022
Version 21.6.0.0.0

Copyright (c) 1982, 2021, Oracle.  All rights reserved.

Enter user-name: admin@faudb_high
Enter password:
Last Successful login time: Thu Sep 29 2022 10:17:31 +02:00

Connected to:
Oracle Database 19c Enterprise Edition Release 19.0.0.0.0 - Production
Version 19.17.0.1.0


SQL> show user
USER is "ADMIN"
SQL>
Conclusion
In coming blogs we will more about autonomous database.
![Thumbnail [60x60]](https://www.dbi-services.com/blog/wp-content/uploads/2022/12/oracle-square.png)
![Thumbnail [90x90]](https://www.dbi-services.com/blog/wp-content/uploads/2022/08/STH_web-min-scaled.jpg)
![Thumbnail [90x90]](https://www.dbi-services.com/blog/wp-content/uploads/2025/11/LTO_WEB.jpg)
![Thumbnail [90x90]](https://www.dbi-services.com/blog/wp-content/uploads/2022/08/MAW_web-min-scaled.jpg)
![Thumbnail [90x90]](https://www.dbi-services.com/blog/wp-content/uploads/2023/01/APY_web-scaled.jpg)