In one of my previous blogs, I explained how to use a Tailscale sidecar container into an existing pod to expose it to your Tailnet. Even though this works fine, it can be tedious to set up and not very convenient for every use case and not scalable at all. Another solution is to use the Tailscale Kubernetes Operator.
Rather than going through all that manual configuration, you can simply add some annotations on your Kubernetes services and call it a day.
Yes, there’s a bit of upfront setup involved but once that’s out of the way, day-to-day management becomes significantly less painful, especially for the workloads. The operator sits inside your cluster and keeps an eye on things, picking up on any Kubernetes resource changes and making sure your Tailscale network reflects those changes accordingly.
My use case is as follows: I’ve installed ArgoCD at home and want to access it through my Tailnet. In this blog, the example will focus on an Nginx pod, but the principle is exactly the same. We’re not making any changes whatsoever to the pods or deployments; only the Services matter.
Let me guide you through the configuration of the Tailscale Operator and see how convenient it is. You’ll love it, I swear!
Step 1: Set up an ACL policy
Before anything else, you’ll need to set up some new ACL policy rules in Tailscale, this allows any tailnet devices that the operator spins up to be identified as belonging to your Tailnet.
Login to your Tailscale admin section –> Access Controls –> Tags
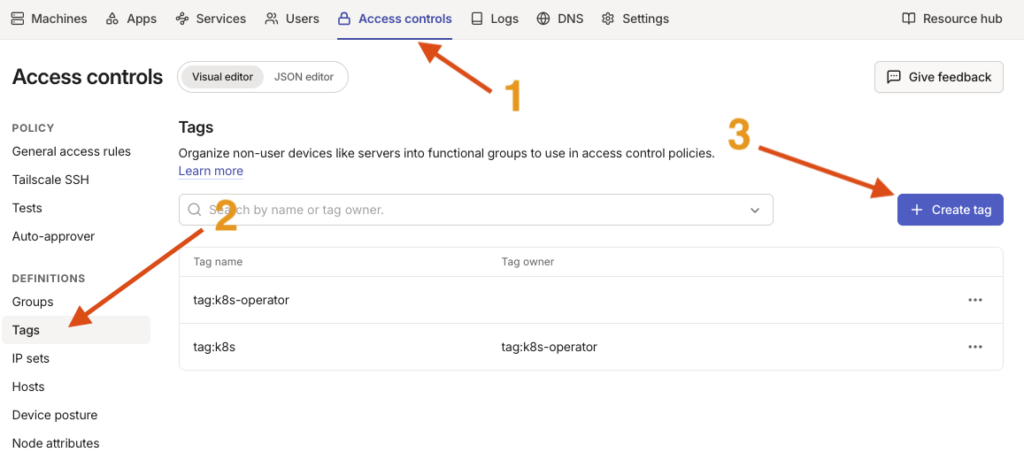
Create the 2 tags:
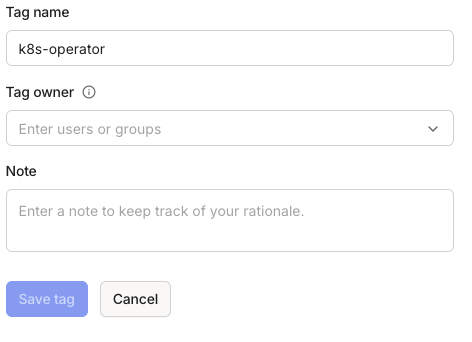
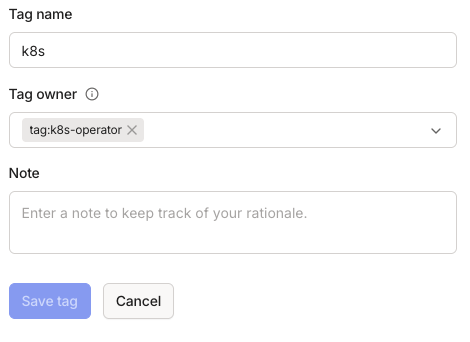
You’ll need to define 2 tags: k8s-operator and k8s.
Make sure k8s-operator is set as an owner of k8s
If you open the JSON editor tab, the equivalent in JSON format should be this:
{
  "tagOwners": {
	"tag:k8s-operator": [],
	"tag:k8s": ["tag:k8s-operator"]
  }
}
Step 2: Create an OAuth client
Your operator needs an OAuth client to authenticate to your Tailnet and register new pods and services.
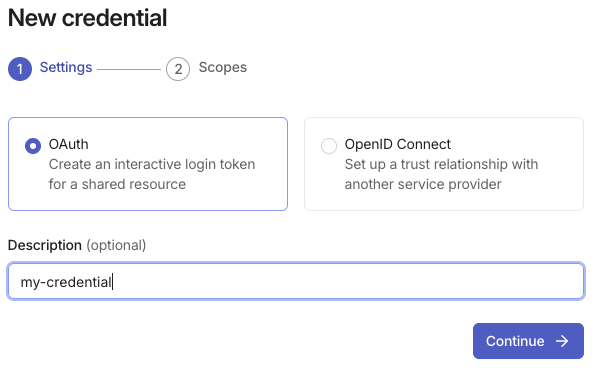
Navigate to the admin console’s Settings –> Trust credentials –> Add Credential :
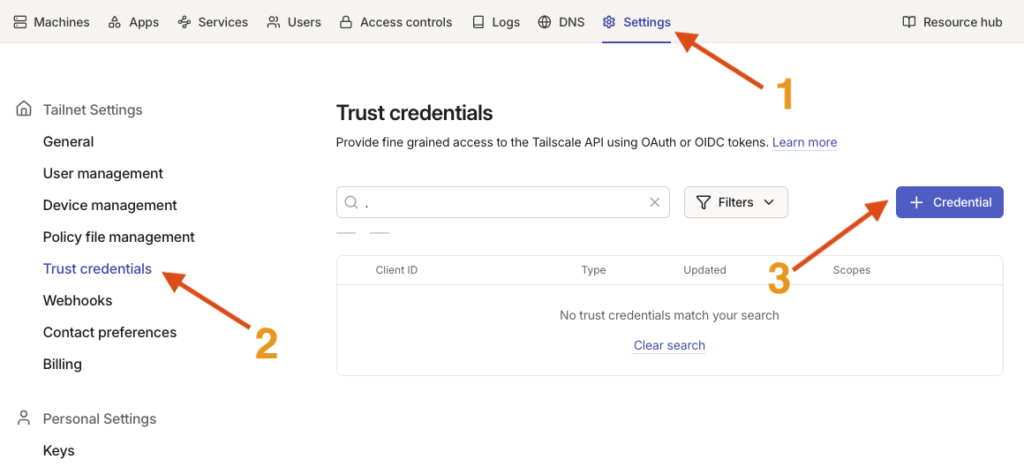
Choose OAuth, give your auth key a name, click continue.
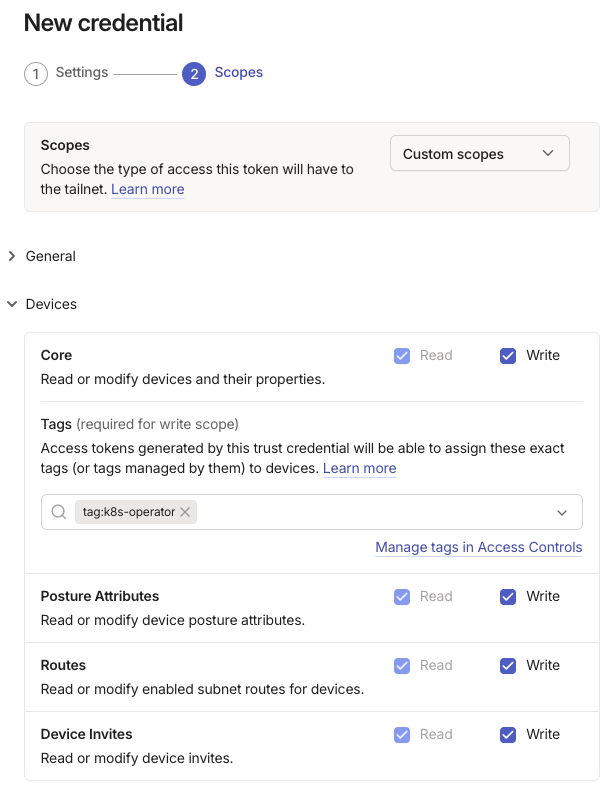
Give Read+Write permissions under the “Devices” section.
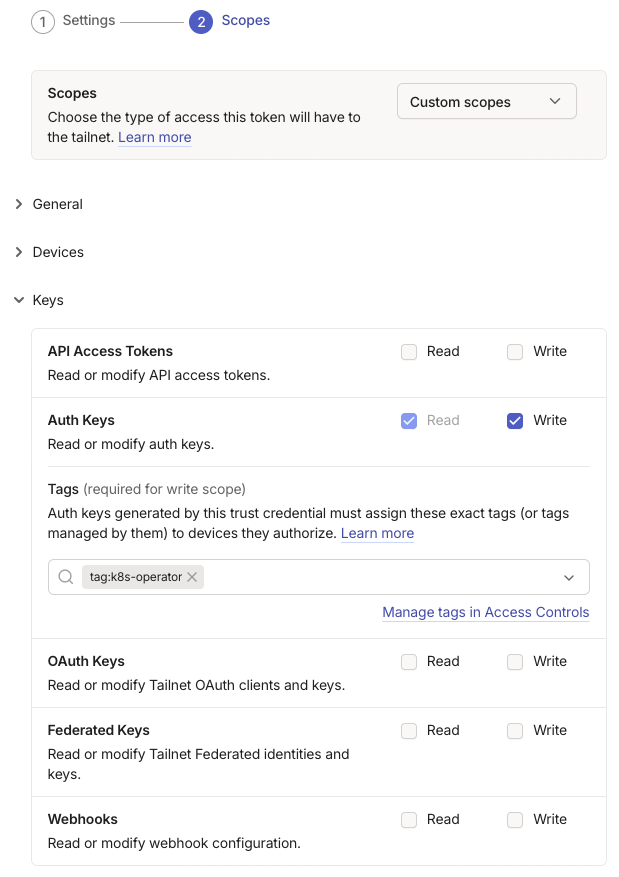
Deploy the Keys section and add Read+Write permissions to the Auth Keys parameters.
Select the tag:k8s-operator tag created earlier from the dropdown to ensure devices created by the operator will have the tag assigned.
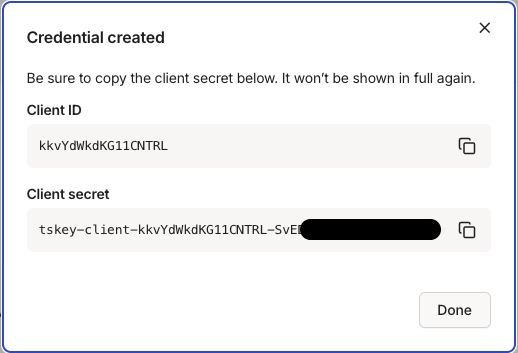
Once you click “Generate credential”, a pop-up window displays the key. Make sure to copy it in a safe place as it won’t be shown again.
Step 3: Install the Operator on your Kubernetes cluster
- Add the helm repository
# Add the repository
$ helm repo add tailscale https://pkgs.tailscale.com/helmcharts

# Update your client’s package list
$ helm repo update- Run the helm install command to install the tailscale-operator
$ helm upgrade --install tailscale-operator tailscale/tailscale-operator \
  --namespace=tailscale \
  --create-namespace \
  --set-string oauth.clientId=<oauth_client_id> \
  --set-string oauth.clientSecret=<oauth_client_secret> \
  --wait
Replace the <oauth_client_id> and <oauth_client_secret> placeholders with the actual values you copied down at the end of the previous step.
- After a few seconds, check that the operator’s pod is up:
rancher:~ # kubectl get pods -n tailscale
NAME                        READY   STATUS    RESTARTS       AGE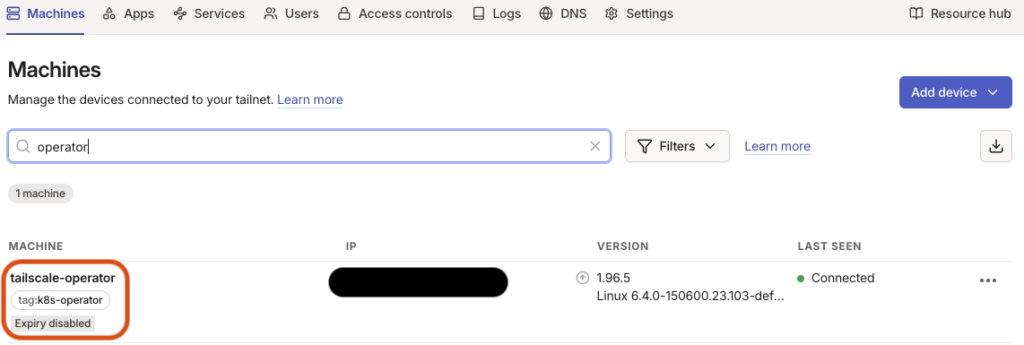
operator-7699b5555b-v6wgw 1/1 Running 20 (16h ago) 55d- Log into your Tailscale account and you should see the operator as a machine:
Step 4: Expose your Kubernetes services easily
For the purpose of this article, we’ll keep things simple: we’re just going to walk through a basic example that exposes an nginx service in your tailnet.
apiVersion: apps/v1
kind: Deployment
metadata:
  name: nginx
  labels:
    app: nginx
spec:
  replicas: 1
  selector:
    matchLabels:
      app: nginx
  template:
    metadata:
      labels:
        app: nginx
    spec:
      containers:
        - name: nginx
          image: nginx:latest
          ports:
            - containerPort: 80

---

apiVersion: v1
kind: Service
metadata:
  name: nginx
  annotations:
    tailscale.com/expose: "true"
spec:
  selector:
    app: nginx
  ports:
    - port: 80
      targetPort: 80
Take a closer look at the Service part of the YAML file. The key element here is the tailscale.com/expose annotation, sitting under the service’s metadata.annotations field.
That single annotation is all it takes to automatically expose the service in your Tailnet.
Once you apply it to your cluster, the Tailscale Operator picks it up on its own and takes care of setting up the appropriate route behind the scenes.
Set it to “true” if you want to expose the service and to “false” if not, it’s that easy!
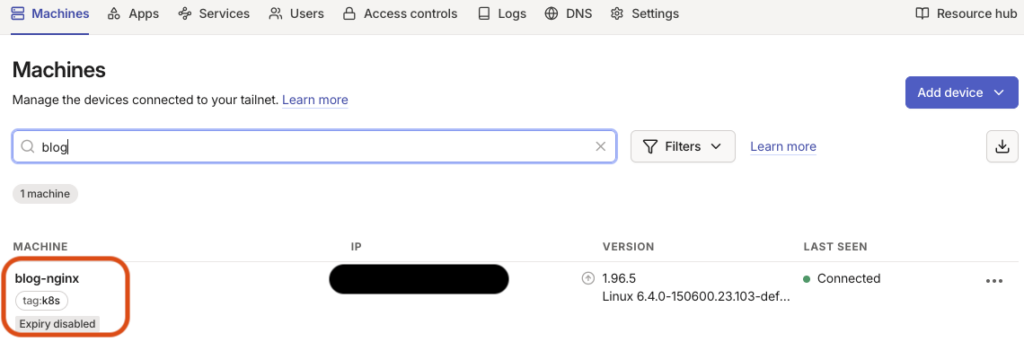
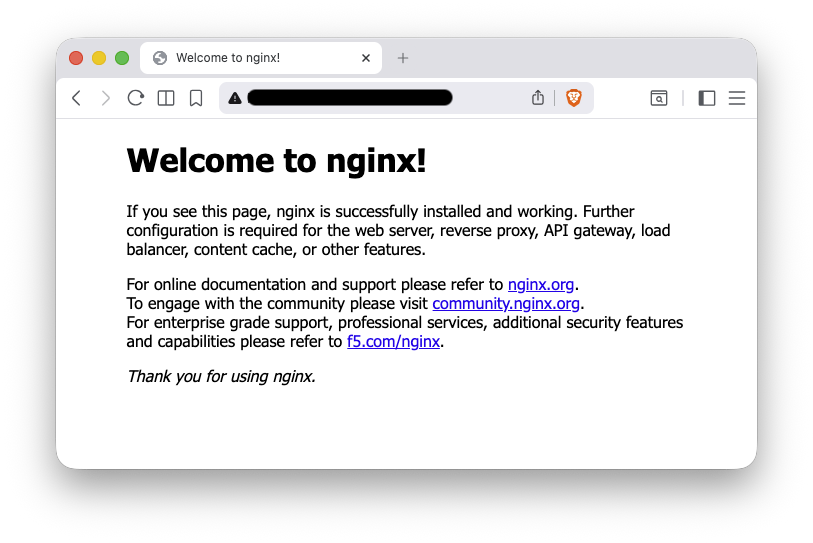
Log back into your Tailscale account, you should see the service as a new device and your nginx pod should be exposed and reachable via its Tailscale IP address !
That’s it.
From now on, whatever you deploy in your Kubernetes cluster, and as long as it has the right annotation, will be detected by the Tailscale operator and exposed to your tailnet.
Cool, no?
![Thumbnail [60x60]](https://www.dbi-services.com/blog/wp-content/uploads/2022/08/GRE_web-min-scaled.jpg)
![Thumbnail [90x90]](https://www.dbi-services.com/blog/wp-content/uploads/2022/08/ADE_WEB-min-scaled.jpg)
![Thumbnail [90x90]](https://www.dbi-services.com/blog/wp-content/uploads/2022/08/NME_web-min-scaled.jpg)