What is Linked server ?
Now a days in each company we have different applications and each one of them have different needs in term of databases support. When data exists on multiple databases the management become a little bit hard. For exemple moving some data from an Oracle database to a SQL Server database is not easy.
A linked servers is configured to enable the Database Engine to execute a Transact-SQL statement that includes tables in another instance of SQL Server, or another database product such as Oracle.
In this Blog, we will see step by step guide to create and configure an Oracle linked server in SQL Server Instance.
- Download ‘oracle database client’
https://edelivery.oracle.com/osdc/faces/SoftwareDelivery
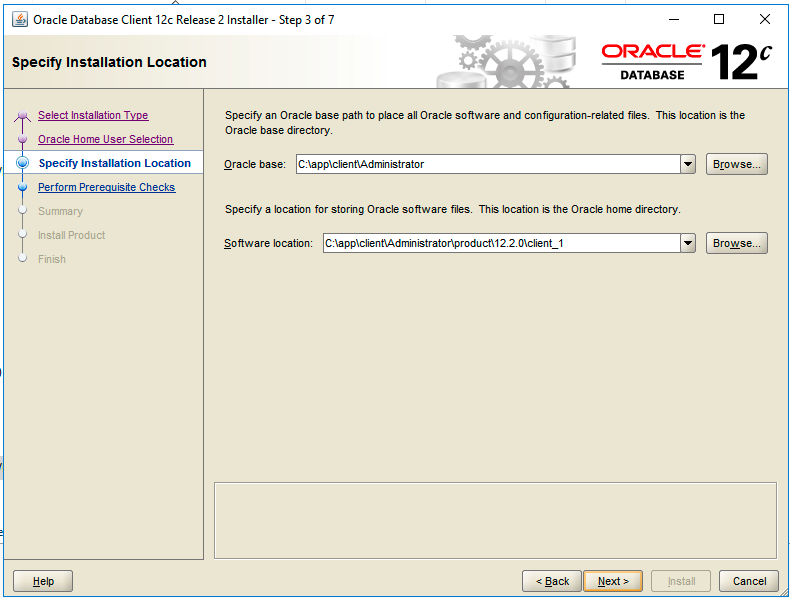
- Install ‘Oracle database client’
- Create a tnsnames.ora file in (C:\app\client\Administrator\product\12.2\client_1\network\admin)
WSDBA01 =
  (DESCRIPTION =
    (ADDRESS_LIST =
      (ADDRESS = (PROTOCOL = TCP)(HOST = 192.168.56.106)(PORT = 1521))
    )
    (CONNECT_DATA =
      (SERVICE_NAME = WSDBA01)
    )
  )
- Run powershell as administrator and then do a tnsping
Check your firewall on each server and between them. In this exemple we do not have any firewall.
- Check your provider by creating a ‘test_connection.udl’ file in your Desktop
Then double click on it (open it)
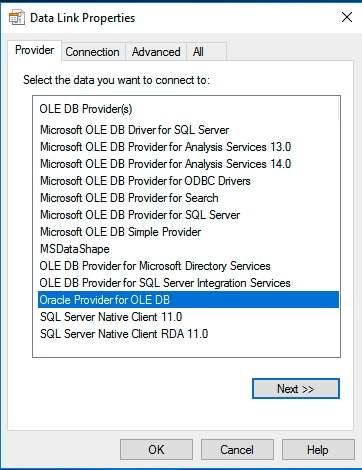
- Choose ‘Oracle Provider for OLE DB’ and then click Next
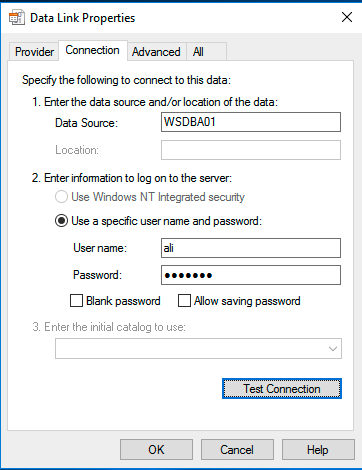
- Enter your service name (defind in tnsnames.ora file) for ‘Data Source’
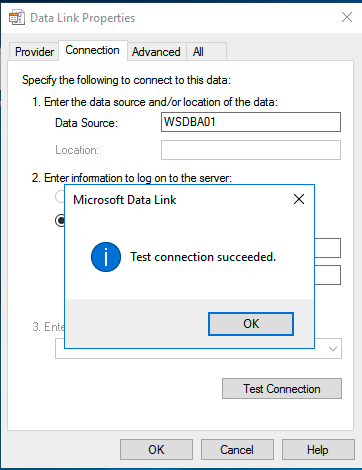
Enter a valide username and password and then click on ‘Test Connection’
- Open your SSMS (SQL Server Management Studio) and connect to your SQL Server instance
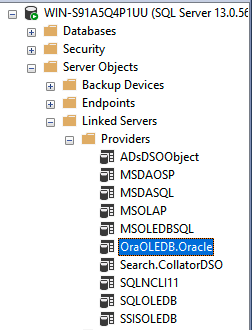
Under ‘Server Objects’ then ‘Linked Servers’ and then ‘Providers’ you must see the ‘OraOLEDB.Oracle’
- Right Click on it and then ‘Properties’
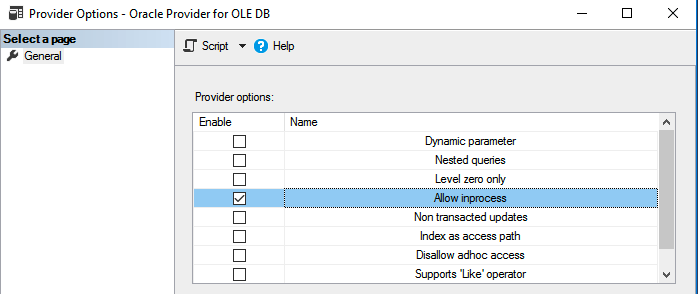
Check mark the ‘Allow inprocess’ and then Click on ‘OK’
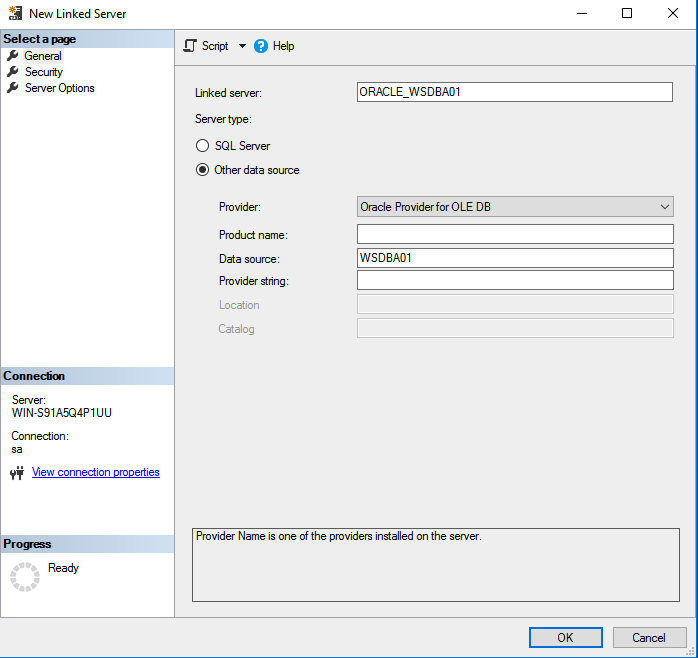
- Right click on ‘Linked server’ and then choose ‘New linked server’
- In General section :
‘Linked server’ : Give a name to your Linked server
‘Provider’ : Choose ‘Oracle Provider for OLE DB’
‘Data source’ : Your service name (defined in tnsnames.ora file)
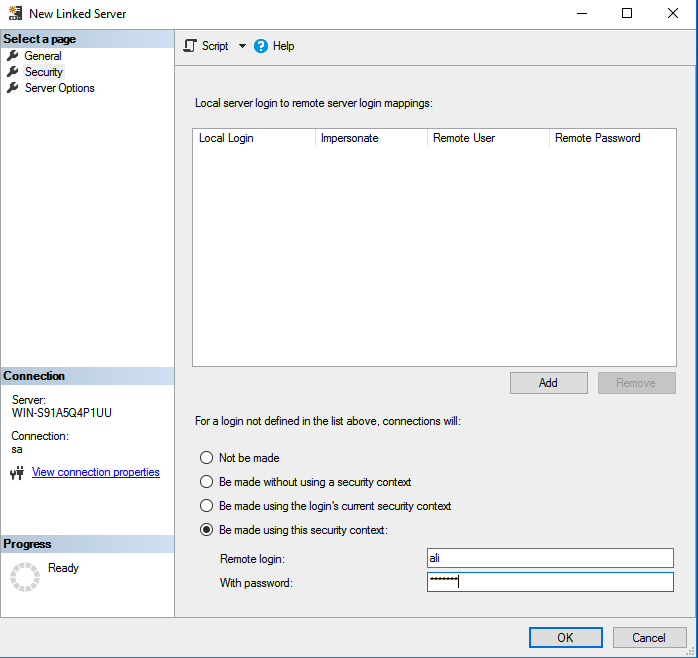
- In Security Section
Put a valide username and password and then click on ‘OK’
- Now under your Linked server and then ‘Catalogs’ and then ‘default’ your must see every tables that your user have right to query.
enjoy 🙂





![Thumbnail [60x60]](https://www.dbi-services.com/blog/wp-content/uploads/2022/12/oracle-square.png)
![Thumbnail [90x90]](https://www.dbi-services.com/blog/wp-content/uploads/2022/10/STS_web-min-scaled.jpg)
![Thumbnail [90x90]](https://www.dbi-services.com/blog/wp-content/uploads/2022/08/STH_web-min-scaled.jpg)