To interact with a Kubernetes cluster during builds, deployments or other tasks in GitLab CI/CD, you need to install the GitLab agent on the cluster.
This operation is very easy with GitLab !
The official documentation is available here
Create a new cluster into GitLab
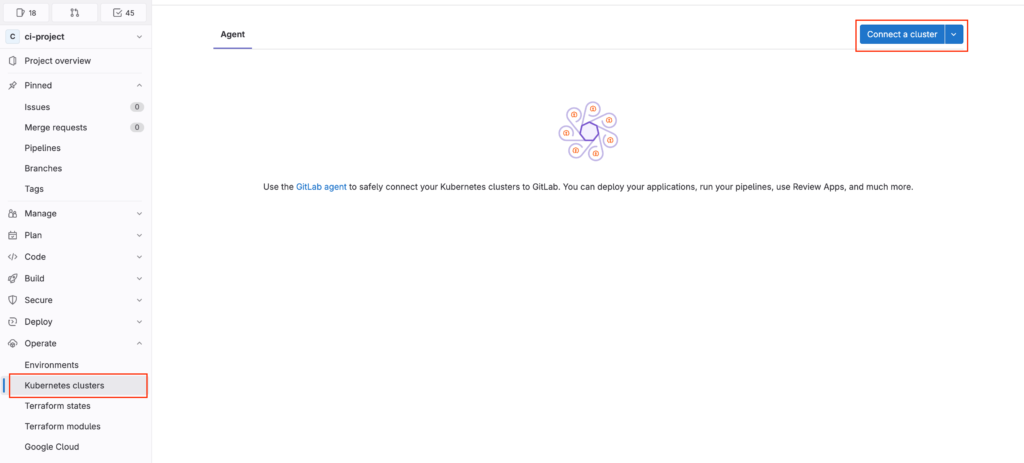
1 – In your project go to : Operate > Kubernetes Cluster and click on “Connect a Cluster”.
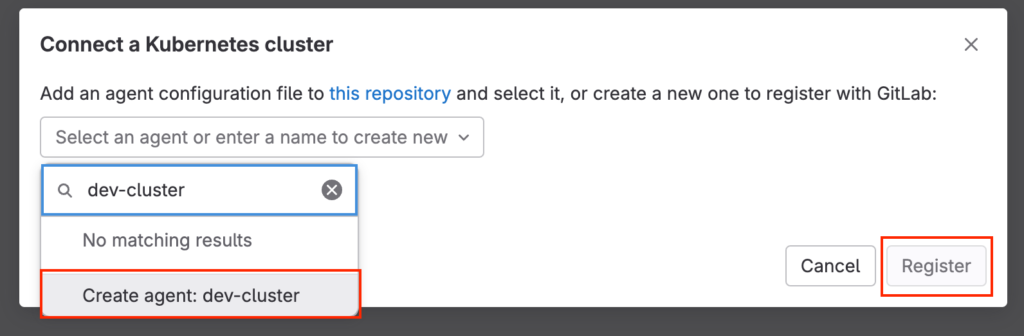
2 – Enter the name of the cluster and click register. The cluster name should follow the naming rules for Kubernetes ressources.
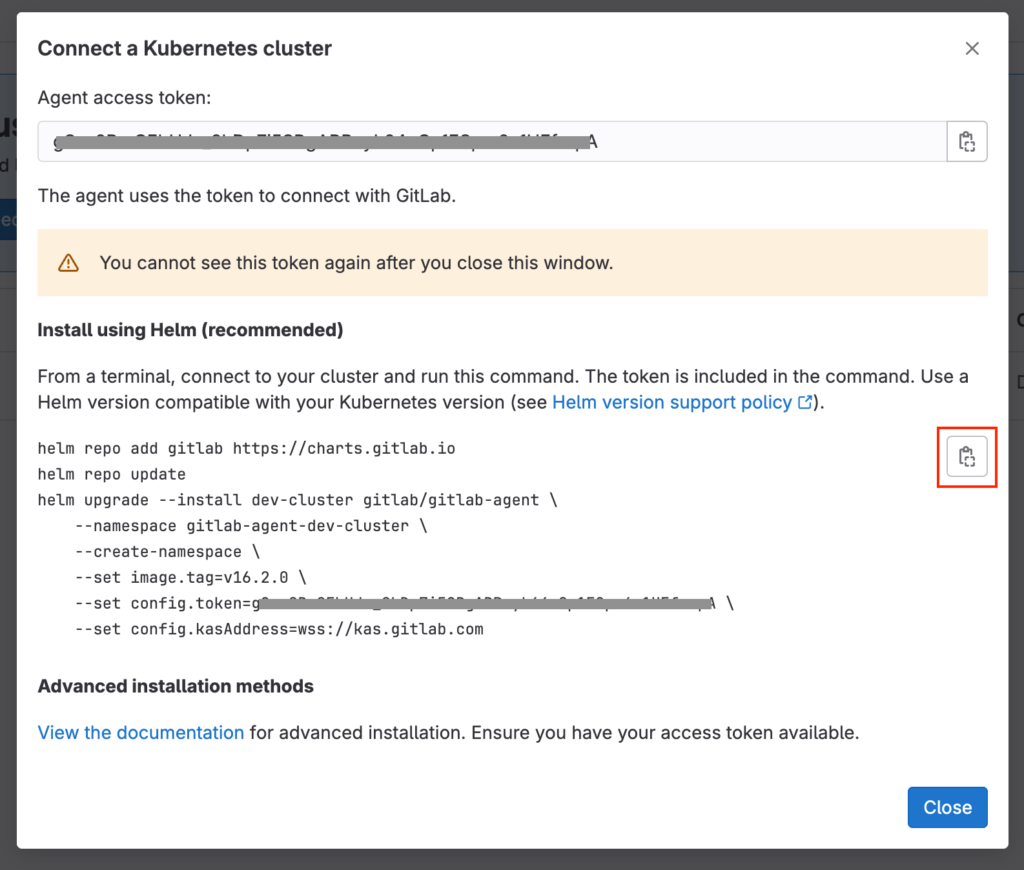
3 – Copy the code for the agent deployment and past it into your Kubernetes shell.
Be sure to save the access token. It will be useful for upgrading the agent in the future.
4 – Verify deployment
The installation of the agent on the Kubernetes cluster creates a namespace gitlab-agent-[my cluster name]. This namespace contains the pod for the agent itself. When the pod is running, the status in the GitLab interface should change to “Connected”.

Conclusion
Installing the GitLab agent is really easy.
You can install several agents on the same project to connect several clusters (e.g. dev, test, prod).
Each cluster defined in GitLab creates a Kubernetes context for deployment in GitLab CI/CD.
To use it, see my next article about GitLab CI/CD deployment.
The same agent can be used by other projects to deploy on the same cluster. A configuration is required to allow other projects to use the agent.
![Thumbnail [60x60]](https://www.dbi-services.com/blog/wp-content/uploads/2022/08/NME_web-min-scaled.jpg)
![Thumbnail [90x90]](https://www.dbi-services.com/blog/wp-content/uploads/2022/08/GRE_web-min-scaled.jpg)
![Thumbnail [90x90]](https://www.dbi-services.com/blog/wp-content/uploads/2022/08/ADE_WEB-min-scaled.jpg)