Cloudbees CD/RO is a highly flexible tool. You can define your own customized parameter forms for pipelines or procedures.
For example, the same parameter form can be adapted according to the users: user-friendly for common users or more permissive for admin users.
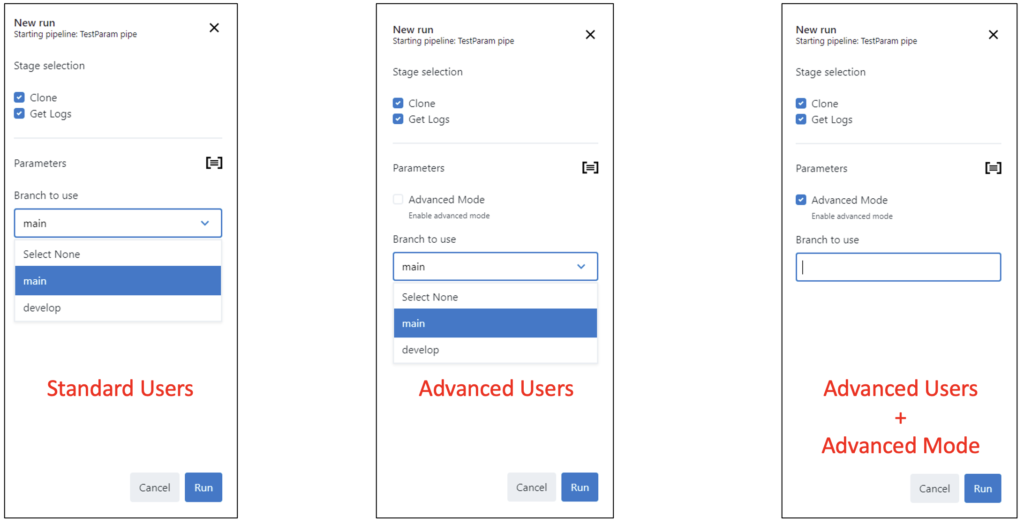
Exemple of dynamic parameters form
I will take a basic example to explain how to configure Cloudbees CD/RO to render a different parameters form depending of the user.
I want to run a pipeline on a git repository. The user can choose the branch on which to run the pipeline. Common users can select the branch to use with a pre-defined drop down list, while the advanced users have a possibility to switch to “Advanced Mode”. In this mode, the drop down list is replaced by a free text field.
Constraints
Although the desired behavior is simple, replace the drop down list by a free text field for debugging. There are a few constraints to bear in mind:
- Field type cannot be changed dynamically
- Field names are unique for each form
- Render Condition only affects display, field exists in all cases
Detect user type
In this case, I use a property “isAdvanced” set on the user to authorize access to the advanced mode.
I use a hidden intermediate field to store my user’s status. As a result, the Render Condition of the fields linked to this value is simplified.
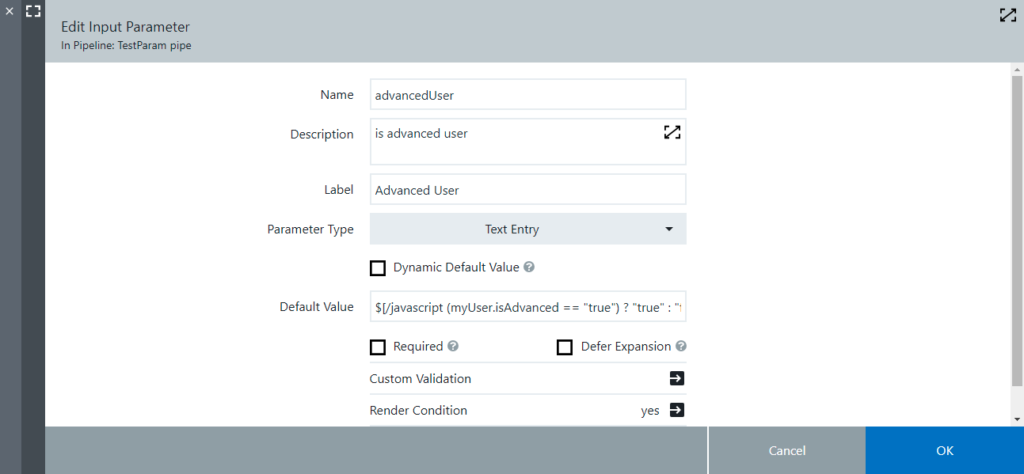
This field contains a boolean value calculated from the user’s property “isAdvanced”. To do this, the default value uses a javascript expression to fill the value:
$[/javascript (myUser.isAdvanced == "true")?"true":"false"]To hide the field in all cases, simply add “false” to the rendering condition.
Advanced option
To activate the advanced mode, add a checkbox to the form.
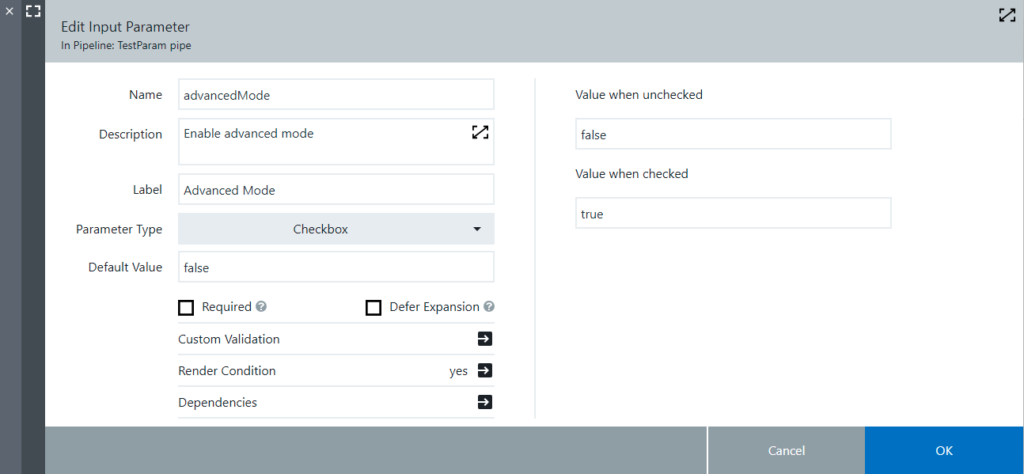
Only advanced user can access this checkbox. To do this, add a Render Condition to check the value of the previous advancedUser field:
advancedUser == trueThe main drop down list
Add the main field to select the branch. This field is used by all users in standard mode.
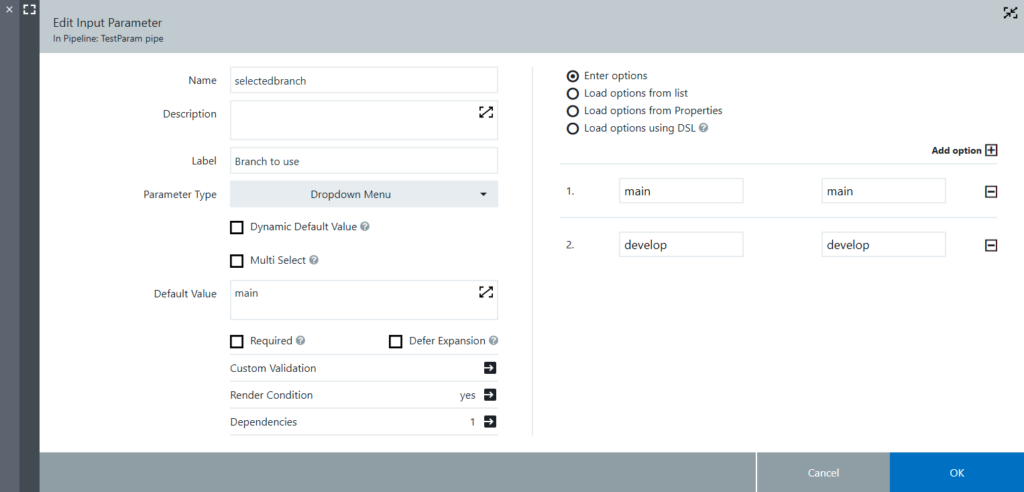
This field is only displayed if the “Advanced Mode” checkbox is unchecked. To do this:
- Add the “advancedMode” field to the dependencies
- Define a Render Condition to hide the field on advanced mode :
${advancedMode} != trueNote : It’s important to add the “advancedMode” field to the dependencies, as it enables dynamic re-rendering of the form when the checkbox is checked or unchecked.
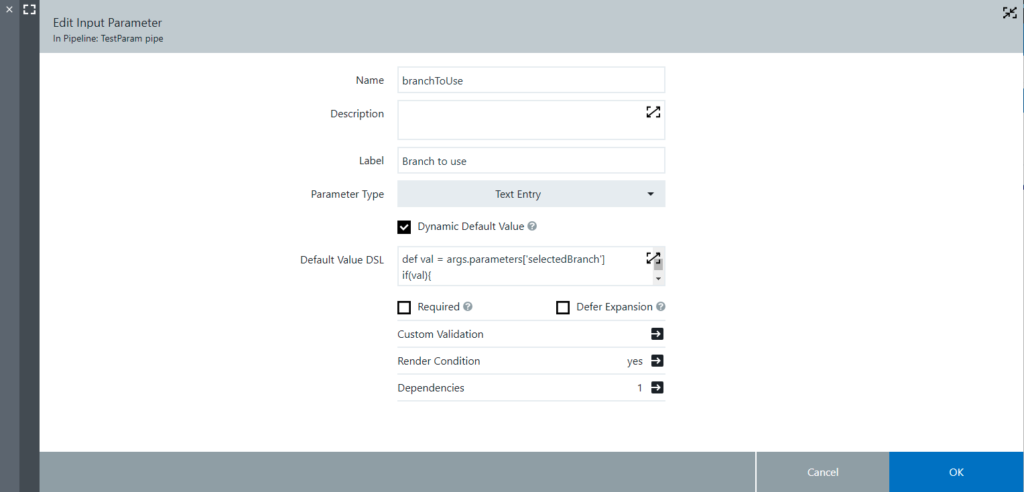
Overriding the main field
We don’t really replace the main drop down list, it’s hidden and after that, we display another text field instead. To do that, add a new text field:
Unlike the drop down list, this field is visible when the “Advanced Mode” checkbox is checked. To do that, add this Render Condition:
${advancedMode} == trueAs with the drop down list, don’t forget to add the “advancedMode” field to the dependencies.
The default value of the text field retrieves the value from the drop down list :
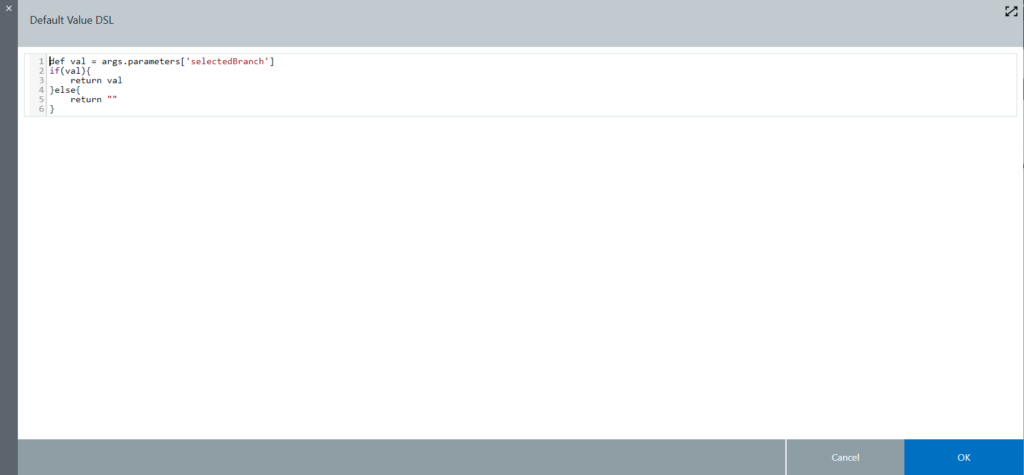
The drop down list and the text field are chained so that only the text field value can be used in pipeline tasks:

This configuration works as follows:
- In standard mode, the drop down list value is transferred to the text field, then the text field value is used in the pipeline.
- In advanced mode, the drop down list is not used, the user modifies the text field, and the text field value is passed to the pipeline.
Conclusion
At the end, the form contains some intermediate field to display only one or two fields to the user:

In conclusion, Cloudbees CD/RO is a truly powerful and flexible tool. So, by using a few intermediate fields and linking them smartly, we can create simple, intuitive forms for our users. As a result, a non-technical user can run a pipeline while advanced users can do what they want – and all without duplicating pipelines!
![Thumbnail [60x60]](https://www.dbi-services.com/blog/wp-content/uploads/2022/08/NME_web-min-scaled.jpg)
![Thumbnail [90x90]](https://www.dbi-services.com/blog/wp-content/uploads/2022/08/GRE_web-min-scaled.jpg)
![Thumbnail [90x90]](https://www.dbi-services.com/blog/wp-content/uploads/2022/08/ADE_WEB-min-scaled.jpg)