Introduction
Computing environments became more and more agile over these last years. Companies need to provide solutions helping people to quickly set up new resources, starting and stopping them, scaling them according to the need and finally, removing them. In such environments, it could be tricky to follow license compliance when resources are changing on hourly basis.
Having a look on AWS services, I saw that AWS provides a license managing tool named “AWS License Manager”. I took few minutes in order to:
- Understand which resources this service is able to monitor
- How it works
- Test it with an on-premise Linux server executing an oracle database
License Manager Service
The first step in order to use License Manager is to select it in the list of AWS Services.
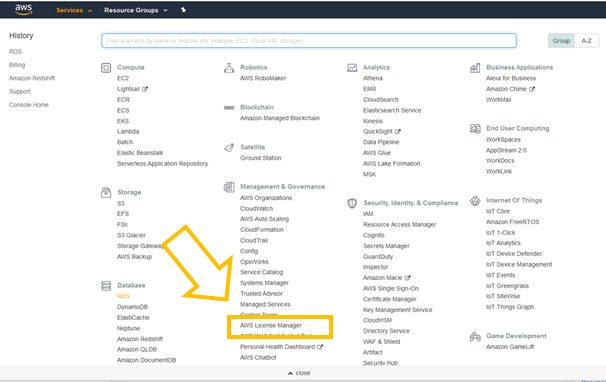
After having clicked on AWS License Manager, the AWS License Manager window will appear.
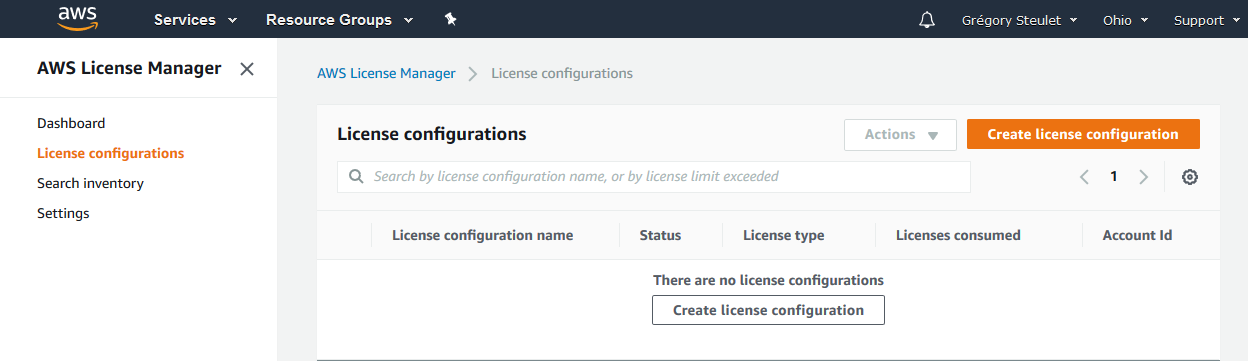
Now, we simply have to create a license configuration with required license terms according to the software vendor. You can setup different kind of metrics such as
- vPCUs
- Cores
- Sockets
- Instances
License Manager also provides the possibility to enforce license limit, meaning that it prevents license usage after available licenses are exhausted.
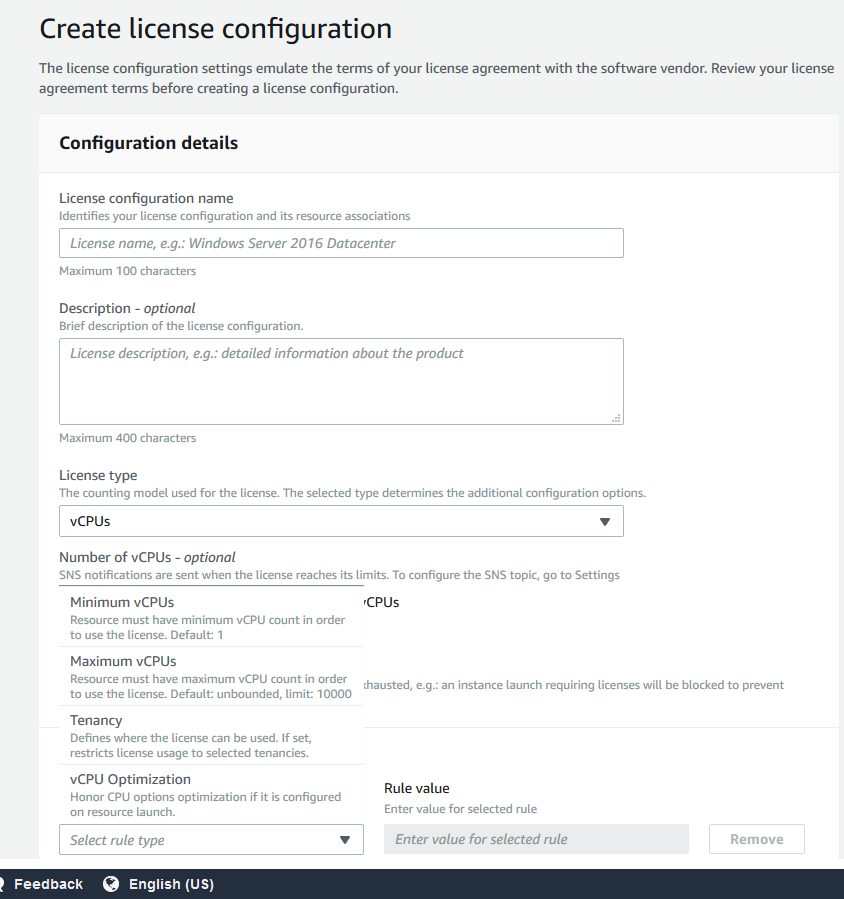
In a context of on-premise License monitoring, it is important to notice that sockets and cores license’s type are not accepted. Therefore, in this example I used vCPUs.

AWS System Manager
Once the license configuration created, it’s now mandatory to use another AWS Service, AWS System Manager. This service allows you to view and control your infrastructure on AWS. AWS System Manager not only allows you to view and control your Amazon EC2 Instance but also on-premises servers, virtual machines (including VMs in other cloud environments). Some System Manager capabilities are not free, however in the context of this example everything is free.
AWS System Manager Agent (SSM Agent)
In order to benefit from AWS System Manager we need to install AWS Systems Manager Agent (SSM Agent) on our on-premised host. Indeed, SSM Agent is an Amazon software that can be installed and configured on an Amazon EC2 instance, an on-premises server, or a virtual machine (VM) and provides a solution to update, manage, and configure resources. SSM Agent is installed, by default on instances created from Windows Server 2016 and Windows Server 2019, Amazon Linux, Ubuntu Server Images AMIs. However, if you are running an on-premise server you need to install it. The process is really straightforward as presented below.
[root@vmrefdba01 ~]# mkdir /tmp/ssm
[root@vmrefdba01 ~]# curl https://s3.amazonaws.com/ec2-downloads-windows/SSMAgent/latest/linux_amd64/amazon-ssm-agent.rpm -o /tmp/ssm/amazon-ssm-agent.rpm
  % Total    % Received % Xferd  Average Speed   Time    Time     Time  Current
                                 Dload  Upload   Total   Spent    Left  Speed
100 18.9M  100 18.9M    0     0  3325k      0  0:00:05  0:00:05 --:--:-- 4368k
[root@vmrefdba01 ~]# sudo yum install -y /tmp/ssm/amazon-ssm-agent.rpm
Loaded plugins: refresh-packagekit, ulninfo
Setting up Install Process
Examining /tmp/ssm/amazon-ssm-agent.rpm: amazon-ssm-agent-2.3.707.0-1.x86_64
Marking /tmp/ssm/amazon-ssm-agent.rpm to be installed
public_ol6_UEK_latest                                    | 2.5 kB     00:00
public_ol6_UEK_latest/primary_db                         |  64 MB     00:07
public_ol6_latest                                        | 2.7 kB     00:00
public_ol6_latest/primary_db                             |  18 MB     00:07
Resolving Dependencies
--> Running transaction check
---> Package amazon-ssm-agent.x86_64 0:2.3.707.0-1 will be installed
--> Finished Dependency Resolution

Dependencies Resolved

======================================================================================================================================
 Package                            Arch                     Version                        Repository                           Size
======================================================================================================================================
Installing:
 amazon-ssm-agent                   x86_64                   2.3.707.0-1                    /amazon-ssm-agent                    61 M

Transaction Summary
======================================================================================================================================
Install       1 Package(s)

Total size: 61 M
Installed size: 61 M
Downloading Packages:
Running rpm_check_debug
Running Transaction Test
Transaction Test Succeeded
Running Transaction
  Installing : amazon-ssm-agent-2.3.707.0-1.x86_64                                                                                1/1
amazon-ssm-agent start/running, process 3896
  Verifying  : amazon-ssm-agent-2.3.707.0-1.x86_64                                                                                1/1

Installed:
  amazon-ssm-agent.x86_64 0:2.3.707.0-1

Complete!
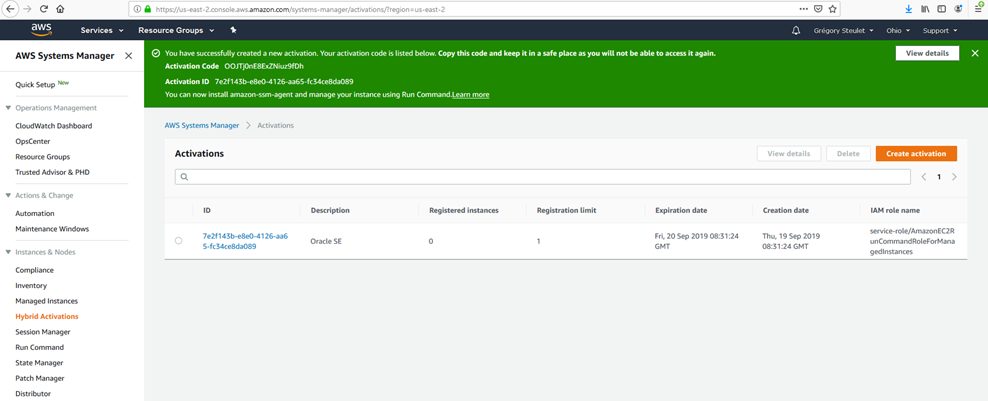
Creating an activation
Once the agent installed, we have to create a new “Activation” in the AWS System Manager Service by clicking on “Create activation“. At the end of the creation you will get an Activation Code and an Activation ID (in the green field below). You have to keep this information for the agent configuration.
Agent Configuration
In order to register your on-premise instance on AWS, you simply have to execute the following command with the activation code and activation id provided by AWS System Manager
sudo amazon-ssm-agent -register -code "<cf Activation Code>" -id "<cf Activation ID>" -region "us-east-2"

2019-09-19 13:53:05 INFO Successfully registered the instance with AWS SSM using Managed instance-id: mi-0756a9f0dc25be3cd
Once registered the Managed Instance should appear as presented below in AWS Systems Manager
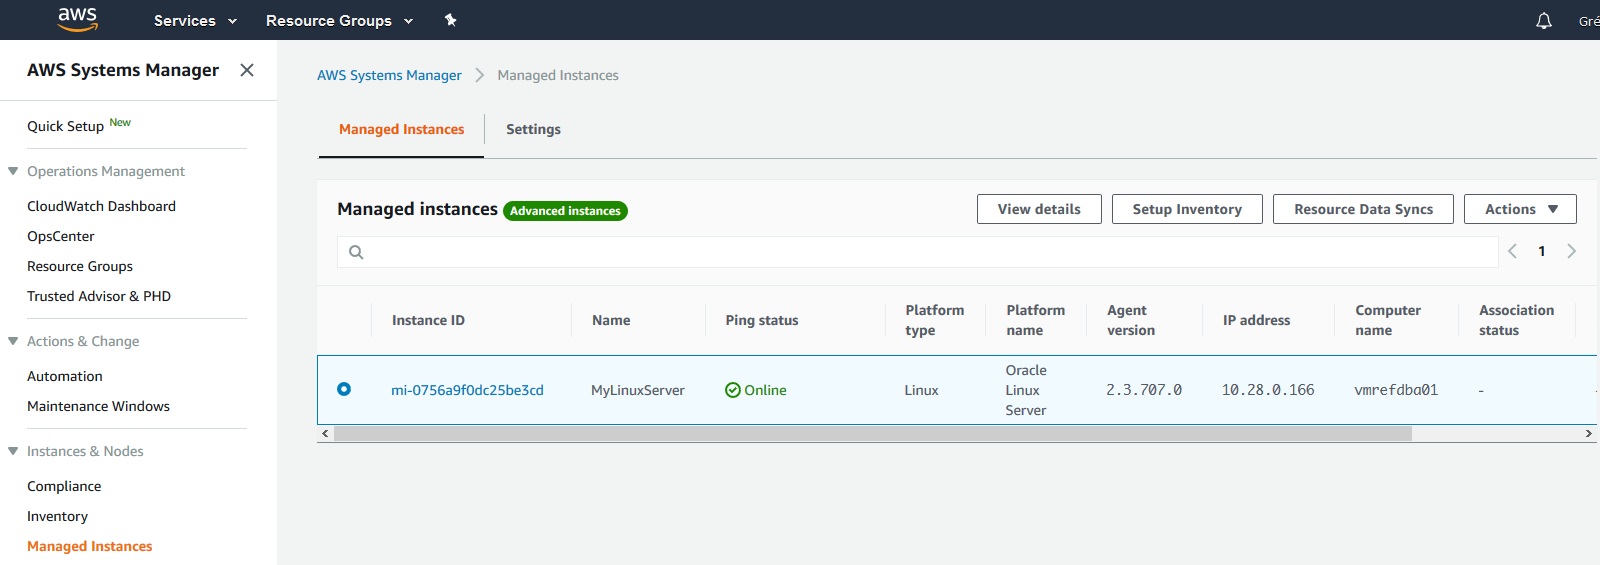
The Platform type is detected as well as the Kernel version, IP address and computer name. AWS Systems Manager provides also a package inventory and many other kinds of inventory such as Network inventory, Files inventory, aso…

Association between License Configuration and Resource ID
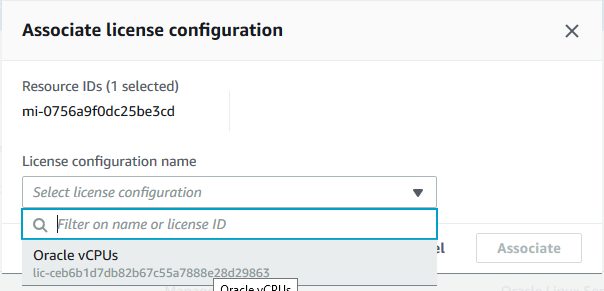
We now have to make the link between the Managed Instance (resource) and the license configuration. The goal of course is to define which license configuration will be applied to which resource. In order to proceed, we have to go into the AWS License Manager, and select “Search Inventory” into the menu. Then we simply have to select the resource and then click on “Associate license Configuration”.

The following window will appear, allowing you to define to which license configuration matches which resource:
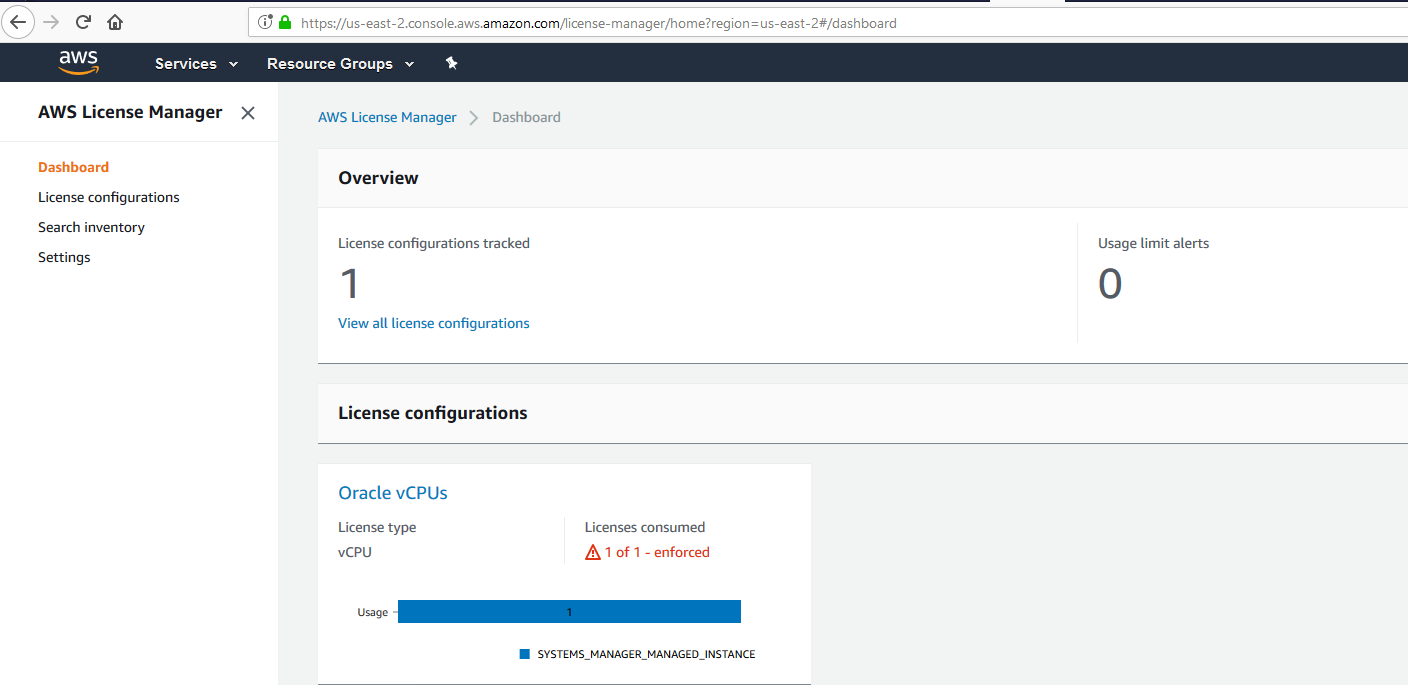
Having a look in the AWS License Manager Dashboard, you can see that 1 out of 1 license is consumed since I dedicated one vCPU to my virtual machine and I provided 1vCPU license to this instance.
Core Messages
- AWS License Manager offers more functionalities for EC2 Instances than for on-premise servers.
- AWS License Manager offers functionalities in order to monitor socket, vCPU, Cores and Instances.
- AWS License Manager definitively helps to manage licenses but doesn’t fit with all requirements and license model.
- AWS Systems Manager is a powerful tool providing several functionalities.
Strenghts
- AWS License Manager is free.
- AWS License Manager offers possibilities to monitor on-premise resources.
- AWS License Manager provides solution in order to prevent instance to run if license compliance doesn’t fit.
- AWS License Manager and AWS System Manager are straightforward to install and configure.
- AWS License Manager and AWS System Manager offers a good documentation.
- AWS System Manager offers many free functionalities (Patch Manager, Session Manager, Insights Dashboard, aso…).
- AWS System Manager offers many functionalities and is the basis of several other AWS tools such as AWS Config which allows to monitor instance’s compliance.
Weaknesses
- AWS License Manager is not able by default to monitor options usage such as the ones of an Oracle database (Partitioning, Active Data Guard, aso…).
- AWS License Manager is not able to calculate Oracle Processors, meaning taking into consideration core factors.
- AWS System Manager is not able to monitor socket or cores on on-premise resources, only vCPUs.
![Thumbnail [60x60]](https://www.dbi-services.com/blog/wp-content/uploads/2022/08/GRS_web-min-scaled.jpg)
![Thumbnail [90x90]](https://www.dbi-services.com/blog/wp-content/uploads/2023/01/APY_web-scaled.jpg)
![Thumbnail [90x90]](https://www.dbi-services.com/blog/wp-content/uploads/2022/08/FRJ_web-min-scaled.jpg)