As we have more and more customers either currently moving to AWS or already moved much, if not even all, of their workloads to AWS, one question pops up quite frequently: Now that we have so many EC2 instances up and running how do we regularly patch them? There are many tools around for patching operating systems, such as Microsoft SSCM, Red Hat Satellite or SUSE Manager just to name a few. There are many other as well but most of them have an important drawback: Either they can only patch Windows systems or they can only patch Linux systems (and even here usually only a subset of the distributions currently in use). This is where AWS System Manager becomes very handy as you can patch most of the commonly used operating system using one single tool. You can even patch your on-prem instances if your network setup includes the on-prem instances as well. In this post I’ll share what we did for one of our customers to remove the pain of either using multiple tools to patch all the operating systems or to manually patch all the systems and then (manually) document what has been done and what was the result.
Managed Instances
Once you start with AWS SSM there are a few key concepts you need to understand. The first one is the so-called “Managed Instance”. For an instance being managed it must fulfill two requirements:
- The AWS agent must be deployed on the instance
- An IAM role with the correct permission must be assigned to the instance
For the AWS agent it is quite easy if you are deployed any of these because the agent will be there be default:
- Windows Server 2003-2012 R2 AMIs published in November 2016 or later
- Amazon Linux
- Amazon Linux 2
- Ubuntu Server 16.04
- Ubuntu Server 18.04
If you are running something else the agent needs to be installed manually as described here for Windows and here for Linux. For on-prem instances it is straight forward as well (Windows here, Linux here) but you need to create Managed Instance Actications as well which is not in the scope of this post.
For the IAM role we’ll first look at what I have currently deployed:
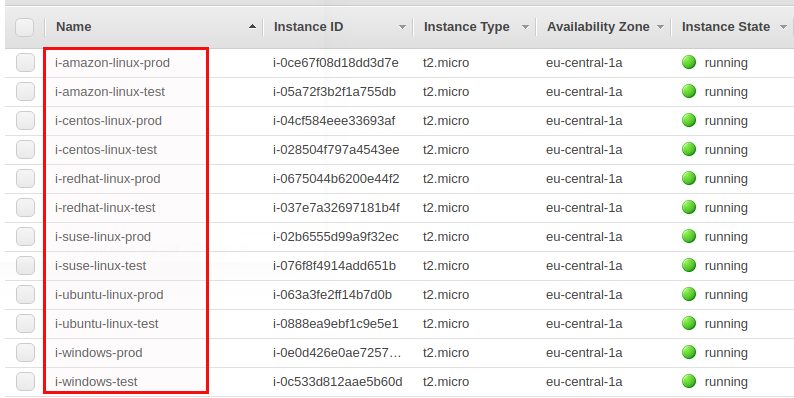
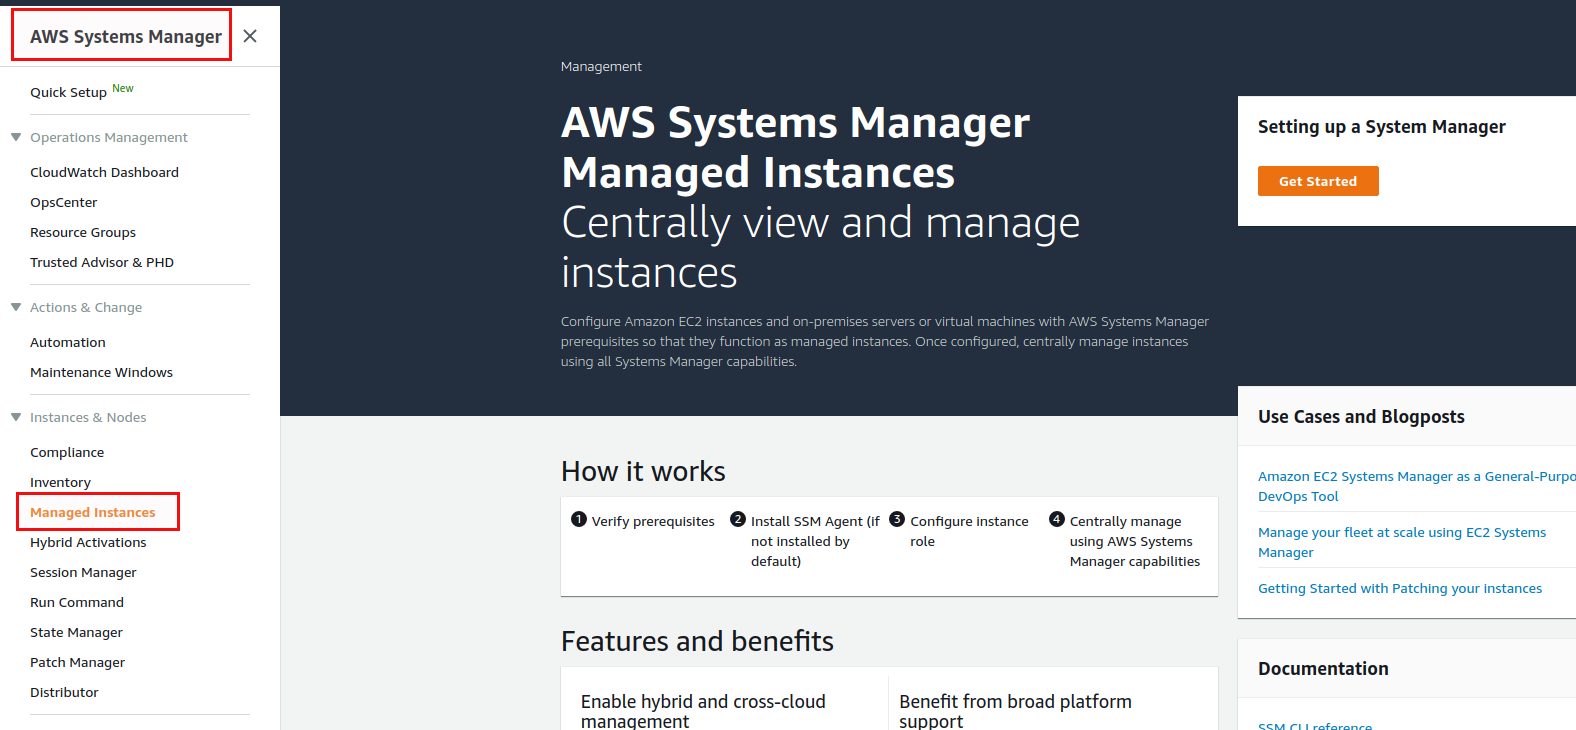
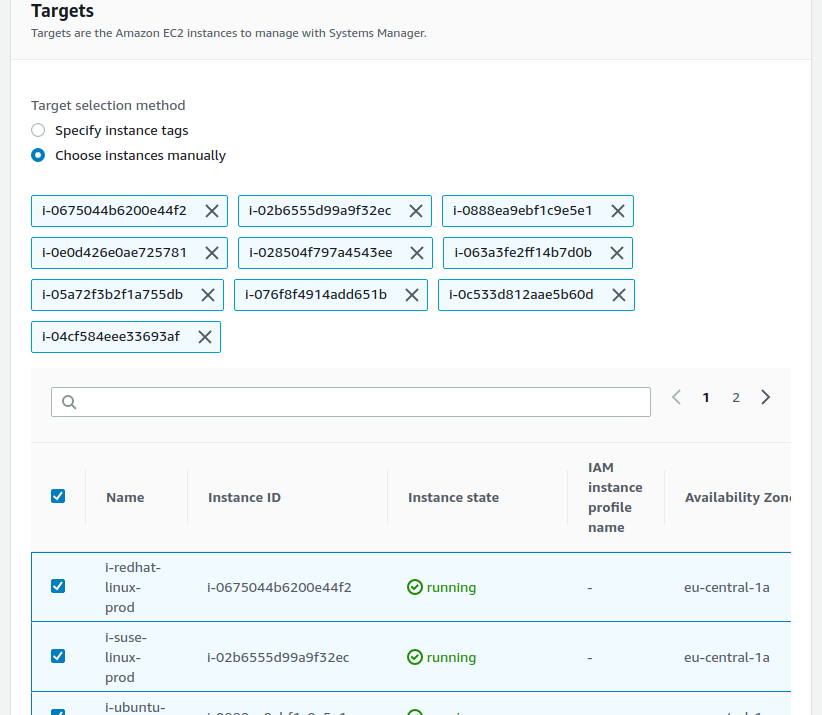
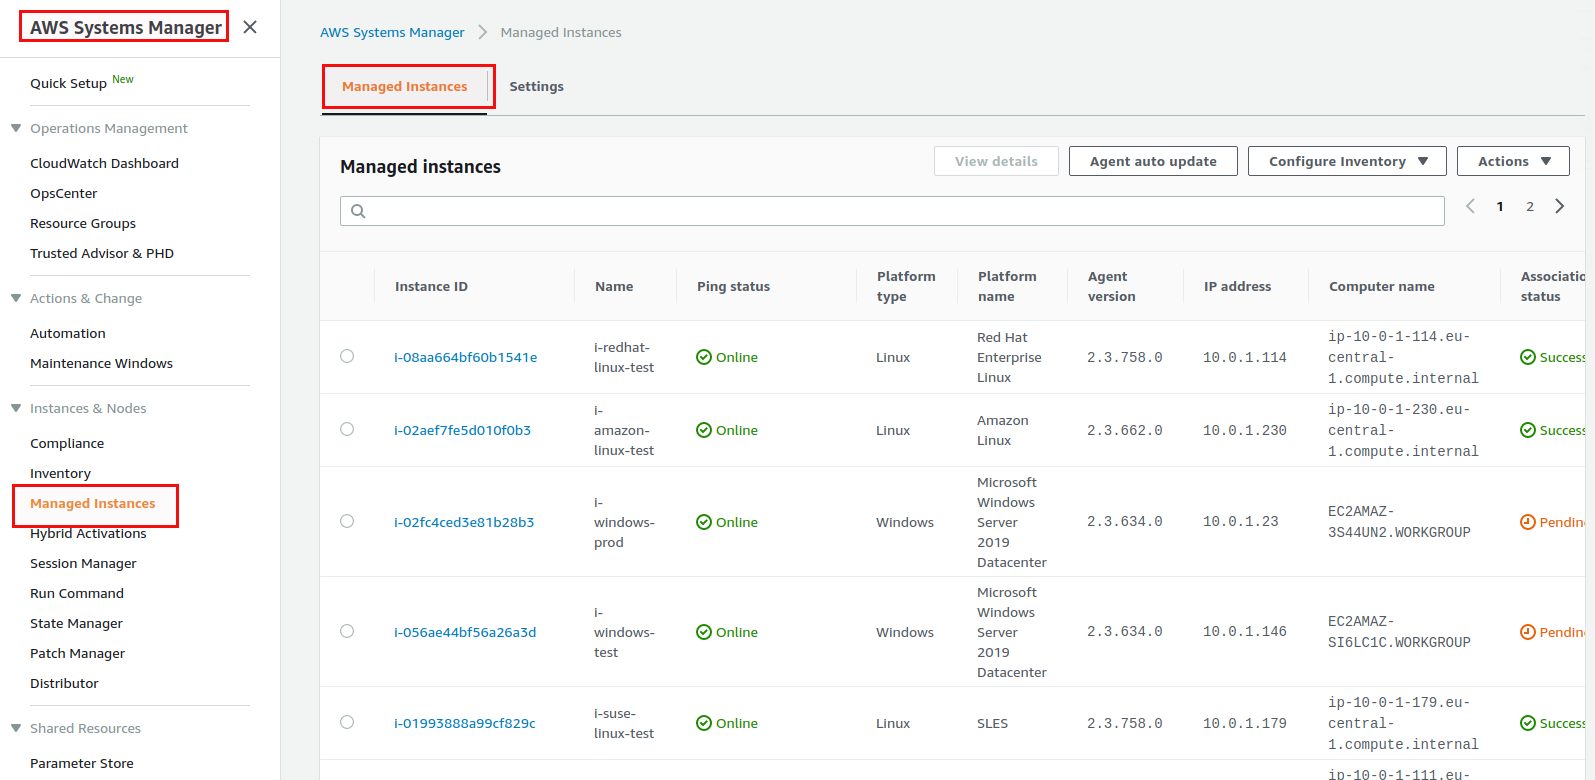
This are two Windows, two Red Hat, two Ubuntu, two Amazon Linux, two CentOS and two SUSE instances, one for Prod and one for Test each. The “Prod” and “Test” naming becomes important later, just ignore it for now. If we take a look at how many managed instances we have right now in System Manager we will see zero, even that the Windows, Ubuntu and Amazon Linux instances have the SSM agent deployed automatically (otherwise we would see a list of managed instances here):
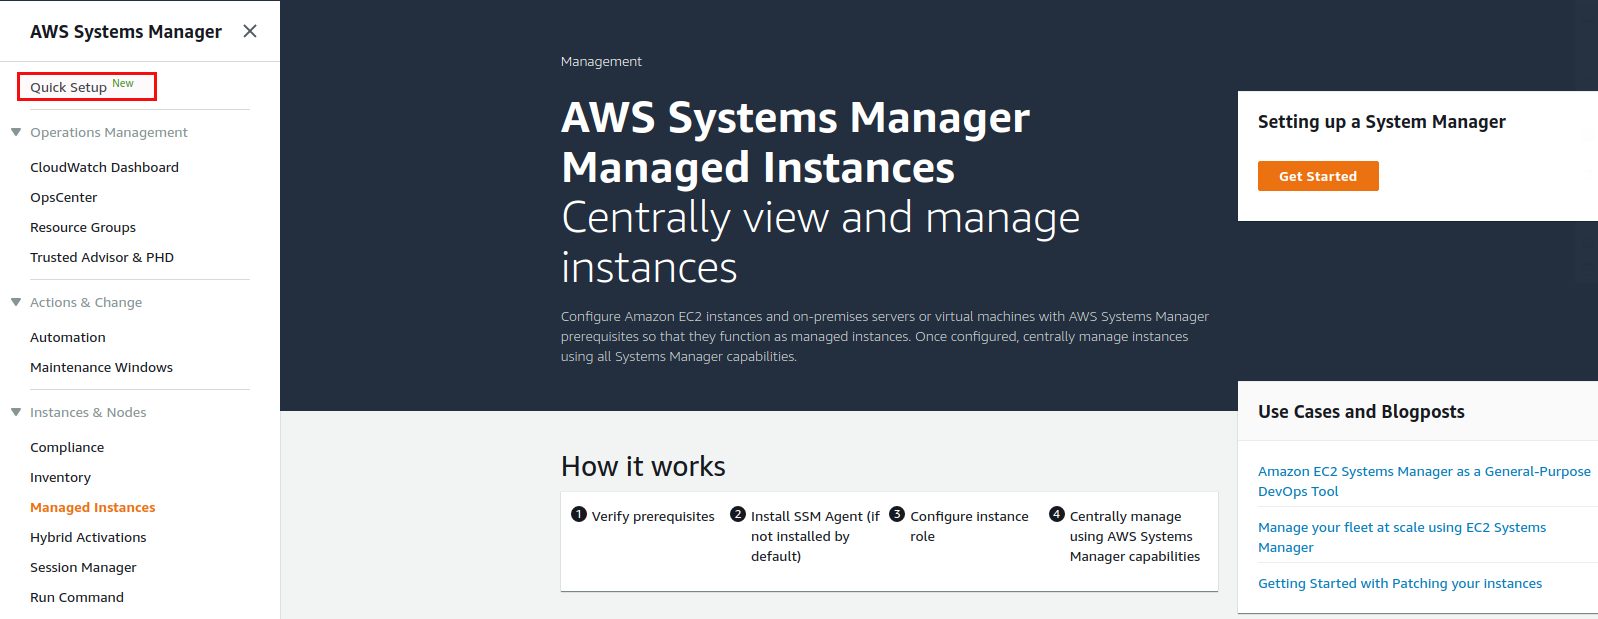
We will use the “Quick Setup” here to setup the IAM role and instance profiles:
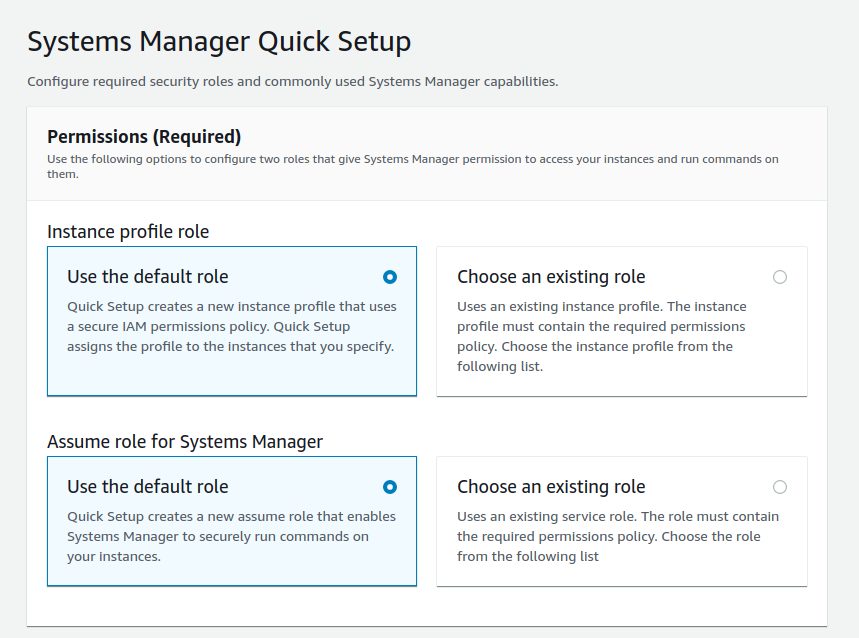
For the scope of this post we will go with defaults suggested by AWS:
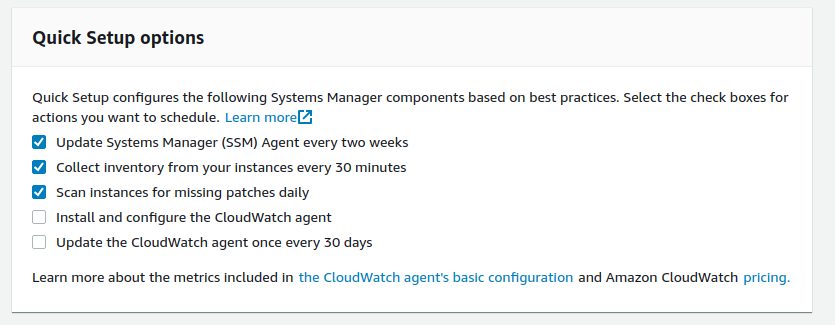
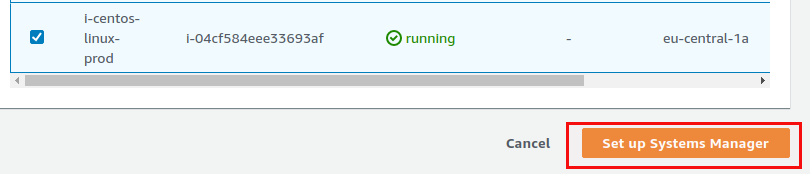
We want all the instances:
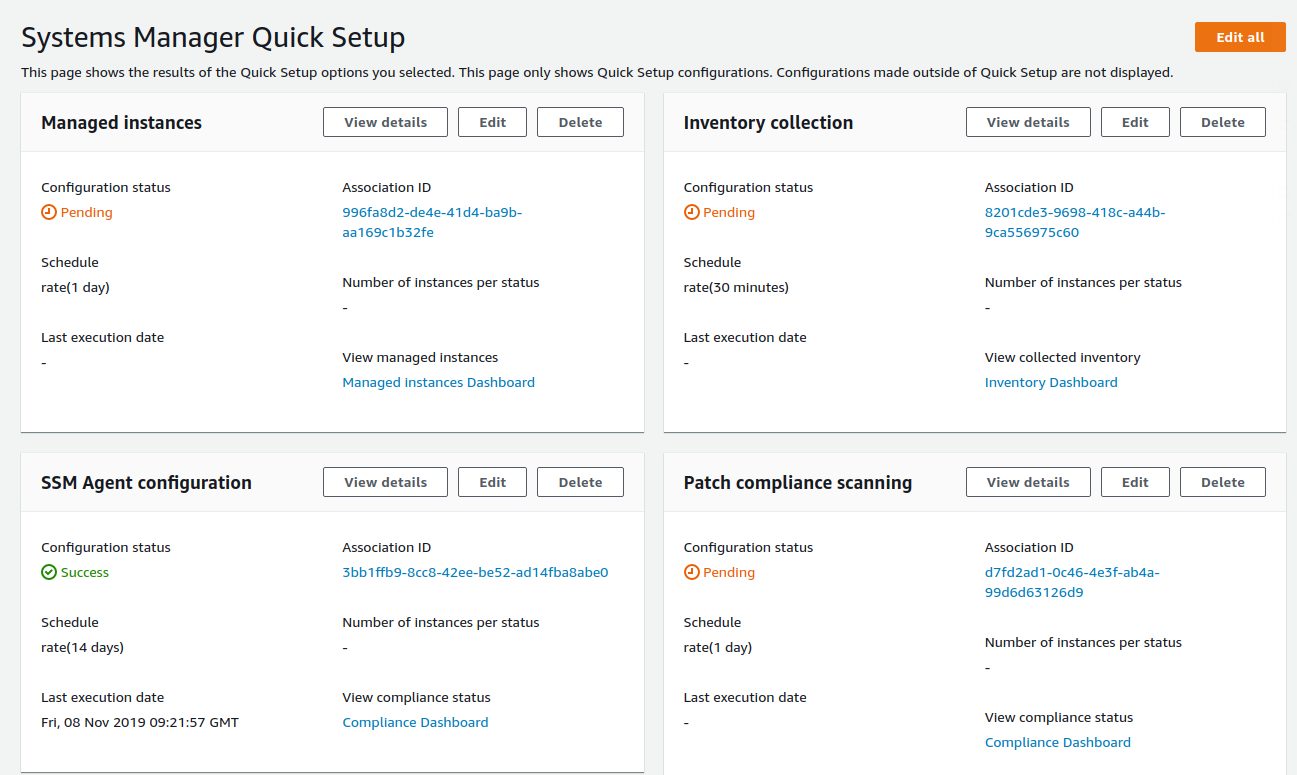
The last screen shows an overview of what is currently happening, basically collecting all the information that will be stored in the AWS SSM inventory. Before you’ll see any instances in “Managed Instances” you will need to wait until the pending inventory actions have been completed:
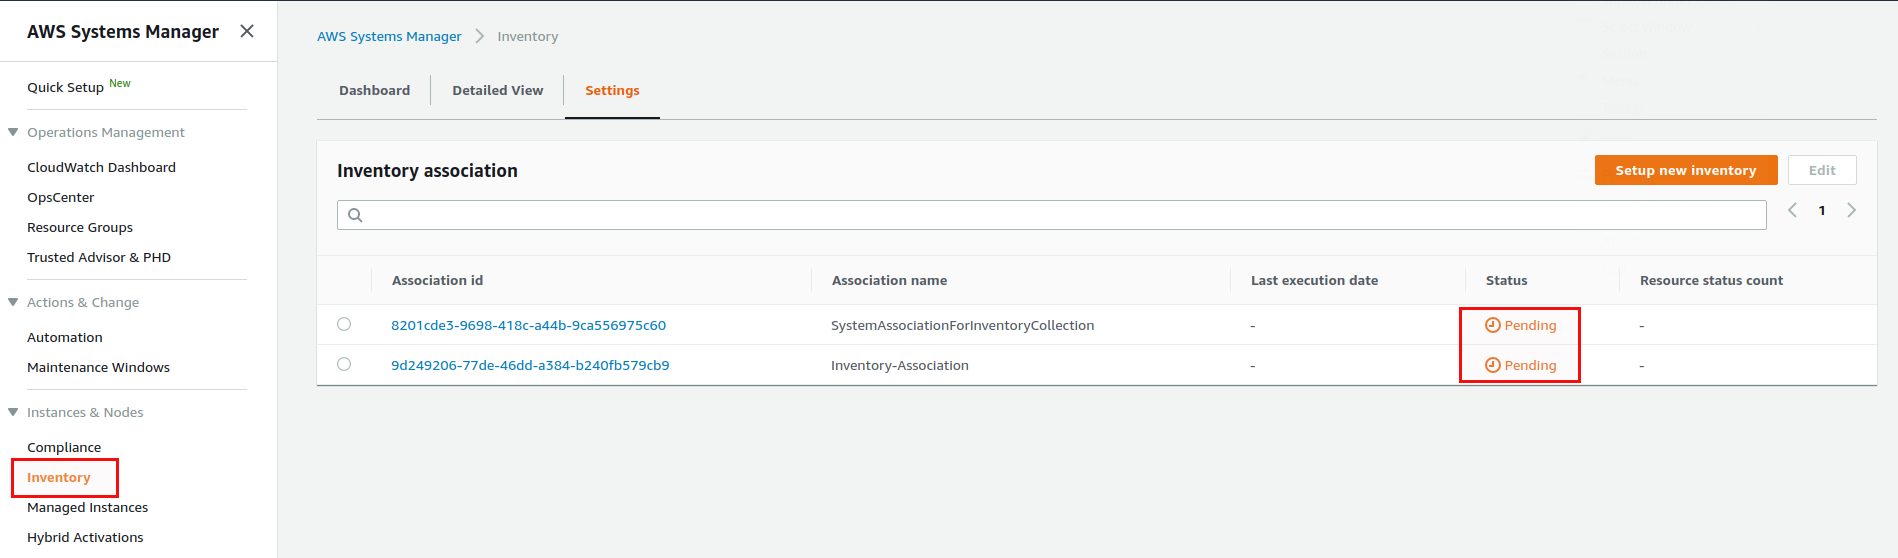
Once that is done all the managed instances should be there (notice that I manually deployed the ASM SSM agent on the SUSE, CentOS and RedHat instances, otherwise they would not show up here):
Patch baselines
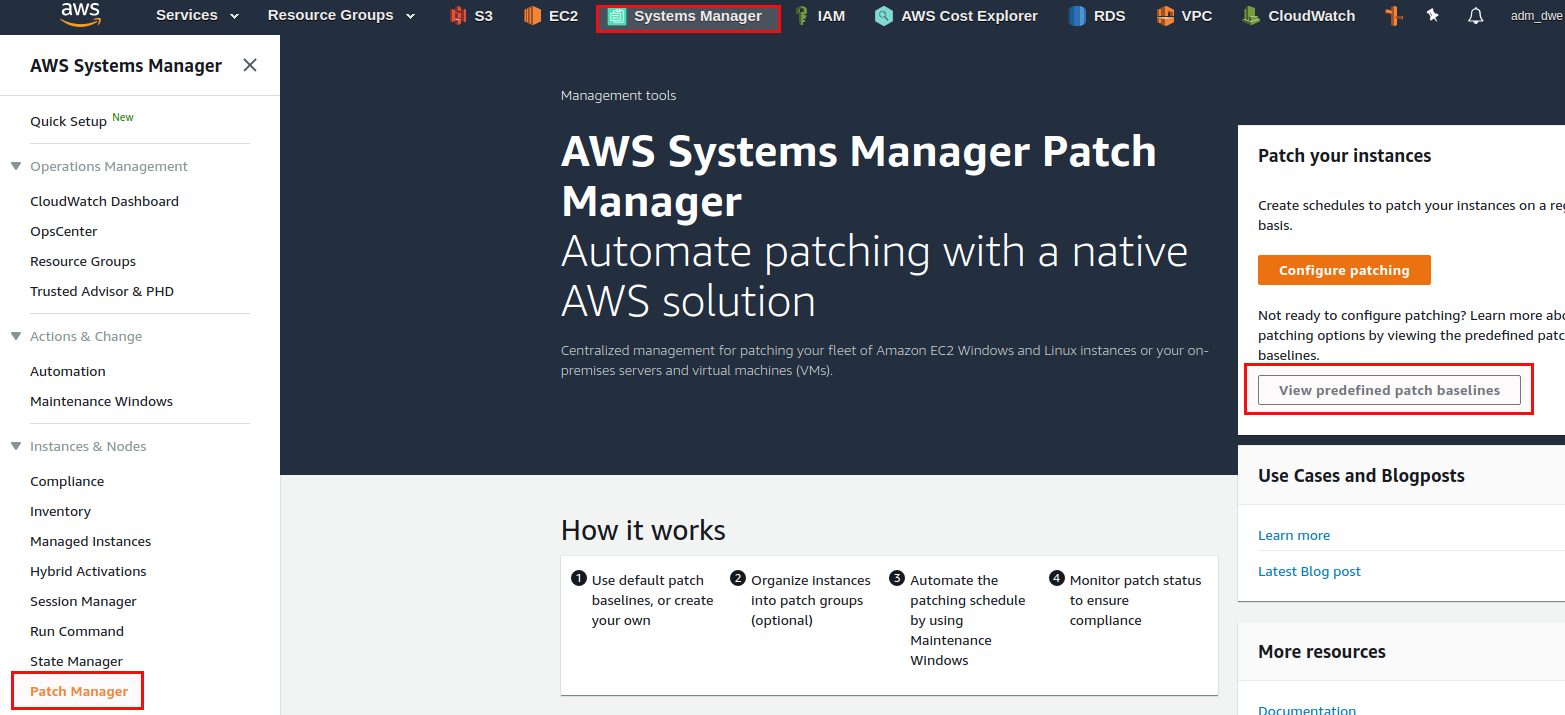
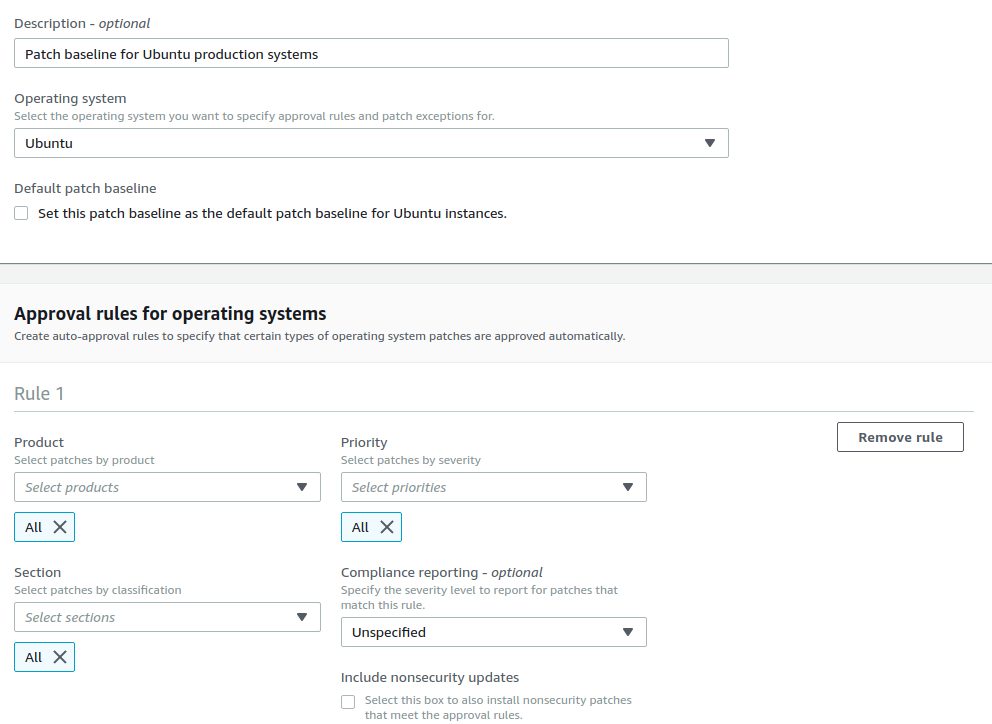
Once all instances are “managed” there is the next concept we need to understand: Patch baselines. Patch baselines basically define which set of patches (classification, severity, …) shall get applied to which product (e.g. Red Hat 7, Red Hat 8, …). As we have six different operating system we need at least six patch baselines. In reality you’ll probably even need twelve because you will have production and test systems. Usually you want to have the same patches applied to production as you have applied to test some days or weeks before and therefore we need two patch baselines per operating system flavor. Patch baselines are listed in SSM under “Patch manager”:
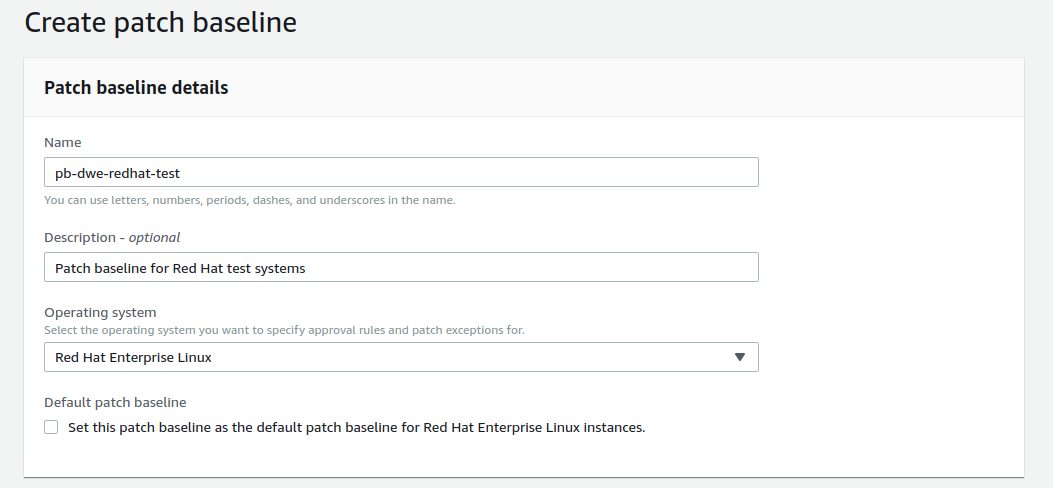
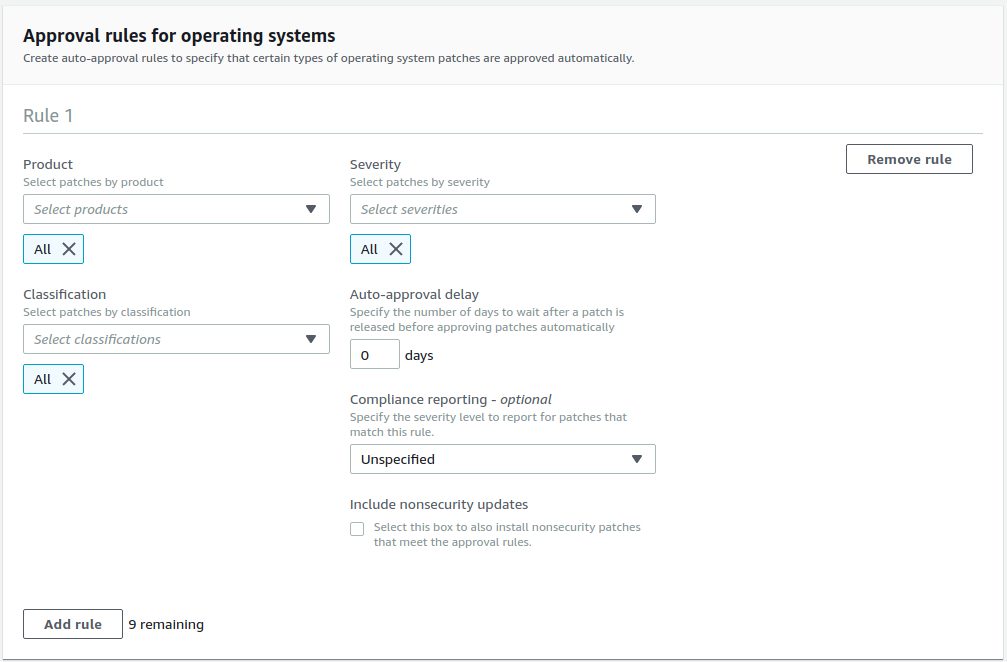
The following screenshots show how I created the patch baseline for the Red Hat test systems:


For the Red Hat production systems the patch baseline is exactly the same but I’ve put an approval delay of 14 days:
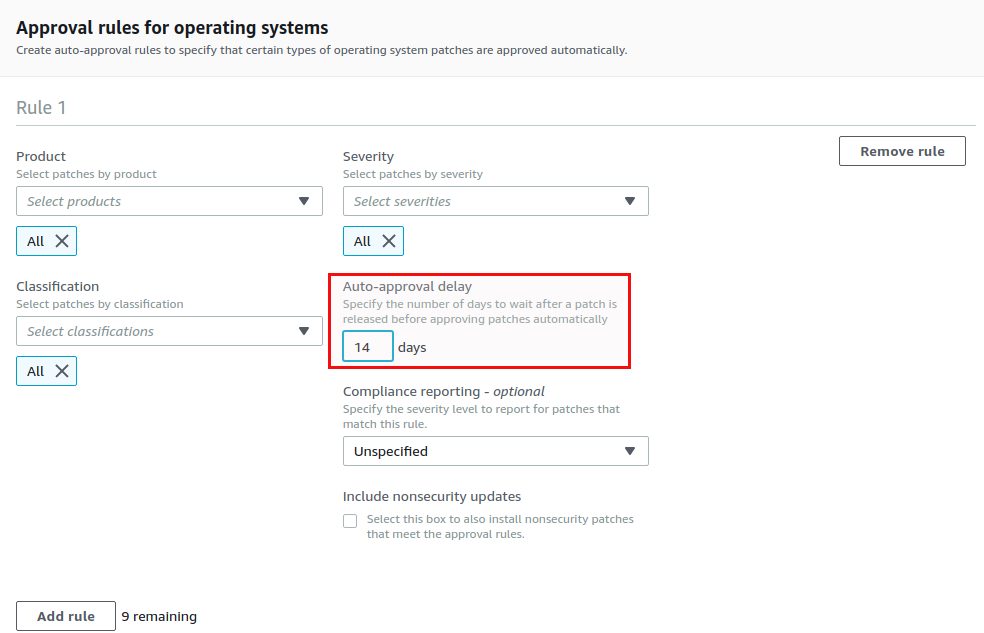
Why the delay? Suppose you patch your test systems every first Tuesday a month and then you patch the production systems 14 days later. As you want to have the same patches on production and test, the production patches get an approval delay of 14 days. This is how you can make sure that your systems are on the same level even if production is patched later than test. One point consider is, that this does not apply to the Ubuntu systems as there is no approval delay for Ubuntu patches:
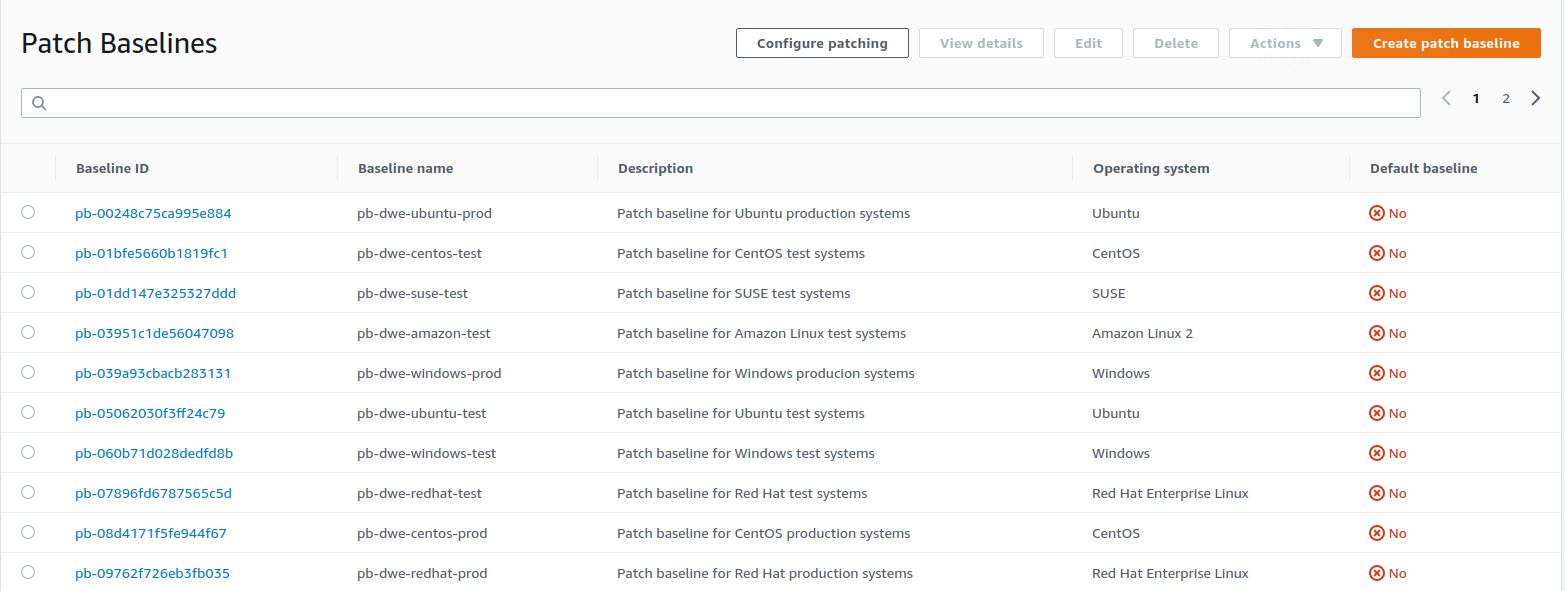
Once all the base lines have been created it looks like this:

The “Patch group” tag
The next key concept that comes into the game are tags. No matter what you well be doing in the cloud, without tags you’re lost. There is just no way around tags if you want to automate processes in the cloud. When it comes the AWS SSM there is the “Patch Group” tag and this tag needs to be assigned to each instance you want to have patched automatically. Let’s assume you want to have the test instances patched every first Saturday each month and the production instances every 3rd Saturday each month ( 6 a.m. in the morning for both). In addition all the Linux hosts should be patched before the Windows hosts, because the Linux hosts run the databases and the Windows hosts run the application servers or the application (of for whatever reason there is a dependency between the hosts and you need to follow a defined order for patching).
What we did to fulfill this requirement is to populate the “Patch Group” tag like this:
- All test instances get the value: patch_test_0600_batch_1 or patch_test_0600_batch_2
- All production instances get the value: patch_prod_0600_batch_1 or patch_prod_0600_batch_2
The “*batch” values builds the dependency between the Linux and the Windows host. Taking one test Linux and one test Windows as an example the tag would look like this:
I’ve assigned the tags to all the remaining instances accordingly:
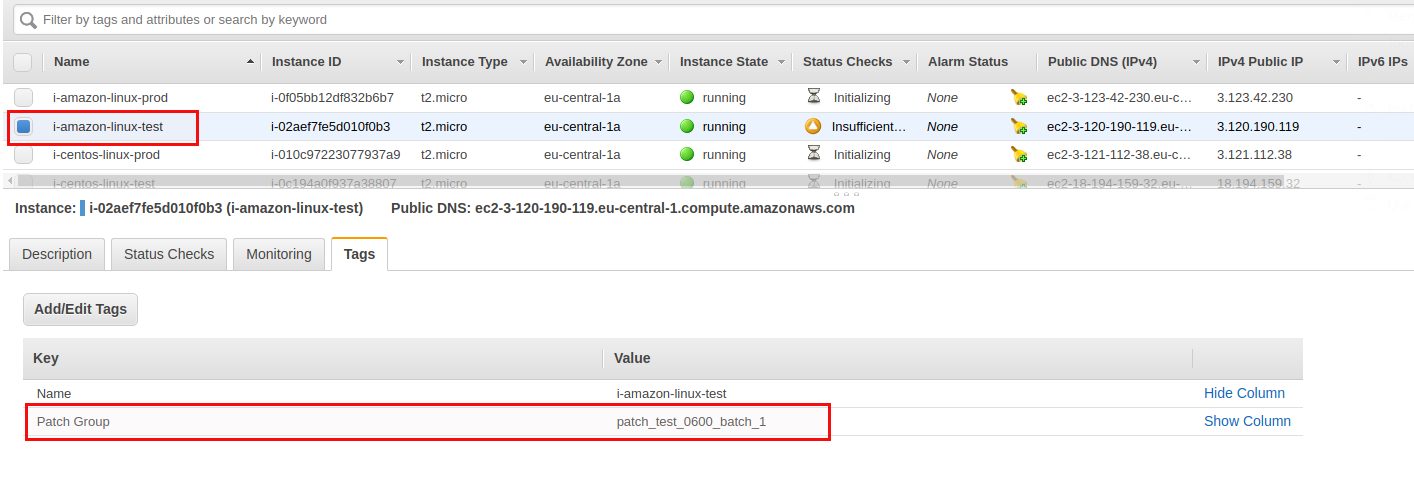
- i-amazon-linux-test: patch_test_0600_batch_1
- i-centos-linux-test: patch_test_0600_batch_1
- i-redhat-linux-test: patch_test_0600_batch_1
- i-suse-linux-test: patch_test_0600_batch_1
- i-ubuntu-linux-test: patch_test_0600_batch_1
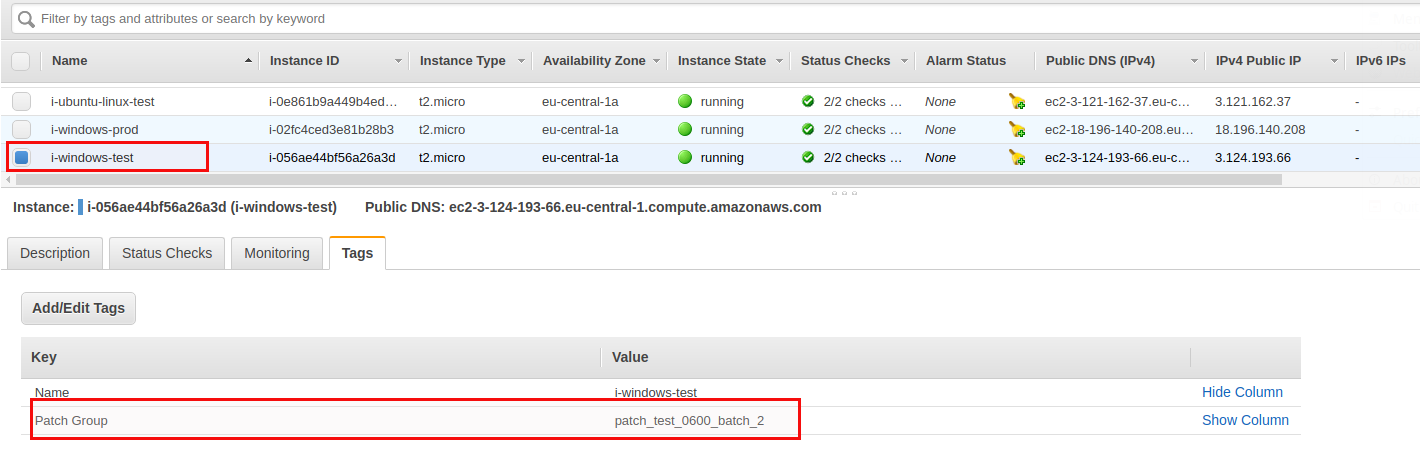
- i-windows-test: patch_test_0600_batch_2
Same procedure for the production instances but using the prod_* tags of course. Only assigning these tags to the instances is not enough though. We need to assign them to the patch baselines as well so the baseline gets selected when a patch is supposed to run on the systems. Assigning a “Patch Group” to a patch baselines basically links the patch baseline to instances with the same tag value per operating system. If you don’t do that you will always get the default patch baseline for an operating system and you have no chance of applying the same patches to test and prod because you can not have different approval delays.
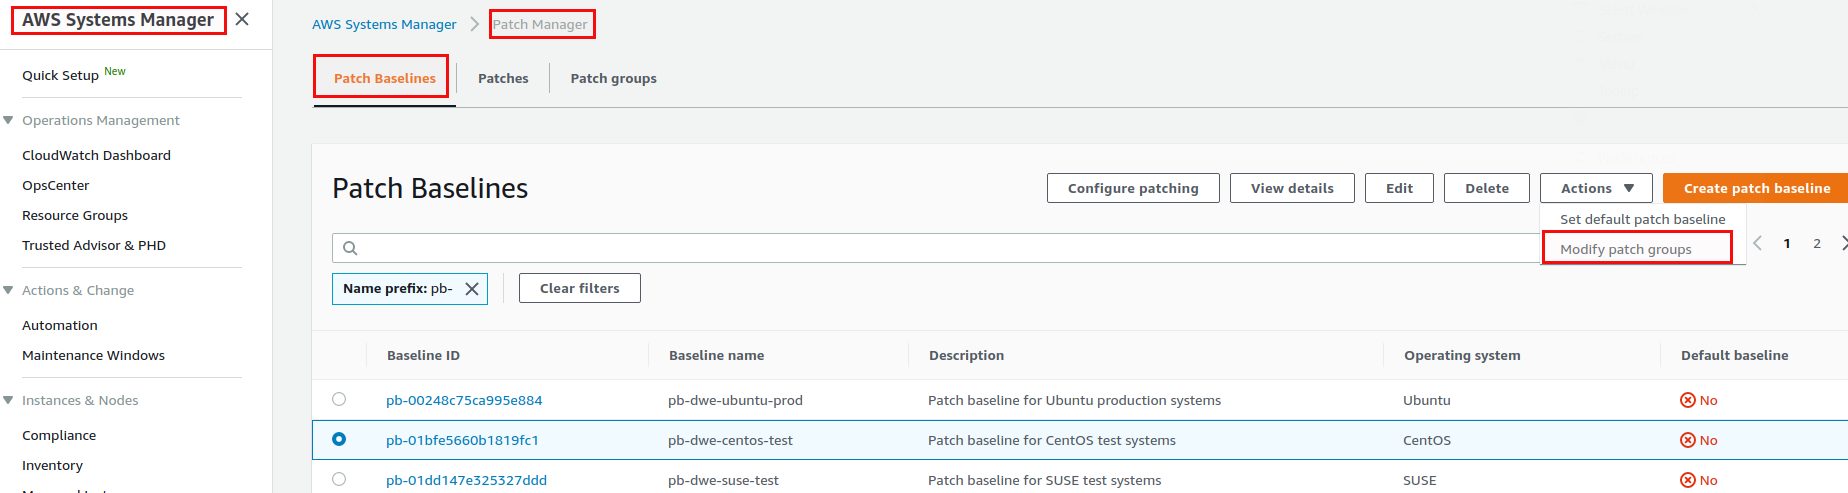
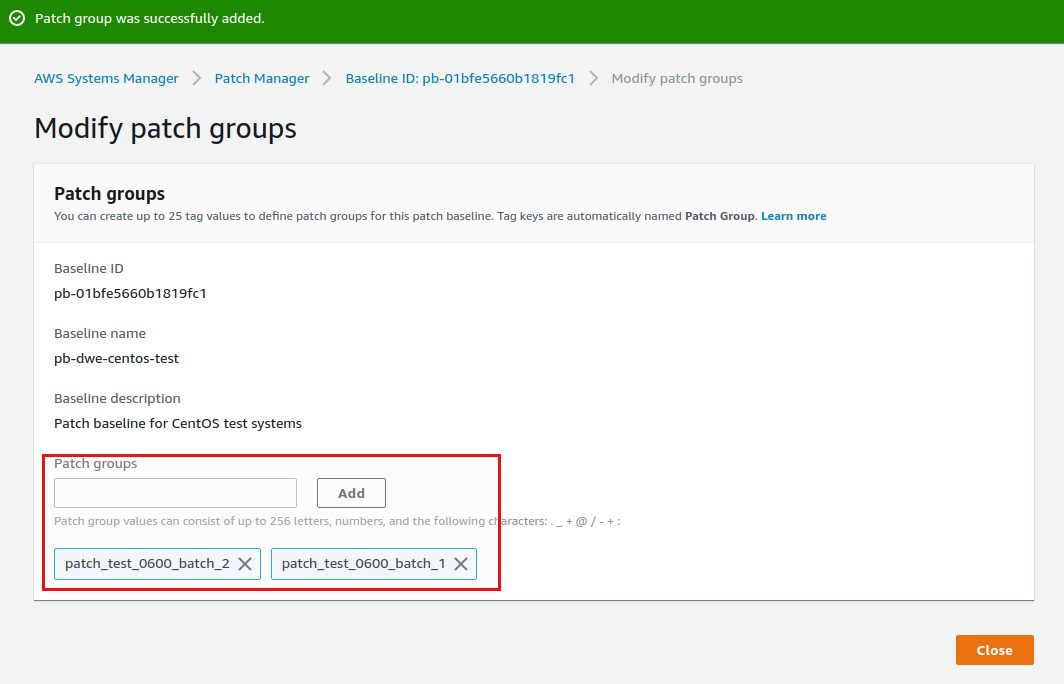
This needs to be done for all the patch baselines we created above. The patch_test_0600_batch* tags get attached to the baselines for test and the patch_prod_0600_batch* tags get attached to the baselines for production.
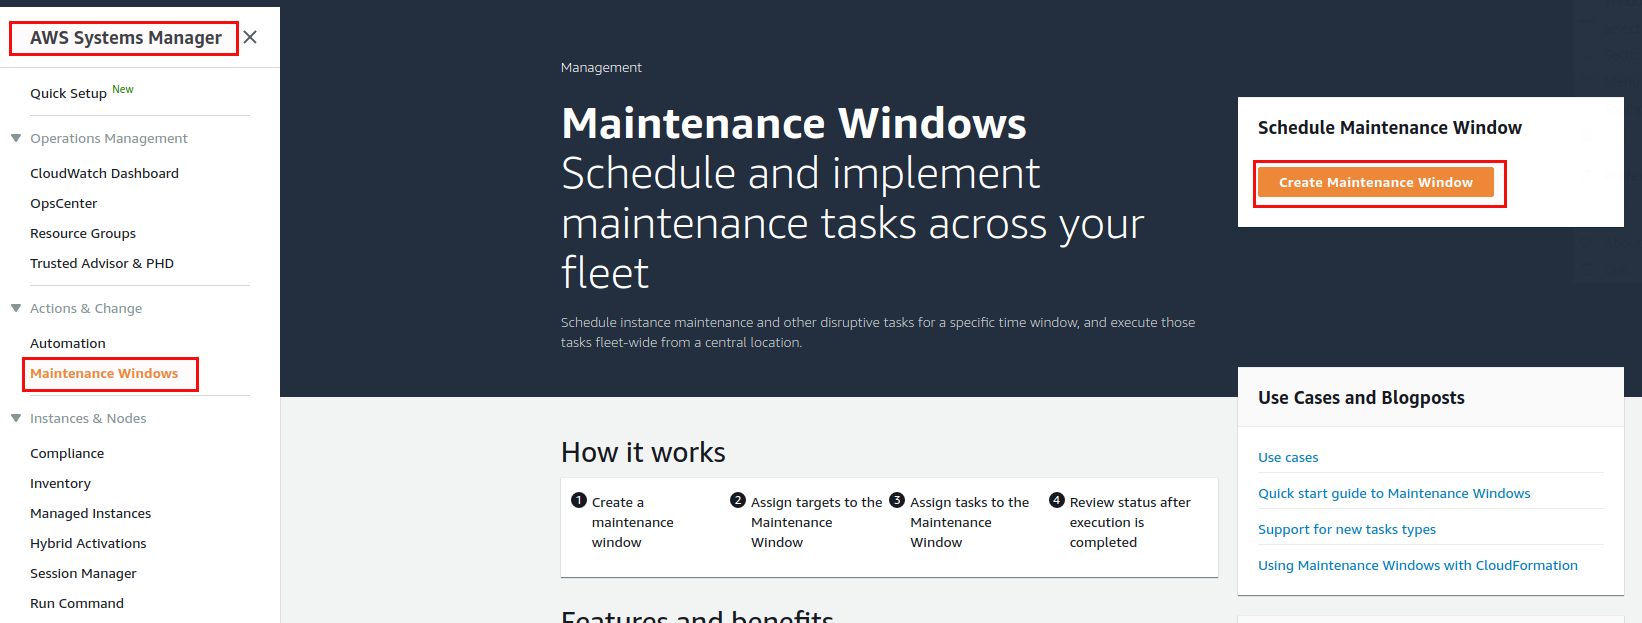
Maintenance windows
The last building block are the maintenance windows. They define when an action will executed on which systems. You can not only use them for patching but for many other tasks as well (e.g. running a PowerShell script on Windows hosts, running a shell script on Linux hosts, running an Ansible playbook and much more).
As we want to schedule patching for all the test instances the first Saturday of a month and all production systems the third Saturday of the month we’ll need to two maintenance windows, one for test and for production. We’ll start with the one for test:
For the scheduling you should go for a cron expression:
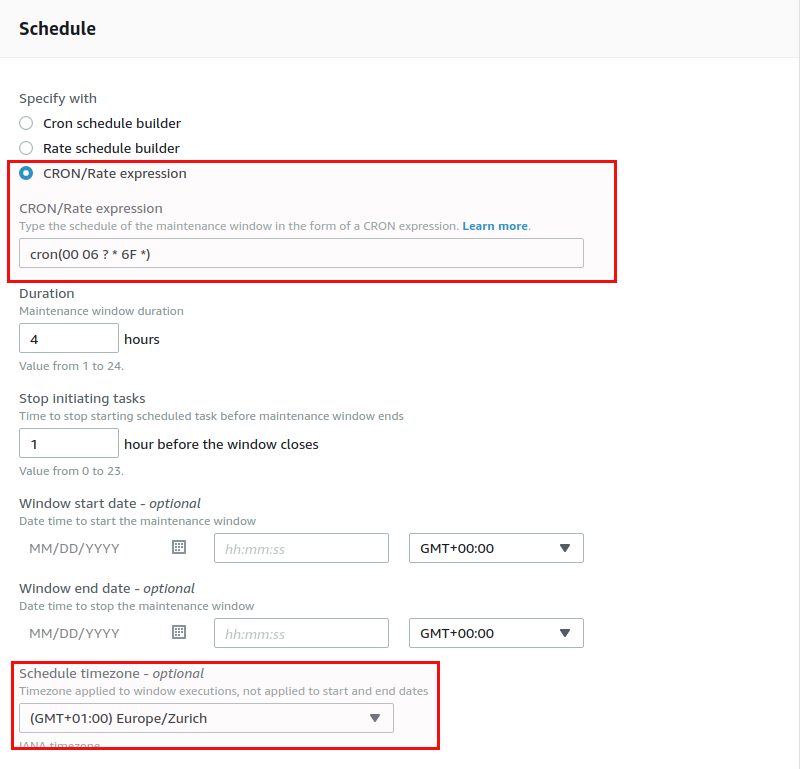
“6F” means the first Saturday (0 is Sunday) each month. Note that if you skip the “Schedule timezone” timezone you will need to provide UTC time in the cron expression. If you do specify your timezone, AWS is automatically calculating the correct UTC time for you, as you can see once the maintenance window is created:

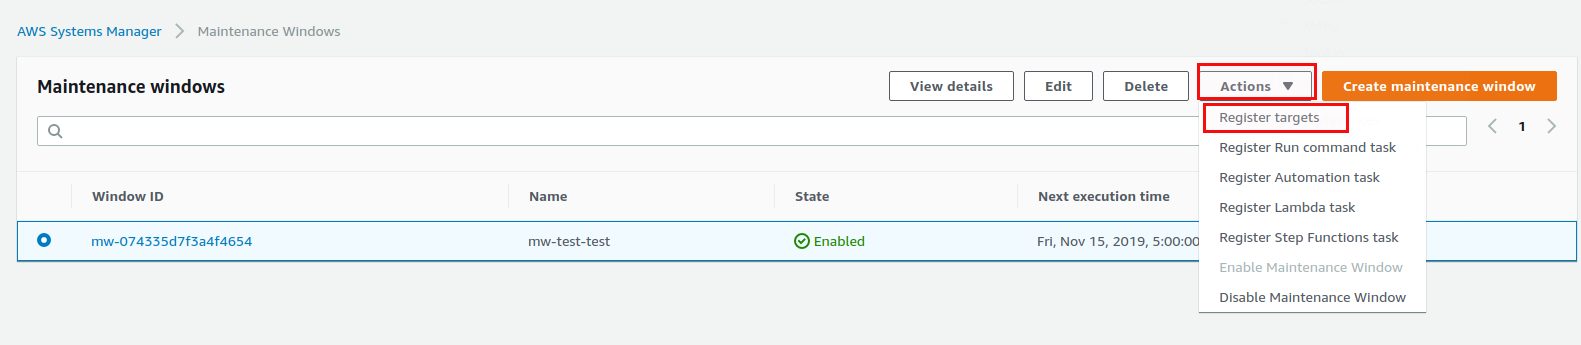
Now we have the scheduling but the maintenance window has no idea what to run and against what to run it. What to run is specified by adding targets:
You should definitely give a name to the target so you can easily identify the target afterwards:
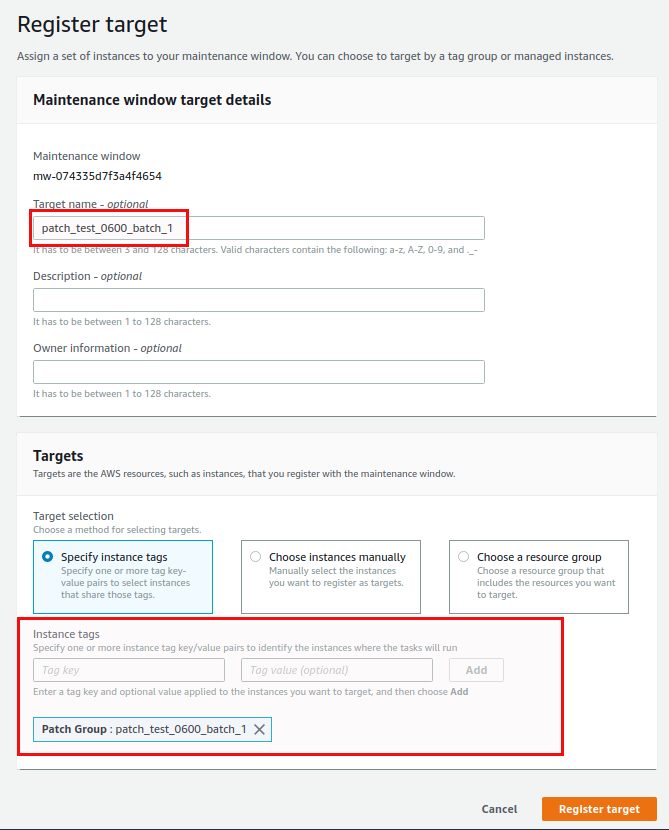
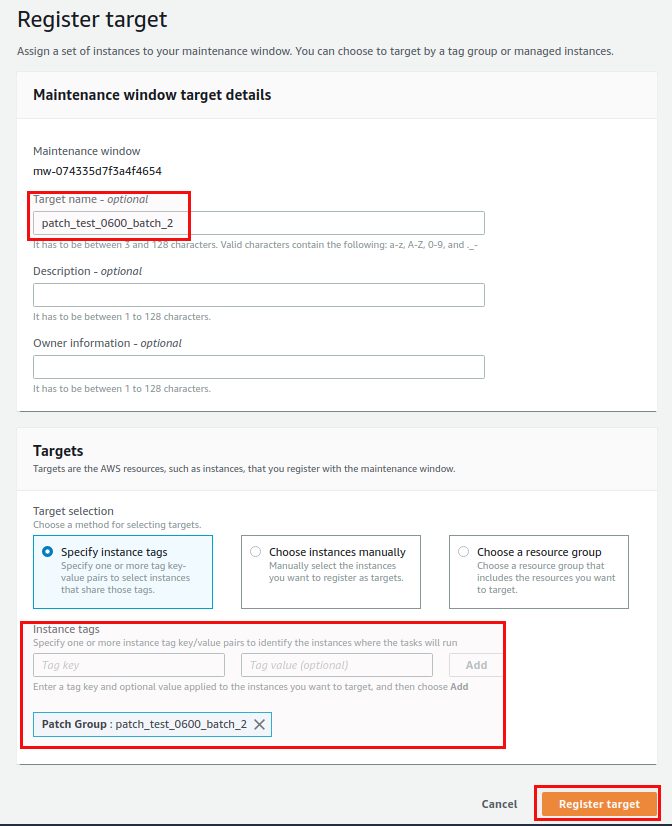
By specifying the “Patch Group” instance tag with our values for the test systems that should run in the first batch we have all the Linux systems registered with this maintenance window. The second target will be the Windows systems that should be patched once the Linux systems have been done:
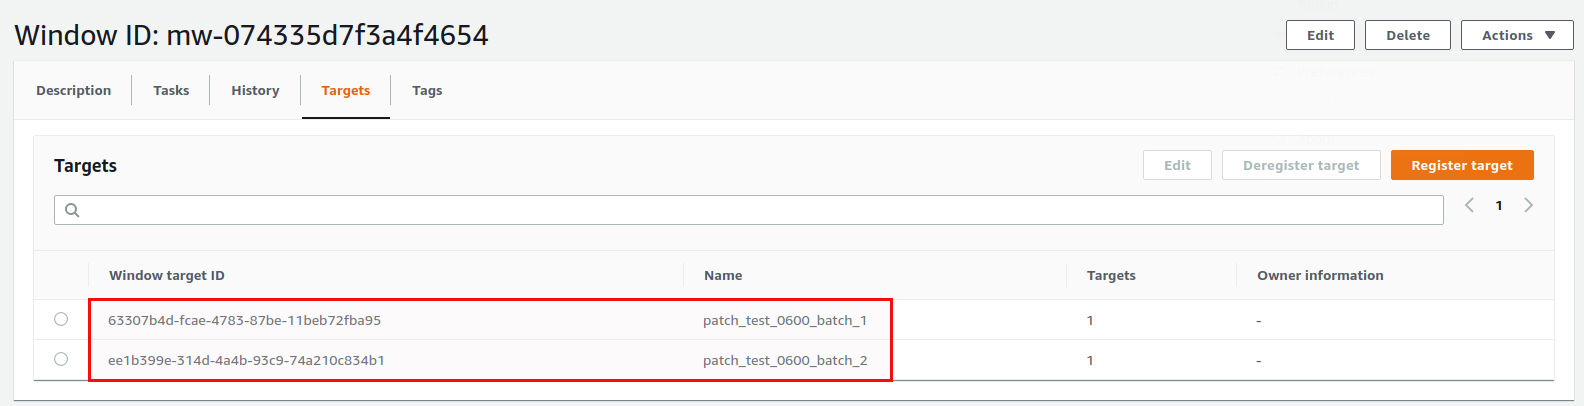
All test systems registered:
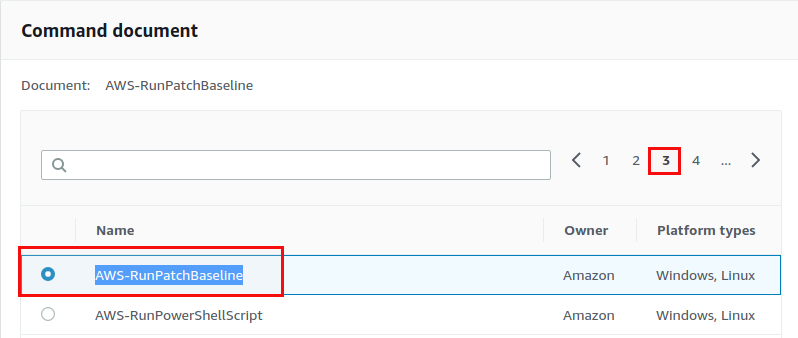
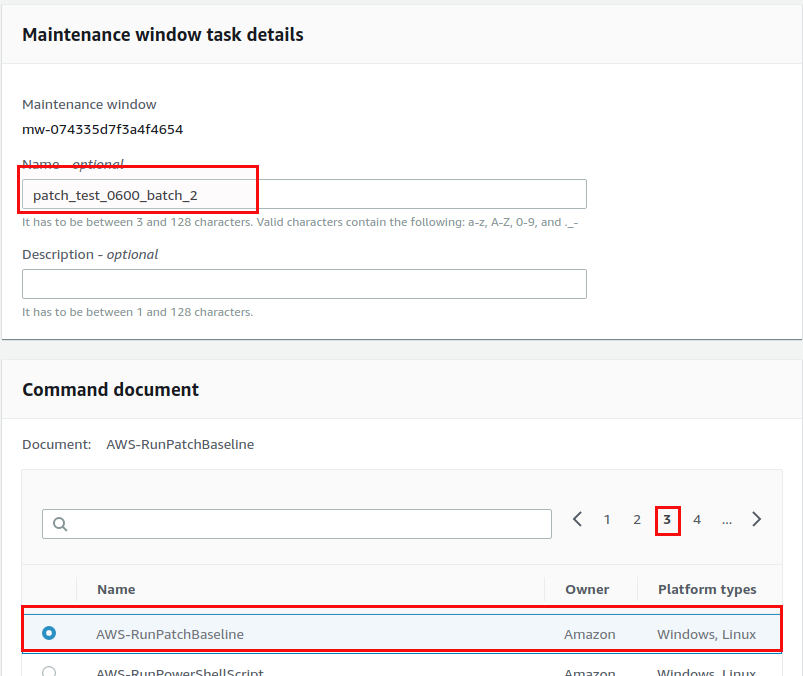
Now that we defined where to run we need to define what to run and this is specified by the “Run command”:

In our case the document is “AWS-RunPatchBaseline” but it could be any of the documents listed as mentioned earlier:
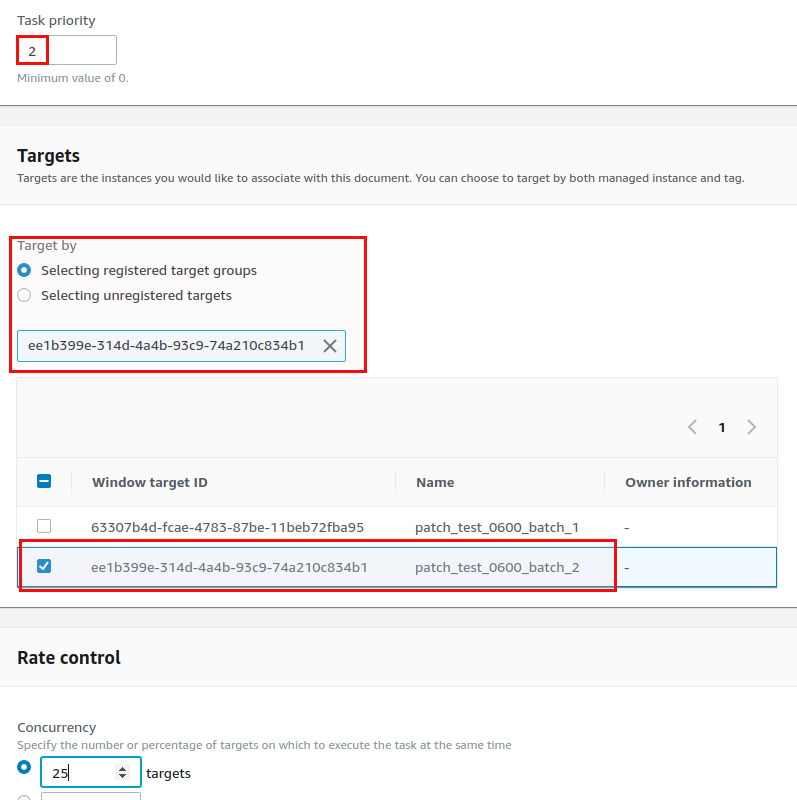
The task priority is 1 (because we want this to be executed first) and the target is “patch_test_0600_batch_1” (this is why the name for target is important. You will probably not remember the unique string that was generated when you registered the target):

The rate control option allows you to control concurrenry and error thresholds, for the IAM role go with the defaults:
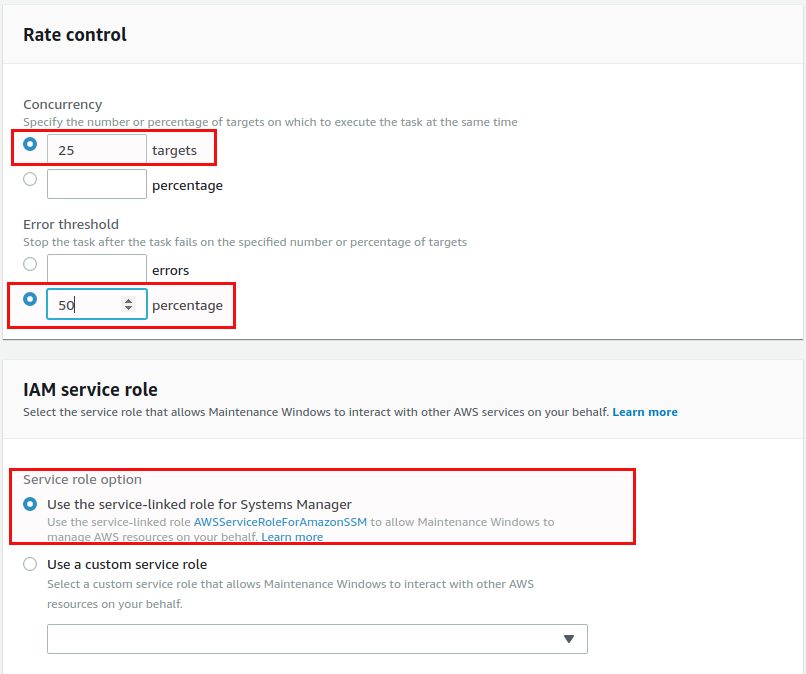
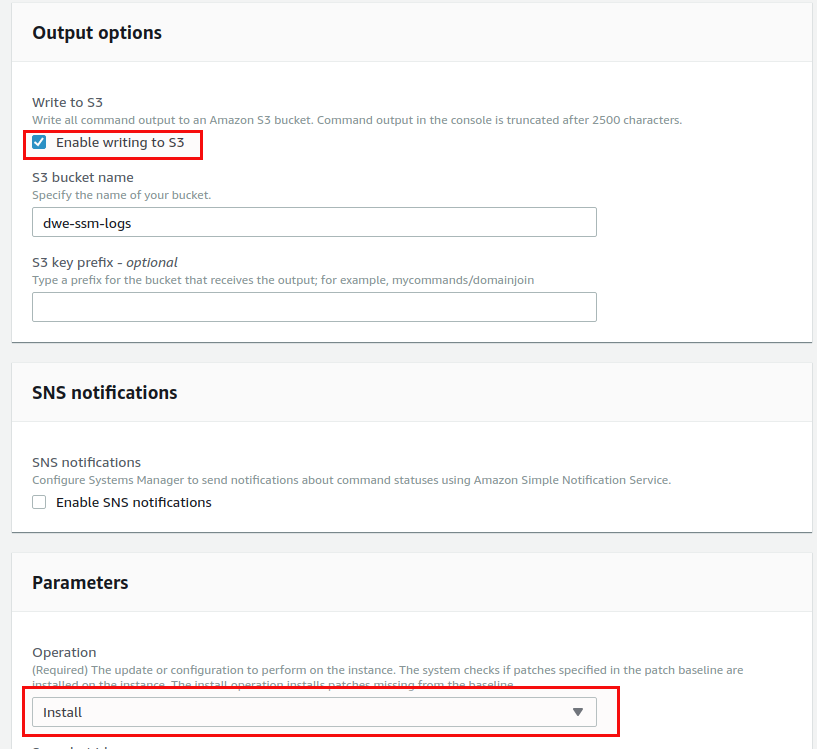
We highly recommend to store the output in a S3 bucket, otherwise the output of the run command will be truncated after 2000 charcters. The parameter should be “Install” (you could also go for “Scan” if you only want to scan for available patches):
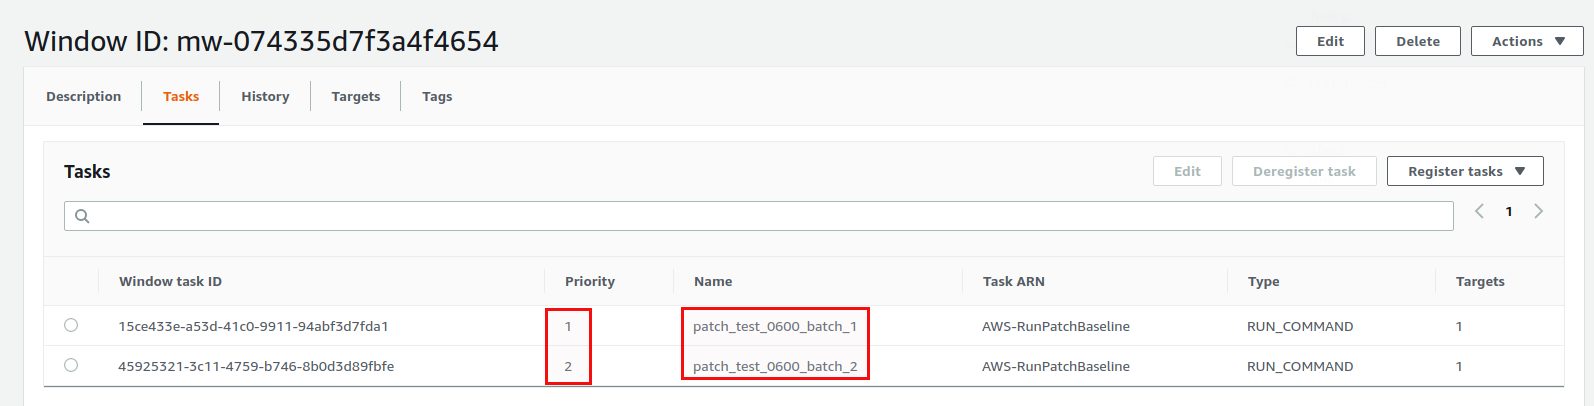
Do exactly the same for the patch_test_0600_batch_2 group, with priority 2:
Both run commands are now registered:
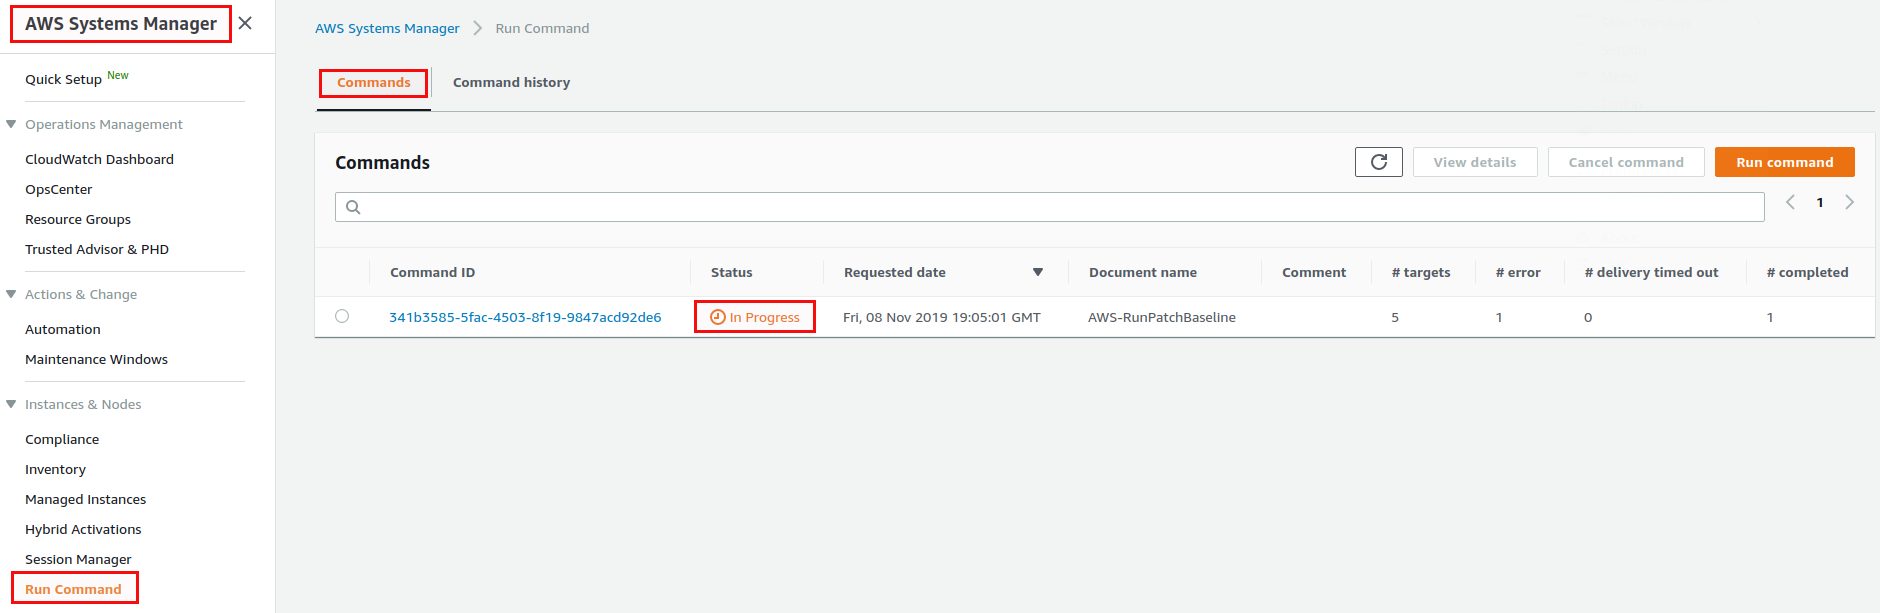
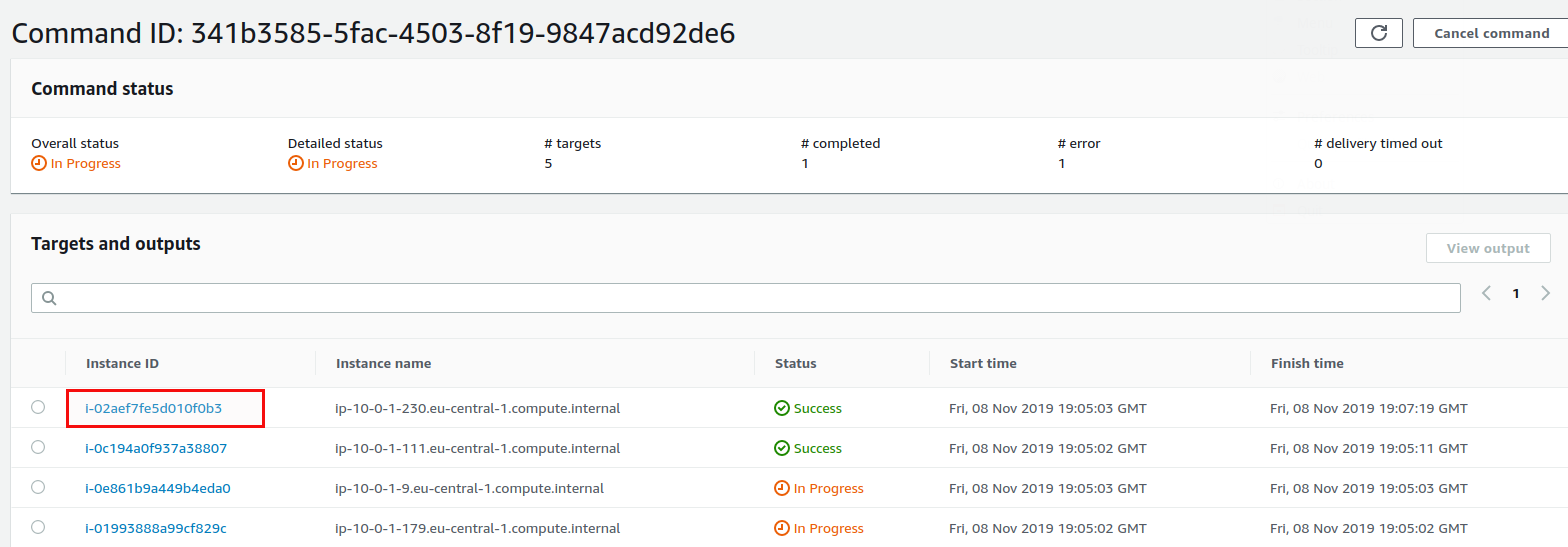
And that’s it. Repeat the same for the production machines and all your instances are scheduled for patching. Once the maintenance window executed you can get the logs in the “Run command” secion:
Here you have the link to the log in S3:


Conclusion
When you start using AWS SSM it is a bit hard to understand all the relations between patch baselines, the patch group tag, target, run commands and maintenance windows. Once you got that it is quite easy to schedule patching of your whole infratructure (even on prem) when you run operation systems AWS has patch baselines for. The logs should definitely go to S3 so you have the full output available.
![Thumbnail [60x60]](https://www.dbi-services.com/blog/wp-content/uploads/2022/08/DWE_web-min-scaled.jpg)
![Thumbnail [90x90]](https://www.dbi-services.com/blog/wp-content/uploads/2023/01/APY_web-scaled.jpg)
![Thumbnail [90x90]](https://www.dbi-services.com/blog/wp-content/uploads/2022/08/FRJ_web-min-scaled.jpg)