Introduction
If you never heard of it, Pester is a PowerShell module, written in PowerShell.
It’s a framework for writing and running unit tests, integration tests, and also infrastructure checks as we will see in a moment.
Pester is used for example to test PowerShell Core and Pester itself.
In this blog post, I’ll do a short introduction to Pester with Installation and basic checks examples.
Installation
Pester is shipped by default with Windows 10 and Windows Server 2016. The version installed is 3.4.
The latest version is available in the PSGallery. It is currently version 5.1.
If you have the 3.4 version installed and would like to update it you will face errors with Update-Module. You need to use the following command to get the latest version:
PS C:\> Install-Module -Name Pester -Force -SkipPublisherCheck
PS C:\> Get-InstalledModule

Version    Name                                Repository           Description
-------    ----                                ----------           -----------
5.1.0      Pester                              PSGallery            Pester provides a framework for...
PowerShell function example
I will now show you a very basic Pester test.
Let’s say I want to write a Pester test for the following PowerShell function.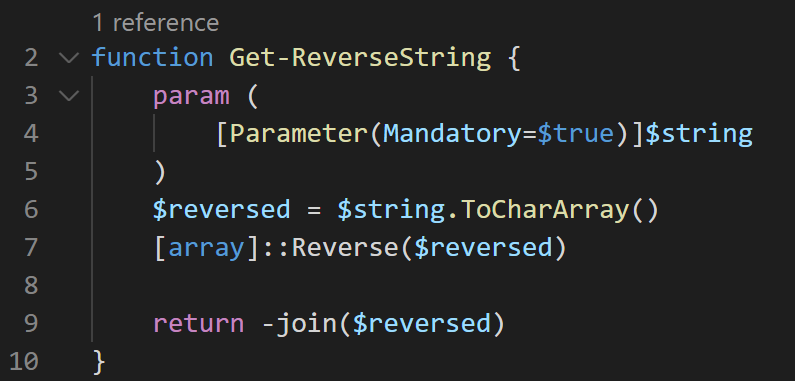
This is a very basic function that reverses the string characters. This is the output: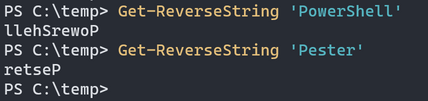
Create a Pester Tests file
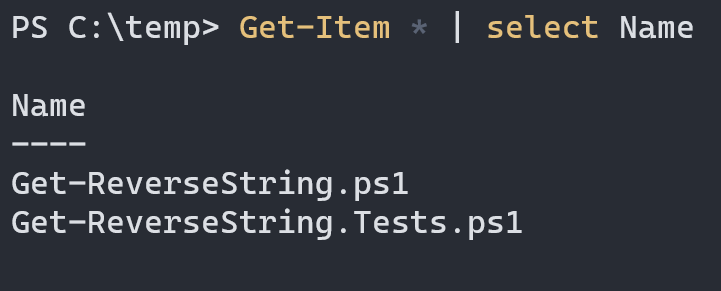
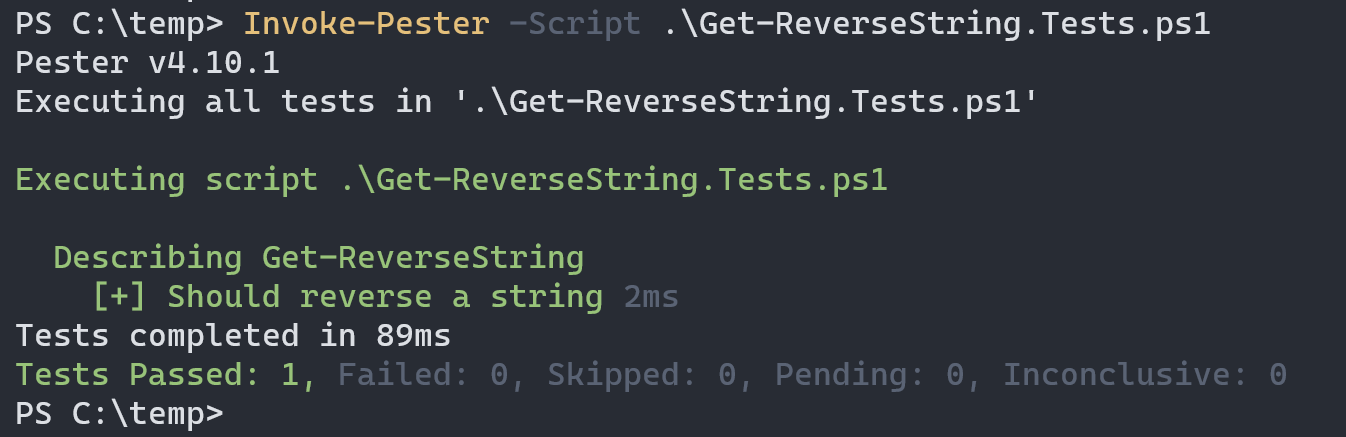
By convention, Pester test files should end with “Tests.ps1”.

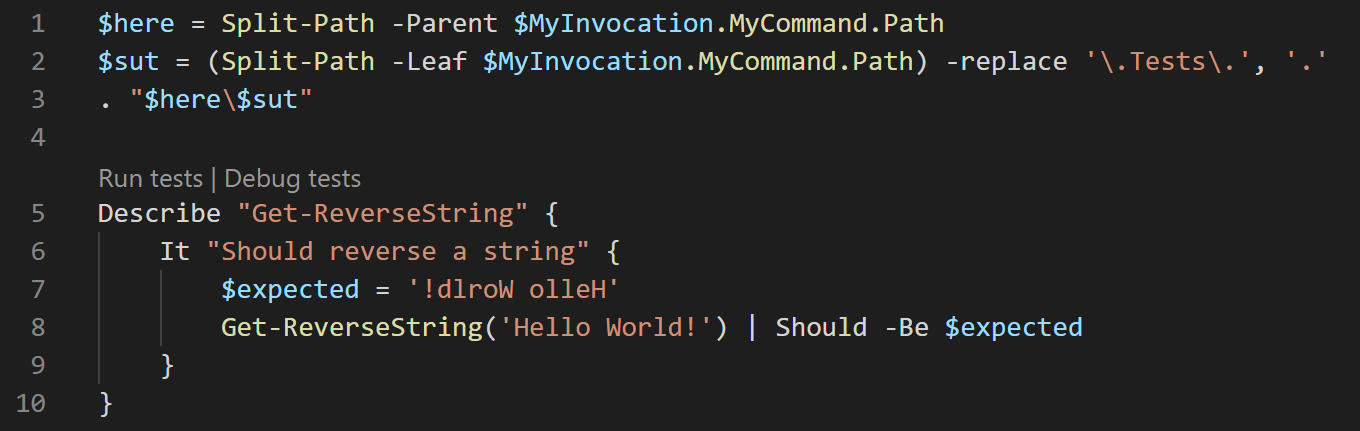
 I already edited the file and wrote the test.
This is what a Pester test looks like:
Pester basics
Pester is very declarative and easy to read.
You can ignore the first 3 rows in the Tests file, they came from the New-Fixture function and just dot sources the function to test into the PowerShell session.
The main commands with Pester are Describe, It, Context, and Should.
Describe is a block that contains tests. You will often have one Describe block for each function you want to test.
Context blocks are like Describe, they contain It blocks. They are optional and are useful to organize your test code.
The It block is the one that actually contains the test. The It block should have an expressive phrase describing the expected test outcome.
Finally, the Should command defines the test condition to be met. If the assertion is not met the test fails and an exception is thrown up. I used the -Be parameter. Many more are available like -BeFalse, -BeGreaterOrEqual, -BeLike, -Contain, etc.
In this example the test is simple. I set the expected value that I should get and I compare it to the actual value returned by the function.
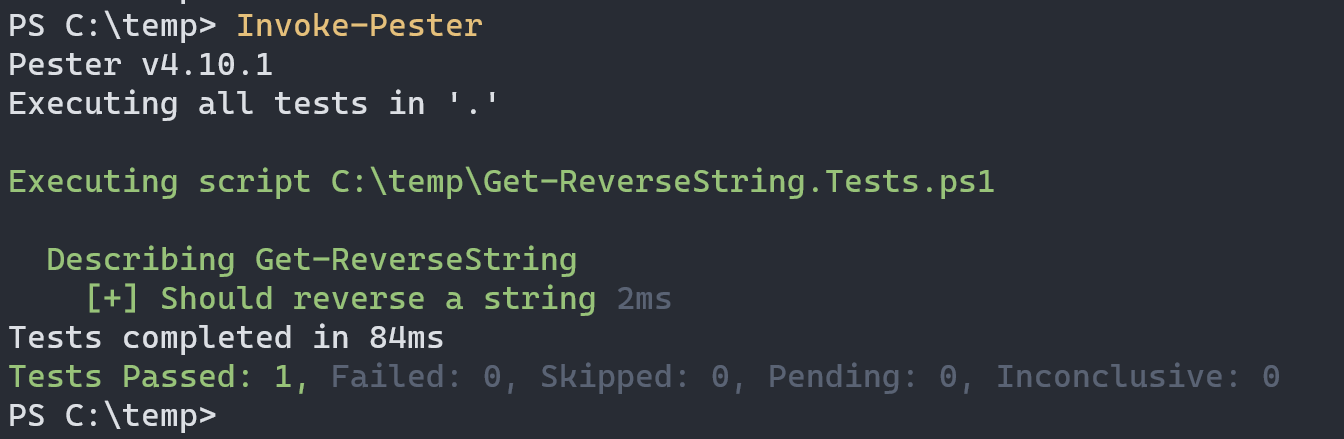
Running Pester Tests
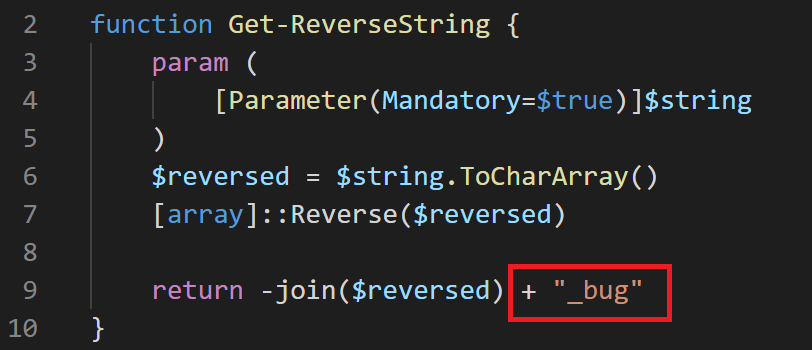 Function behavior has changed and the Pester test will now throw a beautiful exception:
Infrastructure Testing
Pester is often used by sysadmin to do infrastructure testing. Your environment changes frequently and you need to be sure that your infrastructure is aligned with your standard.
Here are a few examples of such tests. The test is done directly inside a Pester code block not using a function like I did previously.
Check that my Windows Server Power Plan is set to High Performance.
Describe "Power Plan" {
    $PowerPlan = (Get-CimInstance -ClassName Win32_PowerPlan -Namespace 'root\cimv2\power' | Where-Object IsActive).ElementName
    It "Should be set to High Performance" {
        $PowerPlan | Should -be "High Performance" -Because "This Power Plan increases performance"
    }
}
The best practice for SQL Server disks is to have an allocation unit size of 64 KB, here is the check:
Describe "File Allocation Unit Size" {
    $BlockSize = (Get-CimInstance -ClassName Win32_Volume | Where-Object DriveLetter -eq $SQLDisk).BlockSize
    It "Should be 64 KB" {
        $BlockSize | Should -Be 65536 -Because "It is recommended to set a File Allocation Unit Size value to 64 KB on partitions where resides SQL Server data or log files"
    }
}
Here I used the dbatools command Get-DbaErrorLogConfig to get the number of files configured for my ErrorLog. My best practice is to have 30 files instead of 6 by default.
Describe "SQL Server Error Log Files" {
    $errorLogCount = (Get-DbaErrorLogConfig -SqlInstance $SQLInstance).LogCount
    It "Should have Number of Log files set to 30" {
        $errorLogCount | Should -Be 30 -Because "Best practices requires 30 logs files to perform daily recycling"
    }
}
When all put together the output of the Tests looks like this:
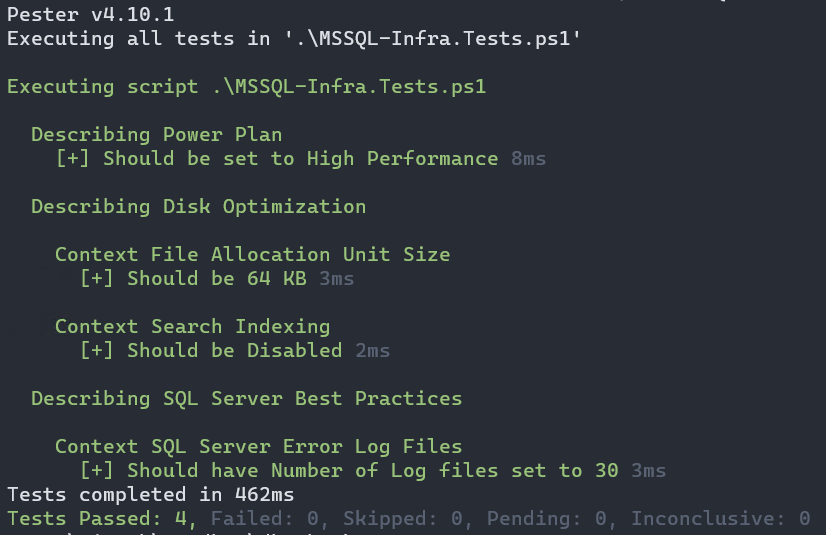 As you can see I can easily validate that my SQL Server infrastructure is configured as expected.
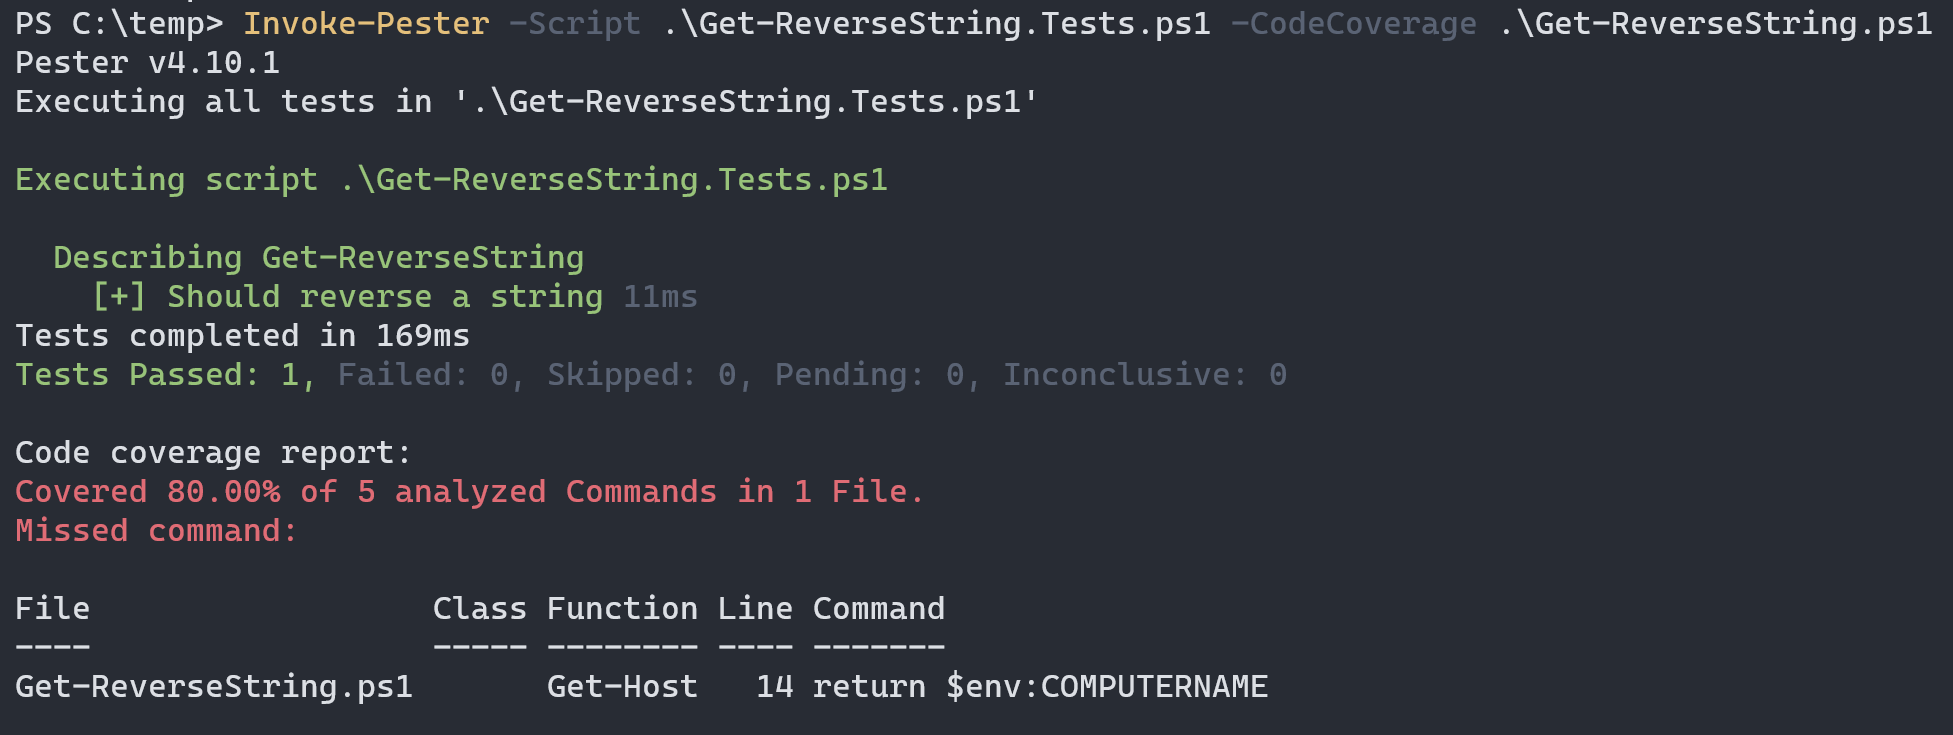
Code Coverage
Code Coverage is the percentage of lines of code that is tested by unit tests.
It’s an indicator of how thoroughly your code has been tested. Having 100% coverage doesn’t mean that the code is bug-free, it just indicates that all your code is being executed during the test.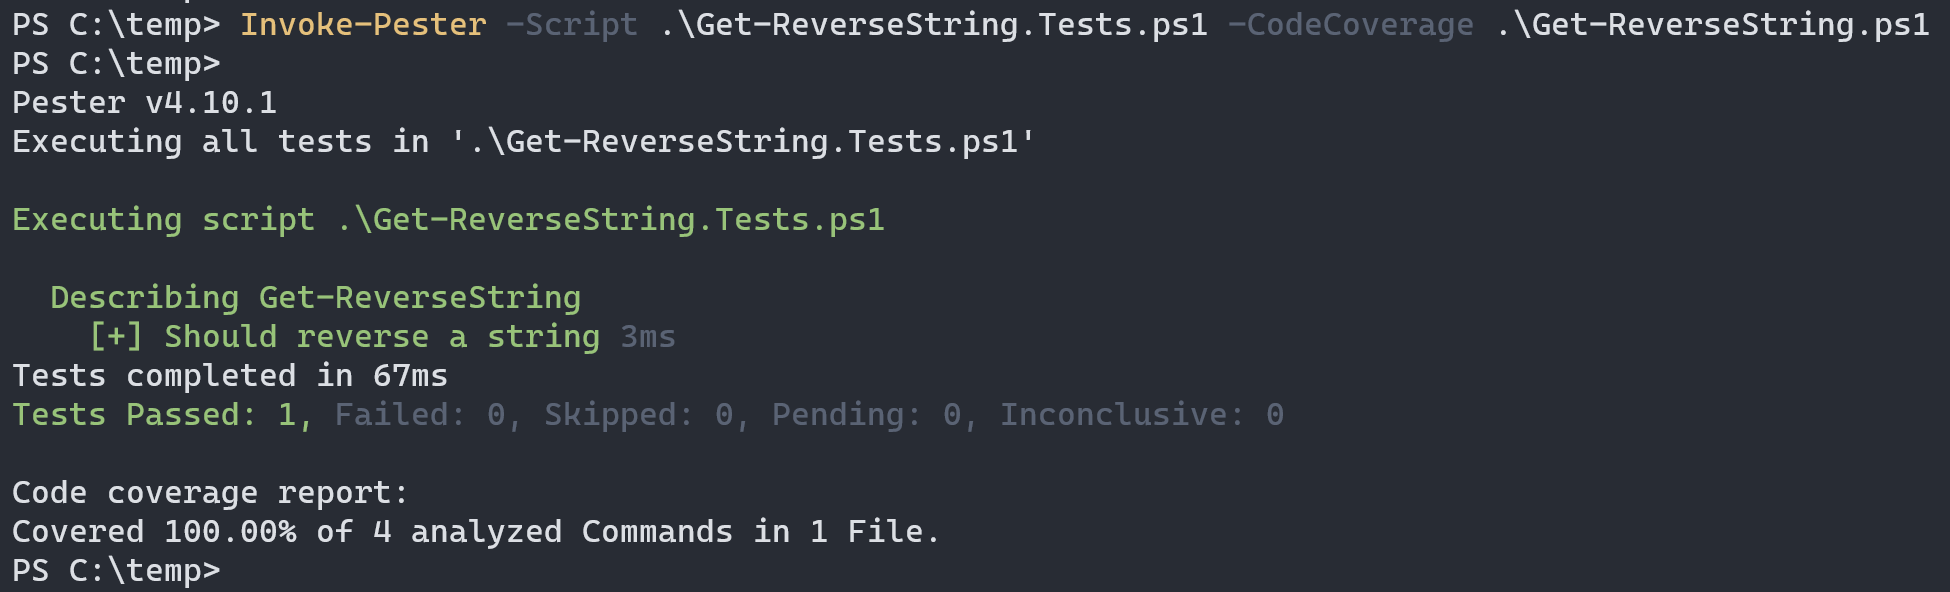
If I add some code to my Get-ReverseString.ps1 file, the -CodeCoverage functionality will tell me exactly what is not covered by tests: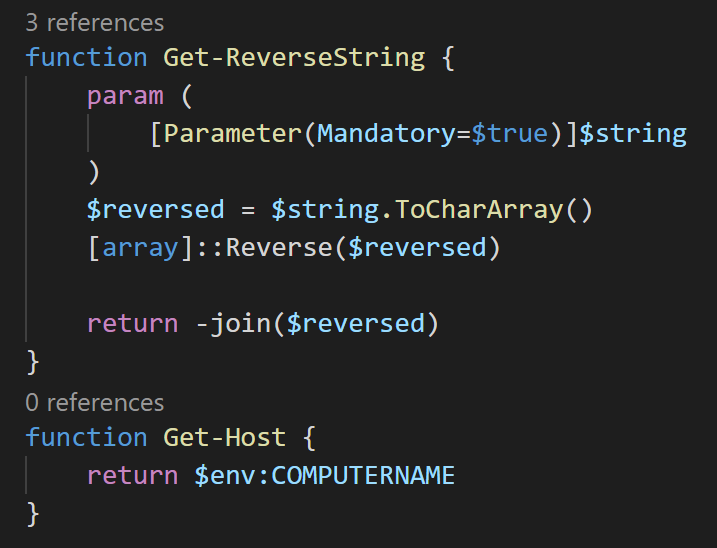
Conclusion
This blog post was just to get you started on learning Pester. There are a lot more possibilities with Pester. I might cover some more advanced usages a future post like the TestDrive or Mocking.
Here are some resources I’d recommend:
You can find all the code from this blog post on GitHub.
Written by Steven Naudet
![Thumbnail [60x60]](https://www.dbi-services.com/blog/wp-content/uploads/2022/12/microsoft-square.png)
![Thumbnail [90x90]](https://www.dbi-services.com/blog/wp-content/uploads/2022/08/STH_web-min-scaled.jpg)
![Thumbnail [90x90]](https://www.dbi-services.com/blog/wp-content/uploads/2022/11/TBR-web-min-scaled.jpg)
![Thumbnail [90x90]](https://www.dbi-services.com/blog/wp-content/uploads/2025/11/LTO_WEB.jpg)
![Thumbnail [90x90]](https://www.dbi-services.com/blog/wp-content/uploads/2023/01/APY_web-scaled.jpg)