by Alexandre Nestor
Introduction
OCI stands for Oracle Cloud Infrastructure and the command line client (CLI) keep the same name: oci
The aim of this guide is to give a practical step by step quick flow, that I used on all new created vm, in order to have the oci cli working in no time.
Installation
The install directory is $HOME/oracle_cli with no optional packages. I added comments in the screenshot trace:
# Download and install the cli
ubuntu@demoubuntu:~$ bash -c "$(curl -L https://raw.githubusercontent.com/oracle/oci-cli/master/scripts/install/install.sh)"
  % Total    % Received % Xferd  Average Speed   Time    Time     Time  Current
                                 Dload  Upload   Total   Spent    Left  Speed
100 16926  100 16926    0     0  64101      0 --:--:-- --:--:-- --:--:-- 64357

    ******************************************************************************
    You have started the OCI CLI Installer in interactive mode. If you do not wish
    to run this in interactive mode, please include the --accept-all-defaults option.

.....

# Give the lib install dir
===> In what directory would you like to place the install? (leave blank to use '/home/ubuntu/lib/oracle-cli'): /home/ubuntu/oracle_cli/lib
-- Creating directory '/home/ubuntu/oracle_cli/lib'.
-- We will install at '/home/ubuntu/oracle_cli/lib'.

# Give the bin install dir
===> In what directory would you like to place the 'oci' executable? (leave blank to use '/home/ubuntu/bin'): /home/ubuntu/oracle_cli/bin
-- Creating directory '/home/ubuntu/oracle_cli/bin'.
-- The executable will be in '/home/ubuntu/oracle_cli/bin'.

===> In what directory would you like to place the OCI scripts? (leave blank to use '/home/ubuntu/bin/oci-cli-scripts'): /home/ubuntu/oracle_cli/oci-cli-scripts
-- Creating directory '/home/ubuntu/oracle_cli/oci-cli-scripts'.
-- The scripts will be in '/home/ubuntu/oracle_cli/oci-cli-scripts'.

# Give optional packages install dir (db is a current package to install)
===> Currently supported optional packages are: ['db (will install cx_Oracle)']
What optional CLI packages would you like to be installed (comma separated names; press enter if you don't need any optional packages)?:
-- The optional packages installed will be ''.
....

# Restart the shell
ubuntu@demoubuntu:~$ exec -l $SHELL

# Test that all is working
ubuntu@demoubuntu:~$ oci -version
3.18.1
Create the access keys
These keys can be created by using ssh-keygen or the fresh installe oci client. Let’s use the oci client.
# The command will create the $HOME/.oci directory
ubuntu@demoubuntu:~$ oci setup keys

# The content of $HOME/.oci directory
ubuntu@demoubuntu:~$ ls .oci
oci_api_key.pem  oci_api_key_public.pem
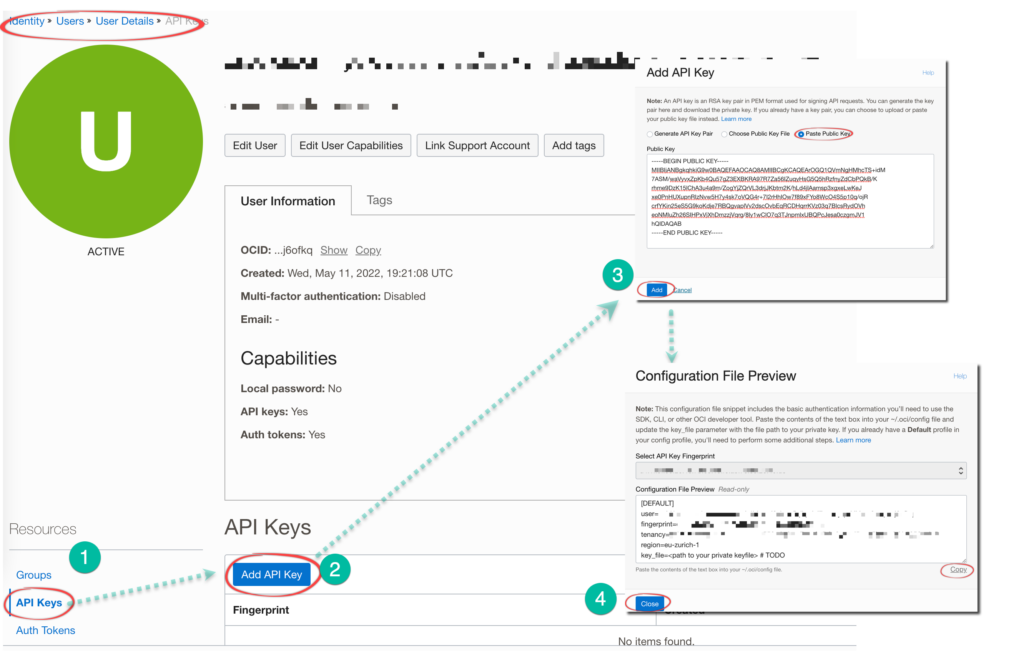
Create the API Key from the user page
Grab generated public key
ubuntu@demoubuntu:~$ cat .oci/oci_api_key_public.pem
-----BEGIN PUBLIC KEY-----
MIIBIjANBgkqhkiG9w0BAQEFAAOCAQ8AMIIBCgKCAQEArOGQ1QVmNgHMhcTS+idM
7ASM/waVyvxZpKb4Qu57gZ3EXBKRA97R7Za56IZuqyHsG5Q5hRzfnyZdCbPQkB/K
rhme9DzK15lChA3u4a9m/ZogYjZQrVL3drjJKbtm2K/hLd4jlAamsp3xgxeLwKeJ
xe0PnHUXupnRIzNvw5H7y4sk7oVQG4r+7P2rHhIOw7f89xFYo8WcO4S5p10q/ojR
crfYKin25eS5G9koKdje7RBQgvaplVv2dscOvbEqRCDHqrrKVz03q7BlcsRydOVh
eoNMluZh26SIHPxVjXhDmzzjVqrg/8ly1wClO7q3TJnpmlxUBQPcJesa0czgmJV1
hQIDAQAB
-----END PUBLIC KEY-----
and copy it into the “Add API Key” window from “Identity > Users > User Details” page of your user.

Final step, copy the generated config file from the “Configuration File Preview” window into the $HOME/.oci/config file.
ubuntu@demoubuntu:~$ cat .oci/config
[DEFAULT]
user=ocid1.user.oc1..********************
fingerprint=d4:*****************
tenancy=ocid1.tenancy.oc1..*******************
region=eu-zurich-1
key_file=/home/ubuntu/.oci/oci_api_key.pem
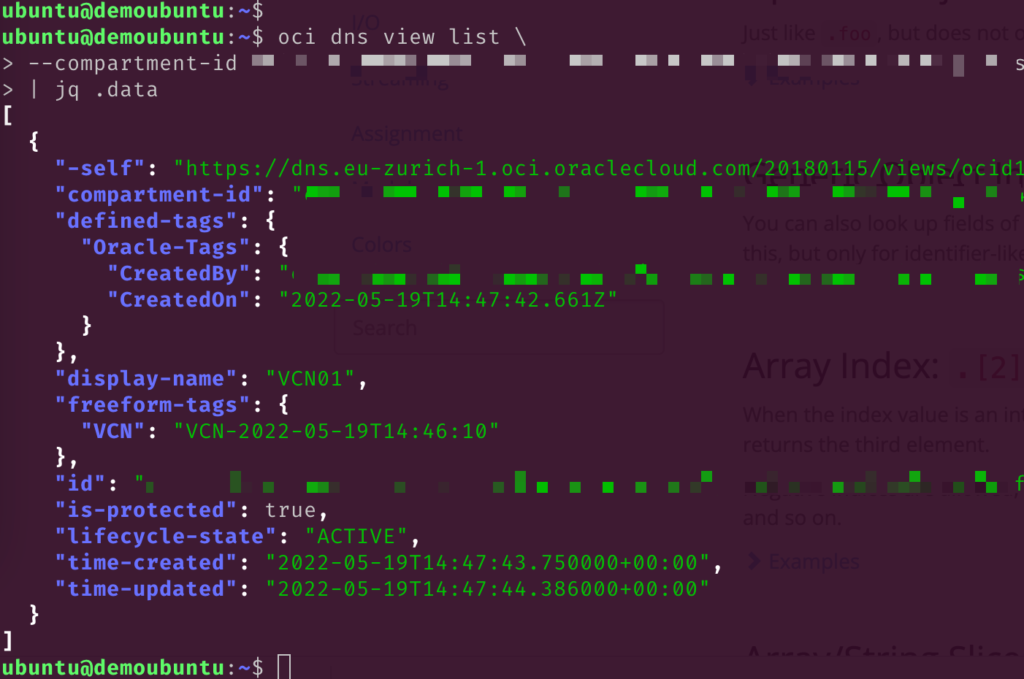
At this moment the environnement is configured and oci commands can be executed (example bellow on dns parameters):

Ressources:
- Oracle Documentation Quickstart: https://docs.oracle.com/en-us/iaas/Content/API/Concepts/cliconcepts.htm
![Thumbnail [60x60]](https://www.dbi-services.com/blog/wp-content/uploads/2022/12/oracle-square.png)
![Thumbnail [90x90]](https://www.dbi-services.com/blog/wp-content/uploads/2024/01/HME_web.jpg)
![Thumbnail [90x90]](https://www.dbi-services.com/blog/wp-content/uploads/2022/11/NIJ-min-scaled.jpg)
![Thumbnail [90x90]](https://www.dbi-services.com/blog/wp-content/uploads/2024/04/SIT_web.png)
![Thumbnail [90x90]](https://www.dbi-services.com/blog/wp-content/uploads/2022/08/JEW_web-min-scaled.jpg)