I did several posts around postgresql and postgres plus advanced server in the past. What is missing is a beginners guide on how to get postgres plus advanced server up and running including a solution for backup and recovery, high availability and monitoring. So I thought I’d write a guide on how to do that, consisting of:
- setting up postgres plus advanced server
- setting up a backup and recovery server
- setting up a hot standby database
- setting up monitoring
As this is the first post of the series this is about getting ppas installed and creating the first database cluster.
Obviously the first thing to do is to install an operating system. Several of these are supported, just choose the one you like. An example setup can be found here. So, once ppas was downloaded and transferred to the system where it is supposed to be installed we can start. There are several ways to get ppas installed on the system but before you begin java should be installed. For yum based distributions this is done by:
yum install java
Using the standalone installer in interactive mode
Starting the installation is just a matter of extracting the file and executing it:
[root@oel7 tmp]# ls
ppasmeta-9.4.1.3-linux-x64.tar.gz
[root@oel7 tmp]# tar -axf ppasmeta-9.4.1.3-linux-x64.tar.gz
[root@oel7 tmp]# ls
ppasmeta-9.4.1.3-linux-x64  ppasmeta-9.4.1.3-linux-x64.tar.gz
[root@oel7 tmp]# ppasmeta-9.4.1.3-linux-x64/ppasmeta-9.4.1.3-linux-x64.run
 provide the username and password you used for downloading the product:
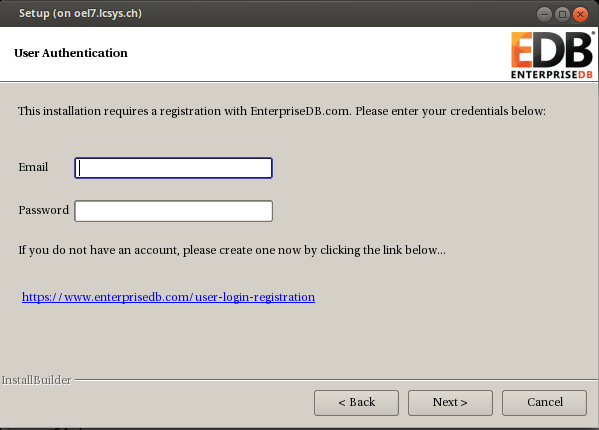


 done.
done.
Using the standalone installer in interactive text mode
If you do not want to use the graphical user interface you can launch the installer in interactive text mode:
# ppasmeta-9.4.1.3-linux-x64/ppasmeta-9.4.1.3-linux-x64.run --mode text
Either go with the default options or adjust what you like. The questions should be self explaining:
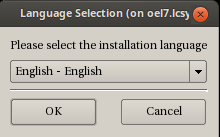
Language Selection
Please select the installation language
[1] English – English
[2] Japanese – 日本語
[3] Simplified Chinese – 简体中文
[4] Traditional Chinese – 繁体中文
[5] Korean – 한국어
Please choose an option [1] : 1
—————————————————————————-
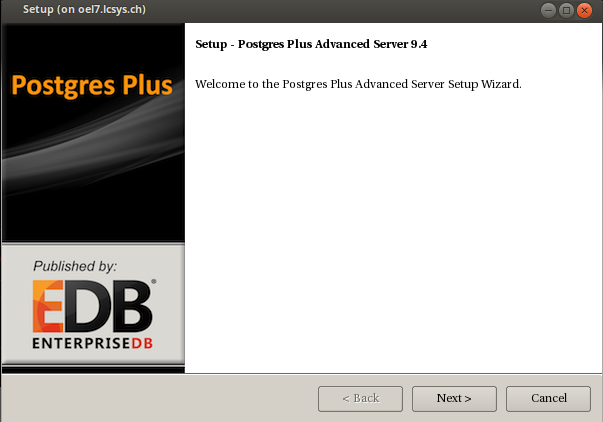
Welcome to the Postgres Plus Advanced Server Setup Wizard.
—————————————————————————-
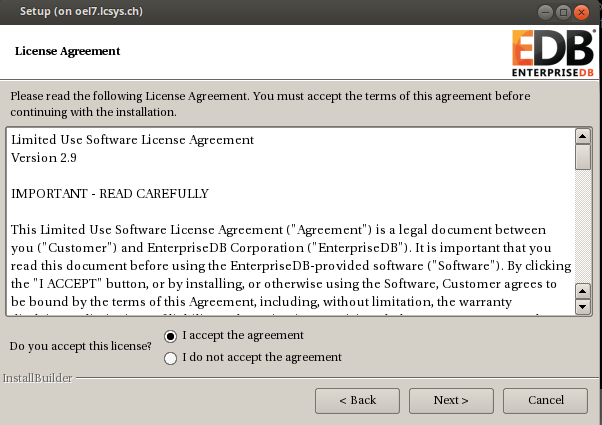
Please read the following License Agreement. You must accept the terms of this
agreement before continuing with the installation.
Press [Enter] to continue:
…..
…..
Press [Enter] to continue:
Do you accept this license? [y/n]: y
—————————————————————————-
User Authentication
This installation requires a registration with EnterpriseDB.com. Please enter
your credentials below. If you do not have an account, Please create one now on
https://www.enterprisedb.com/user-login-registration
Email []:
Password : xxxxx
—————————————————————————-
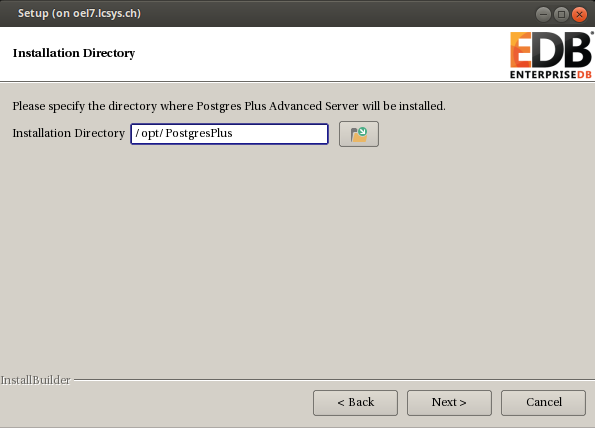
Please specify the directory where Postgres Plus Advanced Server will be
installed.
Installation Directory [/opt/PostgresPlus]:
—————————————————————————-
Select the components you want to install.
Database Server [Y/n] :y
Connectors [Y/n] :y
Infinite Cache [Y/n] :y
Migration Toolkit [Y/n] :y
Postgres Enterprise Manager Client [Y/n] :y
pgpool-II [Y/n] :y
pgpool-II Extensions [Y/n] :y
EDB*Plus [Y/n] :y
Slony Replication [Y/n] :y
PgBouncer [Y/n] :y
Is the selection above correct? [Y/n]: y
—————————————————————————-
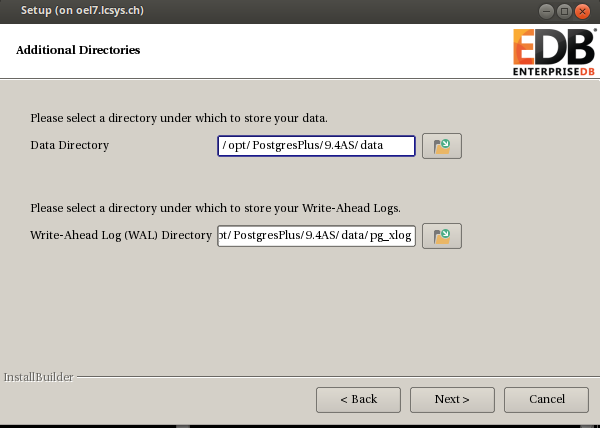
Additional Directories
Please select a directory under which to store your data.
Data Directory [/opt/PostgresPlus/9.4AS/data]:
Please select a directory under which to store your Write-Ahead Logs.
Write-Ahead Log (WAL) Directory [/opt/PostgresPlus/9.4AS/data/pg_xlog]:
—————————————————————————-
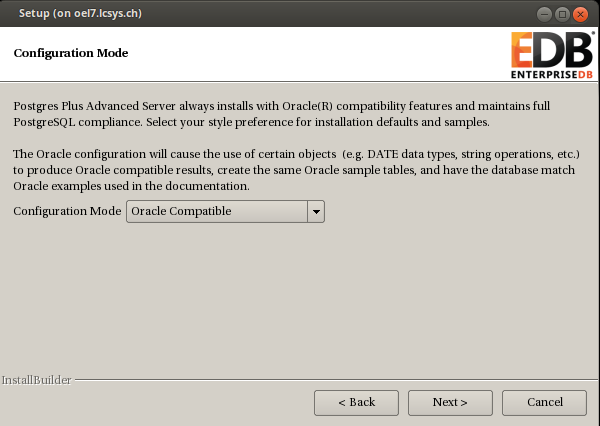
Configuration Mode
Postgres Plus Advanced Server always installs with Oracle(R) compatibility features and maintains full PostgreSQL compliance. Select your style preference for installation defaults and samples.
The Oracle configuration will cause the use of certain objects (e.g. DATE data types, string operations, etc.) to produce Oracle compatible results, create the same Oracle sample tables, and have the database match Oracle examples used in the documentation.
Configuration Mode
[1] Oracle Compatible
[2] PostgreSQL Compatible
Please choose an option [1] : 1
—————————————————————————-
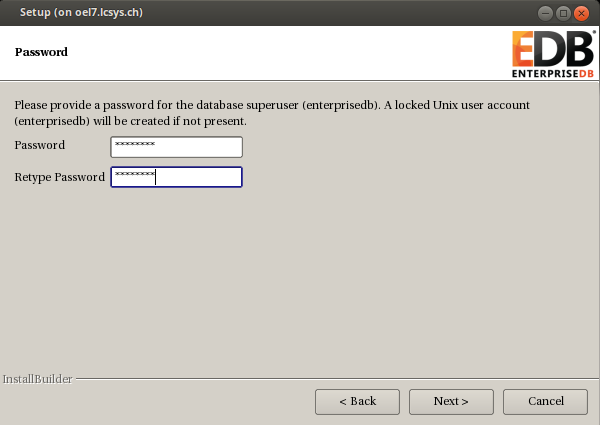
Please provide a password for the database superuser (enterprisedb). A locked
Unix user account (enterprisedb) will be created if not present.
Password :
Retype Password :
—————————————————————————-
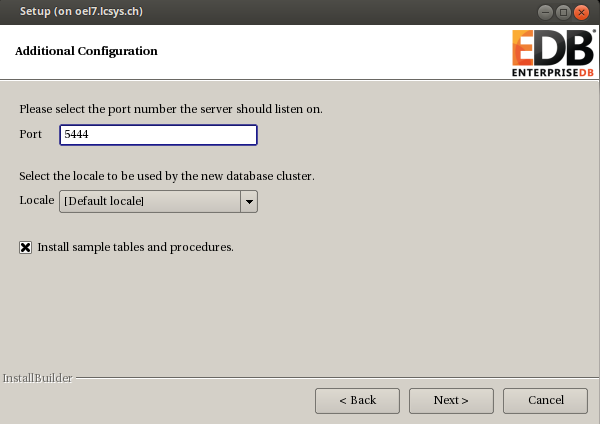
Additional Configuration
Please select the port number the server should listen on.
Port [5444]:
Select the locale to be used by the new database cluster.
Locale
[1] [Default locale]
……
Please choose an option [1] : 1
Install sample tables and procedures. [Y/n]: Y
—————————————————————————-
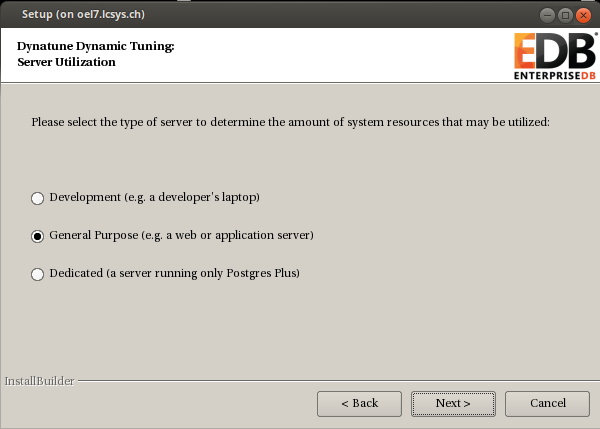
Dynatune Dynamic Tuning:
Server Utilization
Please select the type of server to determine the amount of system resources
that may be utilized:
[1] Development (e.g. a developer’s laptop)
[2] General Purpose (e.g. a web or application server)
[3] Dedicated (a server running only Postgres Plus)
Please choose an option [2] : 2
—————————————————————————-
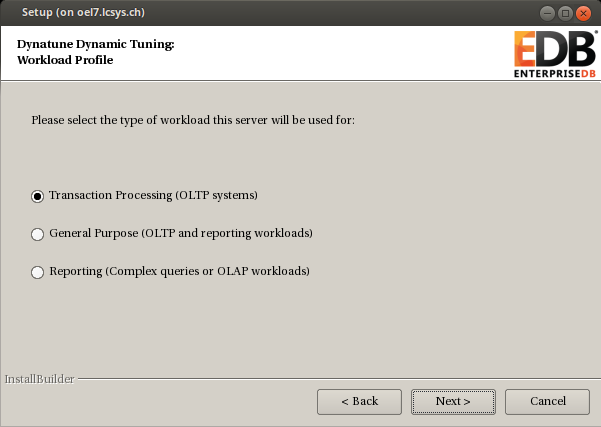
Dynatune Dynamic Tuning:
Workload Profile
Please select the type of workload this server will be used for:
[1] Transaction Processing (OLTP systems)
[2] General Purpose (OLTP and reporting workloads)
[3] Reporting (Complex queries or OLAP workloads)
Please choose an option [1] : 2
—————————————————————————-
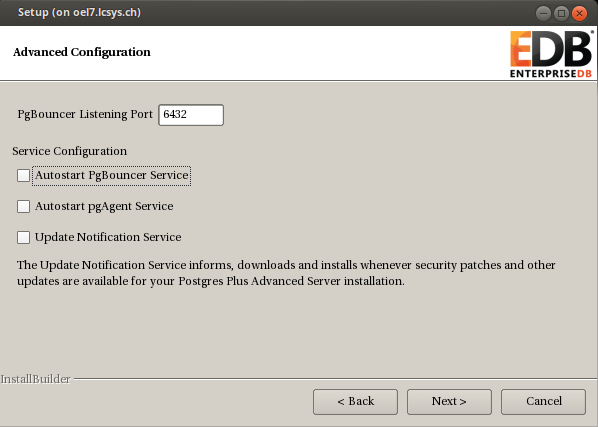
Advanced Configuration
—————————————————————————-
PgBouncer Listening Port [6432]:
—————————————————————————-
Service Configuration
Autostart PgBouncer Service [Y/n]: n
Autostart pgAgent Service [Y/n]: n
Update Notification Service [Y/n]: n
The Update Notification Service informs, downloads and installs whenever
security patches and other updates are available for your Postgres Plus Advanced
Server installation.
—————————————————————————-
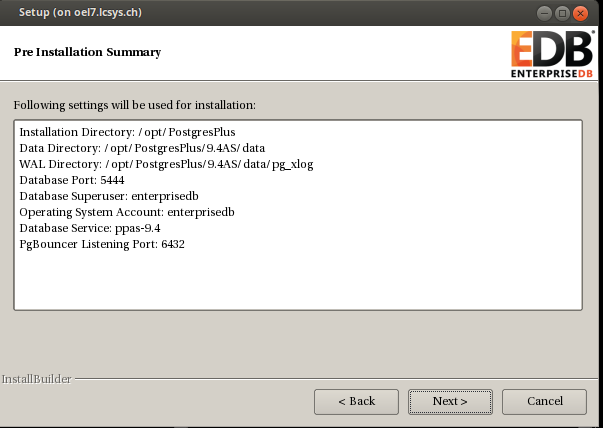
Pre Installation Summary
Following settings will be used for installation:
Installation Directory: /opt/PostgresPlus
 Data Directory: /opt/PostgresPlus/9.4AS/data
 WAL Directory: /opt/PostgresPlus/9.4AS/data/pg_xlog
 Database Port: 5444
 Database Superuser: enterprisedb
 Operating System Account: enterprisedb
 Database Service: ppas-9.4
 PgBouncer Listening Port: 6432
Press [Enter] to continue:
—————————————————————————-
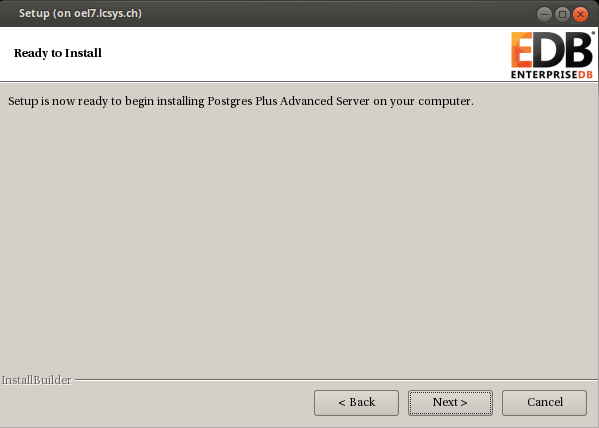
Setup is now ready to begin installing Postgres Plus Advanced Server on your
computer.
Do you want to continue? [Y/n]: Y
—————————————————————————-
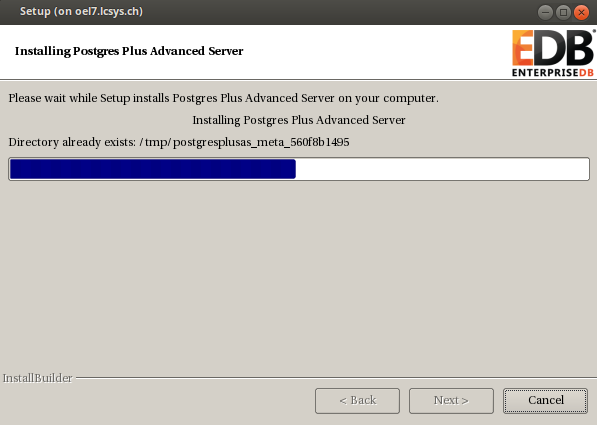
Please wait while Setup installs Postgres Plus Advanced Server on your computer.
Installing Postgres Plus Advanced Server
 0% ______________ 50% ______________ 100%
 ########################################
 Installing Database Server ...
 Installing pgAgent ...
 Installing Connectors ...
 Installing Migration Toolkit ...
 Installing EDB*Plus ...
 Installing Infinite Cache ...
 Installing Postgres Enterprise Manager Client ...
 Installing Slony Replication ...
 Installing pgpool-II ...
 Installing pgpool-II Extensions ...
 Installing PgBouncer ...
 Installing StackBuilder Plus ...
 #
—————————————————————————-
Setup has finished installing Postgres Plus Advanced Server on your computer.
done.
Using the standalone installer in unattended mode
Another option is to use the unattended mode by providing all the parameters on the command line or by creating a configuration file. This is an example for providing the parameters on the command line. Most of the parameters can be skipped and the default is applied:
ppasmeta-9.4.1.3-linux-x64/ppasmeta-9.4.1.3-linux-x64.run –mode unattended
–enable-components dbserver,connectors,infinitecache,edbmtk,pem_client,
pgpool,pgpoolextension,edbplus,replication,pgbouncer
–installer-language en –superaccount enterprisedb
–servicename ppas-9.4 –serviceaccount enterprisedb
–prefix /opt/PostgresPlus –datadir /opt/PostgresPlus/9.4AS/data
–xlogdir /opt/PostgresPlus/9.4AS/data/pg_xlog
–databasemode oracle –superpassword enterprisedb
–webusername document.write([‘xx.xx’,’xx.xxx’].join(‘@’)) –webpassword xxxxx
Installing Database Server ...
 Installing pgAgent ...
 Installing Connectors ...
 Installing Migration Toolkit ...
 Installing EDB*Plus ...
 Installing Infinite Cache ...
 Installing Postgres Enterprise Manager Client ...
 Installing Slony Replication ...
 Installing pgpool-II ...
 Installing pgpool-II Extensions ...
 Installing PgBouncer ...
 Installing StackBuilder Plus ...X11 connection rejected because of wrong authentication.
Done. No matter which installation method was chosen the result is that ppas is installed and the database cluster is initialized. You might check the processes:
# ps -ef | grep postgres
 enterpr+ 12759 1 0 12:03 ? 00:00:00 /opt/PostgresPlus/9.4AS/bin/edb-postgres -D /opt/PostgresPlus/9.4AS/data
 enterpr+ 12760 12759 0 12:03 ? 00:00:00 postgres: logger process
 enterpr+ 12762 12759 0 12:03 ? 00:00:00 postgres: checkpointer process
 enterpr+ 12763 12759 0 12:03 ? 00:00:00 postgres: writer process
 enterpr+ 12764 12759 0 12:03 ? 00:00:00 postgres: wal writer process
 enterpr+ 12765 12759 0 12:03 ? 00:00:00 postgres: autovacuum launcher process
 enterpr+ 12766 12759 0 12:03 ? 00:00:00 postgres: stats collector process
 enterpr+ 12882 12759 0 12:03 ? 00:00:00 postgres: enterprisedb edb ::1[45984] idle
 root 13866 2619 0 12:15 pts/0 00:00:00 grep --color=auto postgres
Or the services that got created:
# chkconfig –list | grep ppas
Note: This output shows SysV services only and does not include native
systemd services. SysV configuration data might be overridden by native
systemd configuration.
If you want to list systemd services use ‘systemctl list-unit-files’.
To see services enabled on particular target use
‘systemctl list-dependencies [target]’.
ppas-9.4 0:off 1:off 2:on 3:on 4:on 5:on 6:off
 ppas-agent-9.4 0:off 1:off 2:on 3:on 4:on 5:on 6:off
 ppas-infinitecache 0:off 1:off 2:off 3:off 4:off 5:off 6:off
 ppas-pgpool 0:off 1:off 2:off 3:off 4:off 5:off 6:off
 ppas-replication-9.4 0:off 1:off 2:off 3:off 4:off 5:off 6:off
 # ls -la /etc/init.d/ppas*
 -rwxr-xr-x. 1 root root 3663 Apr 23 12:03 /etc/init.d/ppas-9.4
 -rwxr-xr-x. 1 root root 2630 Apr 23 12:03 /etc/init.d/ppas-agent-9.4
 -rwxr-xr-x. 1 root root 1924 Apr 23 12:04 /etc/init.d/ppas-infinitecache
 -rwxr-xr-x. 1 root root 3035 Apr 23 12:04 /etc/init.d/ppas-pgpool
 -rwxr-xr-x. 1 root root 3083 Apr 23 12:04 /etc/init.d/ppas-replication-9.4
As the account which installed the software should not be used to work with the database lets create an os account for doing the connections to the database:
# groupadd postgres
# useradd -g postgres postgres
# passwd postgres
Changing password for user postgres.
New password:
Retype new password:
passwd: all authentication tokens updated successfully.
ppas brings an environment file for setting all the environment variables. Lets source that so it will be available for future logins:
su - postgres
 echo ". /opt/PostgresPlus/9.4AS/pgplus_env.sh" >> .bash_profile
 Once you login to the postgres account the environment is there:
 $ env | grep PG
 PGPORT=5444
 PGDATABASE=edb
 PGLOCALEDIR=/opt/PostgresPlus/9.4AS/share/locale
 PGDATA=/opt/PostgresPlus/9.4AS/data
 $ env | grep EDB
 EDBHOME=/opt/PostgresPlus/9.4AS
 Now we are ready to login to the database:
 $ psql -U enterprisedb
 Password for user enterprisedb:
 psql.bin (9.4.1.3)
 Type "help" for help.
 edb=# l
List of databases
Name | Owner | Encoding | Collate | Ctype | ICU | Access privileges
 -----------+--------------+----------+-------------+-------------+-----+-------------------------------
 edb | enterprisedb | UTF8 | en_US.UTF-8 | en_US.UTF-8 | |
 postgres | enterprisedb | UTF8 | en_US.UTF-8 | en_US.UTF-8 | |
 template0 | enterprisedb | UTF8 | en_US.UTF-8 | en_US.UTF-8 | | =c/enterprisedb +
 | | | | | | enterprisedb=CTc/enterprisedb
 template1 | enterprisedb | UTF8 | en_US.UTF-8 | en_US.UTF-8 | | =c/enterprisedb +
 | | | | | | enterprisedb=CTc/enterprisedb
 (4 rows)
Mission completed. The next post will setup a backup and recovery server for backing up and restoring the ppas database cluster.
![Thumbnail [60x60]](https://www.dbi-services.com/blog/wp-content/uploads/2022/08/DWE_web-min-scaled.jpg)
![Thumbnail [90x90]](https://www.dbi-services.com/blog/wp-content/uploads/2022/10/STS_web-min-scaled.jpg)
![Thumbnail [90x90]](https://www.dbi-services.com/blog/wp-content/uploads/2024/03/AHI_web.jpg)