Contexte
A customer recently asked me to disable FileTable/FileStream on their instance because the databases no longer use it, and to ensure that this is indeed the case.
The aim is to migrate to a new architecture without FileTable/FileStream in a second time.
Link to FileTable and FileStream if you need to know a bit more about these technologies
The environment is in a high-availability (HA) configuration using AlwaysOn.
As this isn’t something we do every day, here is a 9-step procedure to achieve this:
• Check that there are no more FileTables
• Disable non-transactional access
• Check that non-transactional access is disabled
• Check the columns in the tables
• Identify FILESTREAM filegroups & check FILESTREAM files
• Delete FILESTREAM containers & the FILESTREAM filegroup
• Disable FILESTREAM on the SQL Server instance
• Disable FILESTREAM on the server
• Disable FILESTREAM on the other servers
Let’s get started!
Step 1: Checking the FileTables
Let’s start with the first, fairly simple step, which is to check that there are no more FileTables
Query used:
SELECT name,object_id,is_filetable FROM <database>.sys.tables WHERE is_filetable = 1;Example:
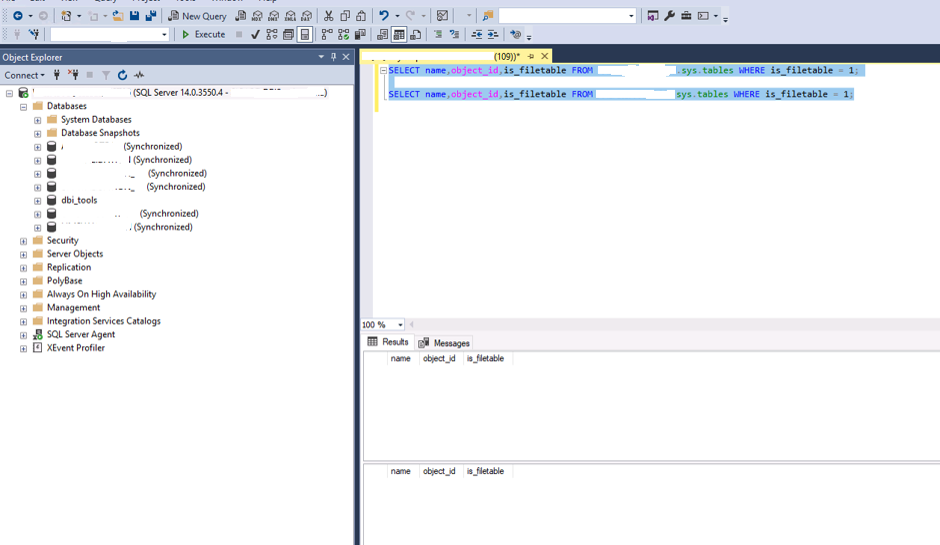
In this example, it is clear that there is no longer a FileTable in the tables of the two databases checked here.
Step 2: Disabling non-transactional access
To ensure that no further data is sent to FileTable/FileStream, we disable non-transactional access:
Query used:
ALTER DATABASE <database> SET FILESTREAM ( NON_TRANSACTED_ACCESS = OFF );Example:
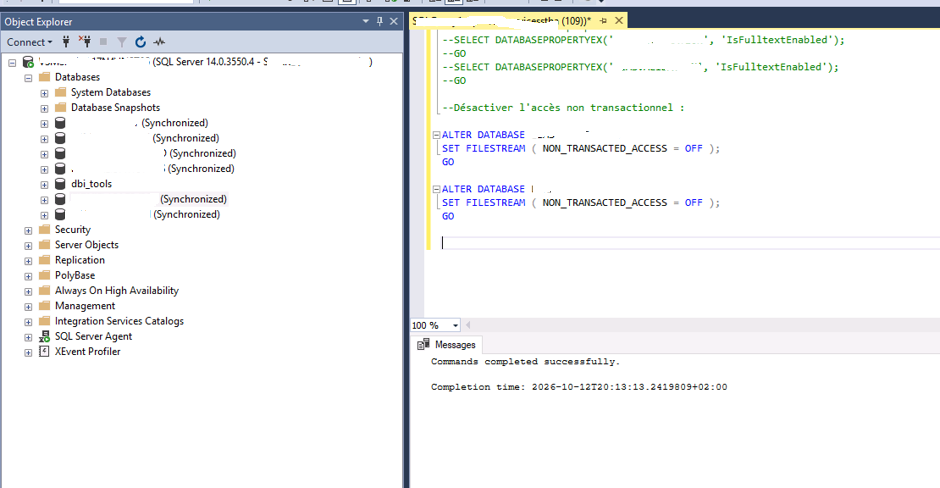
The next step is, of course, to check carefully that it is disabled.
Step 3: Check that non-transactional access is disabled
Query used:
SELECT db_name(database_id),* FROM sys.database_filestream_options;Example:
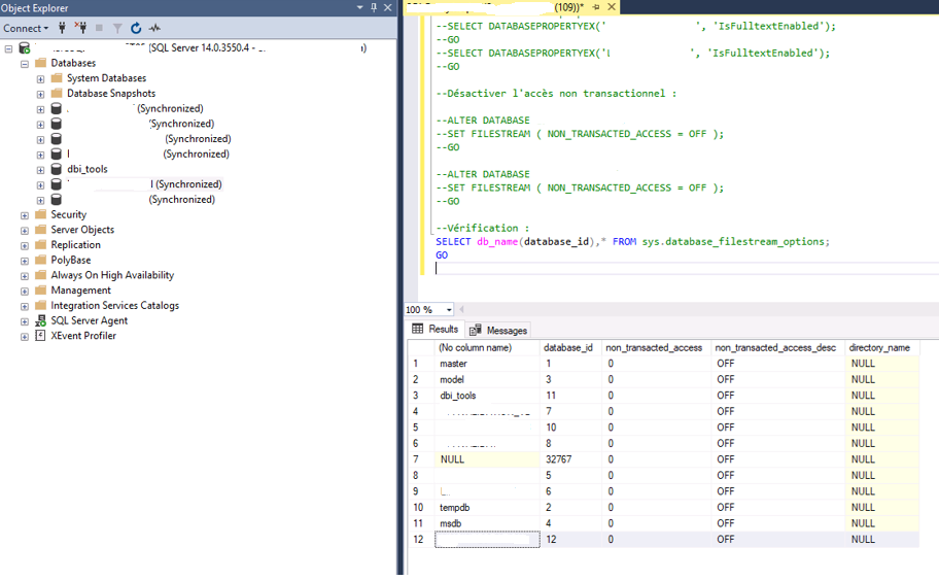
As can be seen in the example, all databases are set to OFF
Step 4: Checking the columns in the tables
This is a very important step, as it is the one I missed in my example by the customer…
In fact, in step 6, if there is still a column in a table that has a FileStream defined, it is not possible to delete the associated files and filegroups.
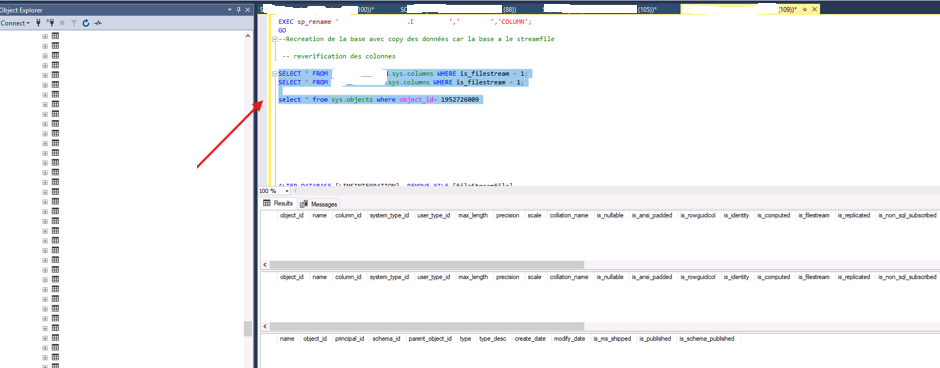
Query used:
SELECT * FROM <database>.sys.columns WHERE is_filestream = 1;
select * from sys.objects where object_id= xxxx
The first query returns the columns that contain FileStream data, and the second provides information about the table.
You will then find a structure of the following type:
CREATE TABLE [schema].[table](
[ID] [uniqueidentifier] ROWGUIDCOL NOT NULL,
…..
[FS] [varbinary](max) FILESTREAM NULL
) ON [PRIMARY] TEXTIMAGE_ON [PRIMARY] FILESTREAM_ON [FileStreamFileGroup]
We can therefore see that there is indeed a FileStream that needs to be removed at column level, but also at table level with the FILESTREAM_ON [FileStreamFileGroup].
Initially, creating a new column with [FS2] [varbinary](max) NULL, copying the data and renaming it, seemed like a good idea but was not sufficient, as the table still had FILESTREAM_ON [FileStreamFileGroup].
To resolve this, you need to recreate a table, copy the data and add the keys, indexes and constraints.
Then check everything again before proceeding to the next steps.
Example:
Step 5: Identify FILESTREAM filegroups & Check FILESTREAM files
In this step, the aim is to identify the FILESTREAM filegroups defined in the databases so that they can be deleted.
Query used:
SELECT name, type_desc FROM <database>.sys.filegroups WHERE type = 'FD';
SELECT name,physical_name,type_desc FROM <database>.sys.database_files WHERE type_desc = 'FILESTREAM';
Example:
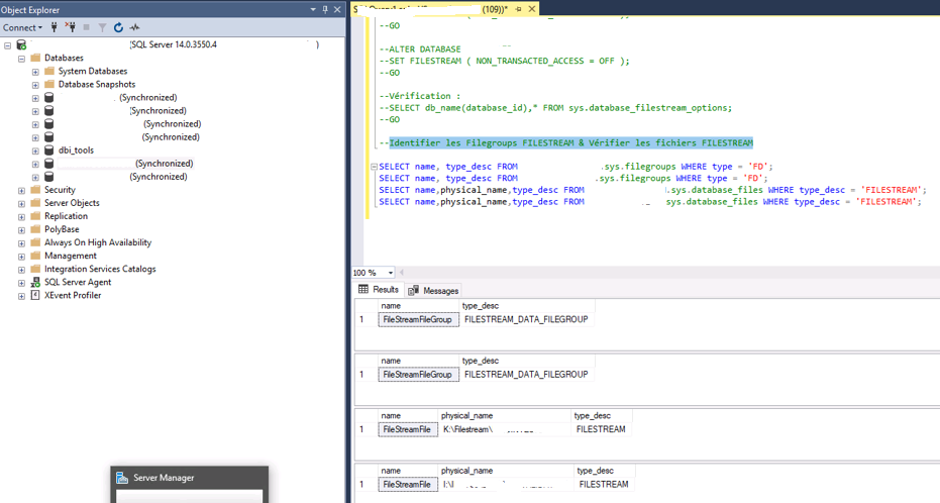
As there are two databases in my example that have a FileStream, there are four lines.
Step 6: Delete the FILESTREAM containers and the FILESTREAM FILEGROUP
Once identified, delete them using the following command.
Query used:
ALTER DATABASE [Database] REMOVE FILE [FileStreamFile]Example:
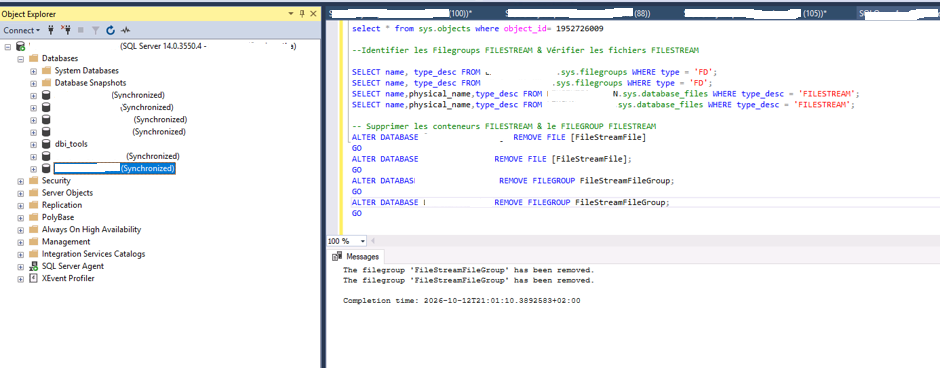
Step 7: Disable FILESTREAM on the SQL Server instance
At this point, we disable FILESTREAM at instance level.
Query used:
EXEC sp_configure 'filestream access level';
GO
EXEC sp_configure 'show advanced options', 1;
RECONFIGURE;
EXEC sp_configure 'filestream access level',0;
GO
RECONFIGURE;
GO
EXEC sp_configure 'show advanced options', 0;
RECONFIGURE;
GO
Example:
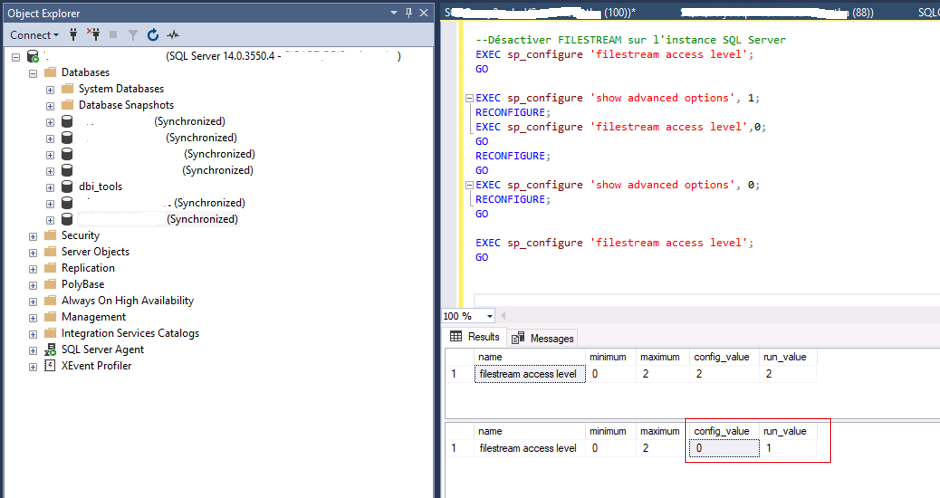
As can be seen from the example, the `config_value` is indeed 0, but the `run_value` has changed to 1.
In such cases, as always, we’ll check what the documentation says:
| Valeur | Signification |
| 0 | FILESTREAM is disabled. No FILESTREAM access is permitted. FILESTREAM columns cannot be used. |
| 1 | T-SQL access only. SQL Server allows access to FILESTREAM data via Transact-SQL statements (INSERT, UPDATE, SELECT). Access via the Windows file system is disabled. |
| 2 | T-SQL access + Win32 streaming. FILESTREAM data can be accessed both via T-SQL and via the Windows APIs (direct file access using FILESTREAM sharing). This is generally the setting used to take advantage of FILESTREAM’s performance. |
We are in T-SQL access only, it’s not really desactivated… Need a restart!
At this stage, we could also carry this out on the secondary node(s) of our AlwaysOn high availability cluster, but it is preferable to do it first on a single node and verify that it works.
Now it is time to disable Filestream on the SQL Server Engine service.
Step 8: Disabling FileStream on the server
For this step, we have already performed a failover of the AAGs to a synchronous secondary node.
We launch SQL Server Configuration Manager to disable FileStream in the Engine properties by unticking the box, as shown in the example above:
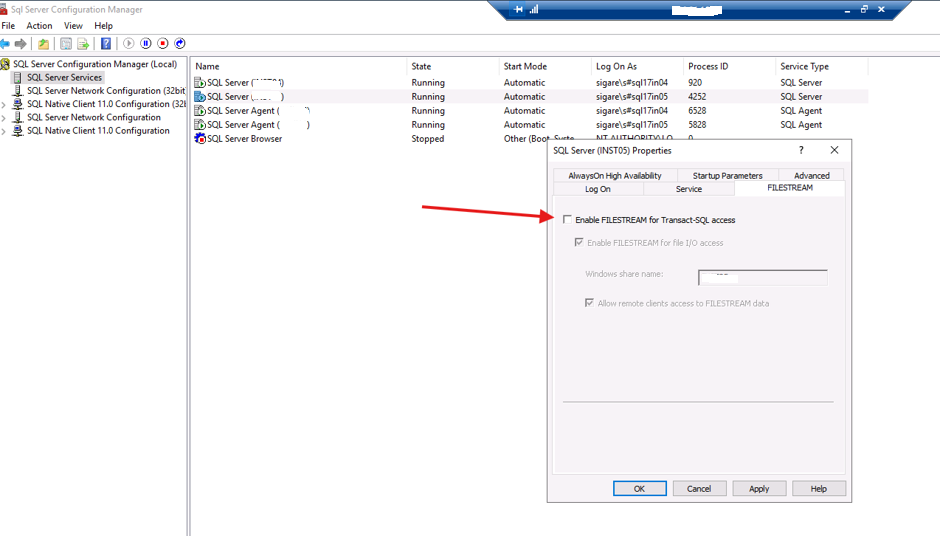
Then restart SQL Server and check that FileStream is disabled on the instance:
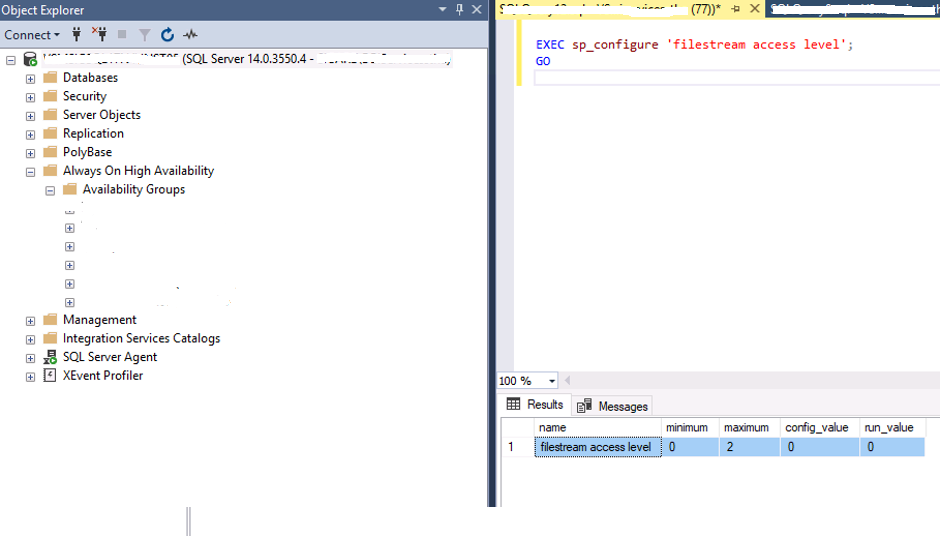
Step 9: Disabling FileStream on the other servers
At this point, you will just need to repeat steps 7 and 8 on the other nodes in your AlwaysOn high-availability cluster.
Conclusion
The steps are not complex in themselves, but where you can lose time is in the step 4 if you have to recreate a table without the FileStream and copy all data from this table. I was happy to have only one with not so much rows…
All the steps up to the restart of the SQL Server Engine service in step 8 are carried out online without any service interruption or failover.
I hope these steps will help anyone facing a similar issue! 😉
![Thumbnail [60x60]](https://www.dbi-services.com/blog/wp-content/uploads/2022/08/STH_web-min-scaled.jpg)
![Thumbnail [90x90]](https://www.dbi-services.com/blog/wp-content/uploads/2025/11/LTO_WEB.jpg)
![Thumbnail [90x90]](https://www.dbi-services.com/blog/wp-content/uploads/2024/03/AHI_web.jpg)