Setting up a distribution path is an important step when connecting two GoldenGate deployments. However, there are so many connection options that it’s hard to know how to proceed. In this blog, I will present the way to connect two deployments secured through NGINX.
Here are the prerequisites before attempting the distribution path creation:
- Having two servers, each running a GoldenGate Microservices Architecture. I will use the latest version here, 26ai.
- Having a running extract on the source setup.
- Port openings: port
443should be open between the two deployments.
In my environment, I have the following:
- Source environment:
oggvm1, with a deployment namedogg_test_01, aCDB01with aPDB1containing aAPP_PDB1schema and atable1table. - Target environment:
oggvm2, with the equivalent deploymentogg_test_02,CDB02,PDB2,APP_PDB2schema, and atable2table.
With all of this in mind, here are the three steps needed to create a working distribution path between two GoldenGate deployments secured with NGINX:
- Create a Path Connection
- Add the certificates used in NGINX to secure the target deployment to the source’s certificate management store.
- Create and start the distribution path.
Path Connection Creation
To open a connection to the target deployment ogg_test_02, the source deployment needs a path connection. As explained in a previous blog, path connections are aliases of an existing user on a target deployment.
It is recommended to separate roles and not use the administrator account of your target deployment, so let’s first create the user.
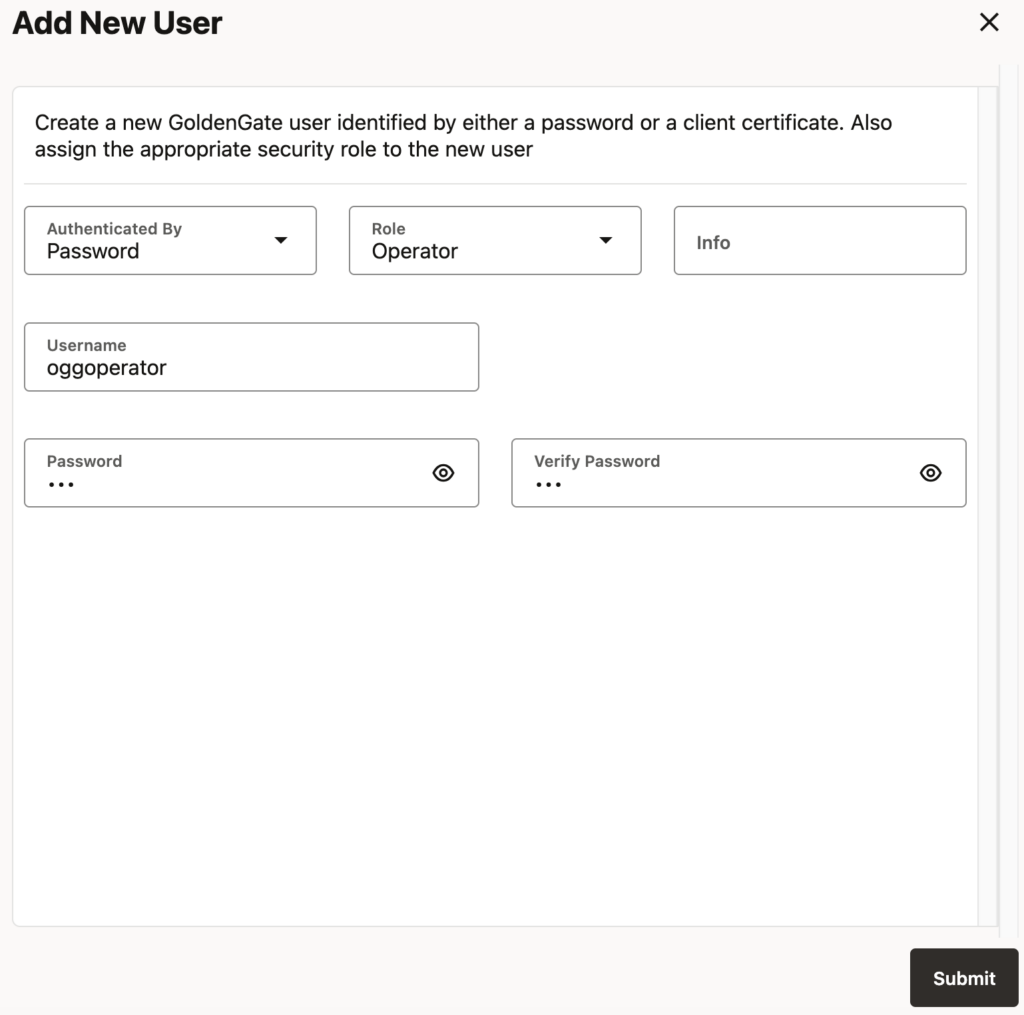
- On
ogg_test_02(target deployment), go to the User Administration tab and add a new user. For the role, Oracle recommends using theOperatorrole, so there is no reason to use the higher-privilegedAdministratororSecurityroles.
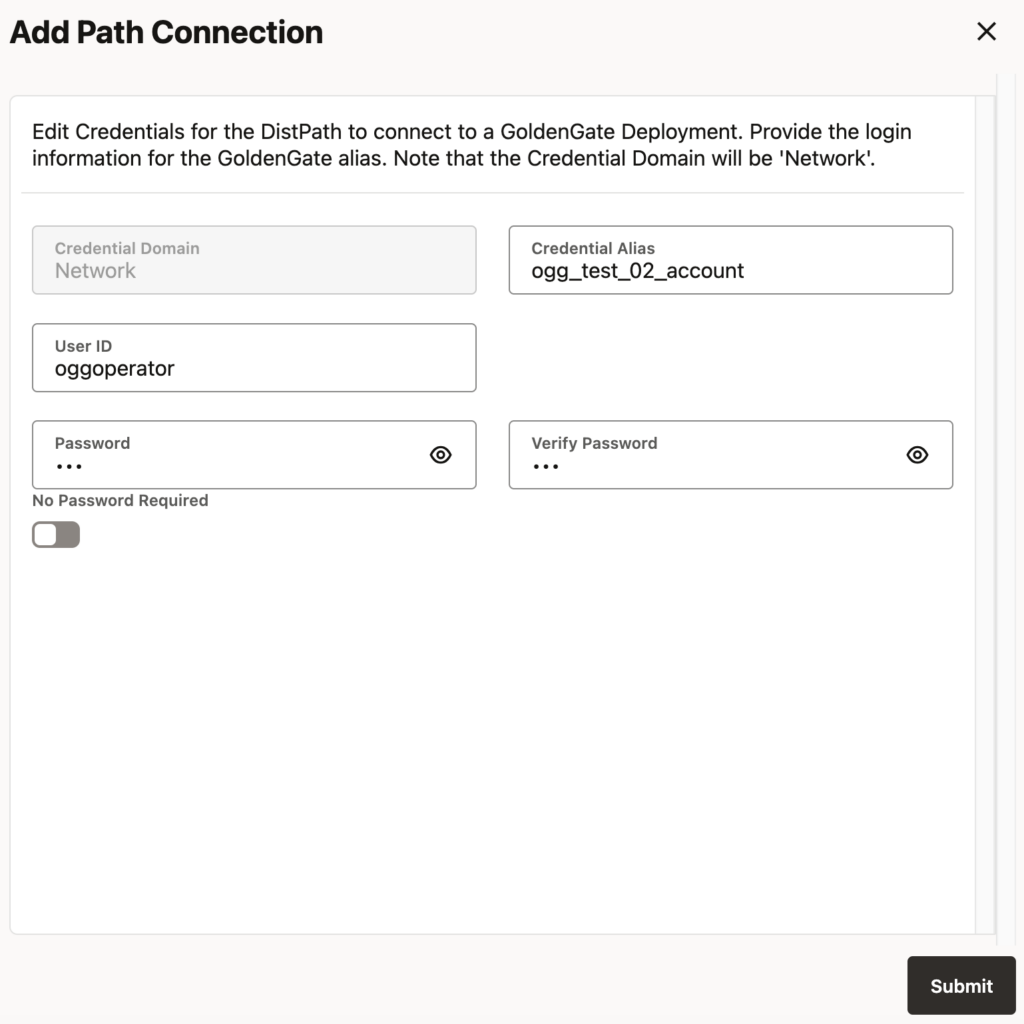
- On
ogg_test_01(source deployment), create the path connection. Only theUseridandPasswordfields must match what you just created on the target. The alias is just known on the source side and doesn’t have to match the username set on the target deployment. The alias defined here in the source deployment will only appear when choosing a connection during the distribution path creation.
Certificate Management
Because your deployments are secured with NGINX, you have to make sure that the certificates being used by one deployment are recognized by the other deployment. To do so, on the source only, you have to register the root certificate authority of the target deployment.
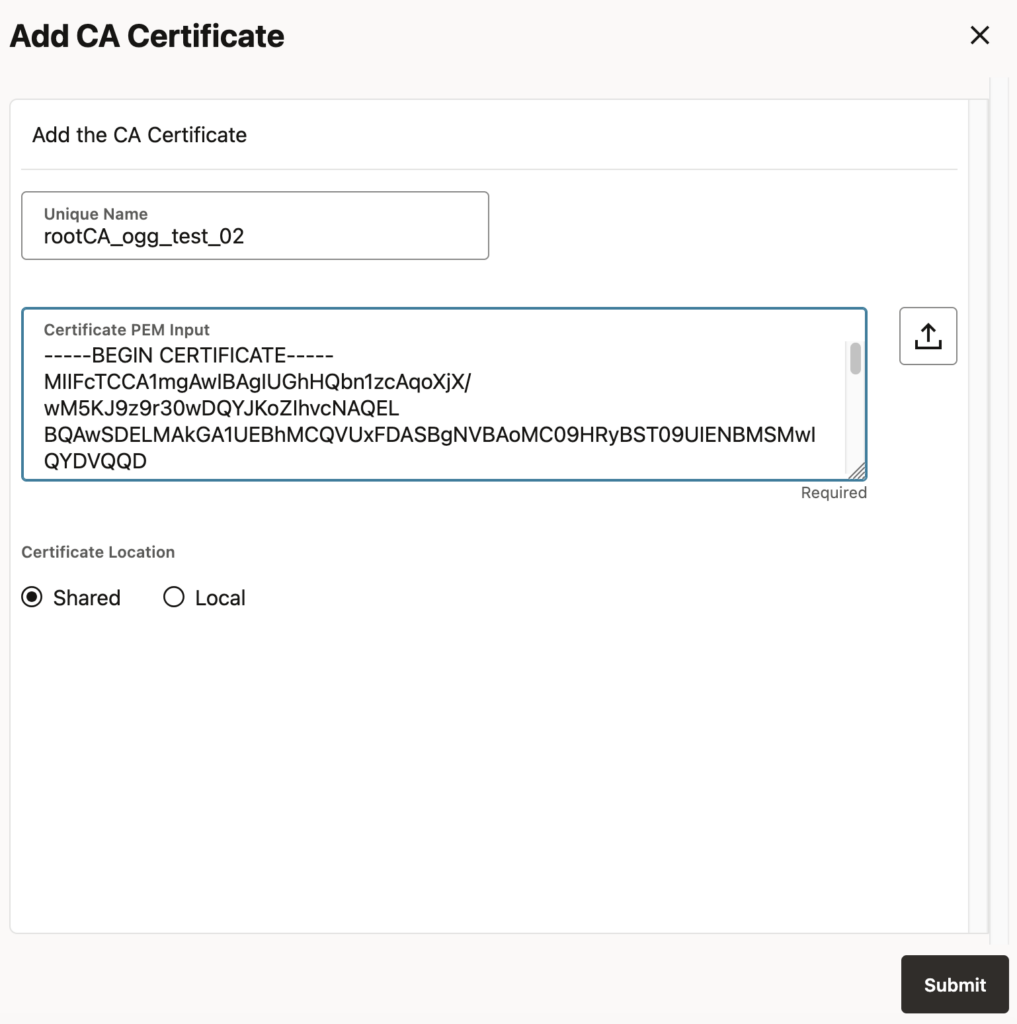
This can only be done at the Service Manager level. In the Service Manager web UI, go to Certificate Management and add a CA Certificate in the source deployment ogg_test_01. You have two options here.
- If the CA only needs to be registered on this specific deployment, you can register it with the Local option. This is the more secure option, but it is very often not needed.
- If the CA registration should be shared with other deployments, you can register it with the Shared option.
Paste the root certificate file used to secure your second deployment. The name used must be unique but will not be used anywhere else in the process.
How should I register a certificate chain ?
If the certificate file contains multiple certificates, GoldenGate doesn’t allow you to register them in one go. Instead, you need to break down the file and register each part individually. Again, the name and order in which you register the certificates do not matter, except for management purposes. I described the issue in more detail in a blog about the OGG-30007 error.
Distribution Path Creation
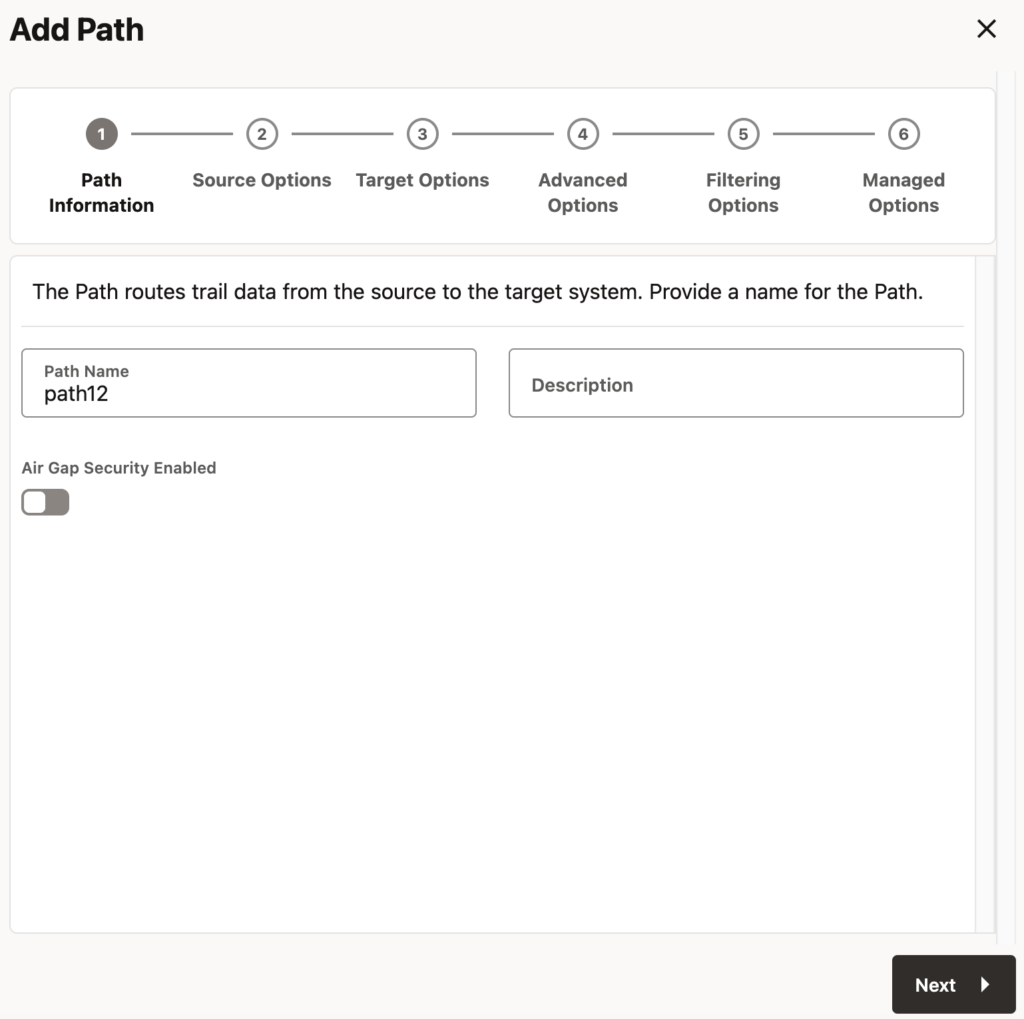
We can now finally create the distribution path. On the source deployment, go on the Distribution Service Paths tab and register the path as such:
- Path information: Specify the path name. If possible, make the target (and the source) visible in the name, to ease management when having multiple distribution paths.
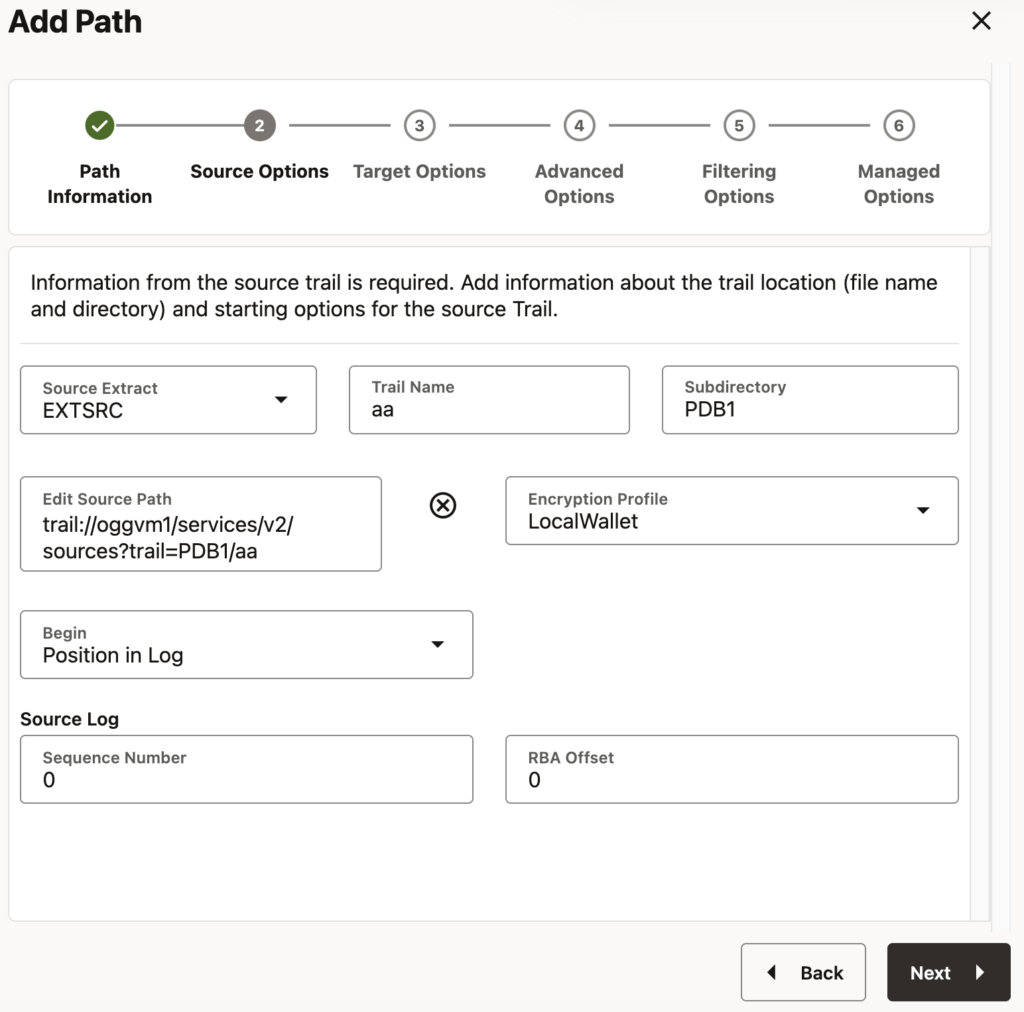
- Source options: Here, you should only select the extract at the source of this distribution path. The rest will be filled automatically or can stay with the default value.
- Target options: This is where the configuration is specific. Because we are using a NGINX-secured deployment on the target, you must click on Reverse proxy enabled and choose the
wsstarget protocol.
- Advanced, Filtering and Managed Options: Nothing here is specific to our setup, but you can of course customize these options as needed.
And that’s it. Your deployments are now connected, and you should see the trail files on the target once you start the distribution path.
oracle@oggvm2:~/ ll $OGG_DEPLOYMENT_HOME/var/lib/data/PDB1
total 0
-rw-r-----. 1 oracle oinstall 0 Mar 22 07:34 bb000000000
The remote peer submitted a certificate that failed validation
If your distribution path doesn’t start and generates a “certificate that failed validation” error, it means that you incorrectly registered your certificates. Make sure that the target deployment’s certificates are registered on the source deployment’s service manager and not the other way around.
You can also try to use the certificate in an OGG_CLIENT_TLS_CAPATH environment variable on the source and connect with the adminclient to check if it’s working.
![Thumbnail [60x60]](https://www.dbi-services.com/blog/wp-content/uploads/2025/05/JDE_Web-1-scaled.jpg)