Recently, I had the chance to install the SQL Server Plug-in for Oracle Entreprise Management Grid Control 11g to monitor a SQL Server instance based on a windows host. Our client, who monitors these Oracle databases via OEM Grid Control 11g, wanted to use the same tool to also monitor SQL Server databases.
In this blog posting, I will describe how to install the 11g agent on a Windows host and how to import as well as use the SQL Server plug-in on Grid Control 11g.
Installation Agent 11g on windows host
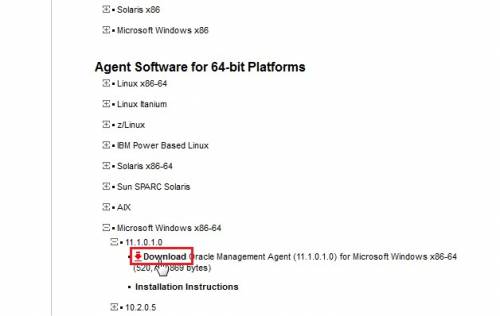
First, we have to download the 11g agent here. Note that we have to use a 64 bit platform.
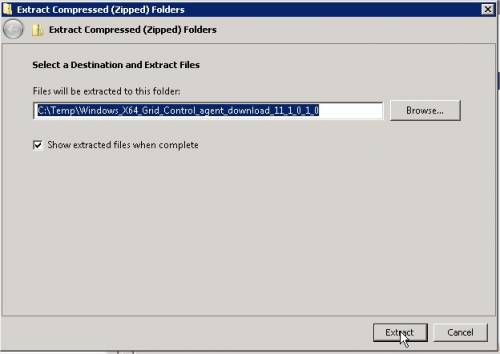
Unzip this file on the Windows host, for example in c:temp.
Create a one-time registration password on the grid for our Windows host.
Go to Grid Control 11g, open the Setup menu and Registration Passwords
Click on Add Registration Password
Enter a password, confirm it, enter a description, select the type One-time, enter the expiration date of today and click OK
We will use this password to establish a secure connection to the OMS in the additional_agent.rsp file just below.
Now go to C:Temp where we have unzipped our 11g agent and open c:Windows_X64_Grid_Control_agent_download_11_1_0_1_0windows_x64responseadditional_agent.rsp file to modify it as follow – then save and close it:
####################################################################
## copyright (c) 1999, 2010 Oracle. All rights reserved. ##
## ##
## Specify values for the variables listed below to customize ##
## your installation. ##
## ##
## Each variable is associated with a comment. The comment ##
## identifies the variable type. ##
## ##
## Please specify the values in the following format: ##
## ##
## Type Example ##
## String “Sample Value” ##
## Boolean True or False ##
## Number 1000 ##
## StringList {“String value 1″,”String Value 2”} ##
## ##
## The values that are given as need to be ##
## specified for a silent installation to be successful. ##
## ##
## ##
## This response file is generated by Oracle Software ##
## Packager. ##
###################################################################
RESPONSEFILE_VERSION=2.2.1.0.0
#################################################################################
#Inputs for Oracle Configuration Manager
#################################################################################
#——————————————————————————-
#SECURITY_UPDATES_VIA_MYORACLESUPPORT: Whether security updates are reqi-
# uired via My Oracle Support
#DECLINE_SECURITY_UPDATES: Whether security updates should be declined.
#MYORACLESUPPORT_USERNAME & MYORACLESUPPORT_PASSWORD: User name and passw-
# ord for My Oracle Support access, these will be effected only when SECU-
# RITY_UPDATES_VIA_MYORACLESUPPORT=true
#COLLECTOR_SUPPORTHUB_URL: If there is not direct connection and Support
# hub is deployed. Need to specify that URL.
#——————————————————————————-
SECURITY_UPDATES_VIA_MYORACLESUPPORT=FALSE
DECLINE_SECURITY_UPDATES=TRUE
MYORACLESUPPORT_USERNAME=
MYORACLESUPPORT_PASSWORD=
COLLECTOR_SUPPORTHUB_URL=
################################################################################
#PARAMETERS FOR SOFTWARE UPDATES
################################################################################
#——————————————————————————-
#INSTALL_UPDATES_SELECTION:
# Option 1. If you want to skip the software updates, provide
# INSTALL_UPDATES_SELECTION=”skip”
# Option 2. If you have already downloaded the updates then provide
# INSTALL_UPDATES_SELECTION=”staged”
# If you choose the Option 2 then make sure you also provide STAGE_LOCATION.
#STAGE_LOCATION: Stage location for software updates. It will be effected
# only when INSTALL_UPDATES_SELECTION is set to “staged”
#——————————————————————————-
INSTALL_UPDATES_SELECTION=”skip”
STAGE_LOCATION=
################################################################################
#PROXY DETAILS FOR SECURITY UPDATES/ SOFTWARE UPDATES
################################################################################
#——————————————————————————-
#PROXY_USER: User name for proxy access.
#PROXY_PWD: Password for proxy access.
#PROXY_HOST: Server providing proxy access.
#PROXY_PORT: Port for proxy access.
#——————————————————————————
PROXY_USER=
PROXY_PWD=
PROXY_HOST=
PROXY_PORT=
################################################################################
#Various inputs required for Installation and Configuration
################################################################################
#——————————————————————————-
#ORACLE_AGENT_HOME_LOCATION: The location of oracle agent home.
#Agent home “agent11g” would be created under the directory specified by
#ORACLE_AGENT_HOME_LOCATION.
#——————————————————————————-
ORACLE_AGENT_HOME_LOCATION=c:oracleagent11g
#——————————————————————————-
#DEINSTALL_LIST: List of components to be deinstalled during a
# deinstall session.The following choices are available. The value should
# contain only one of these choices.The choices are of the form
# Internal Name, Version : External name. Please use the internal name and
# version while specifying the value.
# oracle.sysman.top.agent, 10.2.0.0.0 : Oracle Management Agent 10.2.0.0.0
# oracle.sysman.top.em_seed, 10.2.0.0.0 : Oracle Enterprise Manager Repository Database 10.2.0.0.0
# oracle.sysman.top.oms, 10.2.0.0.0 : Oracle Enterprise Manager Grid Console 10.2.0.0.0
#——————————————————————————-
DEINSTALL_LIST={“oracle.sysman.top.agent”,”11.1.0.1.0″}
#——————————————————————————-
#b_silentInstall: The user should not change this value
#CLUSTER_NODES: This variable represents the cluster node names
# selected by the user for installation.
#——————————————————————————-
b_silentInstall=true
#CLUSTER_NODES=
#——————————————————————————-
#TOPLEVEL_COMPONENT: The top level component to be installed in the
# current session.Value should contain only one of the following available
# choices.The choices are of the form Internal Name, Version : External name.
# Please use the internal name and version while specifying the value.
# oracle.sysman.top.agent, 10.3.0.0.0 : Oracle Management Agent 10.3.0.0.0
# Example: TOPLEVEL_COMPONENT = {“oracle.sysman.top.agent”,”10.3.0.0.0″}
#——————————————————————————-
TOPLEVEL_COMPONENT={“oracle.sysman.top.agent”,”11.1.0.1.0″}
#——————————————————————————-
#SELECTED_LANGUAGES: Languages in which the components will be installed.
# The following choices are available. The value should contain only one of
# these choices.The choices are of the form Internal Name : External name.
# Please use the internal name while specifying the value.
# en, : English
# de, : German
# es, : Latin American Spanish
# es_MX, : Mexican Spanish
# es_ES, : Spanish
# fr, : French
# fr_CA, : Canadian French
# it, : Italian
# iw, : Hebrew
# ja, : Japanese
# ko, : Korean
# pt_BR, : Brazilian Portuguese
# zh_CN, : Simplified Chinese
# zh_TW, : Traditional Chinese
#Example: SELECTED_LANGUAGES = {“en”}
#——————————————————————————-
SELECTED_LANGUAGES={“en”}
#——————————————————————————-
#COMPONENT_LANGUAGES: Languages in which the components will be installed.
# The following choices are available. The value should contain only one of
# these choices.The choices are of the form Internal Name : External name.
# Please use the internal name while specifying the value.
# en, : English
# de, : German
# es, : Latin American Spanish
# es_MX, : Mexican Spanish
# es_ES, : Spanish
# fr, : French
# fr_CA, : Canadian French
# it, : Italian
# iw, : Hebrew
# ja, : Japanese
# ko, : Korean
# pt_BR, : Brazilian Portuguese
# zh_CN, : Simplified Chinese
# zh_TW, : Traditional Chinese
#Example: COMPONENT_LANGUAGES = {“en”}
#——————————————————————————-
COMPONENT_LANGUAGES={“en”}
#——————————————————————————-
#OMS_HOST: OMS host info required to connect to OMS
#OMS_PORT: OMS port info required to connect to OMS
#AGENT_REGISTRATION_PASSWORD: Agent Registration Password needed to
# establish a secure connection to the OMS.
#——————————————————————————-
OMS_HOST=vmtestoraem1.it.dbi-services.com
OMS_PORT=7799
AGENT_REGISTRATION_PASSWORD=manager1
#——————————————————————————-
#s_agentSrvcName: Sets the agent Service Name and this variable can be
# used to overrite the agent service name calculated by the install. This is
# required for only Windows.
# Example:
# s_agentSrvcName = “Oracleagent11gAgent” ; default value
# s_agentSrvcName = “GridAgent” ; User specified value
#——————————————————————————-
#s_agentSrvcName=””
####################################################################################
#Please Don’t change the values of these variables
####################################################################################
#——————————————————————————-
#FROM_LOCATION: Complete path to the products.xml.
#b_upgrade: “whether it is Upgrade or not”
#EM_INSTALL_TYPE: install type
#——————————————————————————-
FROM_LOCATION=”C:/Temp/Windows_X64_Grid_Control_agent_download_11_1_0_1_0/windows_x64/agent/stage/products.xml”
b_upgrade=false
EM_INSTALL_TYPE=”AGENT”
Now, open a windows command prompt as administrator and go to C:TempWindows_X64_Grid_Control_agent_download_11_1_0_1_0windows_x64ouiDisk1 and execute “setup.exe -silent -responseFile C:TempWindows_X64_Grid_Control_agent_download_11_1_0_1_0windows_x64responseadditional_agent.rsp”
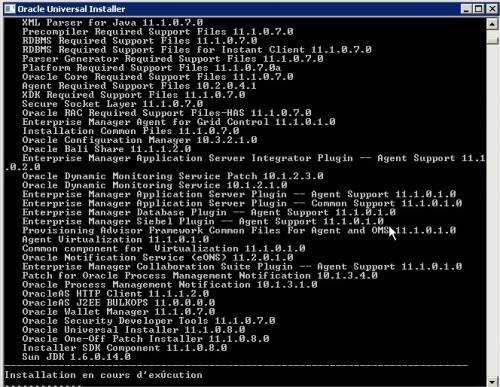
The installation is processing…
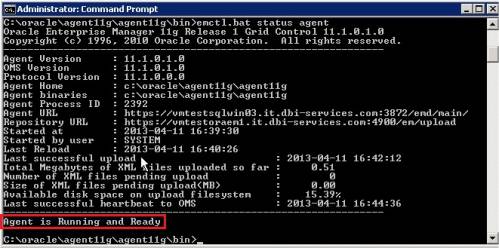
When the screen disappears, the installation is finished. To see if the installation completes successfully, go to c:oracleagent11gagent11gbin and execute the command “emctl status agent”.
If you want stop or restart the agent, you can use this command: “emctl stop agent” or “emctl start agent”.
The installation is done, the agent is running!
Installation of SQL Server plug-in on Grid control 11g
First, download the plug-in by clicking here.
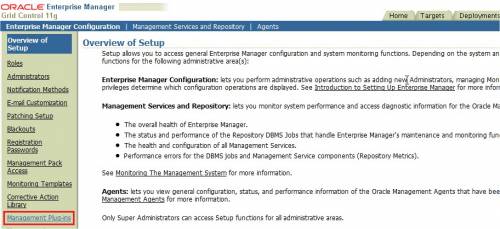
Go to Grid Control 11g and open the Setup menu:
Go to Management Plug-ins
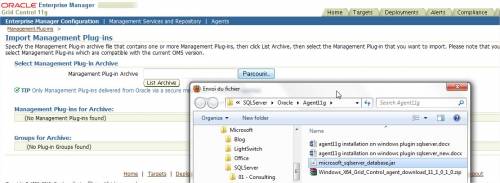
Click the Import button
And select the file we have downloaded before and click Open:
Click the button “List Archive”:
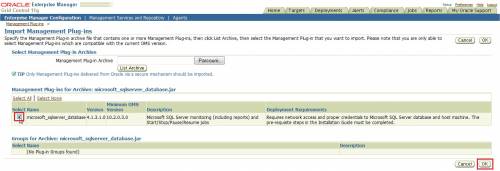
Select the Microsoft_sqlserver_database plug-in and click OK:
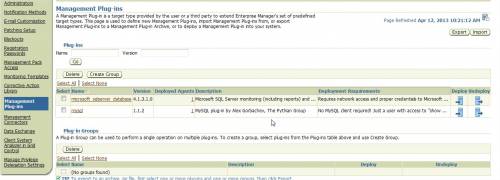
The plug-in is ready to be deployed:
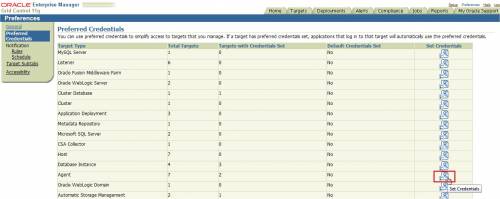
Before deployment go to Preferences menu, preferred credentials:
Click on the “Set credentials” icon of the agent:
For our new host, enter the host username and his password and click apply:
The credentials have been applied:
Now go back to Setup, Management Plug-ins, select the Microsoft_sqlserver_database plug-ins and click on the Deploy button:
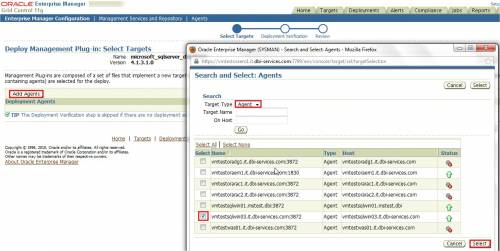
Click on Add agents, and do a search for Agent on the new screen. Select the new SQL Server Host and click on the button Select:
Click Next:
Click Finish:
Deployment complete!
Add an instance to an SQL Server host
Now, we will add an SQL Server instance to our new SQL Server host.
Click on Setup:
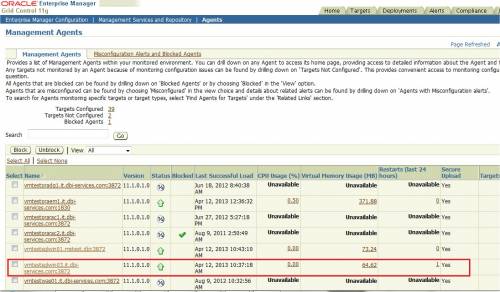
Click on Agents
Click on the new SQL Server host:
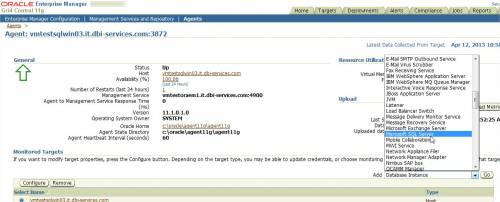
On the dropdown list, select “Microsoft SQL Server” and click Go:
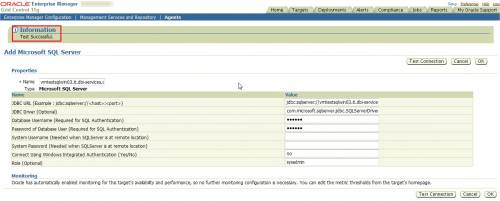
Now, you have to enter:
- JDBC URL: jdbc:sqlserver://vmtestsqlwin03.it.dbi-services.com:1433 (take care to fix the port for named instance)
- JDBC Driver: com.microsoft.sqlserver.jdbc.SQLServerDriver
- Database username(for instance connection): sa or Admistrator or login with sysadmin right
- Password: username password
- Connect Using Windows Integrated Authentication (Yes/No): no
- Role: sysadmin
Click on the button “Test connection”:
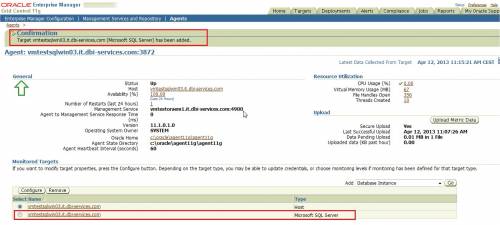
Click on the button OK:
A new instance has been added to the SQL Server host:
Conclusion
We are now able to monitor the Microsoft SQL Server instance and the databases.
Enjoy!










![Thumbnail [60x60]](https://www.dbi-services.com/blog/wp-content/uploads/2022/10/STS_web-min-scaled.jpg)
![Thumbnail [90x90]](https://www.dbi-services.com/blog/wp-content/uploads/2022/08/DWE_web-min-scaled.jpg)